Imagine trying to take a selfie on your iPhone, and all you see is a black screen! It can be even more frustrating when your rear camera works but your front doesn’t. Now, from app glitches to hardware damages, the iPhone front camera not working issue can be caused by a number of reasons. In this article, I’ll first explain the reasons behind the issue and then provide some simple solutions to fix it.
Why is my iPhone front camera not working?
If you are anything like me, before solving a problem, you’d want to know what caused it in the first place. So, here are some common reasons why the iPhone front camera might not work:
- Debris or some other item obstructing the lens.
- Improper Camera settings.
- Bugs in iOS.
- Issues within the app.
- Hardware issue due to a recent drop or non-genuine parts.
- Interference caused by Accessibility features.
How to fix iPhone front camera not working
I came to know about this issue when I saw one of my friends struggling to take a selfie from a social media app on their iPhone. I tried switching between the front and back camera and then restarting the iPhone.
Luckily, restarting worked that night, and that’s my most recommended solution. However, if that doesn’t work, one of the other solutions below surely will!
1. Restart iPhone to fix the front camera
Restarting an iPhone can often help you get rid of temporary system glitches that stop the Camera app from functioning properly. So, go ahead and give your iPhone a restart.
- Open the Settings app on your iPhone → Go to General.
- Scroll down and tap Shut Down → Then, Slide to power off.
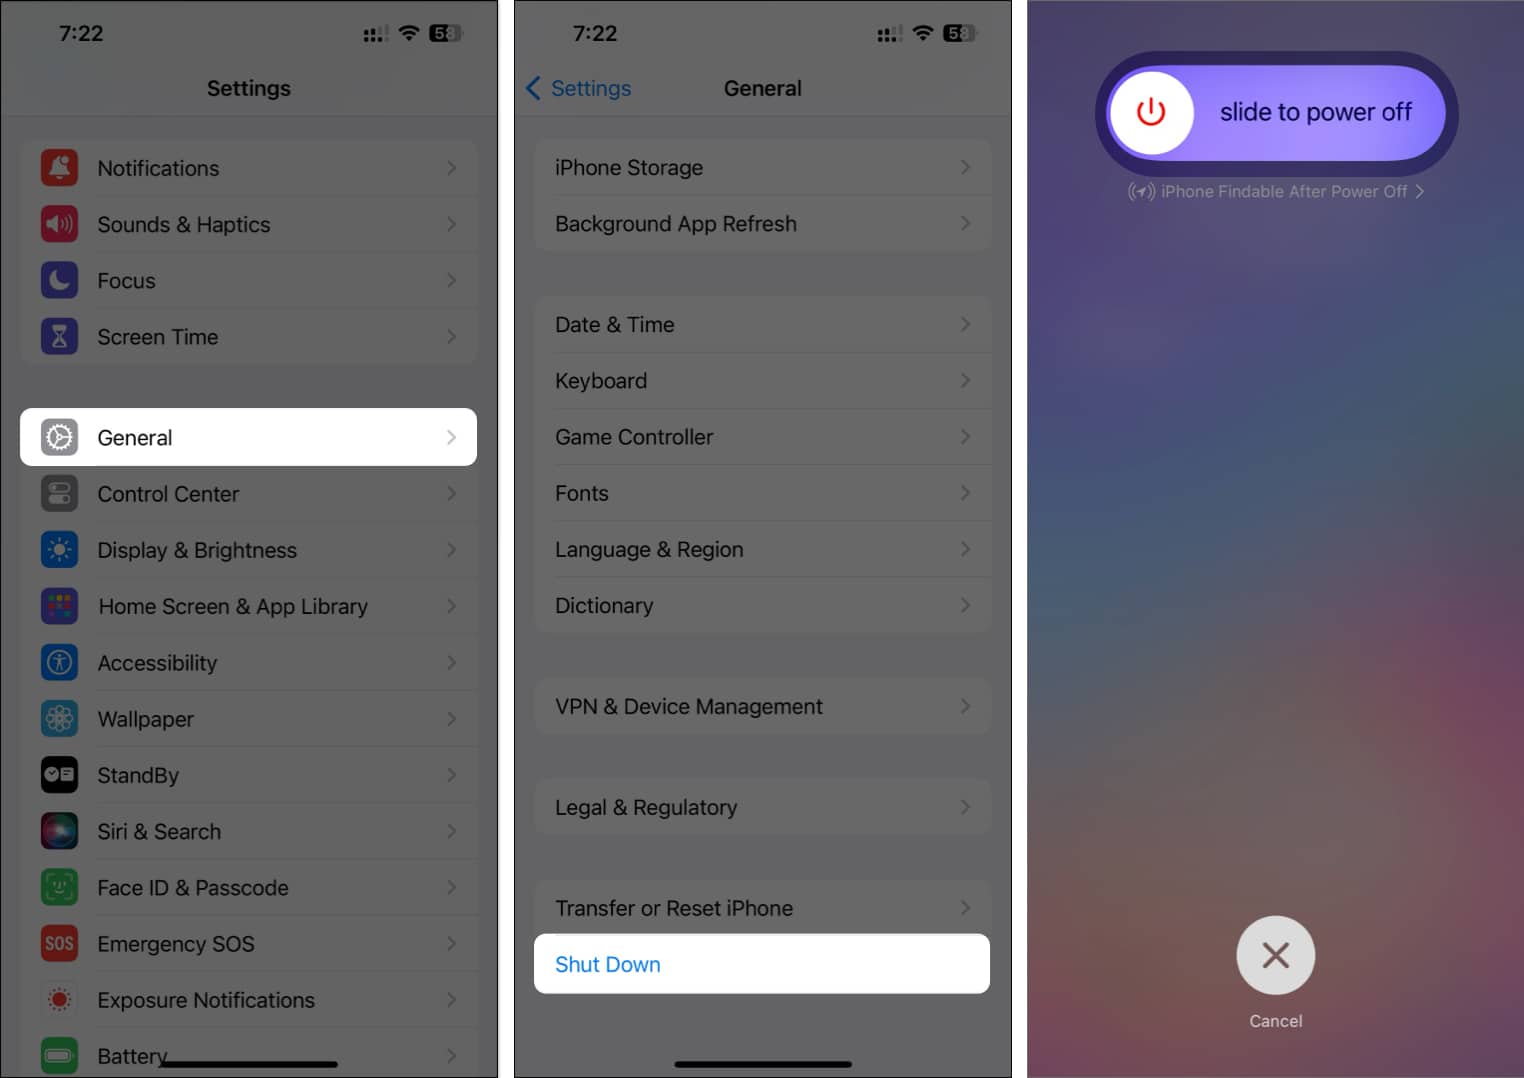
- Wait for one minute → Hold the Side button to start your iPhone.
Once the iPhone boots up, try accessing the Camera app and using the front camera. Sometimes, it can take time for all the functions to load, so try swapping the front and back cameras to get things up and running quickly.
2. Force close and relaunch the app that is using the iPhone Camera
The next thing to try out is force-closing and re-opening the app where you are trying to use the iPhone front camera.
While you are at it, make sure you close all the background apps you don’t need at the moment. It would free up some much-needed RAM.
- Swipe up from the bottom of your screen to open the App Switcher.
- Find the Camera app from the list and swipe up to force close it.

- Open the Camera app again to see if the front camera is fixed.
Before putting the blame on the hardware, it’s good to confirm that the issue isn’t limited to a certain app. So, try using the front camera from some other third-party camera app or a social media app to confirm the real culprit.
3. Clean the front camera
As if I need to state the obvious! Any dirt or debris on the notch or Dynamic Island needs to be wiped out for you to access the front camera.
So, try cleaning the top part of your iPhone display with a damp microfibre cloth. You can check out our detailed guide to learn about the right way to clean or disinfect your iPhone. Once the cleansing is done, try using the front camera again.
Also, while cleaning, carefully look for any damage to the hardware. If you see any damage near the camera housing, you should take the device to the nearest Apple Store and get it repaired.
4. Check camera permissions for the app
Post cleaning, it’s time to check in-app permissions. If you are trying to use the front or rear cameras in any other app than the native Camera app, you need to provide permission in iPhone Settings. To do so:
- Open the Settings app.
- Scroll down and tap the app that’s unable to use the camera.
- Finally, toggle on Camera to allow the app to use your iPhone’s camera.
Now, check if you are able to use the front camera. If not, you’ll have to delve into some uncommon fixes.
5. Ensure your iPhone has sufficient storage
You can face various Camera-related issues if your iPhone is running low on storage. I mean, where will the Camera store the images captured? So, ensure you have enough storage on your device.
- Open the Settings app on your iPhone.
- Then, navigate to General → iPhone Storage.


If the storage is full, you can offload unused apps and delete unnecessary files on your iPhone. For more tips, you can check out our guide on how to free up storage on iPhone.
6. Turn off VoiceOver
Although this is something I can’t vouch for, I have seen a lot of my fellow tech writers mention it in their blogs. They say VoiceOver can interfere with the functioning of iPhone cameras. So, if you have the feature enabled, try disabling it and then use the iPhone front camera.
- Locate and open the Settings app.
- Go to Accessibility → VoiceOver → toggle off VoiceOver.


If you see that you already have the feature disabled, happily move on to the next solution.
7. Install the latest iOS software update
iOS updates often include bug fixes, performance improvements, and security patches that can resolve various issues, including problems with the front camera. So, try installing the latest version of iOS.
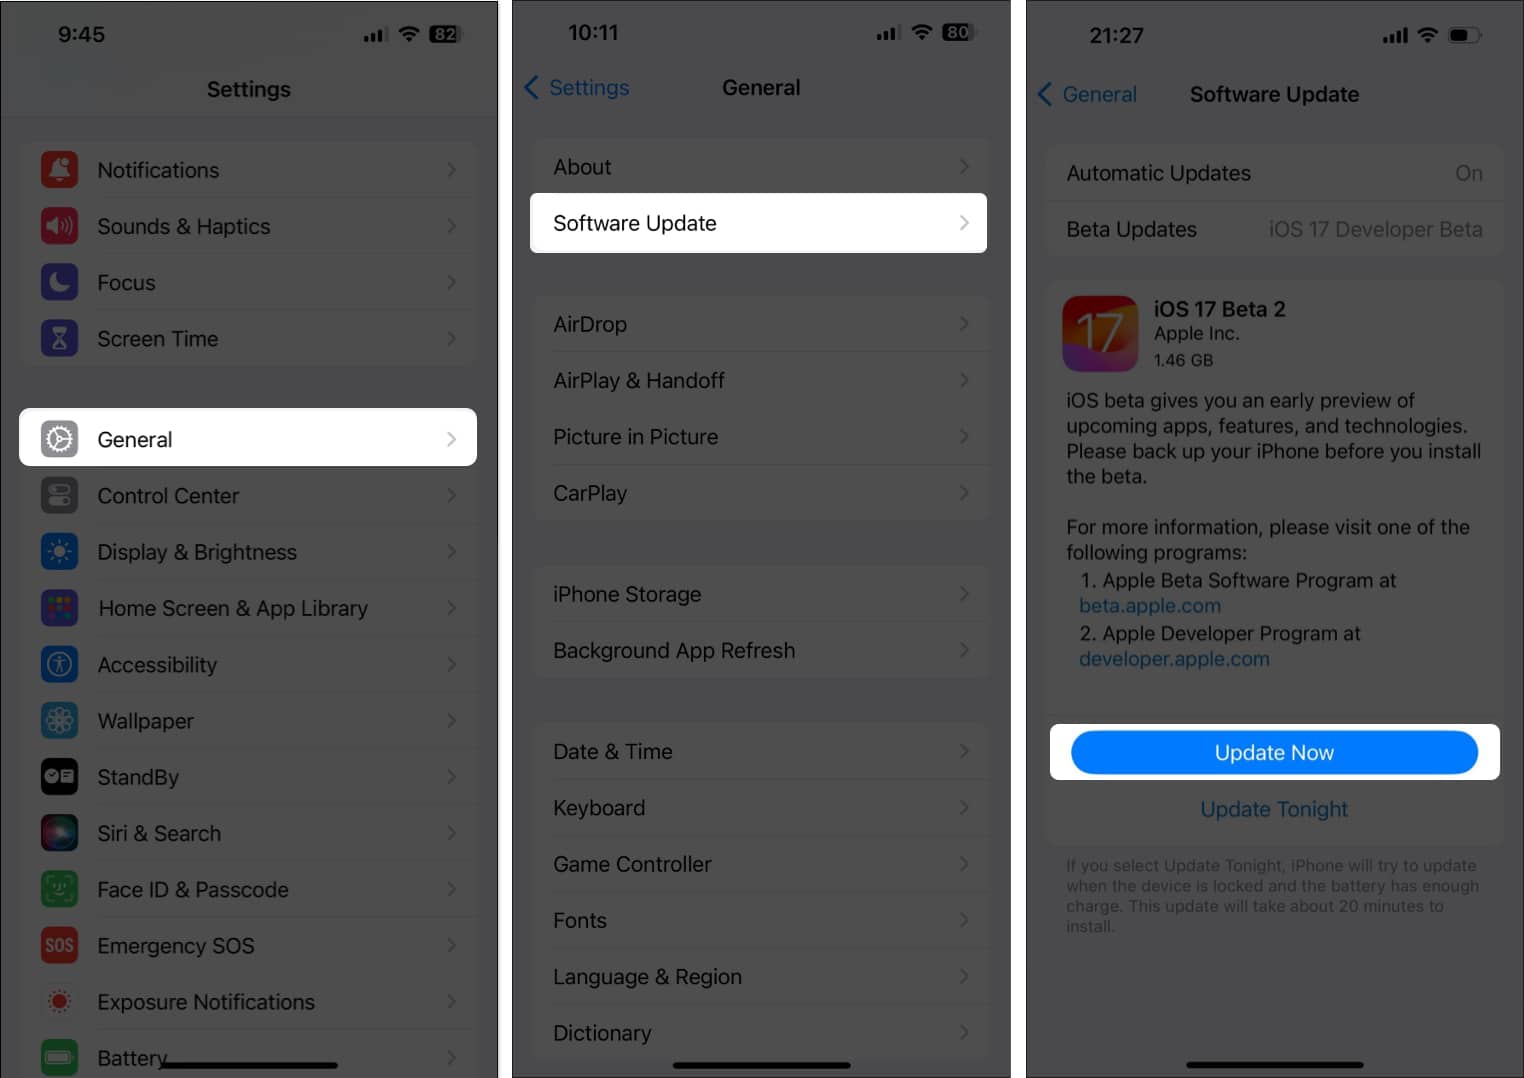
- Navigate to Settings → General → Software Update.
- Tap Update Now/Install Now if an update is available.

8. Reset All Settings
Now, the ride might get a little unpleasant. If none of the above fixes worked for you, you’ll have to restore your iPhone to the way you found it. To start off, reset all your iPhone settings to ensure the Camera settings are completely back to normal.
And don’t worry; resetting settings will only restore the configurations to factory default. You won’t lose any of your data.
- Go to Settings → General → Transfer or Reset iPhone.

- Tap Reset → Reset All Settings → Enter your passcode.
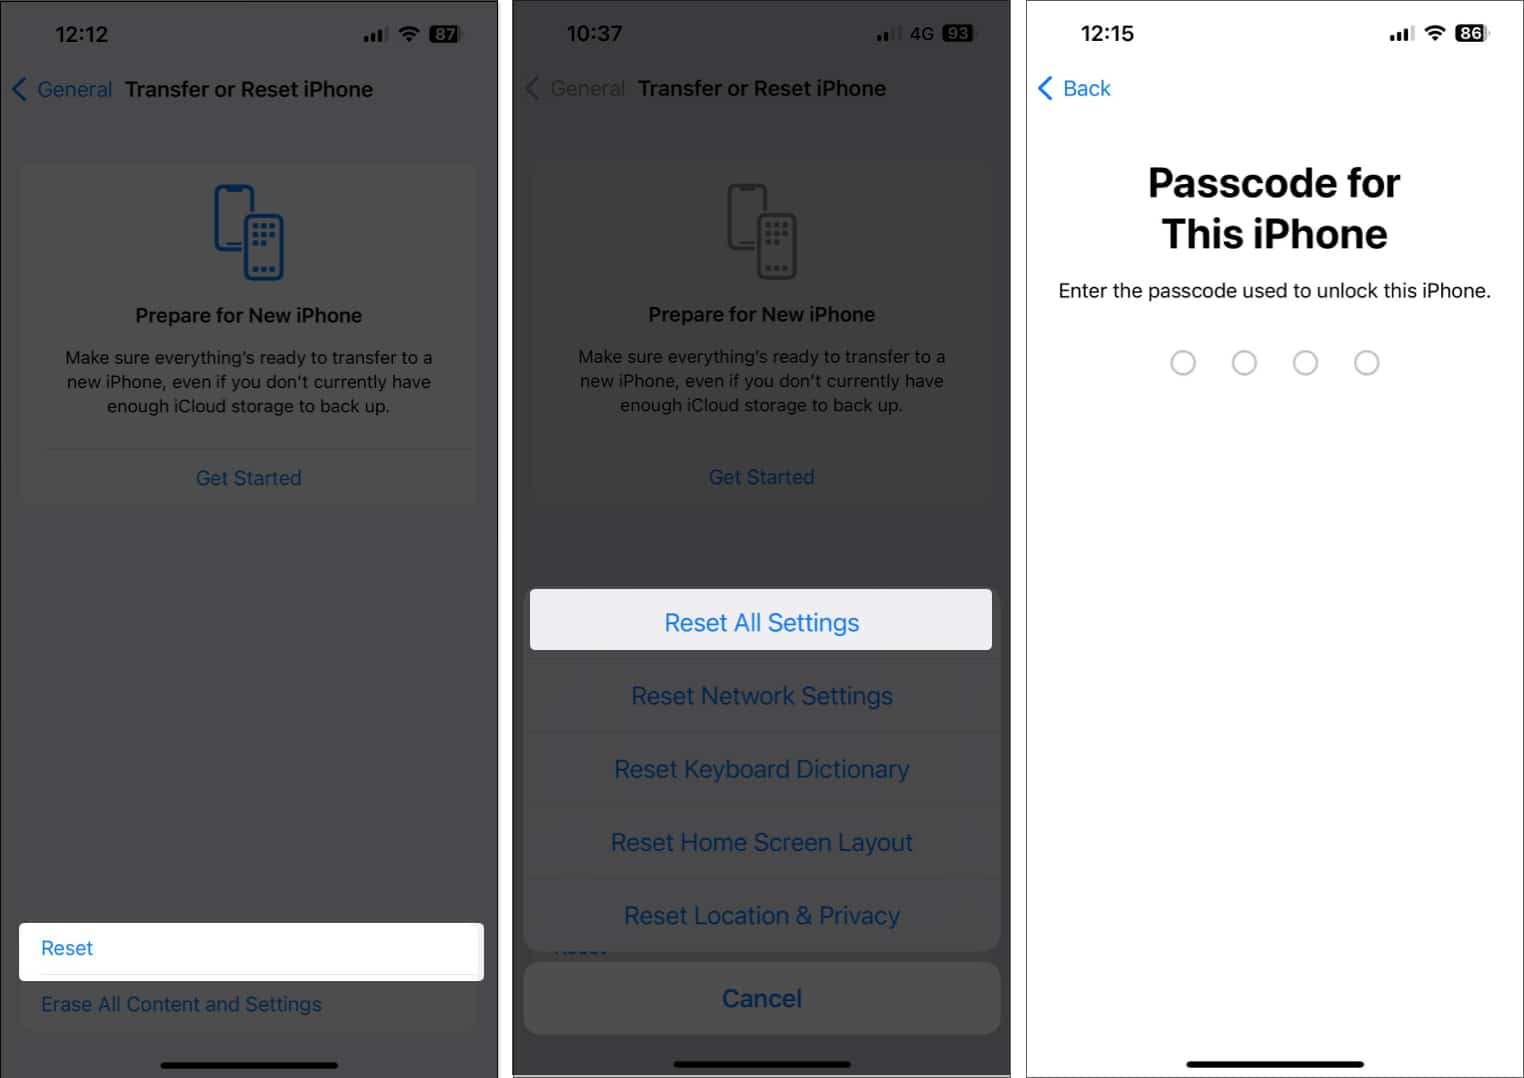
- Tap Reset All Settings again to complete the process.


I hope this really gets your iPhone front camera working again. Because if it doesn’t, you’ll have to take an extreme step.
9. Reset your iPhone to factory settings
As a last resort, you will have to reset your iPhone to its factory settings. This step involves erasing all the data on your iPhone to make sure it is in the same state as when you first took it out of the box. That should, most probably, fix all the issues with the front camera not working on iPhone.
But before you proceed, take a backup of your data so that you can restore it later.
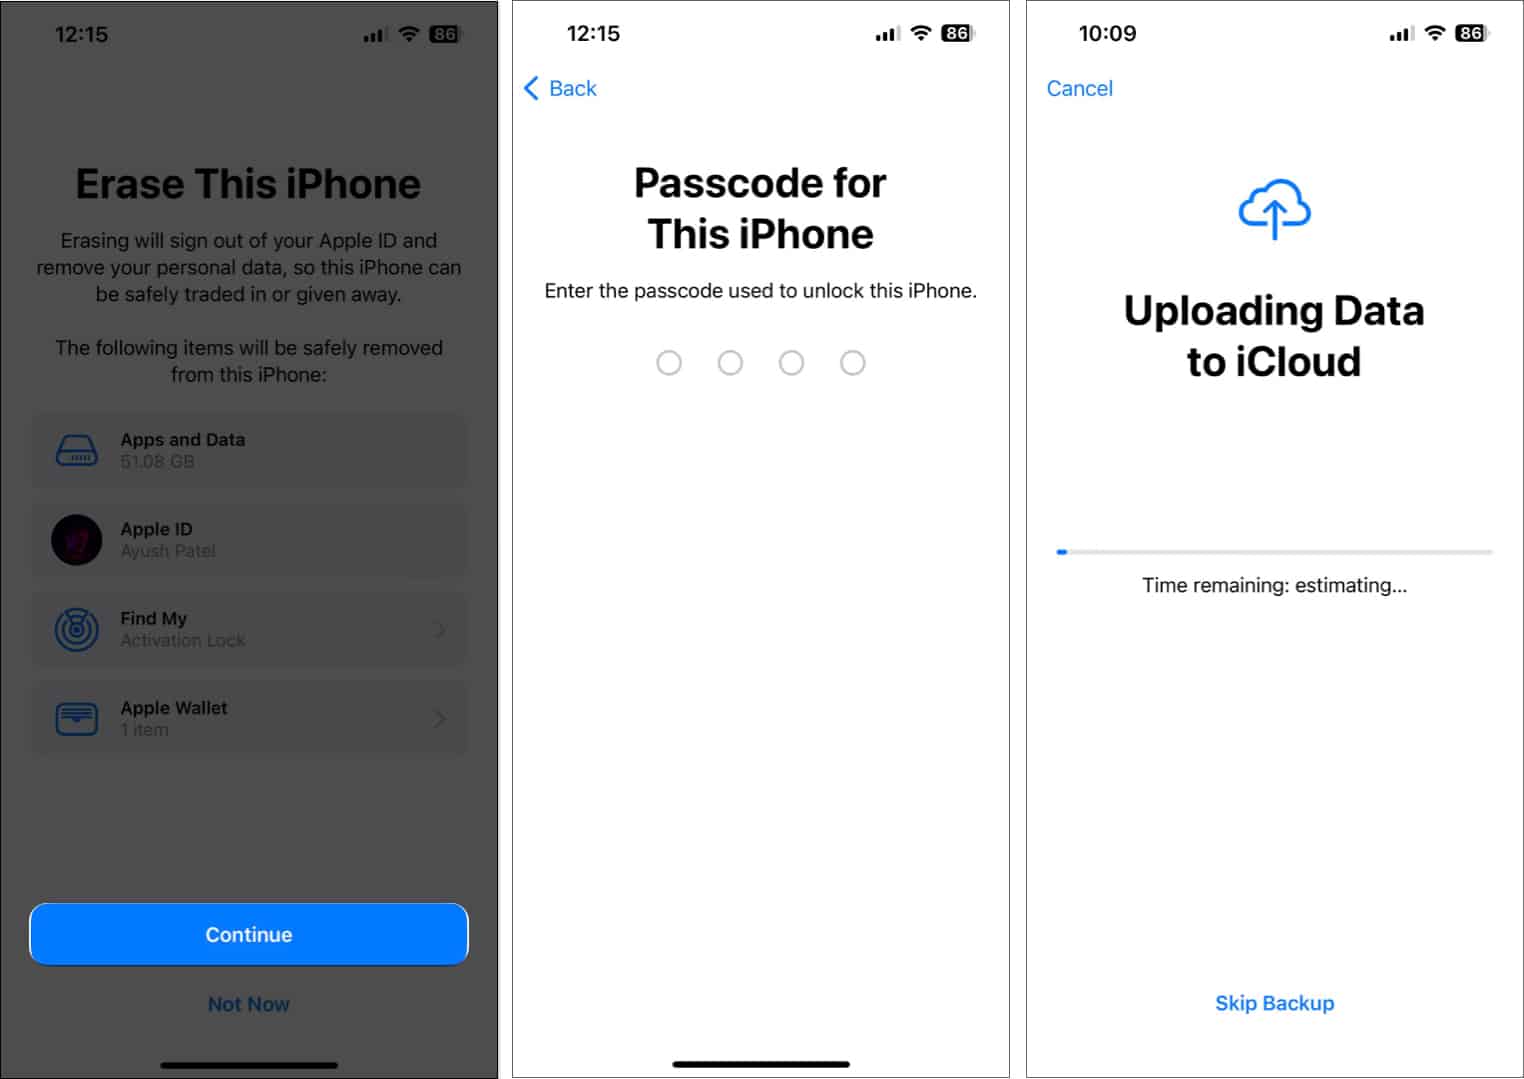
- Navigate to Settings → General → Transfer or Reset iPhone.
- Choose Erase All Content and Settings.
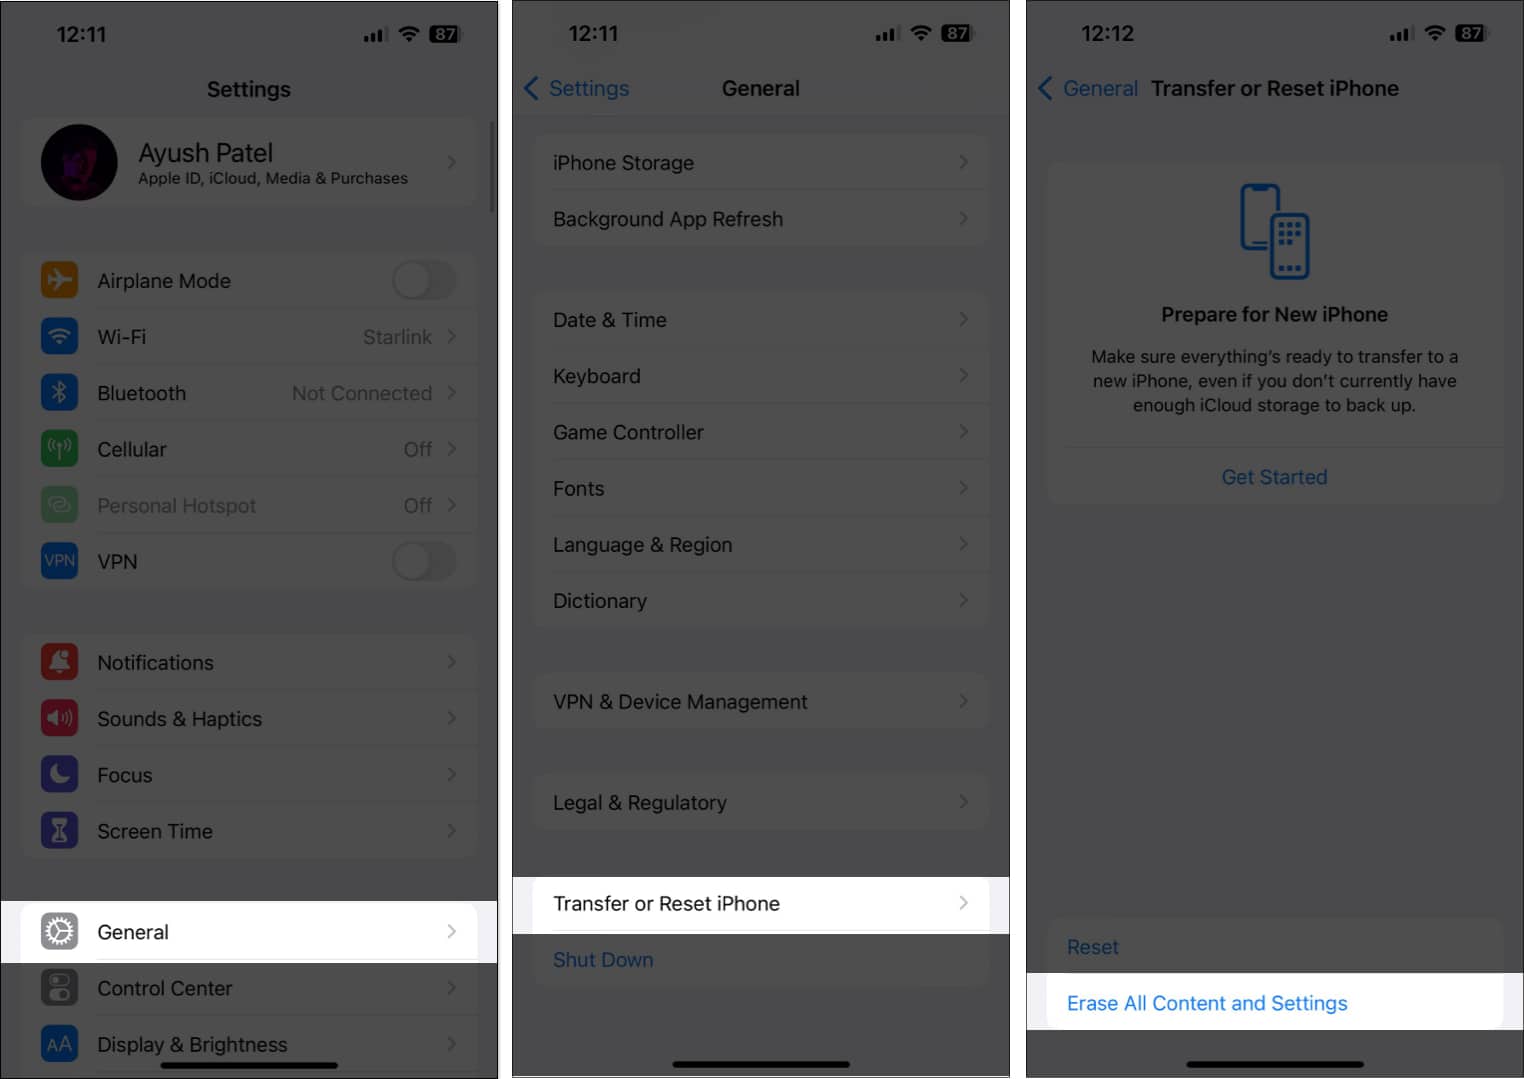
- Then, tap Continue → type the iPhone Passcode.
- Follow the on-screen instructions once the automatic iCloud backup is complete.


Now, after your iPhone is reset, launch the Camera app again. You should definitely be able to use your front camera by now.
Wrapping up…
I am sure one of the above solutions has helped you fix the iPhone front camera issues. You can now go back to clicking selfies, creating memories, and attending meetings over video calls. However, if you still run into frequent problems, you should consider contacting Apple Support. The experts there will help you come to a permanent solution.
In the meantime, you can take a look at some of our other articles to learn what more your iPhone’s rear camera can do.
Also read:


