
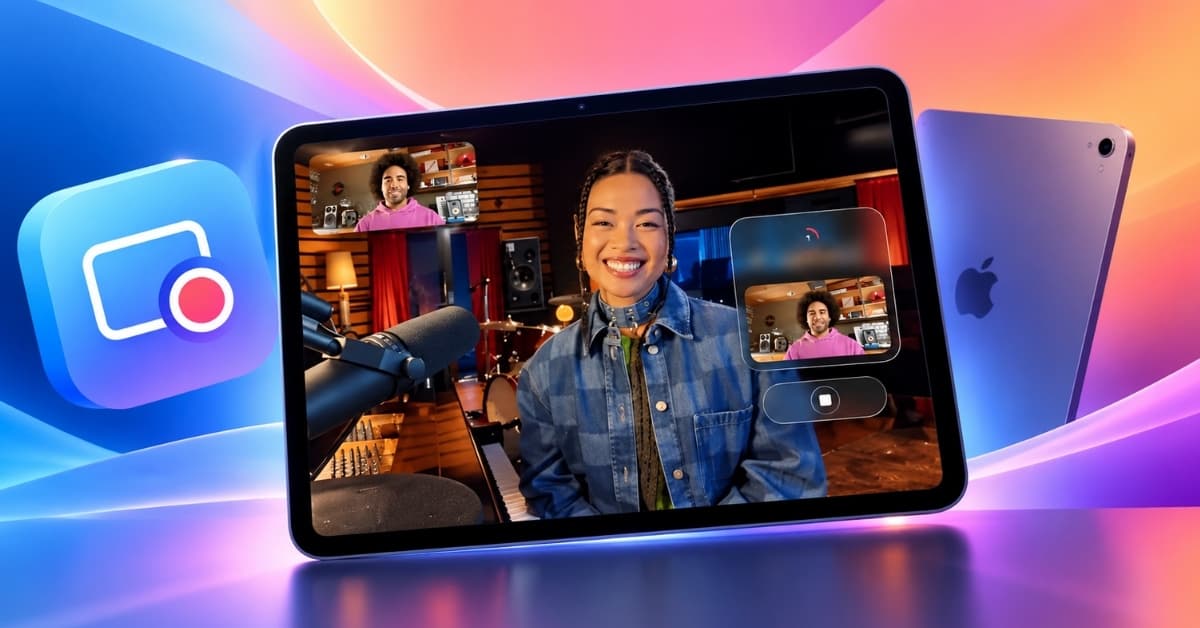
When Apple introduced Local Capture in iPadOS 26, I immediately saw its potential for anyone who records interviews, podcasts, meetings, or other video calls.
In iPadOS 27, the feature remains one of the most useful built-in tools for creators because it lets you record high-quality audio and video locally while you’re on a video call, no matter which app you’re using.
In this guide, I’ll explain what Local Capture does, how to set it up in iPadOS 27, where recordings are saved, how to use an external microphone, and what you need to know to get the best results.
What is Local Capture on iPad?
Local Capture is a feature introduced with iPadOS 26 that enables users to record their own audio and video locally on the iPad during an active video call. Unlike a normal screen recording, Local Capture isn’t designed to capture everything happening on your display. It records your own camera video and microphone audio locally.
This makes it particularly useful for:
- Remote podcast interviews
- Online interviews
- Video meetings
- Webinars and presentations
- Educational sessions
- Content creation
- Remote video production
- Recording your own side of a conversation for later editing
Once the video call ends, your recording is automatically stored in the Files app for safekeeping and easy sharing. Apple designed the feature around a workflow similar to a double-ender: each person records their own high-quality audio and video locally, and the recordings can then be combined in apps such as Logic Pro or Final Cut Pro.
Key Benefits of Local Capture:
- Records directly from your iPad—no third-party apps required.
- Compatible with any videoconferencing platform.
- Captures uncompressed, high-quality audio and video.
- Echo cancellation ensures only your voice is prioritised.
- Also available on iPhones running iOS 26 and later.
How Local Capture works
Local Capture works independently of the videoconferencing app’s own recording system. For example, I can join a FaceTime, Zoom, Google Meet, or another supported app and use Local Capture from iPadOS itself.
Moreover, the feature is not enabled by default. You must turn it on manually whenever you want to record during a call.
When activated, Local Capture:
- Records your microphone audio and camera video.
- Uses echo cancellation to remove other participants’ voices.
- Doesn’t apply Voice Isolation and Wide Spectrum filters. If your recording contains unwanted background noise, you’ll need to clean it up during post-production.
- You can use supported AirPods to remotely start and stop recording during a videoconference.
- Recordings are saved to the Downloads folder in Files by default. You can choose a different save location from Settings > General > Local Capture.
If another app is already using your camera, Local Capture records audio only. You can also deliberately choose Audio Only when starting a Local Capture session.
Note:
It records only your audio and video, not the other participants’, to maintain privacy and clarity.
What you need to use Local Capture on iPad
Before you start, I recommend having:
- An iPad running iPadOS 26 or later
- Any videoconferencing app (Zoom, FaceTime, Google Meet, etc.)
- Camera and microphone access enabled for the calling app
- Sufficient storage on your iPad
- An external USB microphone if you want higher-quality audio
Apple also supports using compatible AirPods for recording audio and capturing video remotely during a videoconference.
How to set up Local Capture on iPad
Before using Local Capture, you need to add its button to Control Centre:
- Swipe down from the top-right corner of the iPad screen to open Control Center.
- Tap the + button to enter Control Center editing.
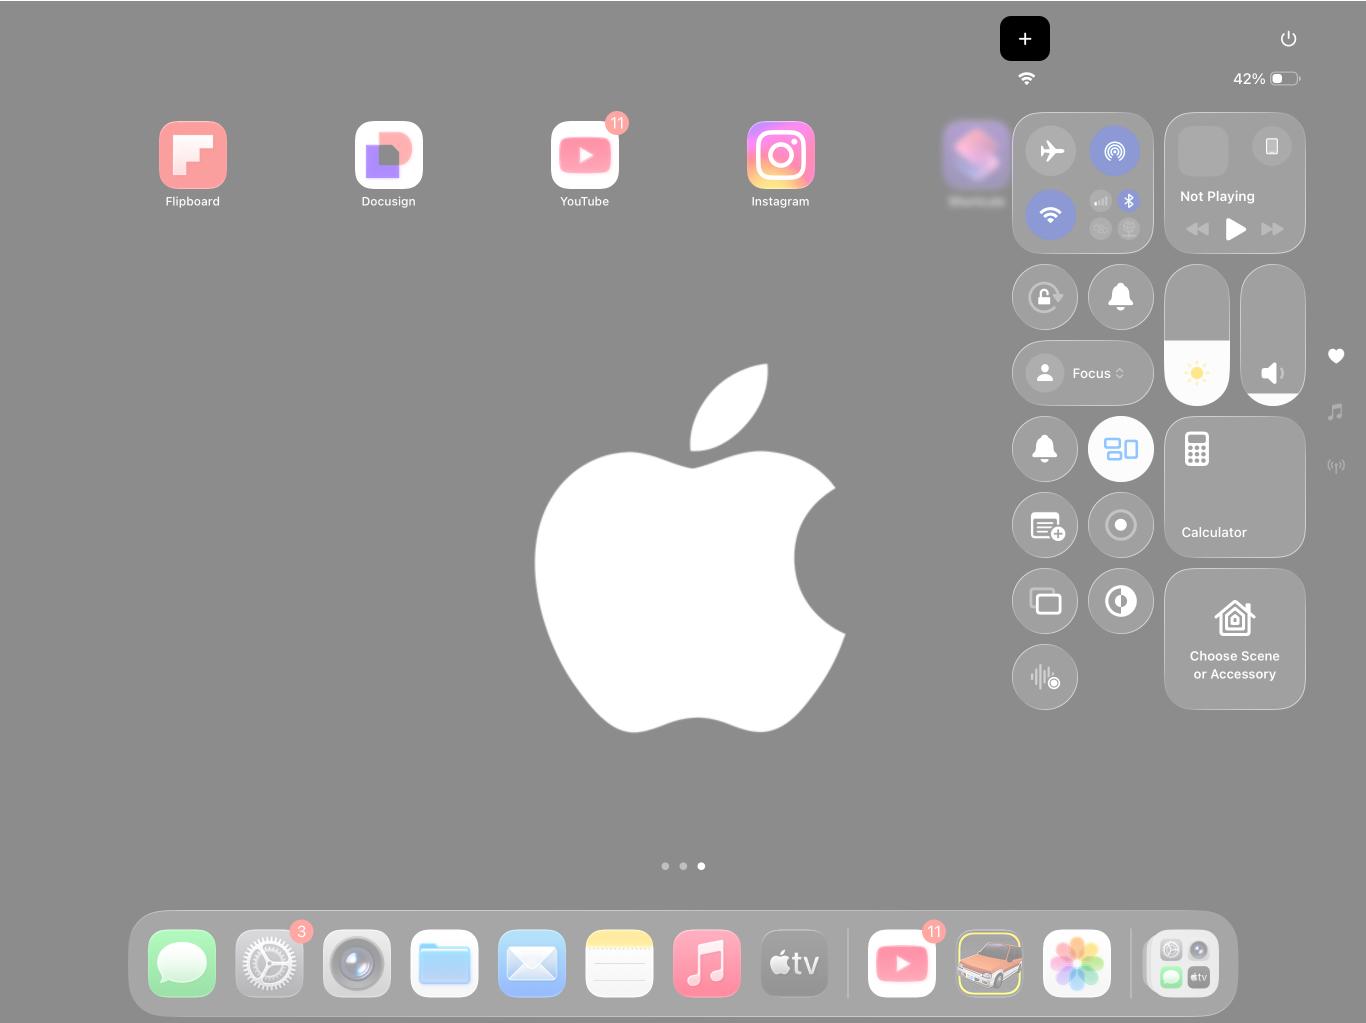
- Now, tap Add a Control.
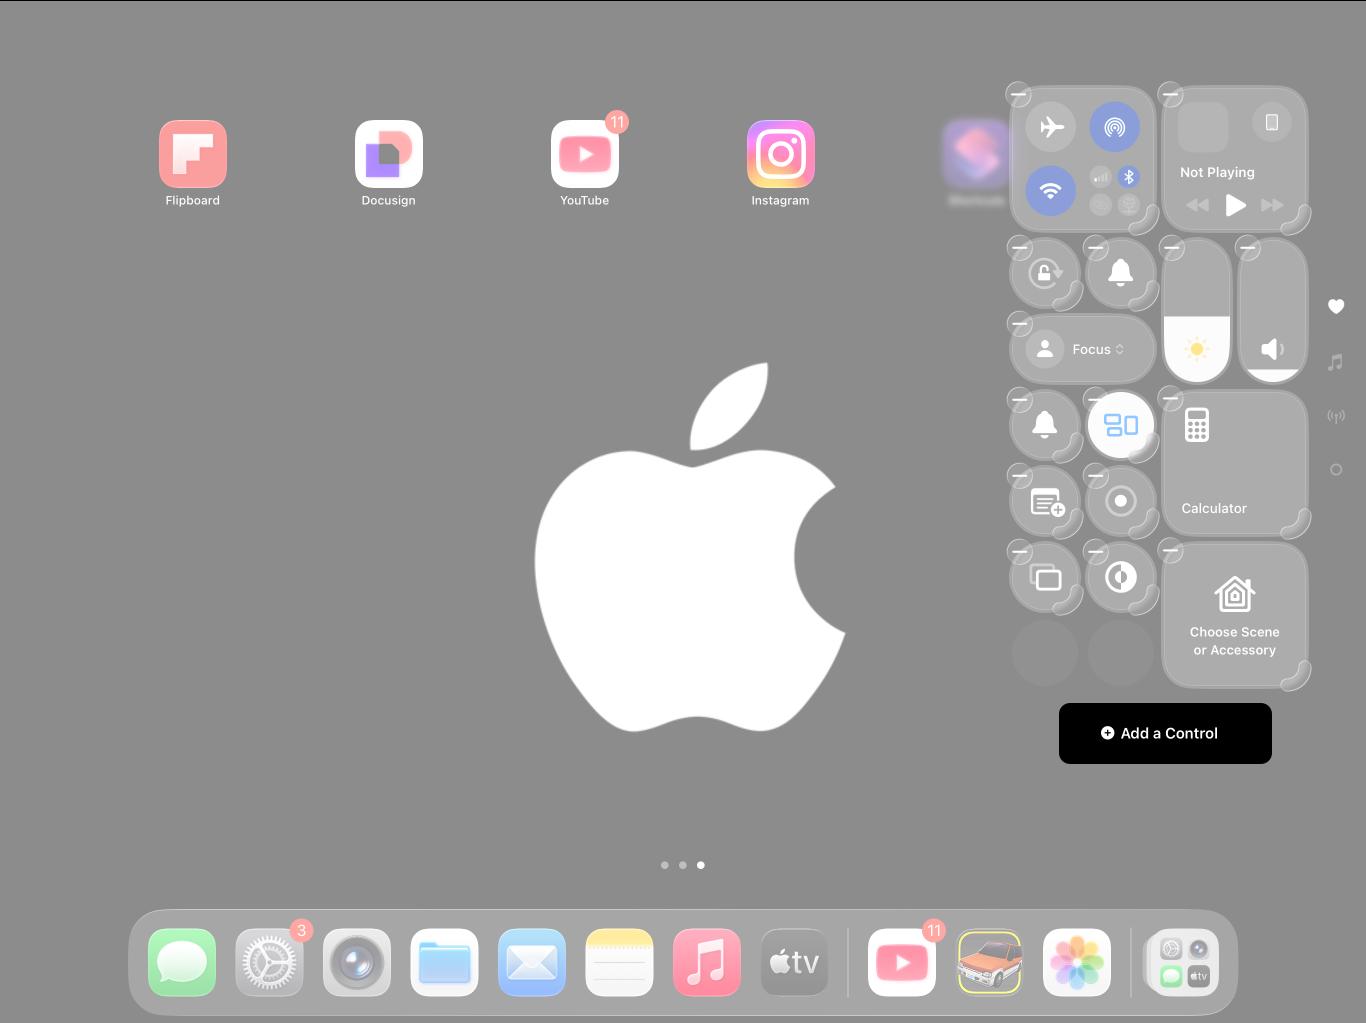
- Next, use the search bar to find the Local Capture control button.
- Tap the Local Capture button to add it to the Control Center.
- Rearrange the control if you want it in a more convenient position.
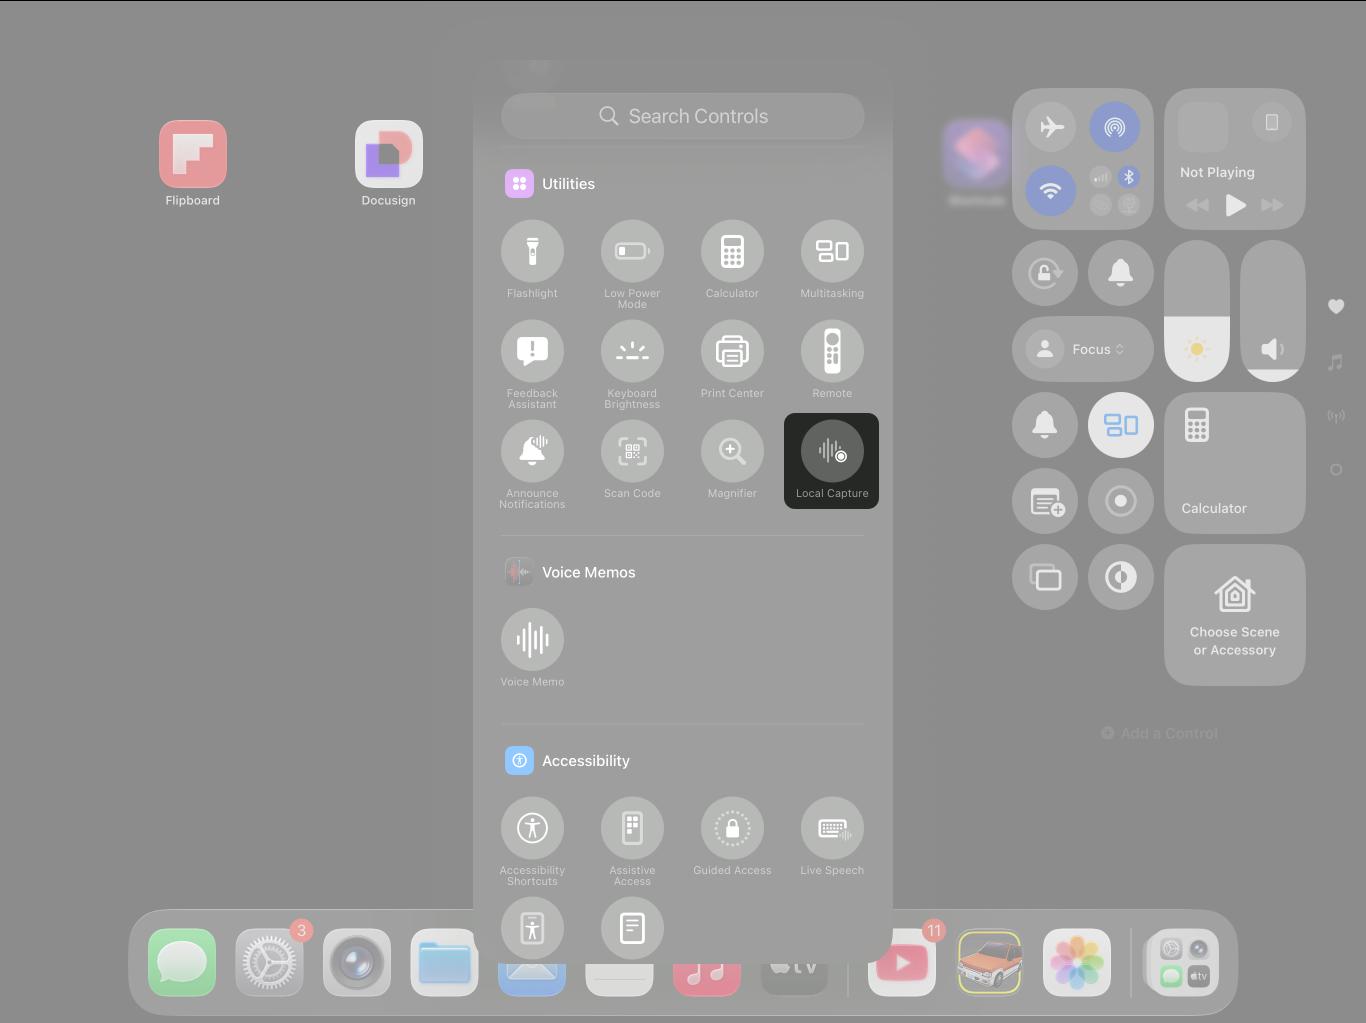
Now, Local Capture will be accessible during any video call from the Control Center.
How to enable and use Local Capture on iPad
Once Local Capture is available in Control Center, recording is straightforward. Here’s how to start using Local Capture during a call:
- Join a video call using FaceTime, Zoom, Google Meet, or any other video calling app.
- Now, pull down the Control Centre.
- Touch and hold the Local Capture control. This opens the Local Capture options.
- By default, Local Capture records both audio and video. If you don’t need video, choose Audio Only.
- Tap Start Recording. Your iPad now records your local audio and video while you continue participating in the call.
- To stop the recording manually, go to Control Centre, tap the Local Capture control, and select End Recording, or wait until the call ends.
- In both cases, you’ll see a notification that the recording has been saved in the Files app.
Note:
that if your camera is already in use by another app, Local Capture records only audio.
How to choose a microphone for Local Capture
One of the more useful iPadOS 27 improvements is the ability to choose the input source used by an app or website. If I’m recording an interview or podcast, I’d generally choose a good external microphone instead of relying on the iPad’s built-in microphone.
To select a microphone:
- Open the app or website you’re using for the call.
- Open Control Center.
- Tap the button for the active app or browser at the top of Control Center.
- Tap Input.
- Select the microphone you want to use.
This is especially useful if you’re using an external USB microphone, headset, or another supported audio input. With a supported external USB microphone, iPadOS can also provide an input gain control to attenuate the incoming volume when starting Local Capture.
Can you use Voice Isolation with Local Capture?
Yes, but there’s an important distinction.
Voice Isolation can be used during the live session, but it isn’t applied to the Local Capture recording.
For a normal app audio session, you can:
- Open the video-conferencing app.
- Open Control Center.
- Tap the app or browser control at the top.
- Tap Voice Isolation.
Voice Isolation reduces background noise during the live call.
However, if your goal is the cleanest possible Local Capture file, plan to do noise reduction or other audio processing during editing.
Where are Local Capture recordings saved?
By default, Apple saves the recordings in the Downloads folder in the Files app.
To find a recording:
- Open the Files app.
- Tap Browse if necessary.
- Open Downloads.
- Look for your Local Capture recording.
The exact file location can be changed, so if you can’t find your recording in Downloads, check the Local Capture save location configured in Settings.
Change the Local Capture save location
iPadOS 27 lets you choose where Local Capture recordings should be saved.
Here’s how:
- Open Settings.
- Tap General.
- Scroll down and select Local Capture.
- Tap Save Location.
- Browse to the folder where you want your recordings saved.
- Select the folder.
- Tap Open.
From then on, Local Capture uses the location you’ve selected instead of the default Downloads folder.
For example, if I were using Local Capture regularly for podcast interviews, I’d create a dedicated folder in Files, such as “Podcast Recordings,” and set that as my save location. That saves me from having to dig through Downloads every time I finish a recording.
How to share a Local Capture recording
After the recording has been saved:
- Open Files.
- Navigate to your Local Capture save location.
- Select the recording.
- Tap the Share button.
- Choose AirDrop, Messages, Mail, or another compatible sharing option.
Apple also notes that Local Capture recordings can be shared with other participants and combined with their recordings in post-production software such as Logic Pro or Final Cut Pro.
Can Local Capture record only audio?
Yes. If you don’t need a video recording, choose Audio Only when configuring Local Capture from Control Centre.
This is useful when:
- You’re recording a podcast and only need audio.
- You want to reduce storage requirements.
- Your camera is already being used elsewhere.
- You don’t need a video file for post-production.
Apple has also included a dedicated Audio Only toggle in Settings > General > Local Capture.
Use AirPods to Control Local Capture remotely
If you have supported AirPods or AirPods Pro, you can use them to remotely start and stop audio and video recording during a videoconference.
Simply press the AirPods stem to start and stop recording. This can be particularly useful when your iPad is positioned several feet away from you.
For example, if I’m recording an interview with the iPad on a tripod, I don’t necessarily want to reach over to the screen every time I need to start or stop recording.
Tips for getting better Local Capture recordings
Make your recordings shine with these pro tips:
- Use a Good Microphone: The microphone has a bigger impact on perceived recording quality than many people expect.
- Check Your Input Before Recording: Open Control Center and verify the input source before starting. This helps prevent accidentally recording with the wrong microphone.
- Free Up Space: High-resolution recordings take space. Clear unused files before a long session.
- Watch Your Input Gain: Avoid setting the microphone input unnecessarily high because distorted audio can be difficult to repair later.
- Frame Your Shot: Place the iPad at eye level with proper lighting to improve video quality.
Troubleshooting Local Capture issues on iPad
Although Local Capture in iPadOS is effortless and quick to use, you may still encounter some issues. Here are some common issues users face, along with quick fixes.
| Problem | Solution |
|---|---|
| Local Capture not available | Check whether your iPad supports iPadOS 26 and later, and is up to date with the latest version. |
| Local Capture button not showing in Control Center | The Local Capture button isn’t available in the Control Center by default; you must add it manually. |
| Recording not saved or missing | Check whether your iPad has enough free storage. If not, delete files that are no longer required. |
| I only get audio, not video | Check whether another app is already using the iPad camera. |
| Audio sounds noisy | Remember that Voice Isolation doesn’t process the Local Capture file. Clean the audio during post-production. |
Transform your iPad workflow with Local Capture
Local Capture turns your iPad into a mobile content creation studio. No more dependency on external apps or devices—record interviews, presentations, podcasts, or video logs effortlessly and professionally.
The biggest thing to remember is that Local Capture isn’t a conventional meeting recorder. It records your own high-quality audio and video locally, making it ideal for the double-ender workflow rather than for capturing everything in a video call.
Have you used Local Capture on your iPad? Share your experience or favourite tips in the comments!
Related articles worth reading: