
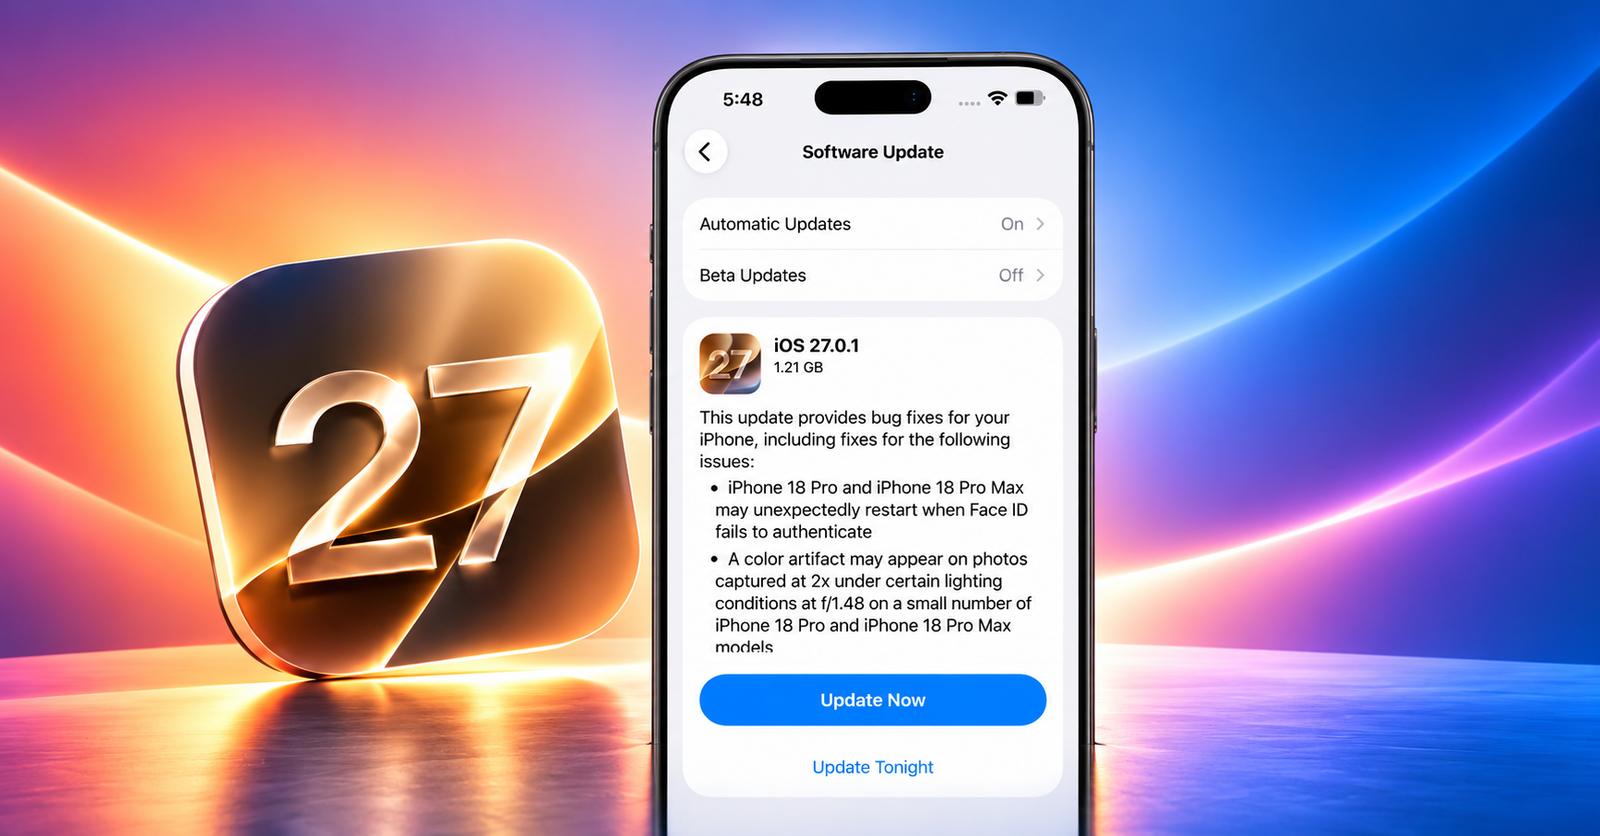
The wait is finally over! Apple just dropped the stable iOS 27 update, right alongside the new iPhone 18 Pro lineup. If you’ve been running the iOS 27 beta to test its features, now’s the perfect time to switch over to the official release. Because beta builds can contain bugs, compatibility problems, and unfinished features.
The good news is that Apple makes it relatively easy to stop receiving future beta updates. However, there’s an important distinction: turning beta updates off doesn’t uninstall the beta version already running on your iPhone.
In this step-by-step guide, I’ll walk you through how to remove iOS 27 beta from your iPhone and install the polished, bug-free version.
Why you should remove iOS 27 beta
The answer is simple: betas are buggy.
Depending on the build, these can include:
- Apps crashing unexpectedly
- Quick battery draining
- Performance glitches
- Features behaving differently between beta versions
- Compatibility issues with third-party apps
- Unexpected interface changes
Apple constantly tweaks features in each beta based on feedback. That’s the trade-off for getting access to upcoming iOS features before the general public.
On the other hand, the official iOS 27 update is stable, polished, and designed for everyday users. You can fully enjoy the new iOS 27 features, including all the Apple Intelligence-powered tools such as Siri AI, Notify Me in Safari, Describe a Shortcut, automatic password fixing, Extend and Reframe in Photos, and much more.
So, if you no longer need early access to upcoming features, switching back to the public release channel can make your iPhone experience more predictable.
What happens when you turn off beta updates?
This is the part I would pay the most attention to.
Turning off Beta Updates doesn’t instantly remove the beta version from your iPhone. Instead, it tells your iPhone that you don’t want to receive future beta updates.
For example, if you’re currently running an iOS 27 beta that is newer than the available public version, turning beta updates off won’t magically replace that software with an older public build.
You’ll generally have two options:
- Wait for the public release to catch up: If the next public iOS release is newer than the beta currently installed on your iPhone, you can install it normally.
- Restore the iPhone: If you want to leave the beta immediately and the public version is older than your installed beta, you’ll need to erase the device and install the current public iOS version using a Mac or PC.
This distinction is important because many users assume that switching Beta Updates to Off automatically downgrades the iPhone. It doesn’t.
Preparations before updating
Before upgrading from iOS 27 beta to the stable release, do some prep work. Trust me, it saves time and avoids frustration.
- Backup Your Data: Make a manual backup via Finder or iTunes. iCloud backups from a beta iPhone can’t be restored to the stable version. Encrypt it if you want to keep Health data and passwords.
- Check Storage: The update file is a few GBs. Free up space and aim for at least 15 GB available.
- Connect to Wi-Fi: Updates are large. Use Wi-Fi to avoid draining your mobile data.
- Charge Your iPhone: Ensure 50% battery or keep it plugged in throughout the process.
These steps keep everything smooth and stress-free, so you’re all set for the fun part!
How to remove iOS 27 beta
Apple makes it super easy to stop beta updates.
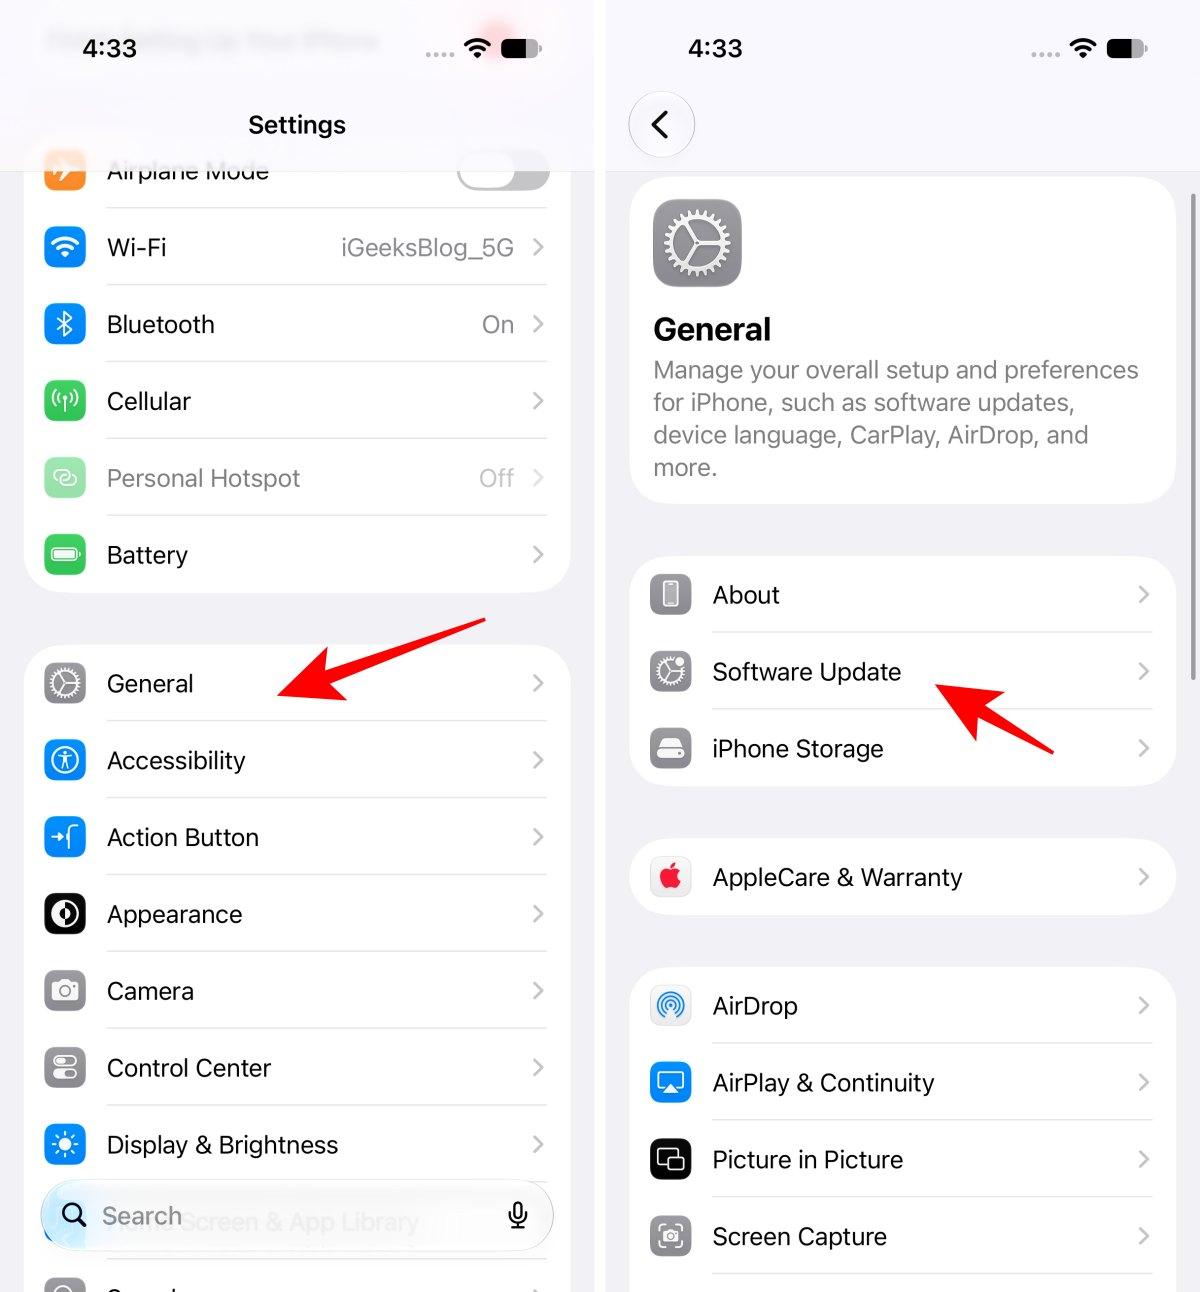
- Open the Settings app and tap General.
- Select Software Update.
- Tap Beta Updates. You’ll see options like Developer Beta or Public Beta.
- Simply choose Off to prevent receiving iOS 27 beta updates on your iPhone.
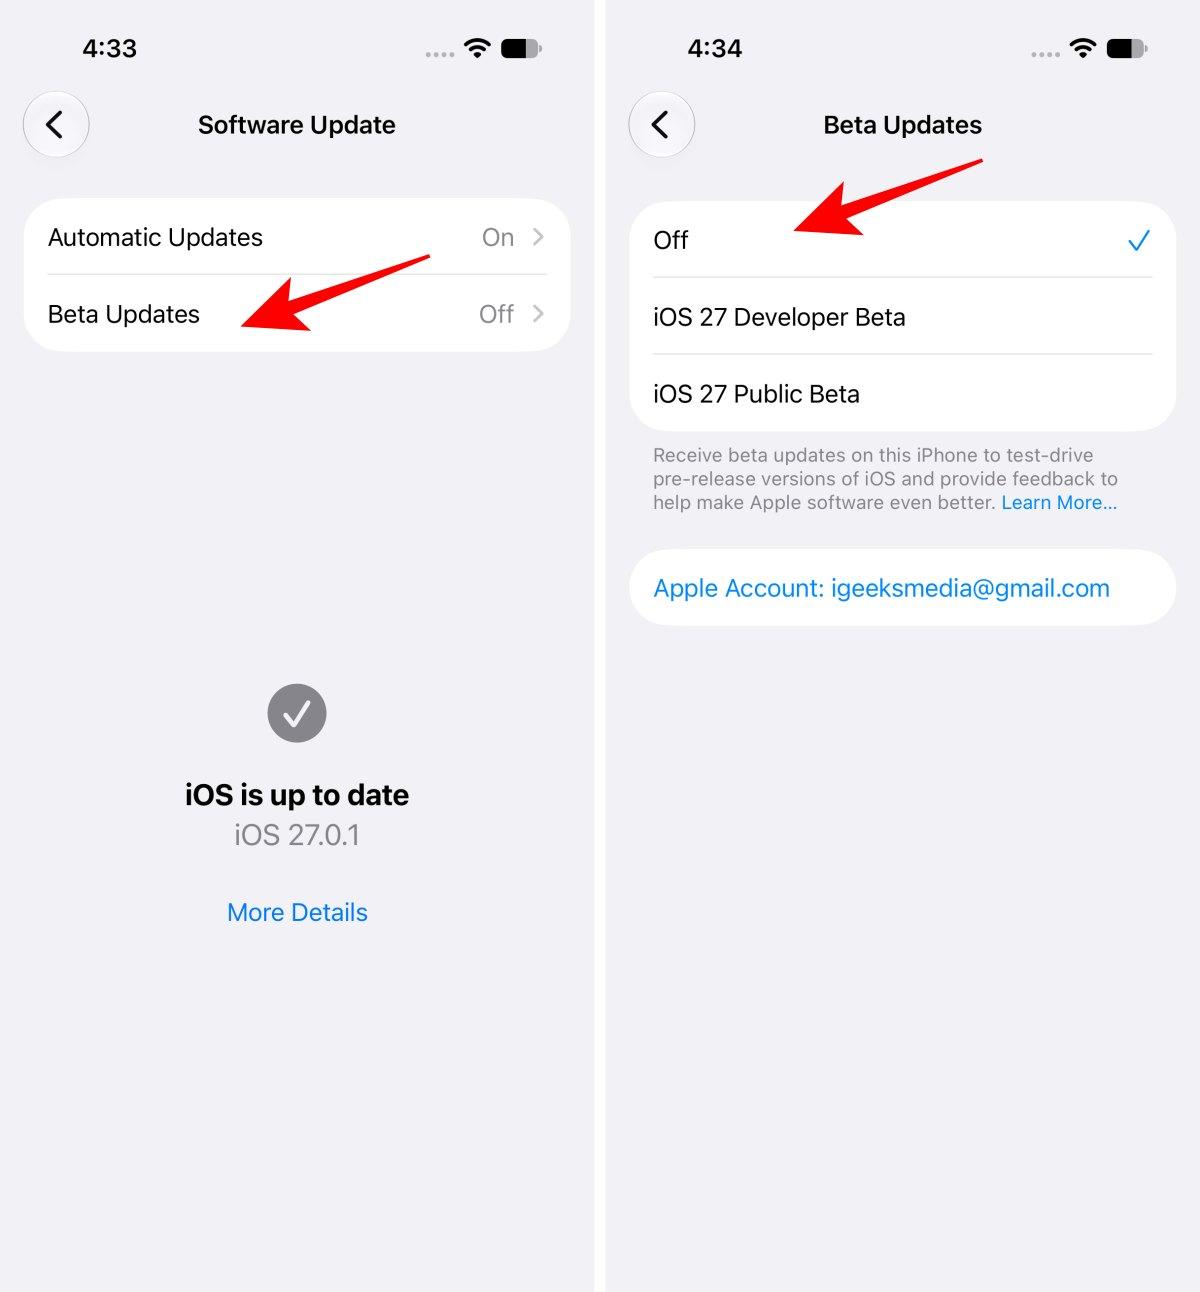
Your iPhone will no longer receive future beta updates through the beta channel. However, remember that your current beta version remains installed.
How to install the iOS 27 official version
Once beta updates are turned off, your iPhone will automatically fetch the stable iOS 27 release.
- Go to Settings → General → Software Update.
- Wait for your iPhone to detect iOS 27.
- Tap Download and Install.
- Agree to the terms and enter your passcode.
- Let it download (10–30 minutes depending on Wi-Fi).
- Tap Install Now when prompted.
Your iPhone will restart a couple of times. Once it boots up, you’ll see the setup screen. Unlock your device, and you’re officially on the stable iOS 27!
If you see “Unable to Check for Update,” don’t panic. Apple’s servers get busy right after launch. Just try again later.
What if I don’t see the public iOS 27 update?
Don’t assume something is wrong.
If your beta build is newer than the current public release, the public version may not appear as an available downgrade through Software Update.
In that situation, you can either:
- Stay on the current beta until a newer public release becomes available, or
- Use a Mac or PC to erase and restore the iPhone to the current public iOS version.
How to downgrade from iOS 27 beta using a Mac or PC
If you don’t want to wait for the public release to catch up with your beta, you’ll need to restore the iPhone.
Important:
This process erases the iPhone.
Before continuing, make sure you have a backup that can be restored to the public iOS version you’re installing.
- Turn off your iPhone.
- Now, press and hold the Power button and immediately connect your iPhone to your Mac or PC via an MFi-certified cable.
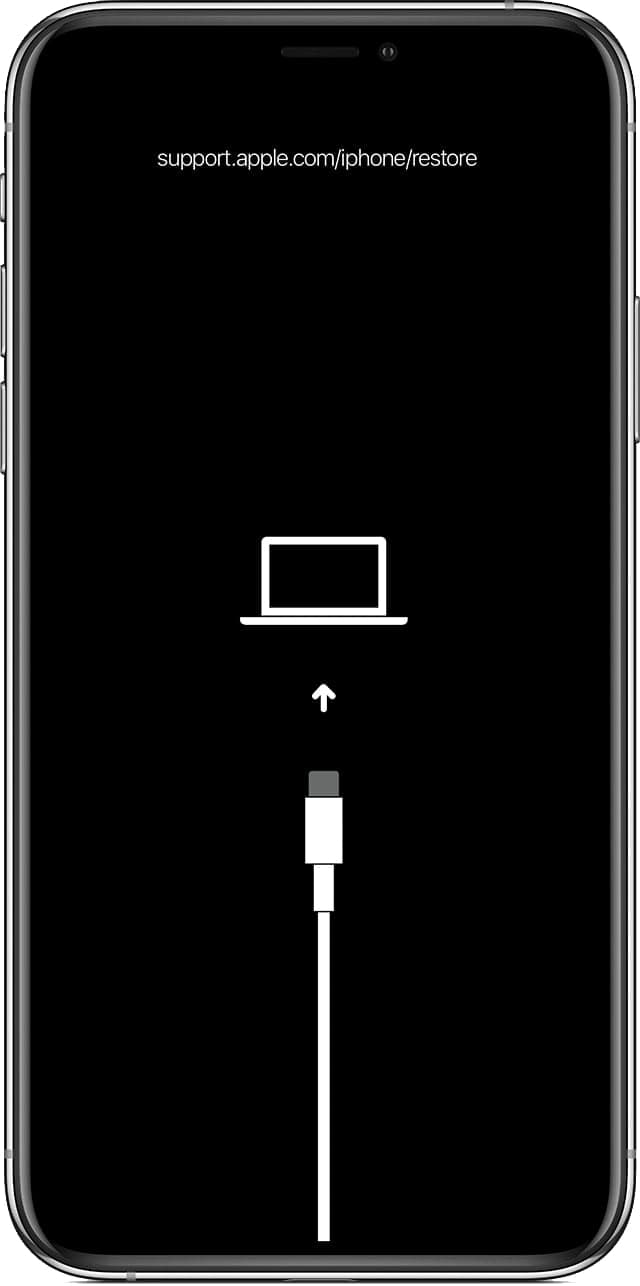
- Keep holding the Power button even after the Apple logo appears until a lightning cable icon and an arrow pointing towards a laptop appear on the screen. Your iPhone will enter Recovery mode.
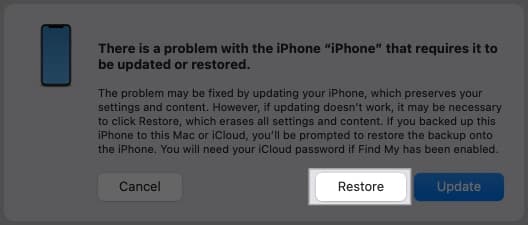
- Now, open Finder on your Mac or Apple Devices on PC and click the Restore button on the pop-up dialogue box that appears.
- Then, click the Restore and Update button.
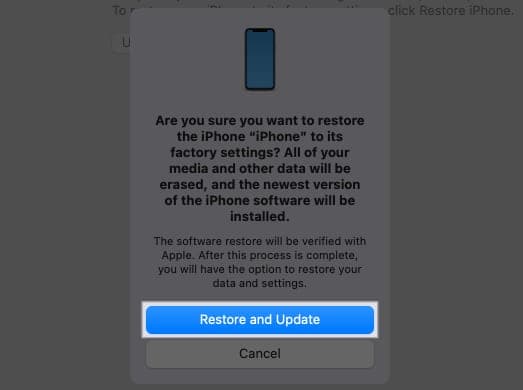
- Next, follow the on-screen instructions to restore your iPhone to the available lower stable version.
- Wait for the process to complete.
Once the restore finishes, your iPhone will run the latest stable iOS version. Then you can download iOS 27 and restore your backup.
Enjoy iOS 27 bug-free
And that’s it! You’ve successfully switched from iOS 27 beta to the official release. Now you can enjoy all the new features—minus the bugs.
Pro tip: Always back up your iPhone before major updates. It’s your safety net in case something goes wrong.
If you hit a snag, drop a comment below or reach out to Apple Support for help. Happy updating!