Apple Watch can be a lifesaver in times of distress. With the help of its innovative, on-device sensors, the watch can automatically detect when you fall, help call the emergency service and contacts, and alert nearby people. Let me tell you more about this potentially life-saving feature and help you set up and use fall detection on your Apple Watch (in unforeseen circumstances).
- Apple Watch models that support fall detection
- How fall detection works on Apple Watch?
- How to turn on fall detection on your Apple Watch
- Check your fall history on iPhone
Apple Watch models that support fall detection
- Apple Watch Series 4
- Apple Watch Series 5
- Apple Watch Series 6
- Apple Watch SE
How fall detection works on Apple Watch?
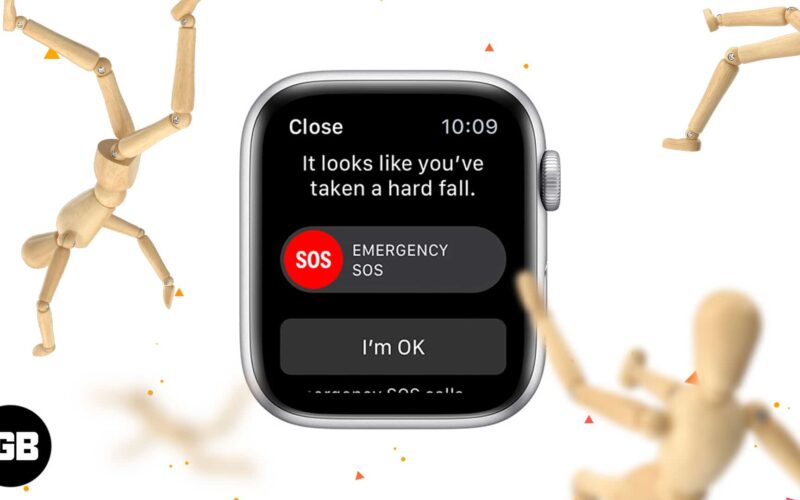
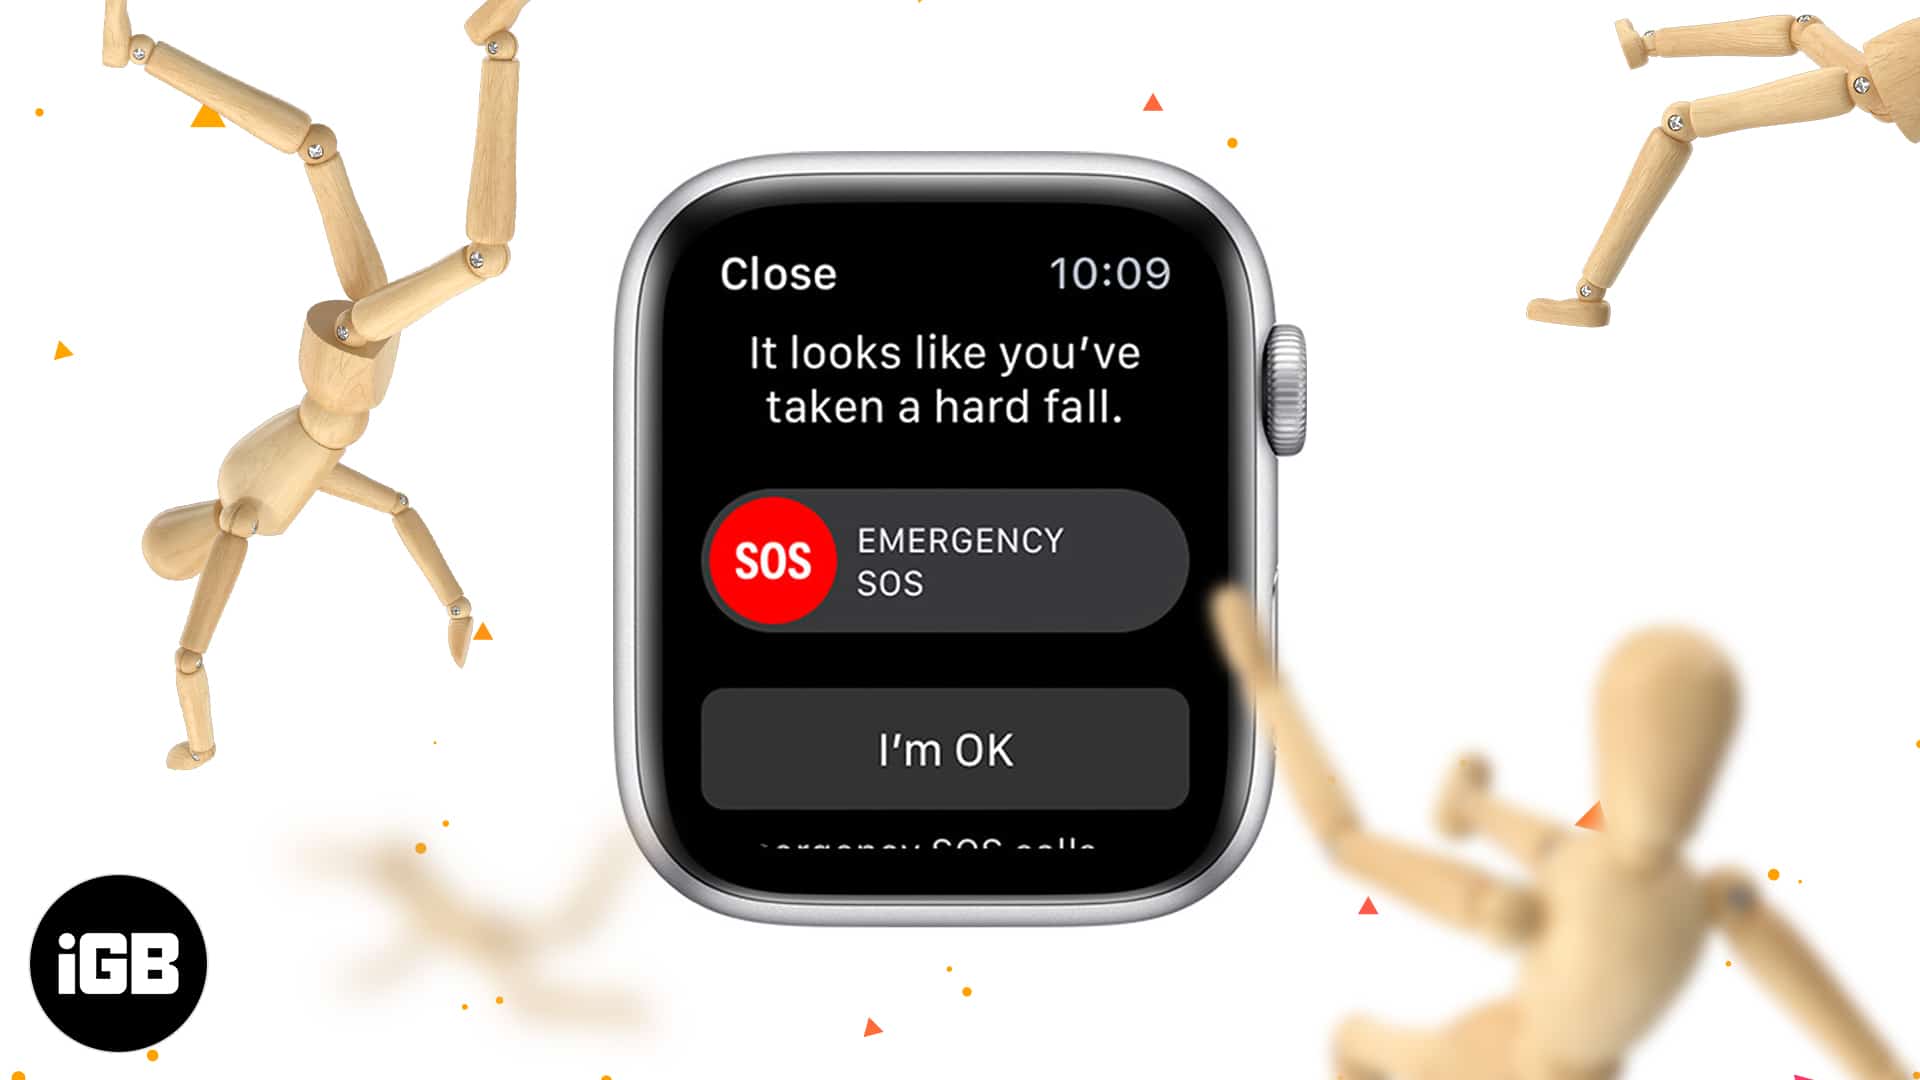
When you suffer an accidental hard fall, the Apple Watch on your wrist automatically detects it. And it provides a haptic tap on your wrist, plays an alarm, and an alert appears on the watch screen.
Scenario 1: When you are conscious and moving after the fall:
From this alert screen, you have the option to either contact the local emergency service or dismiss the alert. To call the emergency service, slide the SOS slider to the right. If you are doing fine and do not need help, you can dismiss the alert. For this, tap ‘I’m OK,’ or tap ‘Close‘ in the top left, or press the Digital Crown.
Scenario 2: When you are unconscious and immobile after the fall:
In scenario 1, if the Apple Watch detects you are moving, it does not call emergency service automatically. It waits for you to make the decision on the alert screen (explained above).
However, when the Apple Watch detects that you have not moved for a while (around a minute), it will begin a 30-second countdown timer. Simultaneously, it will keep tapping your wrist and also sound an alert that gradually gets louder. This is so that someone nearby can get to you. You can tap cancel within these 30 seconds. But if you don’t, your Apple Watch will automatically call the emergency service after this countdown ends.
Once the emergency service picks up the call, your Apple Watch will play an audio message that informs them about your hard fall. The watch also shares your current location with them. Additionally, it can also send your Medical ID to the emergency services (if you had enabled ‘Share During Emergency Call’ under Medical ID settings). During this call, you or someone nearby can also talk to the emergency service.
After calling emergency services, your Apple Watch will send a message to your emergency contacts informing them about your fall. This message also has your location so that your friend or family can reach you ASAP.
Keep in mind:
- If your country has more than one emergency number, Apple Watch will call the ambulance services number.
- You must enable Wrist Detection. If not, the Apple Watch will not automatically call the emergency services even if it has detected a hard fall.
Now, you know how fall detection works. Thus, the next step is to learn how to enable it. Let me guide you through.
Note: During the watch setup or filling the Health app details, if you had entered your age to be 55 or above, fall detection is automatically enabled. But if you are 18 and above, follow along to enable fall detection manually.
How to turn on fall detection on your Apple Watch
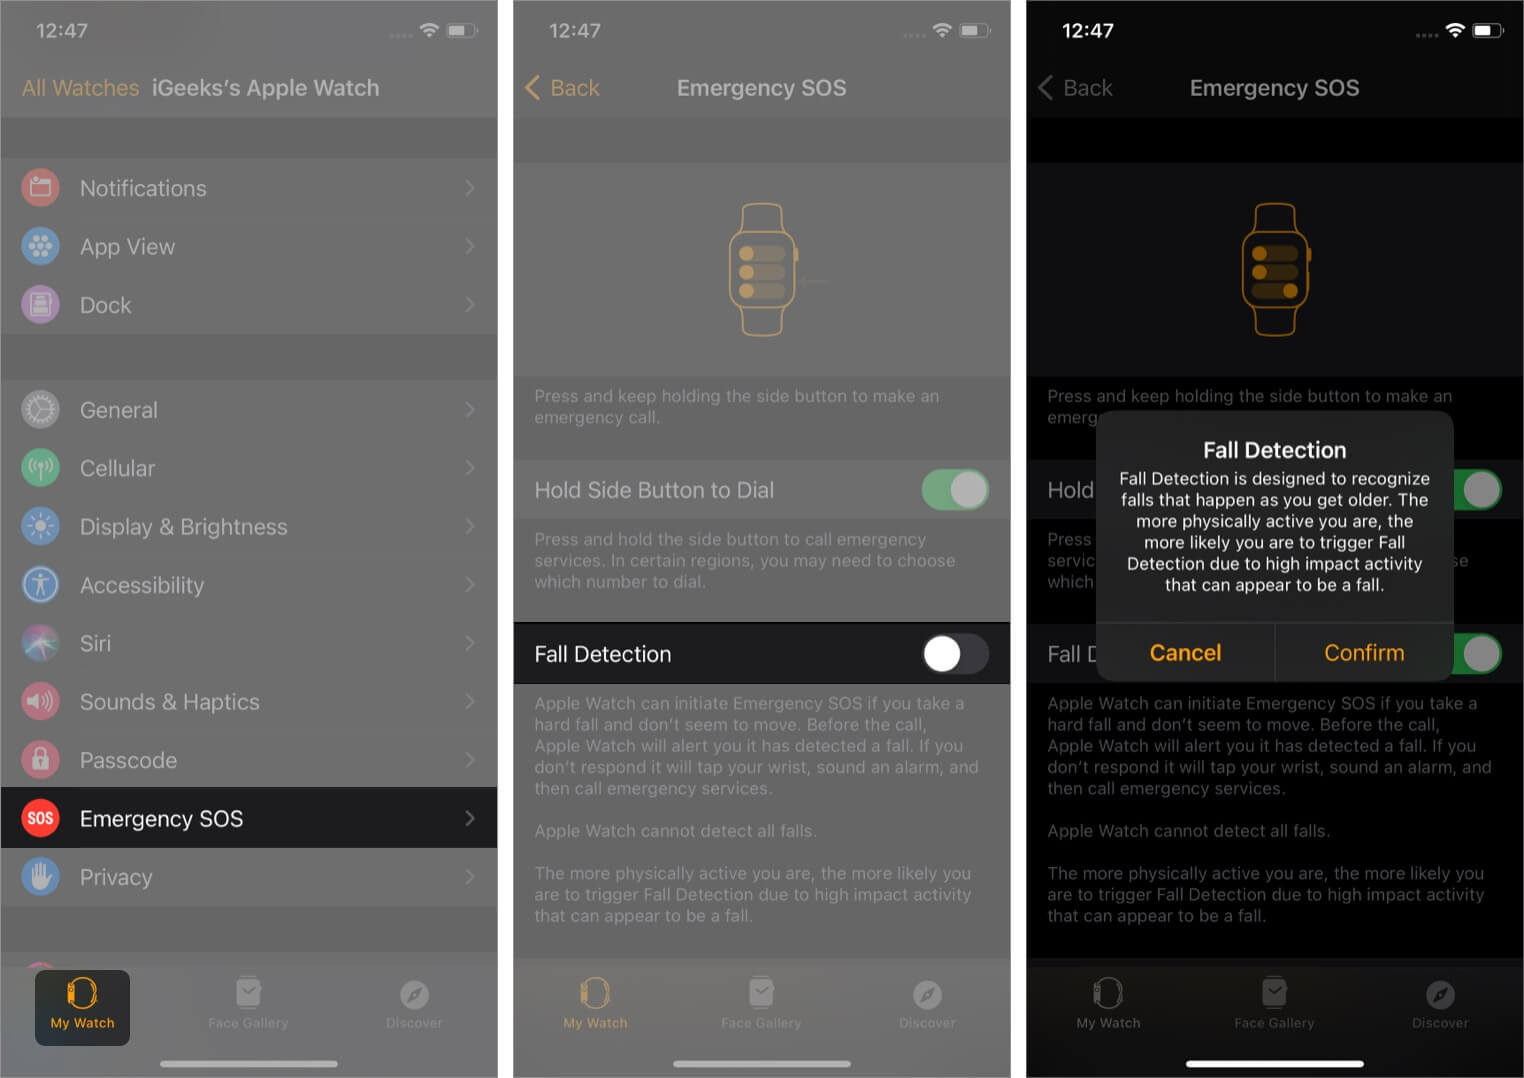
- Open the Watch app on the paired iPhone.
- From the My Watch tab, select Emergency SOS.
- Enable Fall Detection and confirm.
Follow the same steps to turn it off.
Important:
- After enabling fall detection, make sure you set up your Medical ID and add your emergency contacts to it for the fall detection’s improved assistance.
- Also, inside the iPhone Watch app, tap Passcode, and make sure Wrist Detection is on.
Check your fall history on iPhone
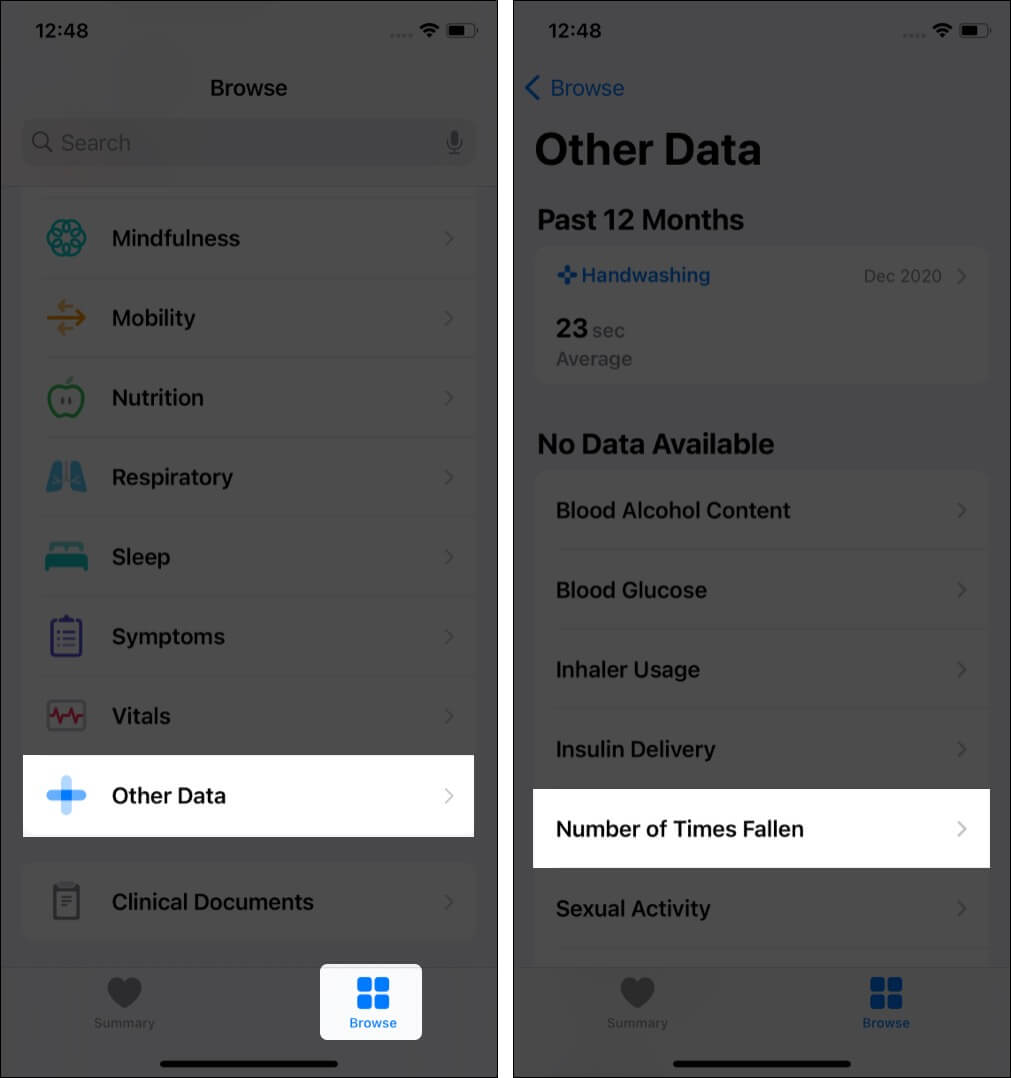
- Open the iPhone Health app and tap Browse.
- Tap Other Data.
- Tap Number of Times Fallen.
Keep yourself safe!
I believe now you are up to date with what fall detection on your Apple Watch is and how to use it. If your parents, grandparents, elder siblings also have an Apple Watch, ask them to turn this feature on. It can be life-saving like it has been for several people.
READ NEXT:

