
- You can delete old backups using the Time Machine app, Finder, Terminal, or by reformatting the entire drive.
- The simplest way is to enter the Time Machine app and delete specific backups from the timeline interface.
- For more control, you can manually delete backups in Finder, but you must be careful not to corrupt them.
- Advanced users can use Terminal commands like `tmutil` to list and delete specific backups from their drive.
- To remove all backups, first disconnect the drive in Time Machine settings, then reformat it with Disk Utility.
Time Machine backups are essential for protecting your data, but they can take up a significant amount of storage space over time. You might want to delete old backups to free up room on your external drive, remove outdated files you no longer need, avoid confusion between backups, or address issues like corrupted backups.
In this guide, I’ll share how to delete Time Machine backups using Finder, Terminal, and other methods.
4 Ways to delete Time Machine backup on Mac
Depending on your requirements and level of expertise, you can delete Time Machine backups on a Mac in four ways:
1. Delete backups in the Time Machine app
The easiest way to delete Time Machine backups on a Mac is via the Time Machine app. You can quickly scroll through your recent backups and delete them individually.
- Connect your Time Machine drive to your Mac.
- Open the Time Machine app using Spotlight search. You can access Spotlight by pressing Command + Space.
- Use the arrows to find the backup you want to delete.
2. Erase Time Machine backups through Finder
Time Machine backups are stored in an organized fashion on your Time Machine backup disk for easy access. As a result, you can quickly find your old backups and delete them through Finder. But do bear in mind that this process is risky, and you can corrupt the backup if you aren’t careful enough.
- Connect your Time Machine drive to your Mac.
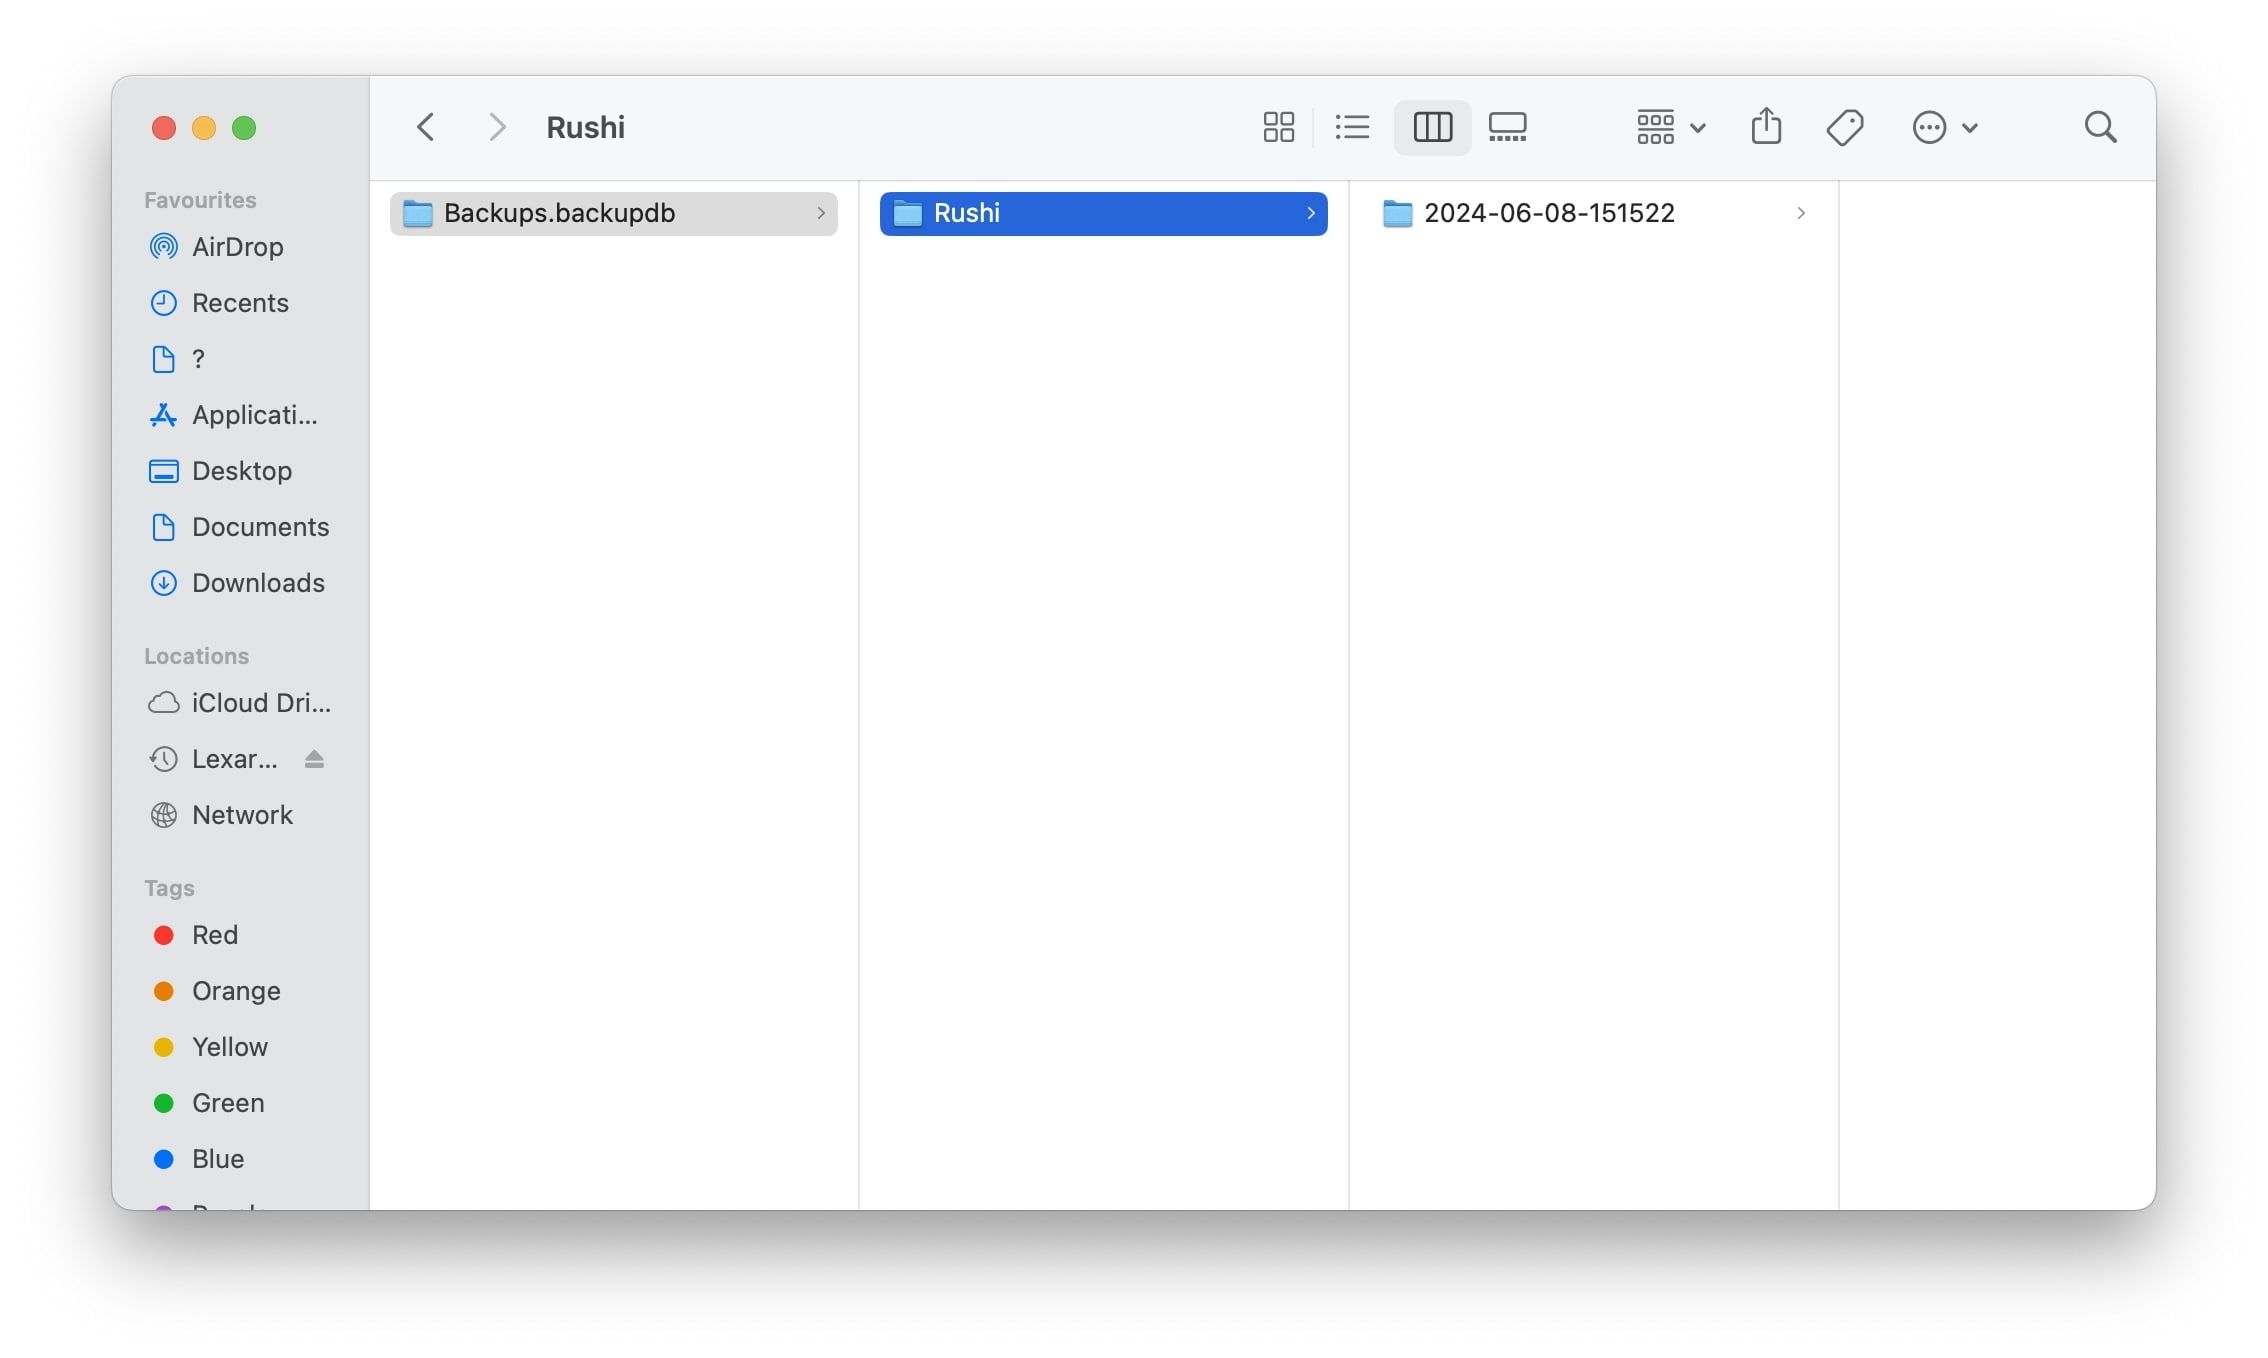
- Locate and open Finder from the Dock on your Mac.
- Click the Time Machine drive from the left sidebar.
- Now, double-click on the Backups.backupdb folder to open it.
- Open the folder labeled with your Mac’s name to find the backups.
- Right-click on a backup you want to delete and select Move to Trash.
3. Clear Time Machine backups using Terminal
In addition to the methods we’ve listed so far, you can also use Terminal commands to view and delete all the Time Machine backups stored on your external backup disk.
Note:
Here are the steps for the same:
- Open the Terminal app on your Mac.
- Type
tmutil listbackupsinto the Terminal and press Return.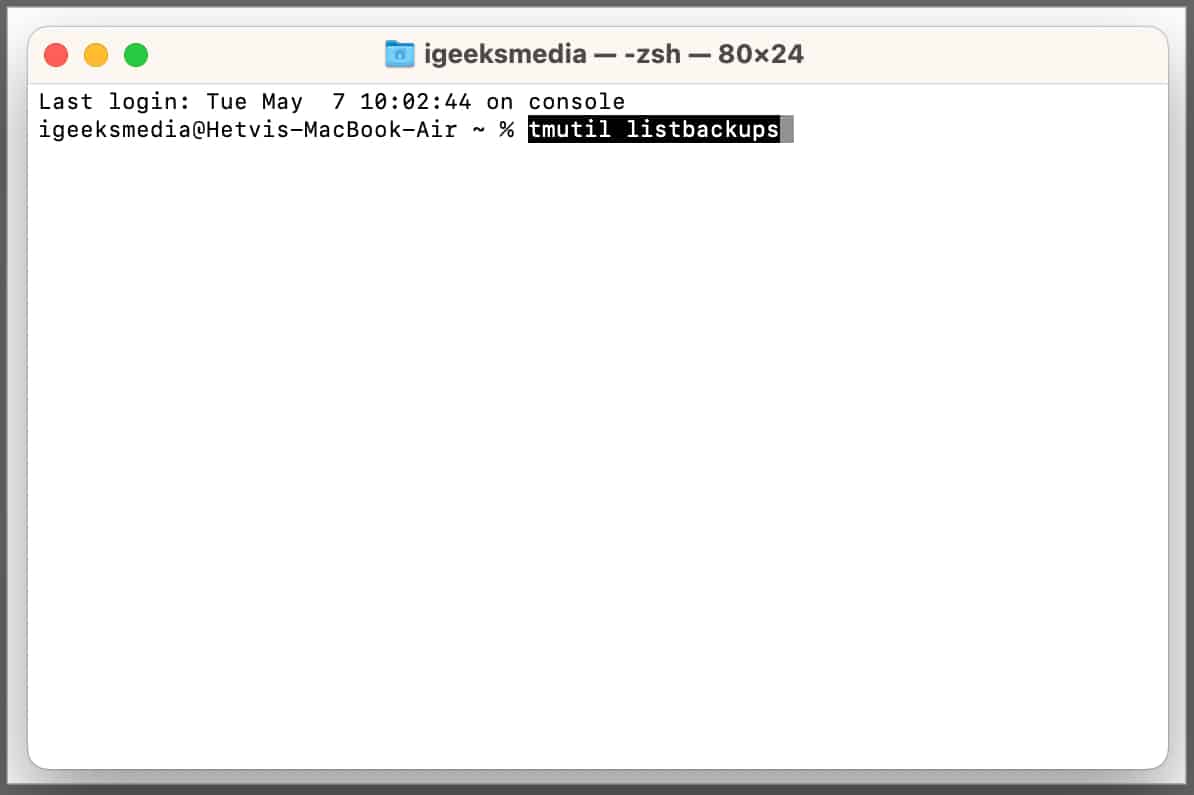
- Copy the path of the Time Machine backup you want to remove.
- Type
sudo tmutil delete [backup path]and press the Return key. - Enter your Mac’s password and press Return to erase the backup.
4. Clear all backups using System Settings and Disk Utility on Mac
The previous methods offer a way to delete individual backups, but what if you need to delete all backups so you can use your drive to store other files? In that case, you can deselect your drive as a backup destination and reformat it.
- Connect the Time Machine backup drive or NAS to your Mac.
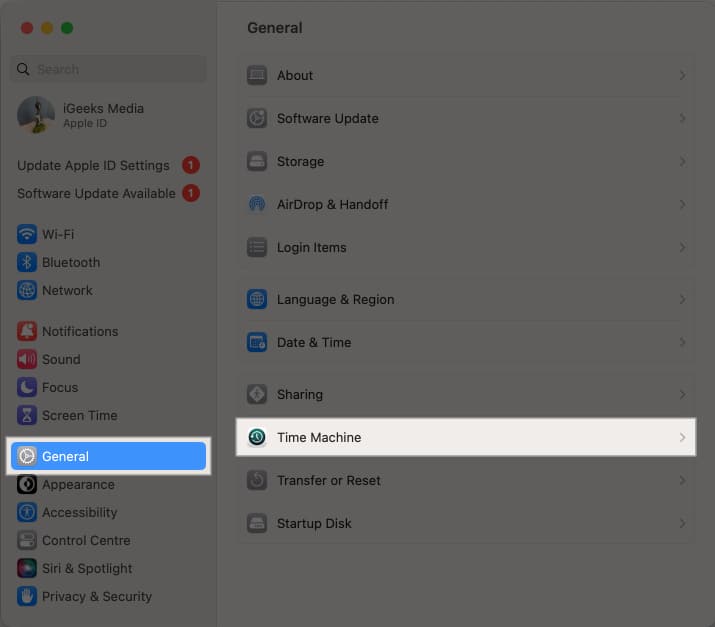
- Click the Apple logo in the menu bar and select System Settings.
- Now, go to General from the sidebar and select Time Machine.
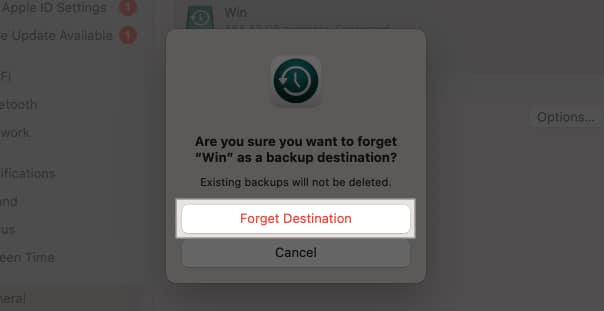
- Select a Time Machine backup disk and click the + icon.
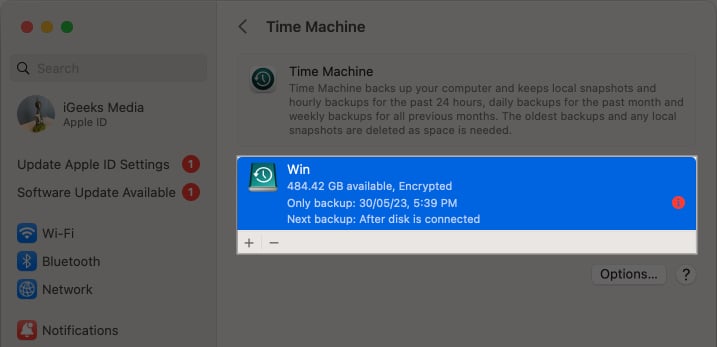
- Click Forget Destination to stop using the drive for backups.


After you deselect your Time Machine drive as a backup destination in System Settings, you must format the drive using Disk Utility on your Mac before you can use the disk to store your other files.
How to delete Time Machine snapshots on Mac
Besides creating backups that live on a separate disk, your Mac also stores temporary backup images locally on its internal drive. This ensures you can restore files even when the backup disk isn’t connected to your Mac.
Follow these steps to delete local Time Machine snapshots on your Mac:
- Open Terminal on your Mac.
- Type
tmutil listlocalsnapshotdates /and press Return. - Copy the date of the Time Machine backup that you want to remove.
- Type
tmutil deletelocalsnapshots [backup date]and press Return. - Enter your Mac’s password and hit Return to remove the local snapshot.

Wrapping up…
Those are all the ways you can delete Time Machine backups on your Mac. Regardless of the method you choose, deleting Time Machine backups can ensure your backup drive has ample storage space for new backups. You can even delete all backups to use the hard drive for other purposes.


