Are you unable to access your files or data on your Mac? Maybe your Mac’s hard drive has been crashed or damaged. However, you can recover your vital files with the right tools and techniques.
Let me share how to recover data from a corrupted or damaged hard drive on your Mac, regardless of its type. Without any further ado, let’s get straight into it.
How to check if your hard drive is corrupted?
If you suspect your Mac’s hard drive is corrupt, there are a few crucial factors you should check to confirm and troubleshoot the issue.
- Corrupted hard drives make it difficult or impossible to access the stored information.
- The data seems to load in a loop during boot-up and when opening files and applications.
- The computer may also freeze or crash often, resulting in frequent restarts.
- Moreover, if files suddenly disappear or are inaccessible, this could indicate a corrupt hard drive.
- When the internal hard drive is corrupt or damaged, your Mac may be unable to boot.
- There may also be slow system performance, lags, or error messages.
How to fix corrupted hard drive and recover data on Mac
A corrupted hard drive on a Mac can be frustrating. However, with the proper techniques, data recovery is often possible. Follow the below-discussed resolves to ensure a smooth Mac hard drive recovery.
Prerequisites to recover data from a corrupted or damaged hard drive on Mac:
- Cease the usage of your hard drive if you’re wary of its condition
- Back up your data as a top priority
- Charge up your device before initiating data recovery
1. Check for backups
When your Mac’s drive gets corrupted, the first step you should take is to check for any saved backup. If you take regular data backups, you can rest assured that your files are safe.
If you haven’t been backing up your data, it’s essential to start right away. There is a high probability that trying to recover lost files on your Mac could potentially affect your current files.
This step ensures that your current files are safe and sound, no matter what the outcome of the data recovery process is. Now, let’s repair the corrupted hard drive on your Mac before more files get damaged.
2. Scan your Hard Disk
If you’re speculating about a drive failure on your Mac, verify this before performing highly advanced recovery methods.
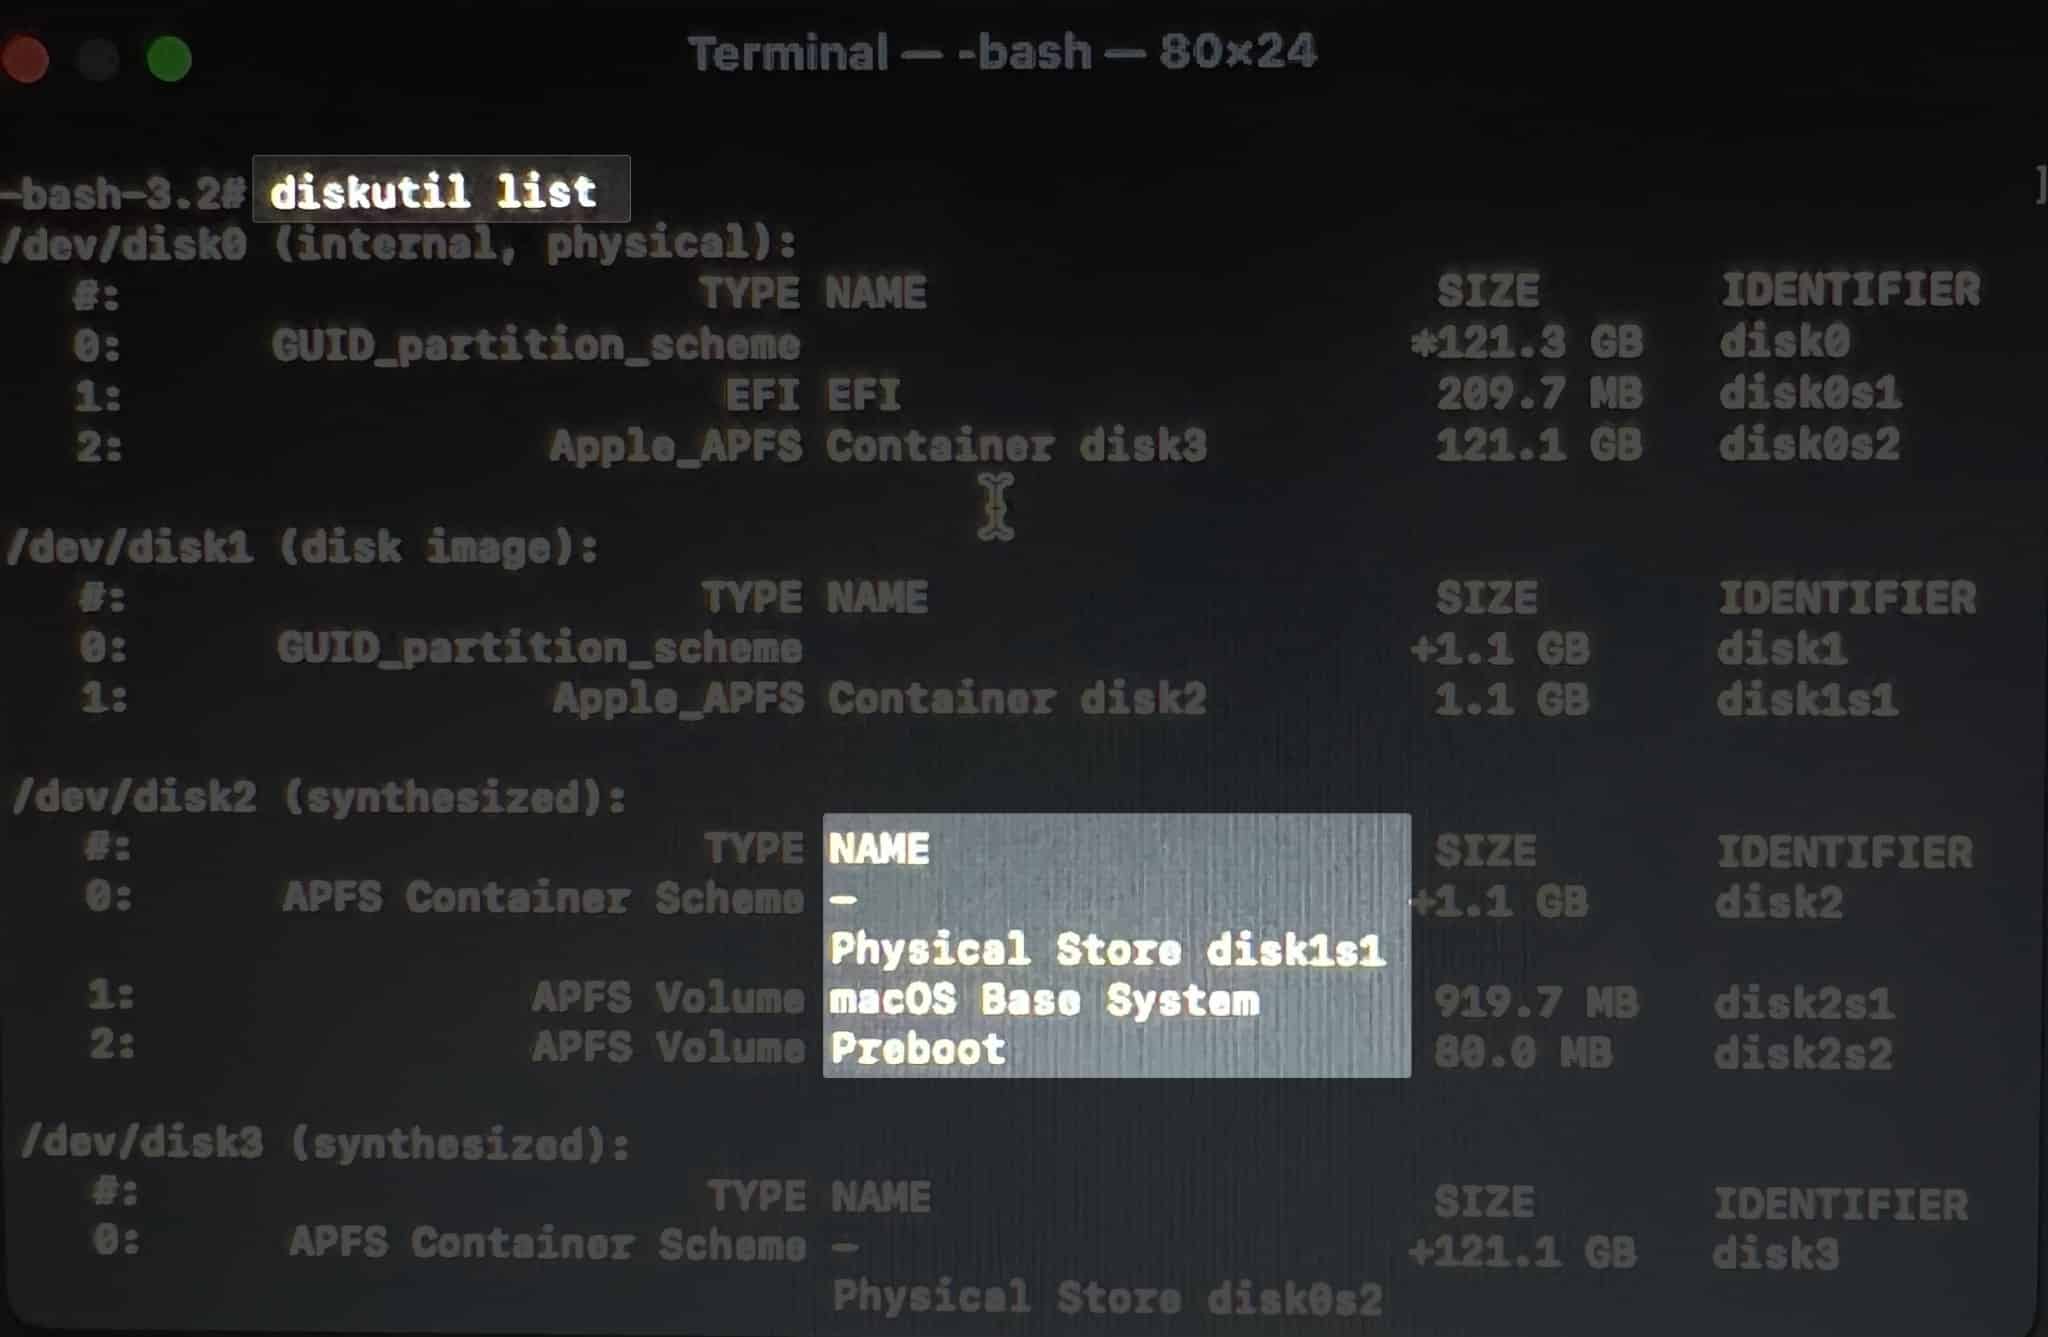
- Launch Terminal on your Mac.
- Type the prompt
diskutil listand press Return.
- You will see a list of all active drives on your Mac.
- Note the IDENTIFIER next to the disk drive you seek to rectify.

- Now, paste the prompt
diskutil verifyVolume /dev/drive identifier.
- Alternatively, to check your main hard drive, use the prompt “
diskutil verifyVolume /“. - Press Return to run the command.
- Once the command is done running, read the last lines in the terminal.
- It will contain a message regarding the status of the hard drive.
In this case, it reflects the drive appears to be OK.
- However, if you locate a message highlighting, “The volume is corrupt and needs repairing,” it’s time to fix the corrupted hard drive on your Mac and recover the essential data.
Alternatively, you can use Disk Utility to scan your hard drive disk and look for errors.
- Launch Disk Utility from Launchpad or Spotlight.
- Click First Aid → Select Run on the prompt.
- Hit Continue to run the tool.
- Now, wait until the scan is completed.
- You will be alerted of any errors in the hard drive volumes.
3. Run Disk Utility on Mac
Proven to be the most straightforward method, Disk Utility can repair all damaged drives quickly. Take a good look at the process outlined below:
- Open Terminal → Paste the command
diskutil list. - Press Return and note the IDENTIFIER for the corrupted drive.
- Now, use
diskutil repairVolume /dev/drive identifierprompt to start the disk repair. - Wait until it applies the necessary changes and successfully repairs your hard drive.
However, this method may not work effectively if AFPS Volumes and Containers are mounted on your hard drive. In this situation, it is advisable to jump to the following method.
4. Access Recovery Mode on Mac
If you’ve gotten this far, it’s time to ramp up the level of complexity to get the desired result. Accessing Recovery Mode on Mac can differ based on the chipset on your device. Therefore,
- If you’re using an Intel-based Mac, press and hold CMD + R during the system restart.
- On the other hand, for an M1 chip Mac, press and hold the power button.
Leave the keys once the Loading startup options message appears on the screen. Now, follow the steps outlined below:
- Select Disk Utility from the menu and click Continue.

- Choose a drive of your preference → Hit Mount.

- Press the CMD + Q keys together to quit the Disk Utility menu.
- Now, go to Utilities from the menu bar and access Terminal.

- Use the prompt
diskutil listand press Return to summon active drives on your Mac. - Save the drive name you wish to repair.
- Paste the
diskutil repairVolume ‘/Volumes/ drive name‘ command and hit Return. - Wait until Recovery Mode repairs your corrupted drive.
- Once get the Finished file system repair alert, your drive should be fixed and ready to use.


5. Accessing Time Machine
Time Machine is a utility tool of macOS for creating a backup of the entire system. It consists of all the files and folders stored on the drive.
When Time Machine is enabled on your Mac, it regularly backs up any changes since the last backup by taking snapshots of your hard drive.
This can be especially useful when you haven’t been able to access your data through other means, such as running disk repair utilities or attempting to recover data from a damaged disk image.
6. Restart your Mac in Safe Mode
Safe Mode boots your Mac with basic utilities and allows users to troubleshoot problems. Although lost data cannot be retrieved from corrupted hard drives using Safe Mode on Mac, it can still help resolve common device issues.
For example, if your device is running slowly or freezing, booting into Safe Mode can help you identify which software or utility is causing the problem. Hence, it diagnoses device issues and potentially prevents further damage from occurring.
7. Verify Finder settings
If you’re a fan of using an external drive on your Mac, you must make it visible. Otherwise, this can make you think your external hard drive is damaged or corrupted. To verify the same, follow the steps outlined below.
- Launch Finder on your Mac.
- Click Finder from the menu bar and hit Settings.

- Now, ensure External Disks are enabled for your device.


8. Third-party Data Recovery software
If you’re not technically inclined, you can opt for a direct approach using high-end data recovery software. These software are easy to use and well known in the market.
Using software with a simple and intuitive interface lets you recover files from a corrupted hard drive quickly. Furthermore, you can filter out the documents you wish to return to your device.
9. Contact Apple support
After exploring several potential solutions, if the problem of the corrupt drive on your Mac persists, it’s time to bring in the experts. Contact Apple Support for a better understanding of the issue and to find an optimal solution.
Useful tips to prevent future data loss
Let’s look at a few factors that can help you protect your Mac’s hard drive from damage or corruption.
- Perform data backup regularly and keep copies of your essential files.
- Ensure your software and operating system are updated with the latest security patches.
- Use reliable anti-virus protection software to protect your data from malware and viruses.
- Avoid physically damaging your hard drive. Handle your Mac carefully and protect it from extreme temperatures and moisture.
- Prevent using public Wi-Fi networks as they are more vulnerable to security threats.
- Use encryption to protect your data and ensure only authorized users can access it.
- Avoid downloading files from unverified sources, as it can put your Mac at risk of malware and data loss.
Revive and retrieve!
Recovering data from a corrupted or damaged hard drive on a Mac can be difficult but not impossible. Try the methods prescribed above and see what suits you the best. The proper steps and precautions can make the recovery process much more manageable.
Thank you for reading. Please leave your thoughts in the comment section below.
Read more: