- To change the Game Center nickname iPhone, iPad, or Vision Pro, open Settings > Game Center > update the Nickname field.
- On Mac, open System Settings > Game Center > Update the Nickname field > Hit Return.
When you created your Game Center account, you may not have thought much about the nickname (username) and picked something that was suggested to you. But if you’re trying to connect with friends on Game Center, you may want to change that nickname and make it simpler for your pals to find you.
Let me show you how to change your Game Center username on iPhone, iPad, Mac, and Vision Pro so that you can add more friends and enjoy new challenges together.
- How to change Game Center nickname on iPhone and iPad
- How to change Game Center nickname on Mac
- How to change Game Center nickname on Apple Vision Pro
How to change Game Center nickname on iPhone and iPad
You can change the Game Center username as many times as you want. So, if you don’t like the current name, here’s all you need to do:
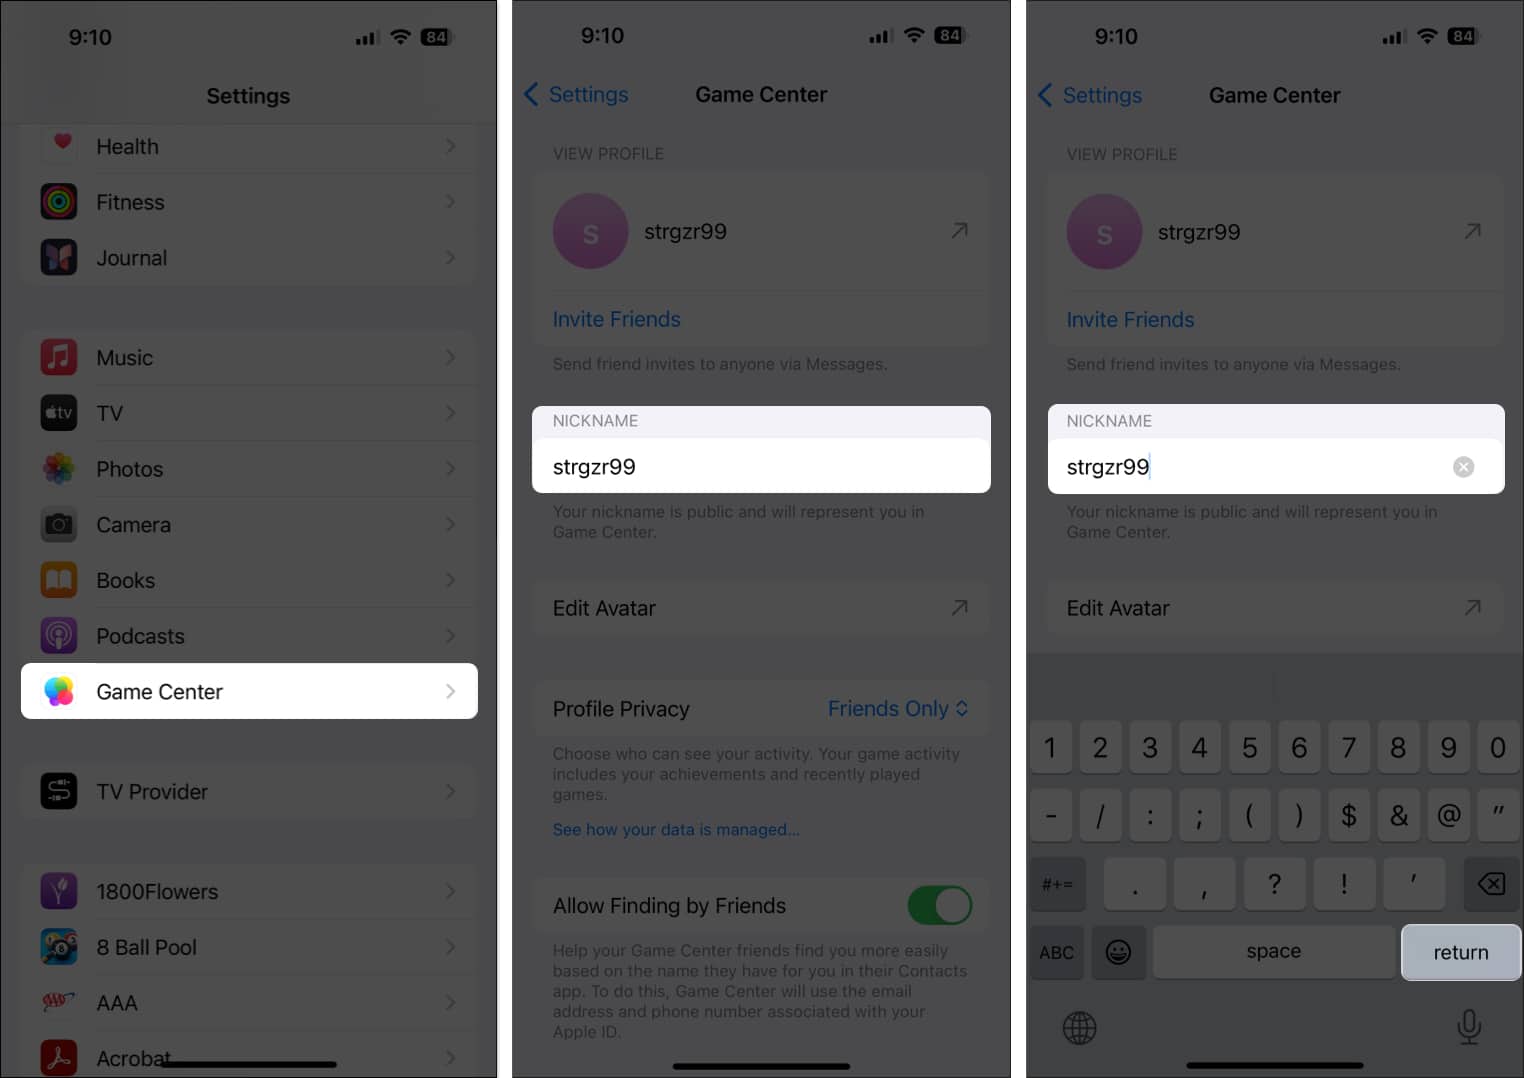
- Open the Settings app → Scroll down and choose Game Center.
- Tap the Nickname field → Delete the existing name and enter a new name.
- Select Return at the bottom of the keyboard when you finish.
Remember, if the new nickname you entered isn’t available, you’ll have to pick a different one.
You can then use the arrow on the top left to exit the Game Center settings, and you’ll see the updated name on your other Apple devices.
This will make you more identifiable and help add more friends on Game Center. Then you can quickly move onto to some two-player games.
How to change Game Center nickname on Mac
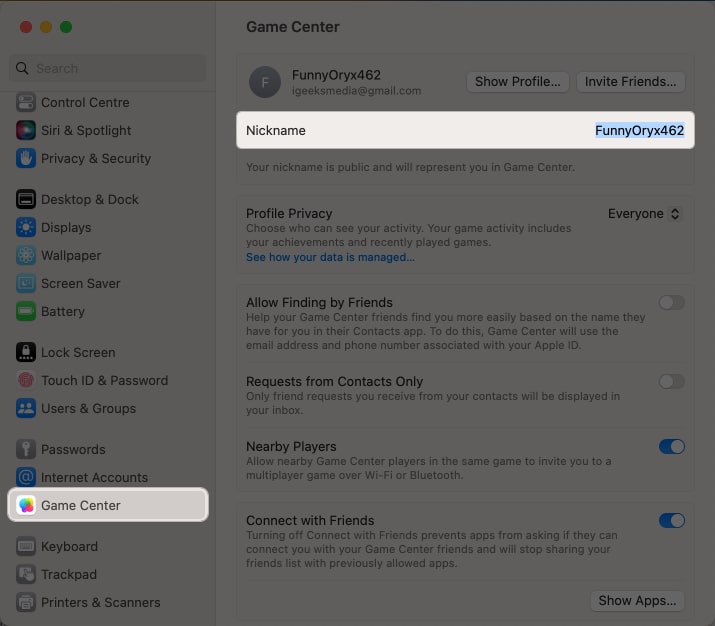
- Go to System Settings using the icon in the Dock or Apple icon in the menu bar.
- Select Game Center from the left pane.
If you haven’t already, toggle on Game Center and continue with your Apple ID. - Select the Nickname field → Edit or enter a new name → Hit return to save it.
You can then close the System Settings and should see your updated Game Center nickname on your Apple devices.
How to change Game Center nickname on Apple Vision Pro
Like a lot of other apps and services, Game Center can be synced across all Apple devices – including the mind-blowing Apple Vision Pro.
Since the device is relatively new, you might not have enabled the Game Center on the Vision Pro. Here’s all you need to do.
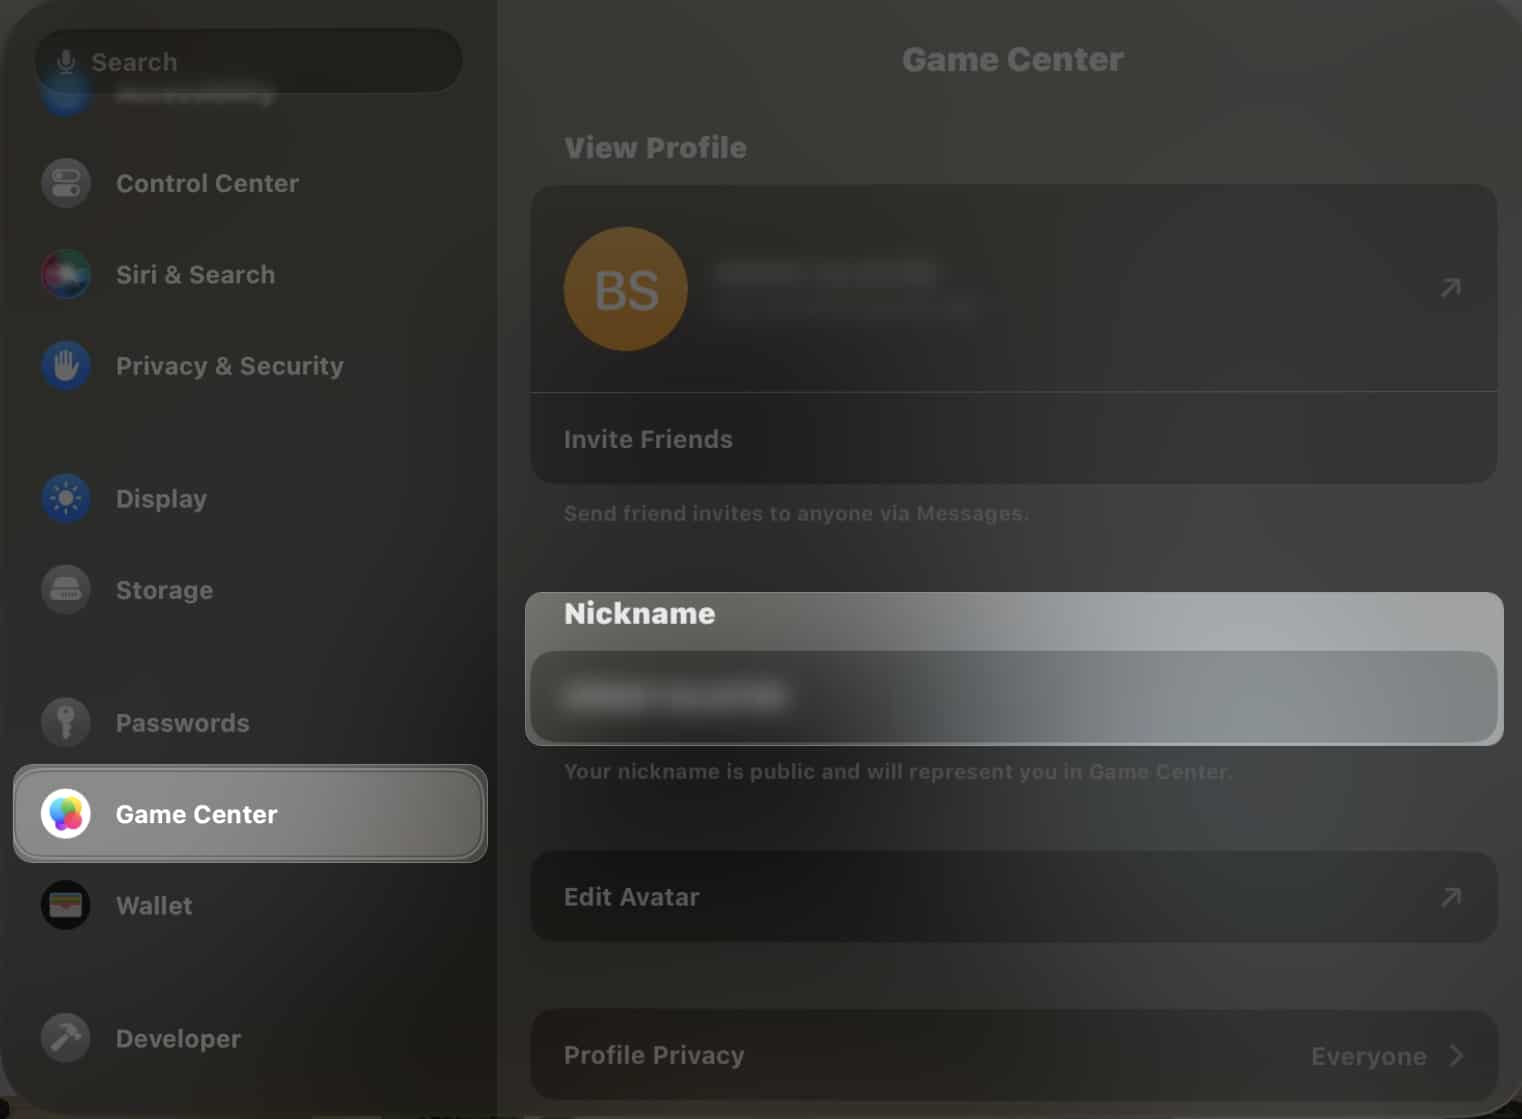
- On your Vision Pro, go to Settings → Game Center.
- If you haven’t already, toggle on Game Center → Sign in with your Apple ID.
- Select the Nickname field → Enter a new name.
That’s it. The steps are as straightforward as on the iPhone. The only difference lies in employing hand gestures to control the Vision Pro.
For optimal gaming sessions with your new headset, consider enhancing your setup with Vision Pro accessories and travel cases. Not only will these additions elevate your gaming experience, but they’ll also ensure the safety of your equipment.
If you want to sign into Game Center with a different Apple ID, head to Settings > Game Center and tap Sign Out. Turn the Game Center toggle back on, choose the “Not [your Apple ID]” option, and then sign in with the other Apple ID connected to the Game Center account.
You can only have one Game Center account linked to an Apple ID. If you want to have multiple Game Center accounts, you’ll need to set up additional Apple IDs. However, if you have set up Family Sharing, multiple people within the group can access that Game Center account and its purchases.
You can change the profile picture or avatar for your Game Center account easily. Go to Settings → Game Center → Tap Edit Avatar → Make your selection and tap Done.
Game on!
Now that you know how to change your nickname on Game Center, play some games to challenge your friends!
I hope you found this guide helpful. Do share your thoughts in the comments below.
Read more:


Leave a Reply