How to change default account for Apple Notes
Change the default Notes account for seamless syncing across devices.

The Notes app is a great tool for organizing ideas and thoughts. If you use multiple accounts, knowing how to change the default account is essential for seamless syncing across devices. This guide will show you exactly how to do it!
Why should you set a default account for Apple Notes?
- Simplified access to your notes: By designating a default notes account, all new notes will automatically be saved in that particular account. Consequently, you can effortlessly access your notes from any device by just logging into the desired account.
- Organize your notes: If you have multiple accounts for Apple Notes, you can categorize them based on your needs. For example, you can assign one account for work-related notes, another for personal notes, and a third for shared notes. This approach facilitates efficient note organization and quick retrieval.
- Data security: By setting a default Notes account, your notes will be duplicated and stored in two separate locations. This duplication becomes invaluable in the event of any mishaps affecting one of your accounts. For instance, if your device is misplaced or stolen, you can still access your Notes from other devices.
How to set a default account for Notes on iPhone or iPad
- Launch the Settings app on your iPhone.
- Scroll down, tap the Apps→ select Notes.
- Select Default Account.
- Choose your desired option from iCloud, Email, or On My iPhone.

Additionally, if you don’t see the On My iPhone option in the Default Account section, you can turn it on by going to the Settings app → Selecting Notes → Look for the “On My iPhone” Account, and toggle the button next to it to the on position.
How to set default account for Notes on Mac
- Launch the Notes app.
- Click Notes in the menu bar → Choose Settings from the dropdown.
Alternatively, you can press Cmd + (,) together to access the Notes app settings quickly.
- Click the dropdown button next to the Default account.

- Choose one of these options: iCloud, Email, or On My Mac.

If you don’t see the On My Mac option in the Default account menu, you can enable it by following these steps: Launch the Notes app Settings → Ensure that the checkbox next to Enable the On My Mac account is checked.
Wrapping up…
Congratulations on changing the default account for the Notes App! It’s an easy and practical way to manage your notes. For more tips, refer to our complete guide on Apple Notes on Mac.
Frequently Asked Questions
Topics

Written by
Bhaskar SharmaBhaskar is a tech guru who turned wordsmith. Hiding his B.Tech degree in a closet, he ditched the corporate path to simplify tech for everyone. For the past 5 years, he's been dishing out how-tos, reviews, and sharp insights. But there's more! He's a witty interview champ and has been sharing his wisdom for 3 years. Furthermore, he has honed his editing skills for 1.5 years and is now delving into marketing to assist newcomers. When not jamming his fingers on those mechanical keyboards, you may find him on strings or engaging in sports. And by evening, his quotes will be appearing on your Instagram feeds.
View all posts →More from How-to
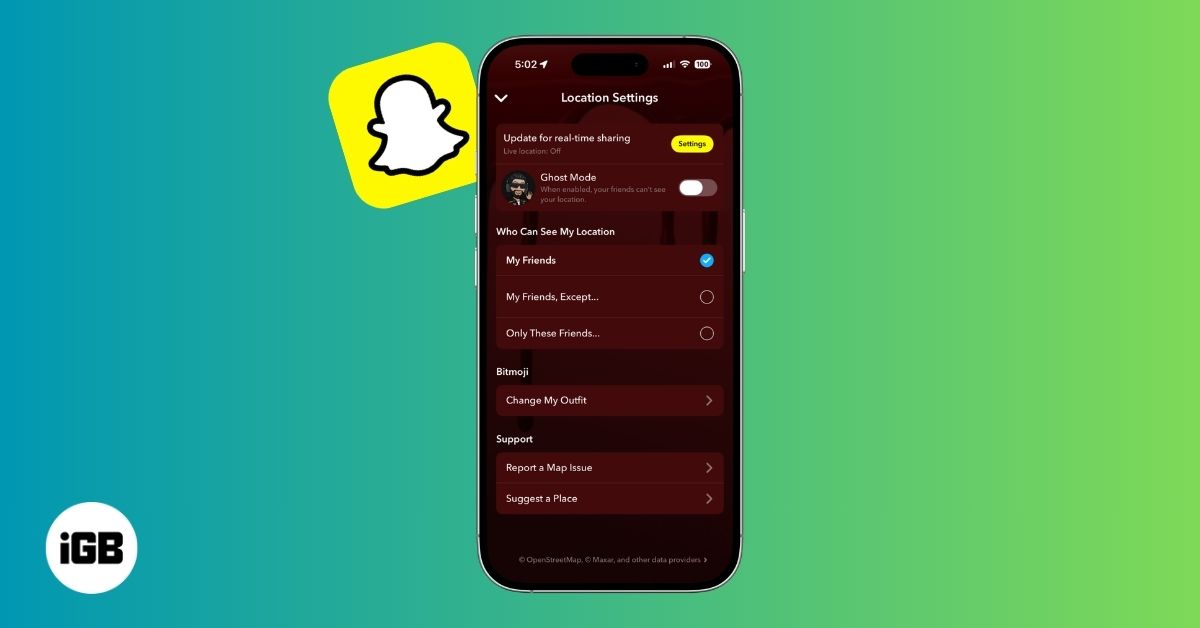
How to Turn Off Location on Snapchat (Step-by-Step Guide)
Want to stop sharing your location on Snapchat? This guide explains how Snapchat location sharing works and shows simple ways to turn off your location using Ghost Mode or phone settings. Stay in control of your privacy in just a few steps.

Snapchat Parental Controls: How to Set Up Family Center and Keep Your Teen Safe
Snapchat’s Family Center lets parents monitor their teen’s friend activity and screen time without reading private messages. Here’s how to set it up and what to expect.

How to Block and Unblock Someone on Instagram
Instagram lets you block or unblock someone in seconds. Follow these simple steps to take full control of your privacy and online peace.