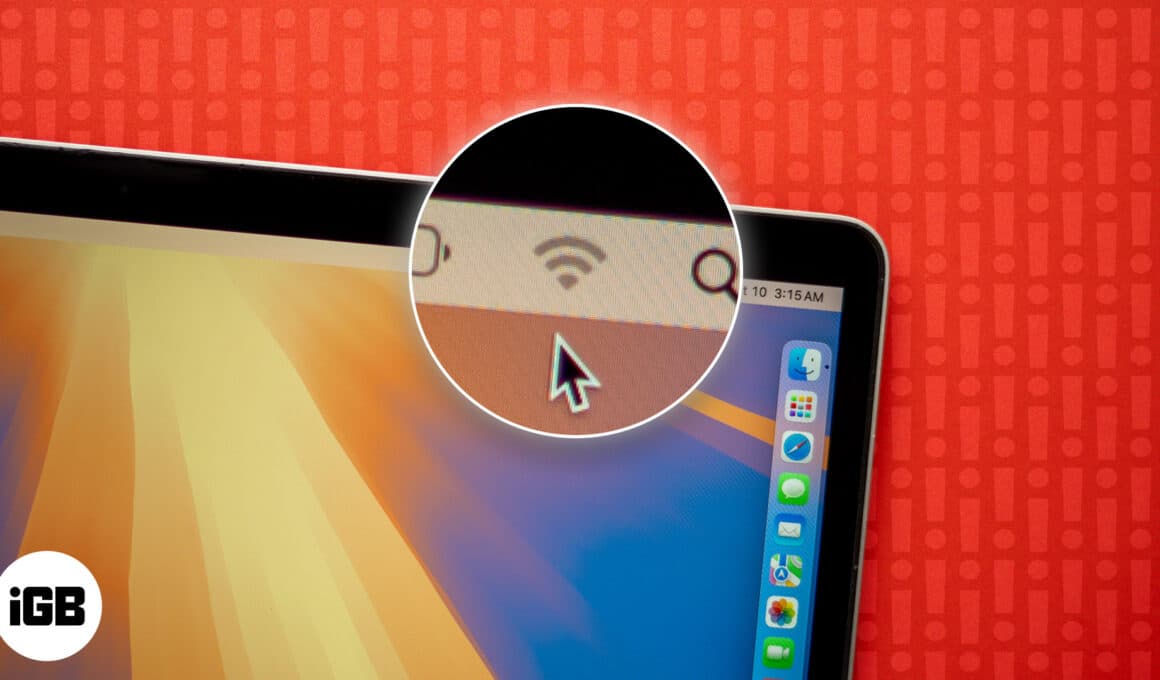
How to fix macOS Sequoia Wi-Fi issues
It’s frustrating to experience Wi-Fi issues on your Mac when you’re trying to stay productive or enjoy a seamless online experience. From slow connections to frequent dropouts, Wi-Fi problems can occur due to a variety of reasons.
Sometimes, it may happen after updating the latest macOS. Or, there may be some other causes such as network setting errors or software glitches.
Fortunately, there are several troubleshooting steps you can take to restore your Mac’s Wi-Fi to full functionality. In this article, we’ll look at how to fix macOS Sequoia Wi-Fi issues.
But first, let’s check a few things to make sure the issue is actually with macOS and not the Wi-Fi network itself.
- If you’re experiencing a problem with a specific app such as Slack or WhatsApp, check if the Wi-Fi is working on other apps.
- Check if the Wi-Fi network works on other devices connected to it, such as your iPhone or iPad.
If you’re experiencing Wi-Fi issues across multiple apps on your Mac and the network is working fine on other devices, proceed with the steps below to fix Wi-Fi issues on macOS Sequoia.
How to fix Wi-Fi issues on macOS Sequoia
1. Restart your router
One of the first things you should try to resolve Wi-Fi issues is to restart the router. To do so, turn off the router and disconnect it from its power supply. Wait for at least thirty seconds, and then plug it back in and power it on. Connect your Mac to the network and check if Wi-Fi works now.
Also make sure that:
- The router is not overheating. Ensure that it hasn’t been covered or placed at a location where there isn’t much ventilation.
- The router is not placed on or near any large metal surfaces. For instance, if it’s placed on a filing cabinet or near the radiator, it may not work correctly.

2. Turn off Wi-Fi and then turn it back on
This might seem simple, but it often works to fix any temporary glitches.
- On your Mac’s menu bar, click the Wi-Fi icon. If it’s not there, click Control Center and then the arrow next to Wi-Fi.
- Toggle off the Wi-Fi, wait for a few seconds and then toggle it on again.
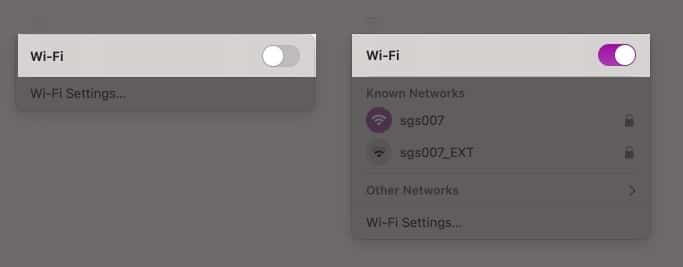
Check if this fixes the Wi-Fi issues you were facing,
3. Reboot your Mac
Restarting any device can often fix a lot of issues. This works for Wi-Fi issues on your Mac too.
- Click on the Apple menu and select Restart.
- In the dialog box, confirm by clicking the Restart button.
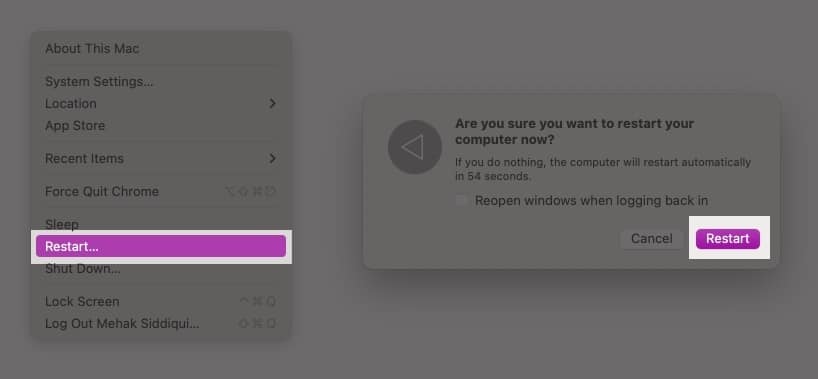
Once your Mac turns on again, check if the Wi-Fi is working.
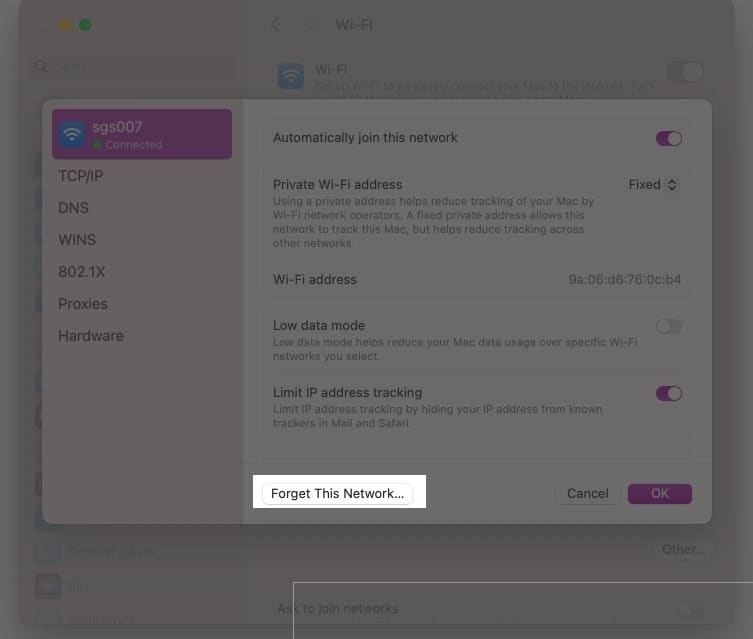
4. Forget the Network and reconnect MacBook to it
Follow the steps below to reconfigure the W-Fi network on your Mac.
- Click on the Apple Menu and select System Settings.
- In the left pane, select Wi-Fi.
- Click Details next to the network you’re connected to.
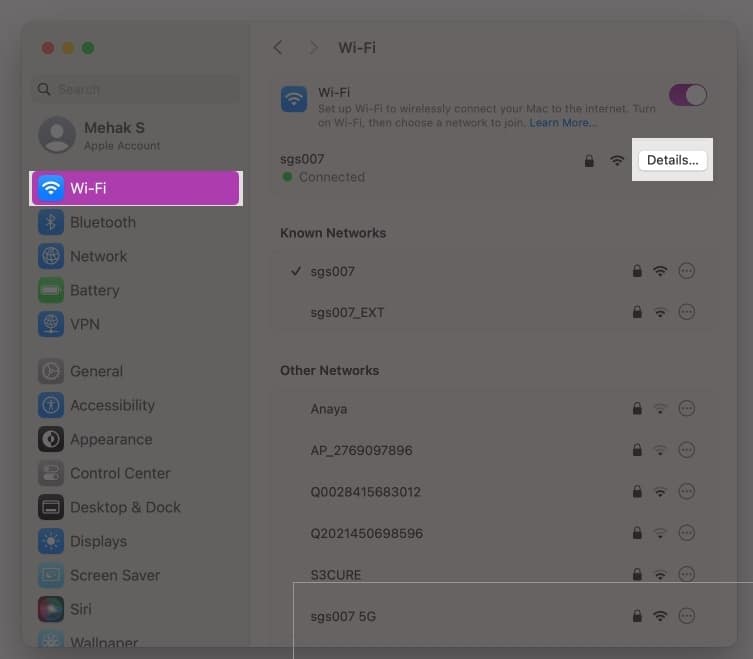
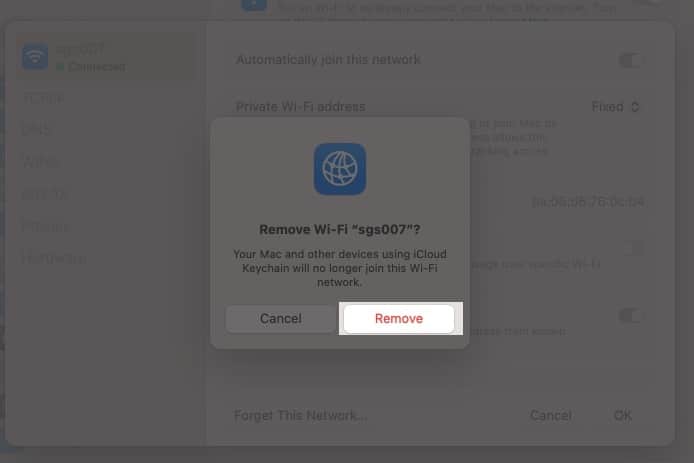
- Click on Forget This Network and then click Remove.
- Now, go back to System Settings → Wi-Fi and look for the name of your Wi-Fi network under Other Networks.
- Click Connect next to it and type in your Wi-Fi password.
Check if your Wi-Fi issues are resolved. If not, try the other methods below.
5. Change DNS Servers
DNS is what your Mac uses to translate domain names into IP addresses when you’re browsing the web. Changing DNS servers can help to fix Wi-Fi issues on macOS. Follow the steps below:
- Click the Apple menu and open System Settings.
- Click Wi-Fi and then choose Details next to the Wi-Fi network you’re connected to.
- From the left side, select DNS.
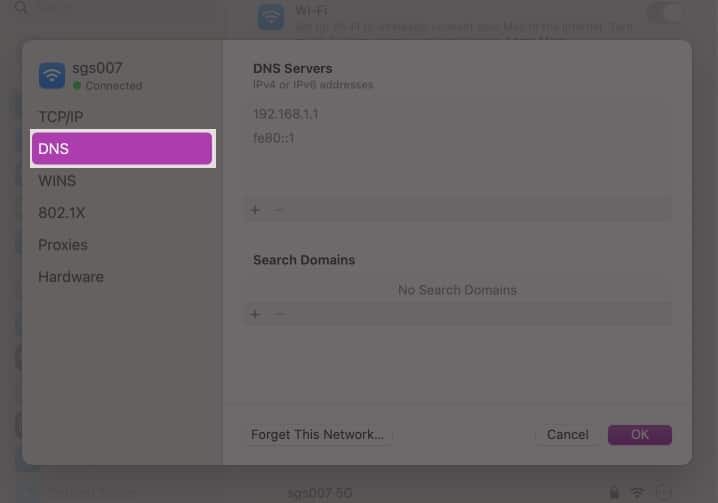
- Click the ‘+’ symbol under DNS Servers.
- Type in the following IP address: 8.8.8.8

- Press the Return key on your keyboard.
- Click ‘+’ again to add a secondary DNS server.
- Type in 8.8.4.4 and press Return.
- Close System Settings and check if Wi-Fi works for you now.
6. Turn off Firewall
In rare cases, the firewall feature on your macOS or some third-party firewall software might disrupt your Wi-Fi connection. Follow the steps below to turn off the built-in firewall in macOS Sequoia.
- Click on the Apple menu and open System Settings.
- Click on Network and select Firewall.
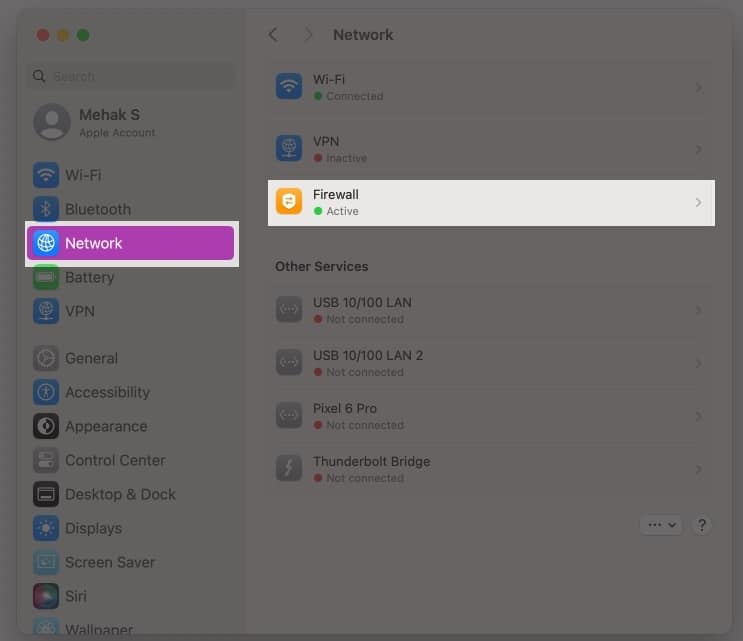
- Toggle off the Firewall and then close System Settings.
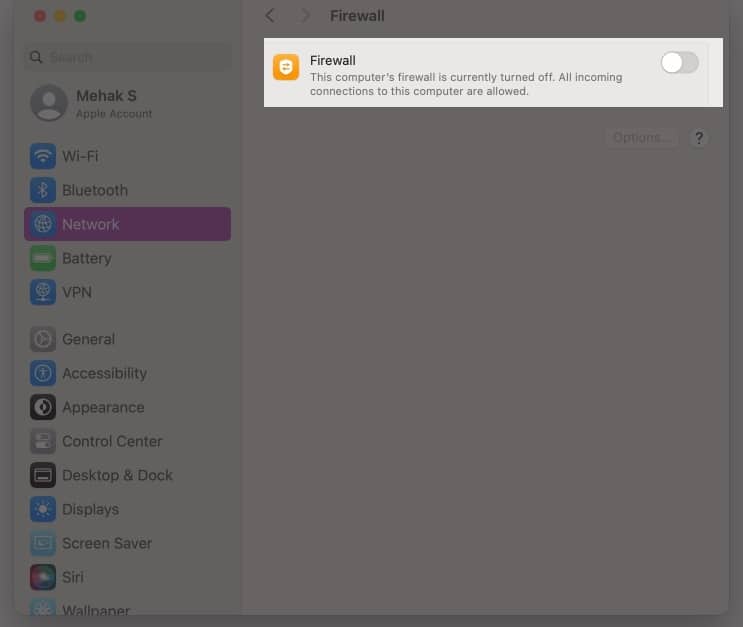
Now, check if your Wi-Fi works. Similarly, if you use a third-party firewall, disable it and check your Wi-Fi connection.
7. Check third-party apps
Many third-party apps like VPNs, parental control, or antivirus software can cause Wi-Fi issues on your Mac especially after you update your macOS.
Therefore, if none of the steps given above have fixed your Wi-Fi issues, try to disable or uninstall any third-party apps that could be causing the problem.
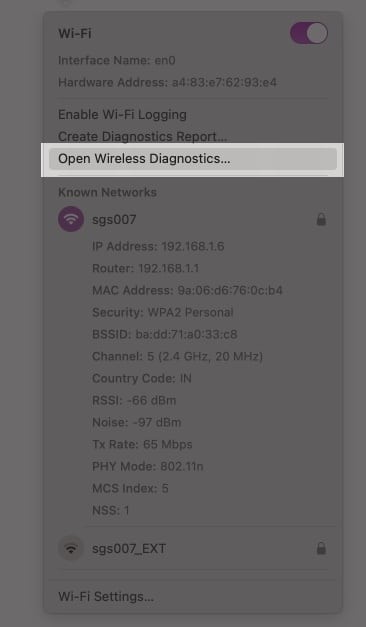
8. Run Wireless Diagnostics
If you continue to face Wi-Fi issues on your Mac, you can run wireless diagnostics to help identify the problem. Here’s how:
- Close all open apps.
- Try to connect to the Wi-Fi network if you aren’t already connected.
- Press and hold the Option key on the keyboard and click the Wi-Fi icon in the menu bar. Click on Open Wireless Diagnostics.
- Follow the onscreen instructions to analyze your network connection.
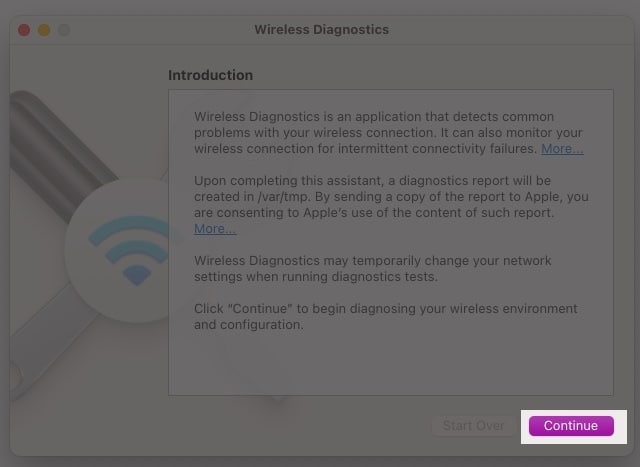
- Your Mac will analyze any Wi-Fi issues, and you can click the Info buttons in the Summary pane to learn more about each item listed.
Signing off
Hopefully, I have helped you fix Wi-Fi issues on your Mac. If you continue to face problems, contacting Apple Support for assistance is a good idea.
Frequently Asked Questions
You might want to read these posts as well:
Topics

Written by
Nidhi BohraA tech-aficionado whose superpower lies in blabbering interminably about new technologies. After 4+ years and 4500+ content pieces that helped diverse companies grow, I followed my passion and made iGeeks Media my home. When not gushing over technology, you will find me immersed in a fictional world, either reading or creating one.
View all posts →More from How-to
How to Turn Off Location on Snapchat (Step-by-Step Guide)
Want to stop sharing your location on Snapchat? This guide explains how Snapchat location sharing works and shows simple ways to turn off your location using Ghost Mode or phone settings. Stay in control of your privacy in just a few steps.

Snapchat Parental Controls: How to Set Up Family Center and Keep Your Teen Safe
Snapchat’s Family Center lets parents monitor their teen’s friend activity and screen time without reading private messages. Here’s how to set it up and what to expect.

How to Block and Unblock Someone on Instagram
Instagram lets you block or unblock someone in seconds. Follow these simple steps to take full control of your privacy and online peace.