I didn’t realize how boring my documents had started to look until one day everything felt the same. Same fonts, same layout, same predictable feel every time I opened Word or PowerPoint. And the truth is, Windows wasn’t forcing that on me. I just never bothered to change it because installing fonts always felt like one of those tedious, slightly technical tasks.
Turns out, it isn’t. Once I figured out how simple it actually is, it completely changed how I approach writing, designing, and even basic presentations. If you’ve been stuck using default fonts, this is one of the easiest upgrades you can make.
Here’s exactly how I install custom fonts on Windows now, based on what actually works in real use.
Table of Contents
- How I actually install fonts on Windows (3 methods that work)
- How to check if fonts are installed correctly
- Things I wish I knew before installing fonts
- Where fonts are stored in Windows
- Fonts not installing on Windows? Here's what worked for me
- When these methods don’t work
- How to delete custom fonts on Windows
- Final thoughts
How I actually install fonts on Windows (3 methods that work)
After trying multiple approaches, I realized Windows gives you several ways to install fonts, but not all of them are equally practical.
Before anything, you need to download the font file. Always use a trusted source. I usually go with sites like 1001 Free Fonts, browse styles, and download what fits. Most files come as ZIP folders.
From there, here are the methods I actually use.
Method 1: Unzip and Install (Quick and reliable)
This is the simplest way, especially when you’re trying out a font for the first time.
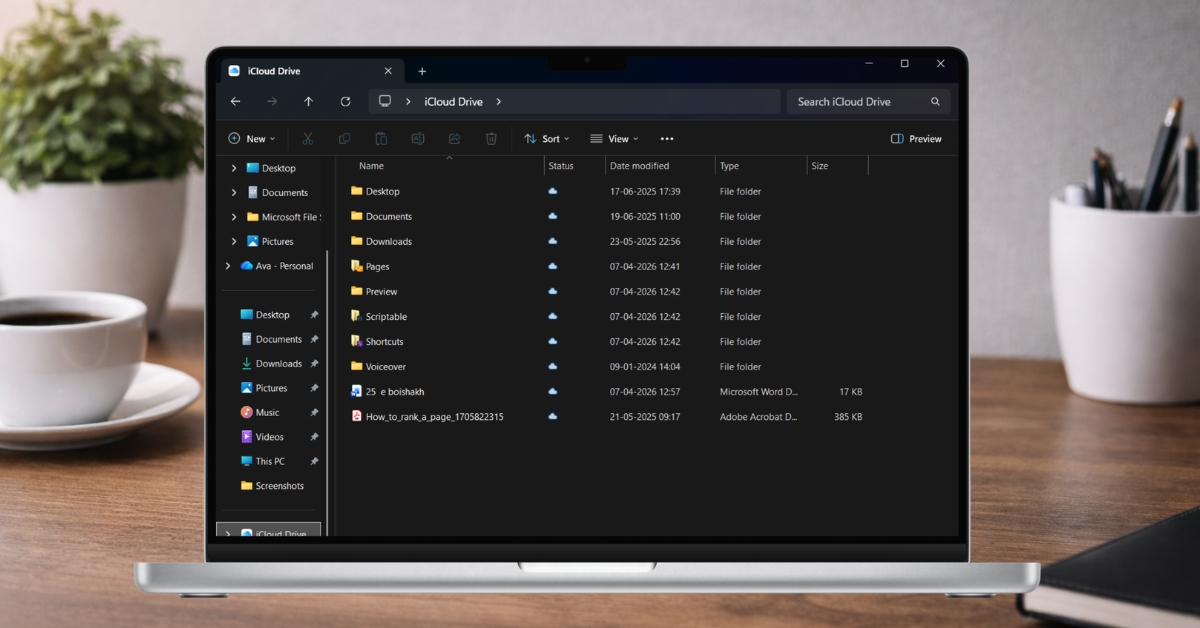
- Open File Explorer and go to the location where you saved the font zip file. I have saved it in the Downloads folder.
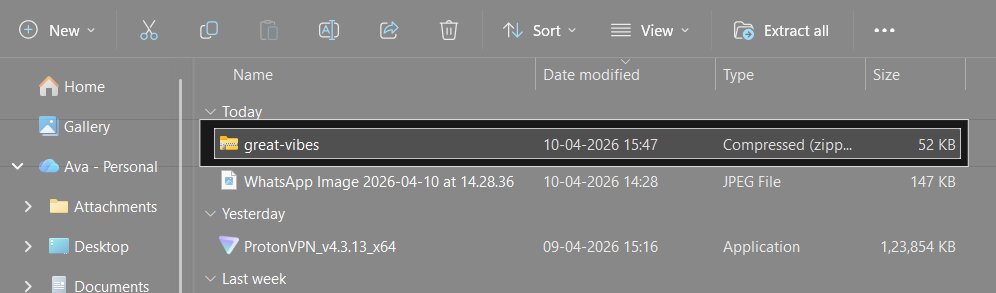
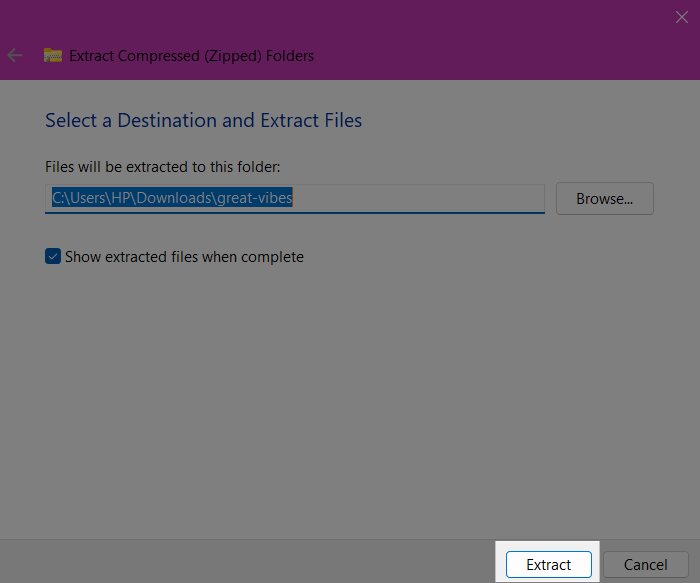
- Click the zip file, select Extract All from the top menu, and select Extract from the dialogue box.
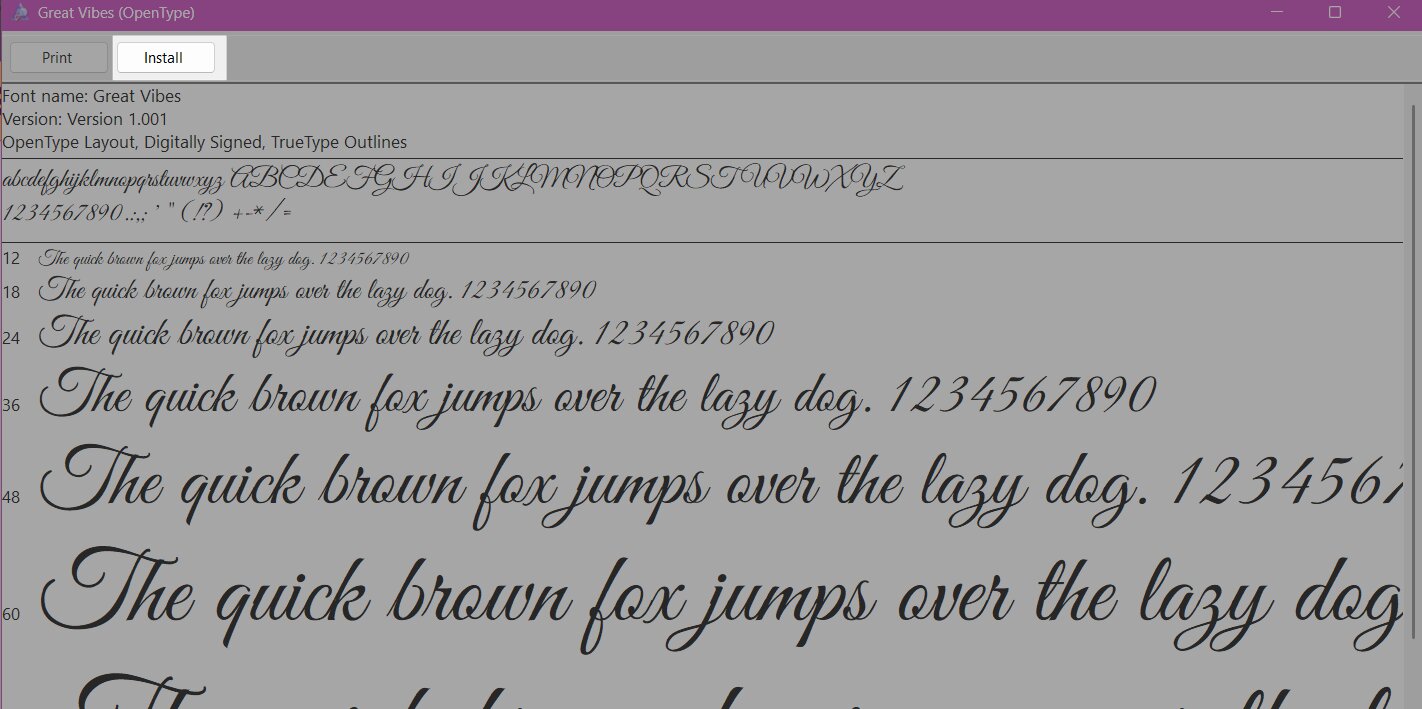
- Now, open the unzipped file and double-click the TTF file.
- It will open the font viewer. Simply, click Install on the menubar. If you are the administrator, you can install the font for all the user profiles.
I usually use this when I want to preview a font before committing to it.
Method 2: Install fonts from Windows settings
When I’m installing multiple fonts at once, this method feels cleaner.
- Press Windows + I keys on your laptop or PC.
- Go to Personalization from the left panel and select Fonts.
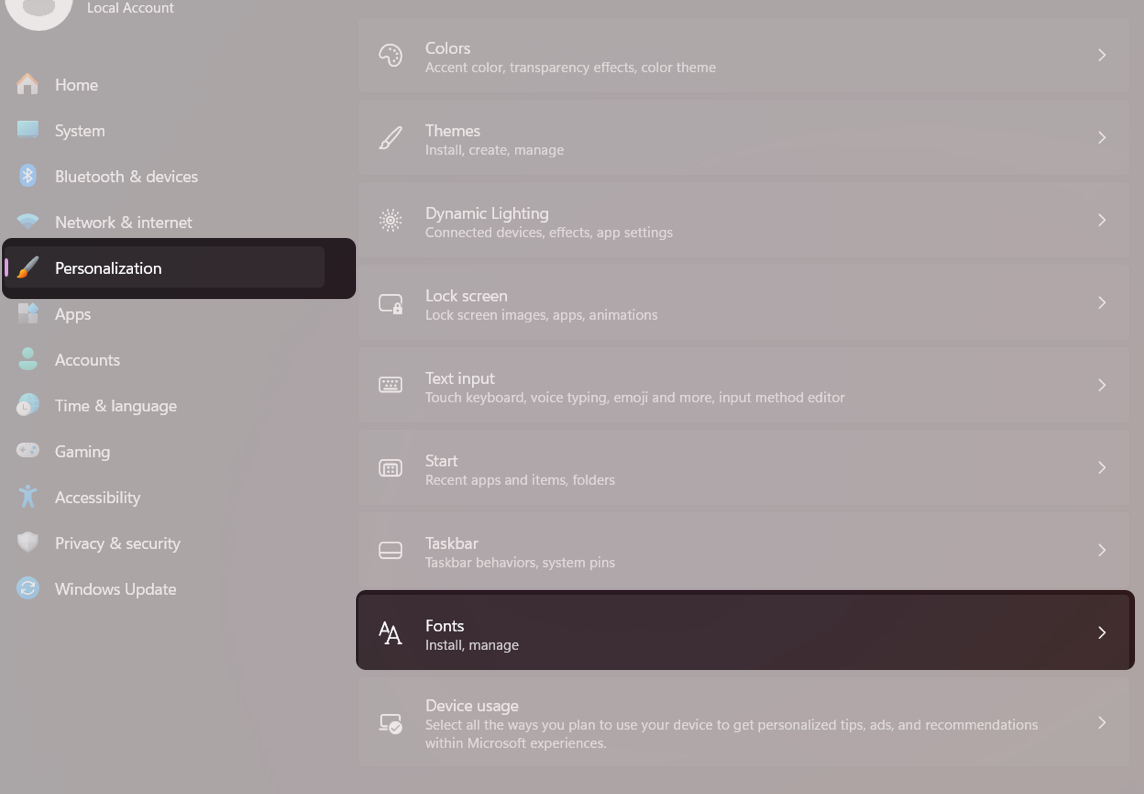
- Click Browse and install fonts, and select all the font files, or simply drag and drop them from the File Explorer window.


That’s it. Windows installs it instantly.
Bonus:
I also found regional language fonts in the Microsoft Store for free. You just need to click the Get more fonts in the Microsoft Store banner in the same settings page. In this approach, there is no need to download fonts from a third-party website. However, due to a very limited selection, it’s not ideal for designers or creators.
Method 3: Install fonts directly from Explorer
This is the one that genuinely changed things for me. No settings. No extra steps.
What I actually do:
- After extracting the font file, right-click and drag the mouse to select all the .ttf or .otf files. Remember to stop before the .txt file.
- Now, hold down the Shift key and left-click on the last .ttf file. It will open the context menu for all the font files.
- Choose Install from the menu. It directly installs the font into Windows.
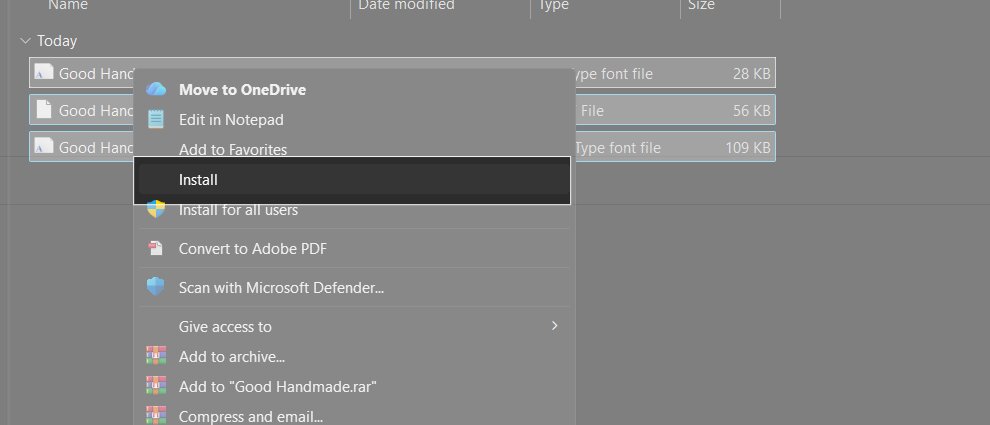

That’s it. It installs everything in seconds. Once you start using this method, the others feel slow.
How to check if fonts are installed correctly
This is where I used to get confused. I’d install a font and then panic when I didn’t see it immediately.
Here’s what actually works:
- Go to Settings > Personalization > Fonts.
- Scroll down to the Available Fonts section and search for the font name you just downloaded.
- Wait for it to show up. If you see it, it’s installed correctly.
- Next, I open Word / Photoshop.
- Search for the font name in the font dropdown
- If it’s missing, restart the device for proper sync.
Things I wish I knew before installing fonts
After installing dozens of fonts, a few patterns became obvious.
- You must extract ZIP files properly, or fonts won’t install.
- Some fonts look great in previews but break in real use.
- Installing fonts in bulk saves a lot of time.
- Too many fonts make everything messy and harder to manage.
- Duplicate fonts can cause conflicts.
- Random websites often give corrupted files.
Now I test every font before actually using it in projects.
Where fonts are stored in Windows
At some point, I got curious about where fonts actually live.
You’ll usually find them here:
- C:\Windows\Fonts
- %LOCALAPPDATA%\Microsoft\Windows\Fonts
You can drag fonts here manually to install or delete them to remove.
That said, I don’t recommend messing with this unless necessary. The regular methods are safer.
Fonts not installing on Windows? Here’s what worked for me
I ran into this issue when I was trying to install a bunch of custom fonts, and Windows 11 just refused to cooperate. Here’s what actually worked for me, step by step.
First, I stopped double-clicking the font file and instead right-clicked it and chose Install for all users. This made a surprising difference. Windows sometimes blocks standard installs due to permission quirks, and this option bypasses that.
When that didn’t fully solve it, I checked the file itself. A few of my fonts were downloaded as ZIP files, and I hadn’t extracted them properly. Once I extracted them and installed the .ttf or .otf files directly, things started working.
At one point, I realized Windows Security was quietly interfering. I temporarily disabled Controlled Folder Access. For this:
- Open Windows Security and go to Virus & threat protection from the left panel.
- Scroll down and click Manage ransomware protection.

- Toggle off Controlled Folder Access.
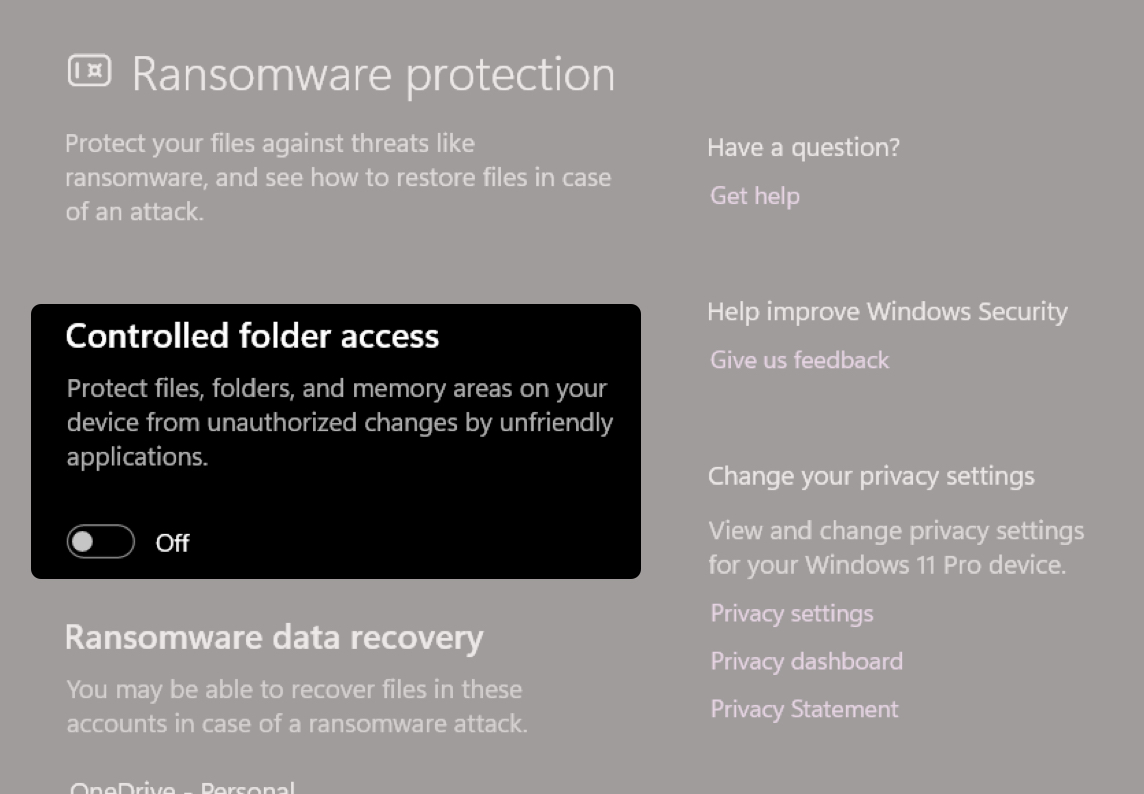


After installing the font, I turned it back on.
You can also restart the Windows Font Cache Service, which fixes fonts not showing up after installation:
- Press
Win + R, typeservices.msc. - Find Windows Font Cache Service from the list.
- Click Restart on the left side.
Finally, when nothing else worked for one stubborn font, I checked if it was actually compatible. Some older or corrupted fonts just won’t install on Windows 11, no matter what. So, you’re better off downloading a fresh version.
When these methods don’t work
There are limits.
- Corrupted font file: If the file is broken, nothing will fix it.
- ZIP not extracted: Windows can’t install fonts directly from compressed archives.
- Permission restrictions: Work or school PCs may block installations.
- Unsupported formats: Rare, but it happens.
At this point, I don’t waste time. If a font doesn’t work quickly, I move on.
How to delete custom fonts on Windows
Cleaning up is just as important as installing. Here, I have shared two methods to quickly uninstall fonts that you added earlier.
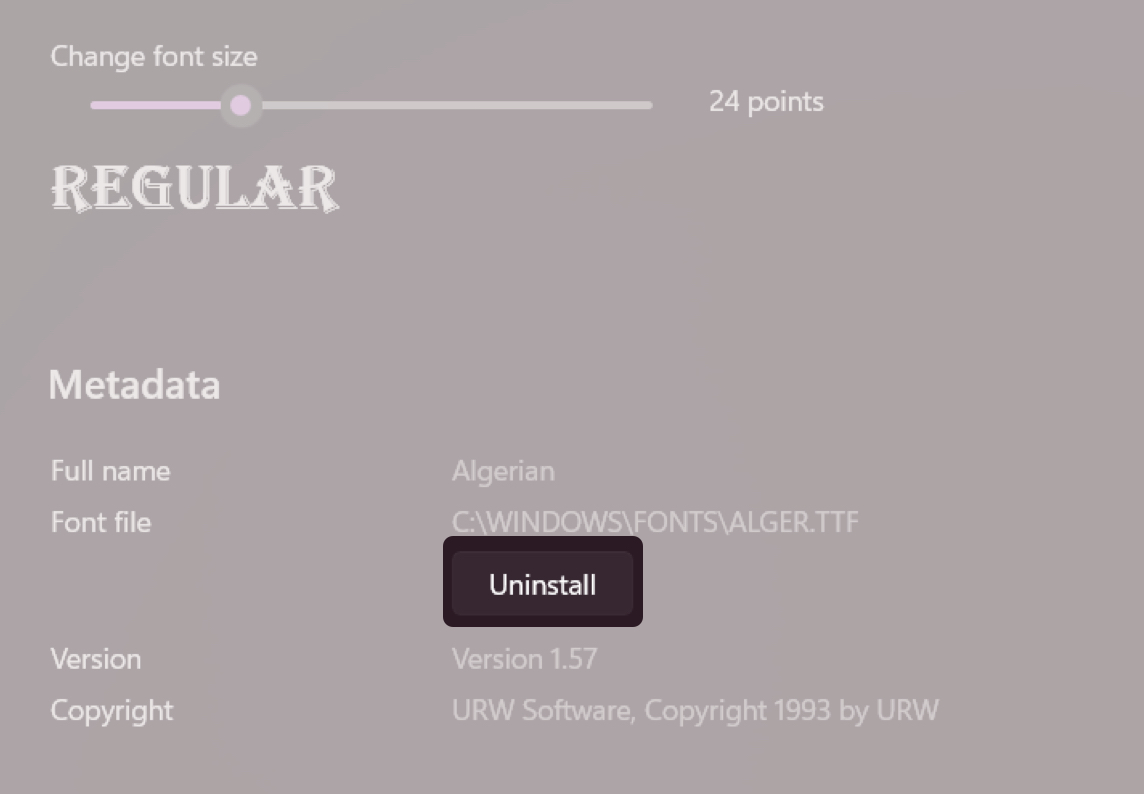
Method 1: From Settings
- Go to Fonts settings under Personalization.

- Search and select the font you want to remove.
- Click the Uninstall button.


Method 2: From Fonts folder
- Open File Explorer and go to
C:\Windows\Fonts. - Look for the font file, select it, and click the recycle bin at the top.
Final thoughts
I used to think installing fonts was one of those annoying tasks you just tolerate. Turns out, it’s one of the easiest ways to upgrade how your work looks.
Once fonts become easy to install, you stop settling for defaults. You experiment more. Your work starts to feel intentional instead of repetitive. And honestly, that small shift makes a bigger difference than most people expect.
If you’re trying this today, which font are you installing first?
Related articles worth reading: