OpenAI’s ChatGPT service has made its way to iOS. With this handy tool’s artificial intelligence, you can get answers to questions, receive creative suggestions, find inspiration, or learn something new.
You can download and install the official ChatGPT app on your iPhone for free, make the same types of requests as on the website, copy the responses, and view your entire conversation history.
How to create an account or sign in to ChatGPT on iPhone
The ChatGPT app for iOS was first rolled out to the U.S., and then was made available in Albania, Croatia, France, Germany, Ireland, Jamaica, New Zealand, Nicaragua, Nigeria, South Korea, and the U.K, Algeria, Argentina, Azerbaijan, Bolivia, Brazil, Canada, Chile, Costa Rica, Ecuador, Estonia, Ghana, India, Iraq, Israel, Japan, Jordan, Kazakhstan, Kuwait, Lebanon, Lithuania, Mauritania, Mauritius, Mexico, Morocco, Namibia, Nauru, Oman, Pakistan, Peru, Poland, Qatar, Slovenia, Tunisia and the United Arab Emirates.
ChatGPT is available on App Store for free with an in-app purchase for ChatGPT Plus. The upgrade offers improved availability, faster responses, and preferred access to new features.
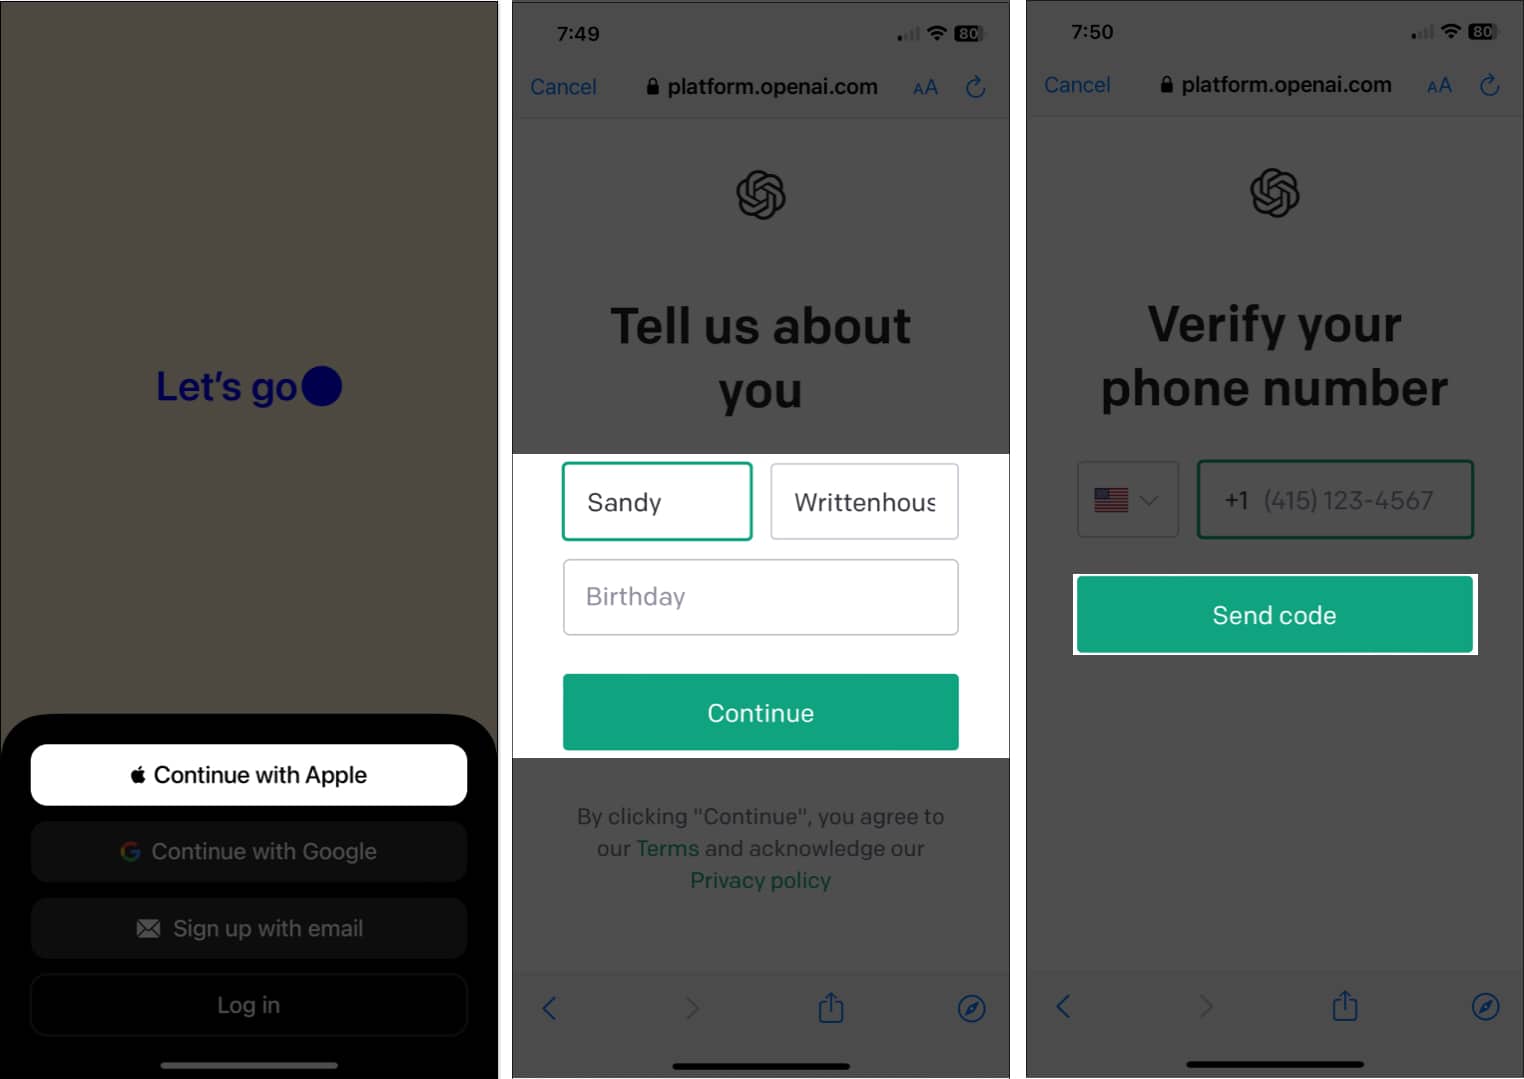
When you open the ChatGPT app for the first time, you can either create a new account or log in if you’ve already set up an account on the ChatGPT site.
To create a new account, follow these steps:
- Choose Continue with Apple, Continue with Google, or Sign up with email and enter the required details per the option you pick.
- Add your details, such as first and last name, date of birth, and phone number.
- Enter the code you receive on your iPhone and follow the prompts to set up your account.
- To sign in with an existing account, simply select Log in and enter your sign-in credentials.
You’re then ready to start a new conversation with ChatGPT.
How to use ChatGPT app on iPhone
With ChatGPT on iPhone, you can send your requests, copy the responses, submit feedback, and enjoy the same service as on the web.
Ask a question or submit a request
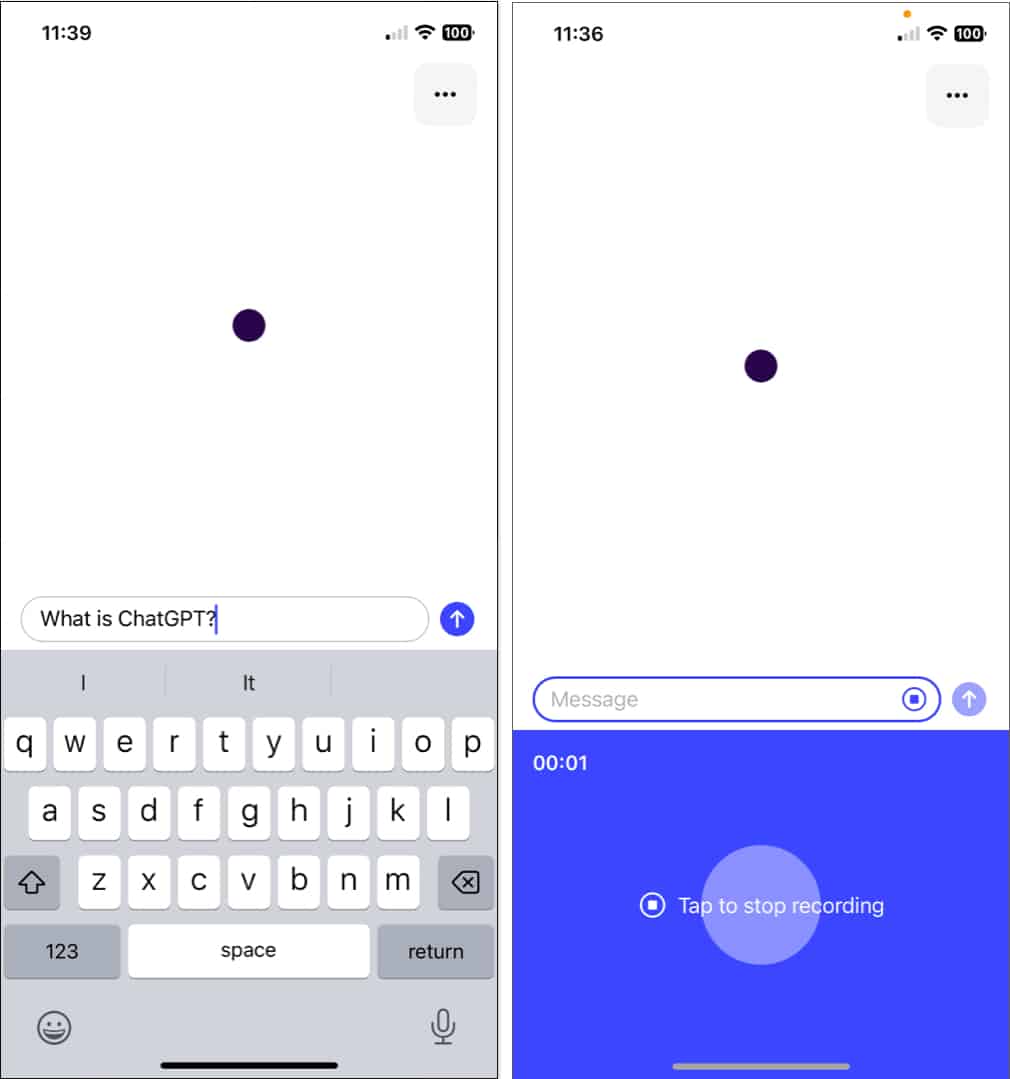
- To get started, type your request in the text field for the chat. You can also tap the Audio icon and record your question. Tap the Stop button when you finish speaking, and you’ll see your request display.
- Use the Send button to submit your question, and you’ll receive your answer almost immediately.
- If you have further requests on the same topic, continue to submit your questions in the same conversation. This keeps your various related requests together in one thread.
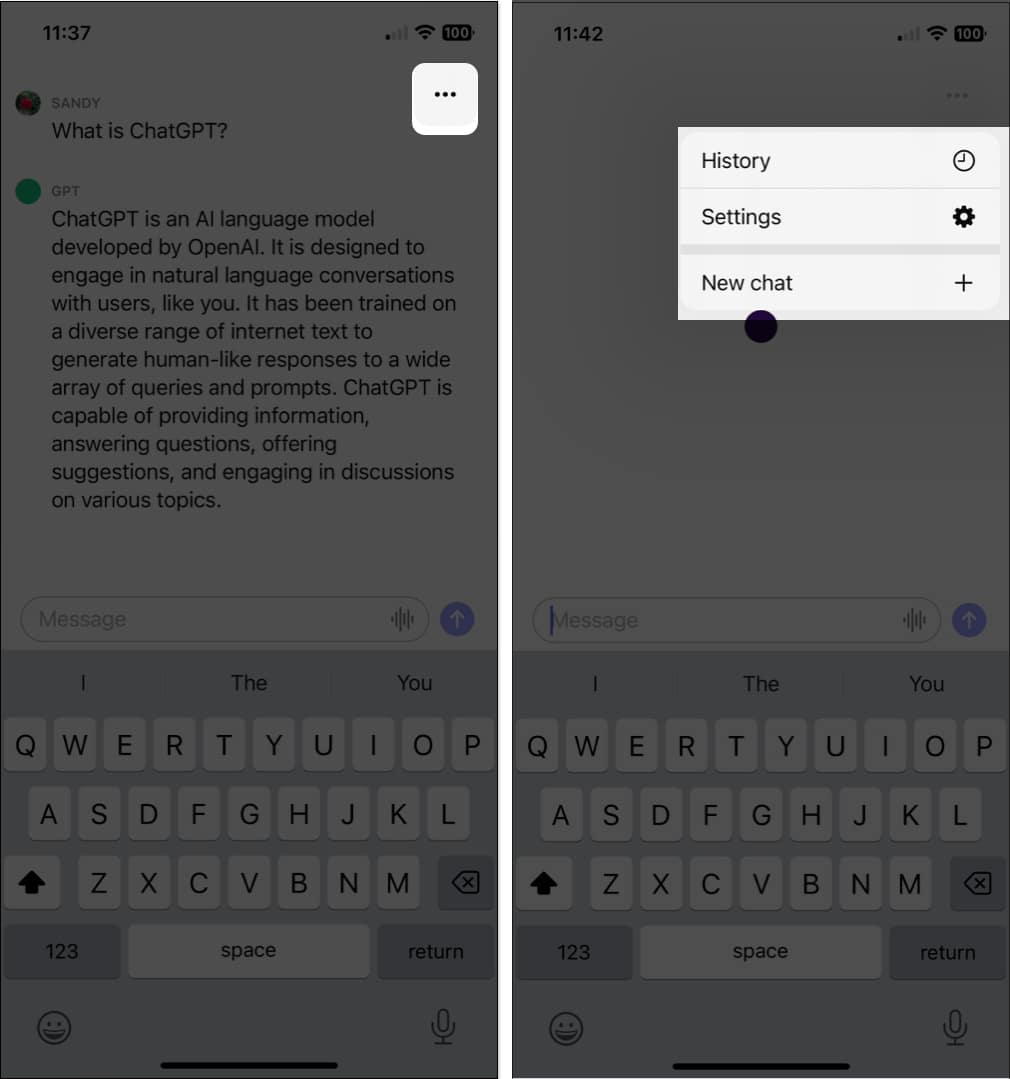
- If you want to ask a question on a different topic, tap the three dots on the top right and pick New chat. You’ll then see a new conversation begin.
Copy a response or selected text
After you receive a response to your request, you can take a few actions on that response. One includes copying it or working with specific text from it.
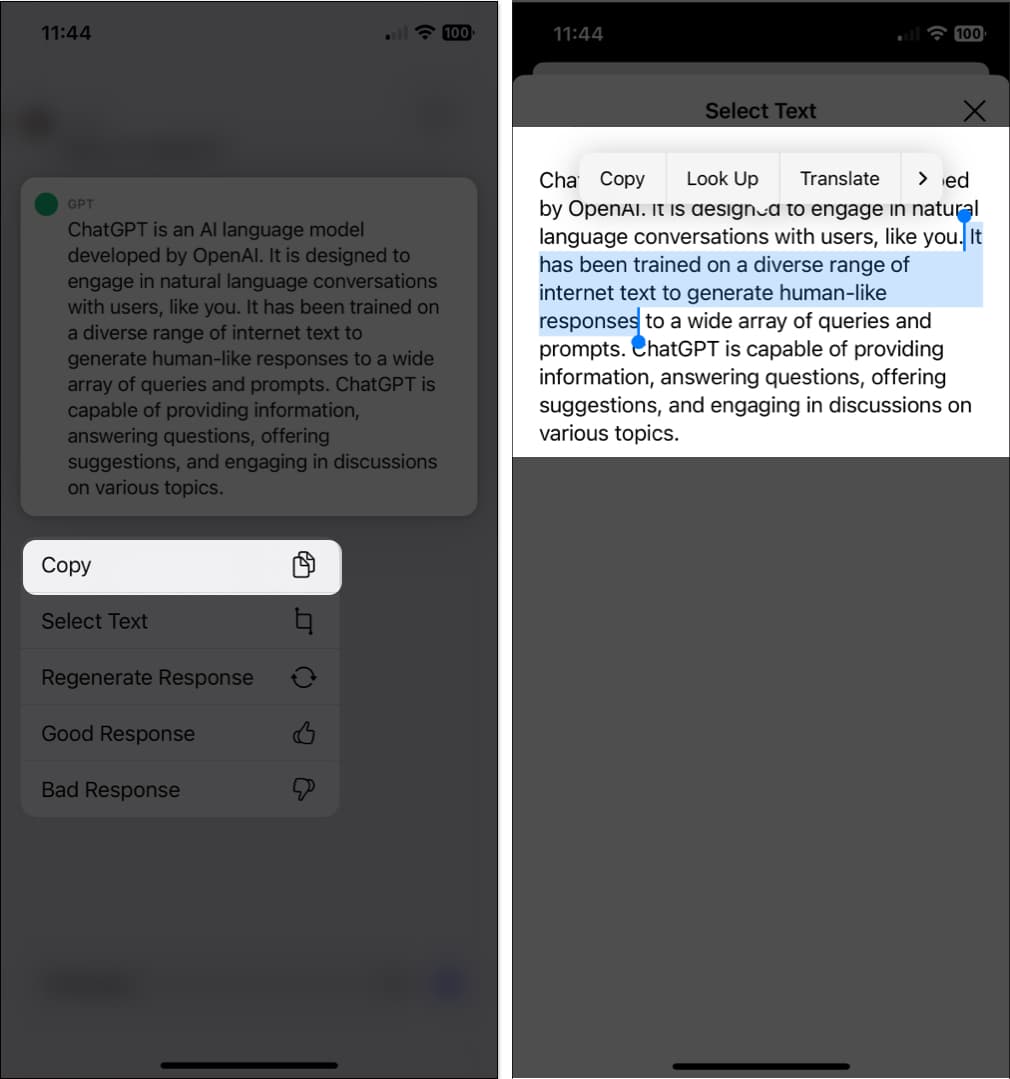
Long-press (tap and hold) the answer and do one of the following:
- To copy the entire response, select Copy. This then places the text on your clipboard for you to paste where you like.
- To work with certain text, pick Select Text. Then use the selection handles (dots) to capture the exact part of the response you want. You should see the shortcut toolbar display above your selected text where you can pick an action like Copy, Look Up, Translate, Search Web, Speak, or Share.
Provide feedback
To help ChatGPT, you can provide feedback when you receive a response. This is useful if you find the response to be correct or if you feel the opposite. The system learns from feedback so that it can provide better responses in the future.
Long-press the answer and choose either Good Response or Bad Response. You’ll then see a brief message at the top thanking you for your feedback.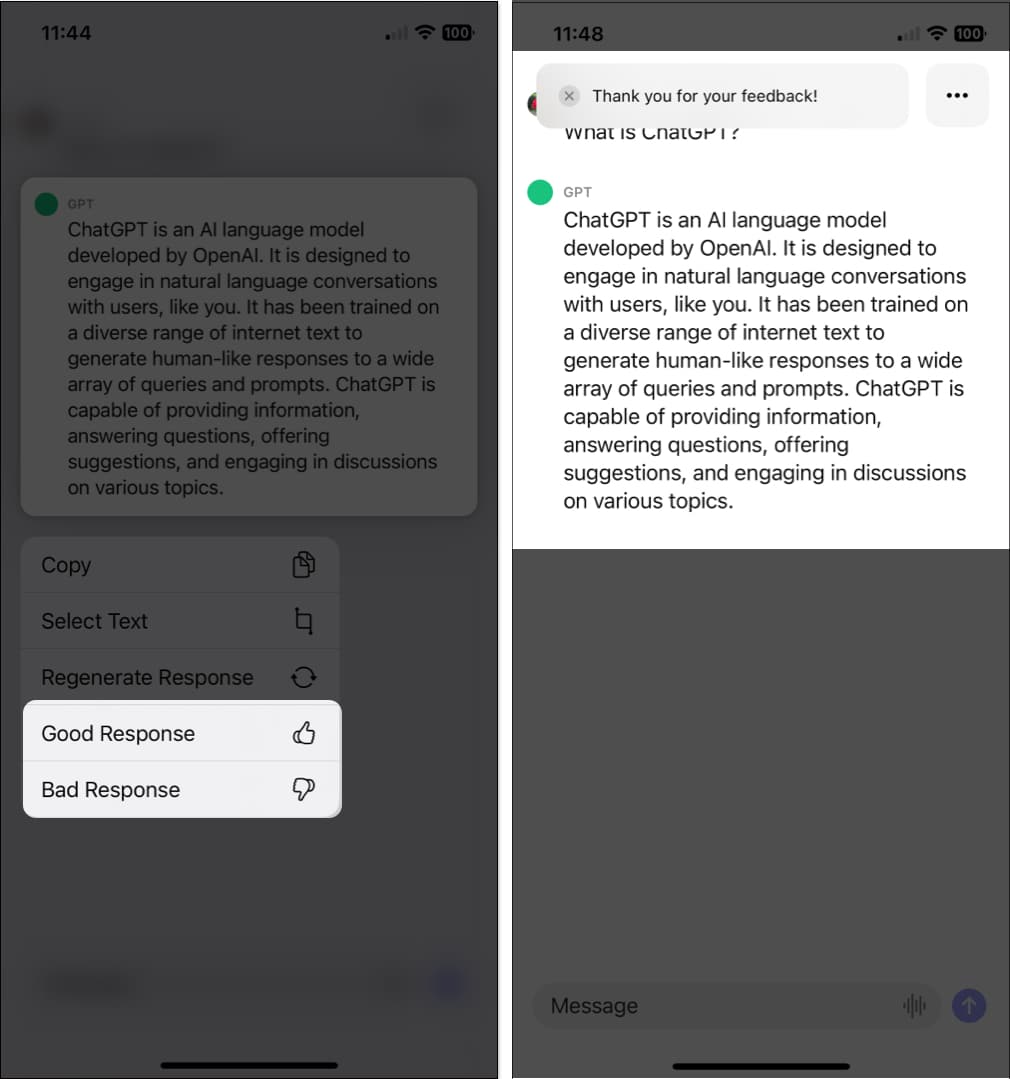
Access your ChatGPT app history on iPhone
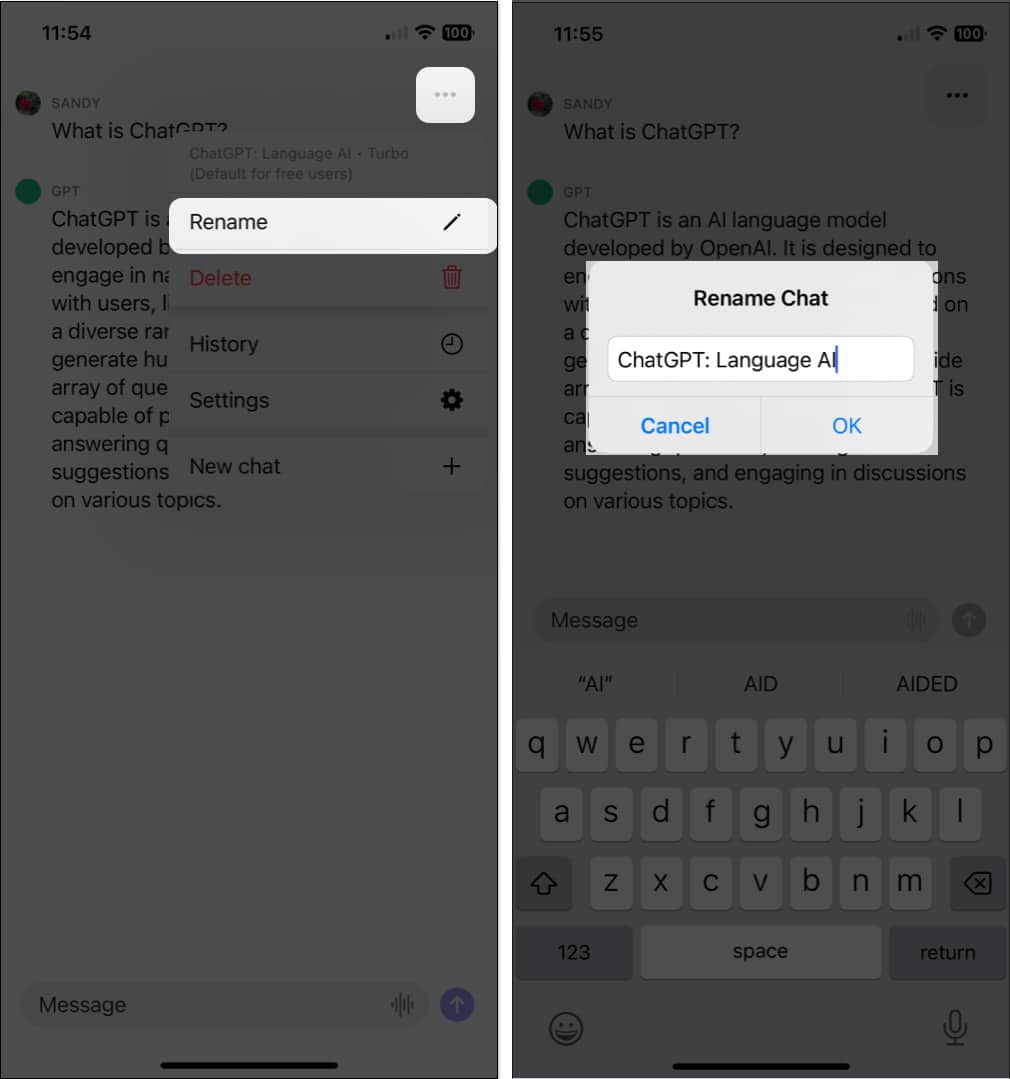
One of the nicest features of ChatGPT and the iOS app is that it saves and syncs a history of your requests and responses. You can then access those at any time via the app or the web, review the responses, rename them, or delete those you no longer need.
Tap the three dots on the top right and pick History. You’ll then see a list of your requests and responses pop-up at the bottom. 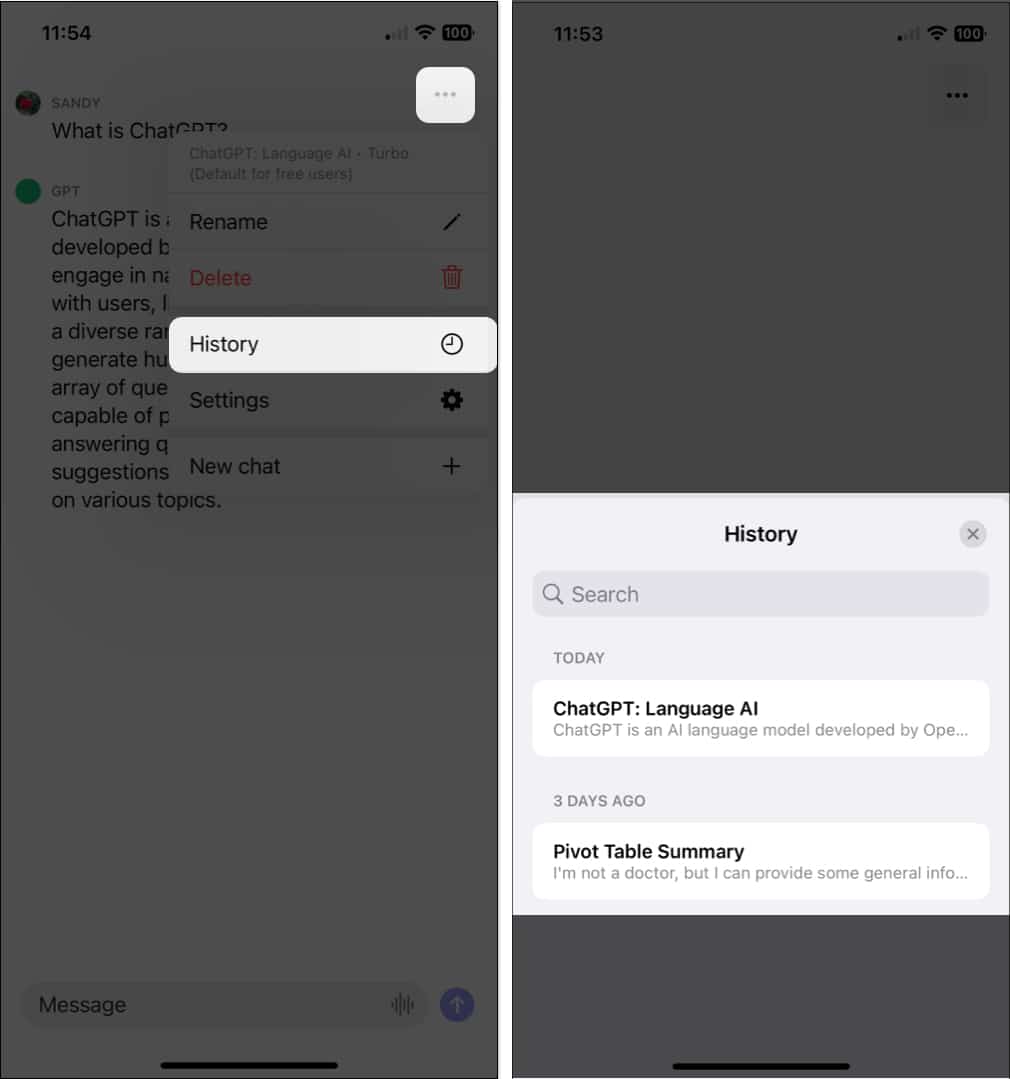
Choose a chat, and when it displays, tap the three dots to take one of the following actions.
- Rename: Give the conversation a different name. Enter the new name and tap OK to save it.
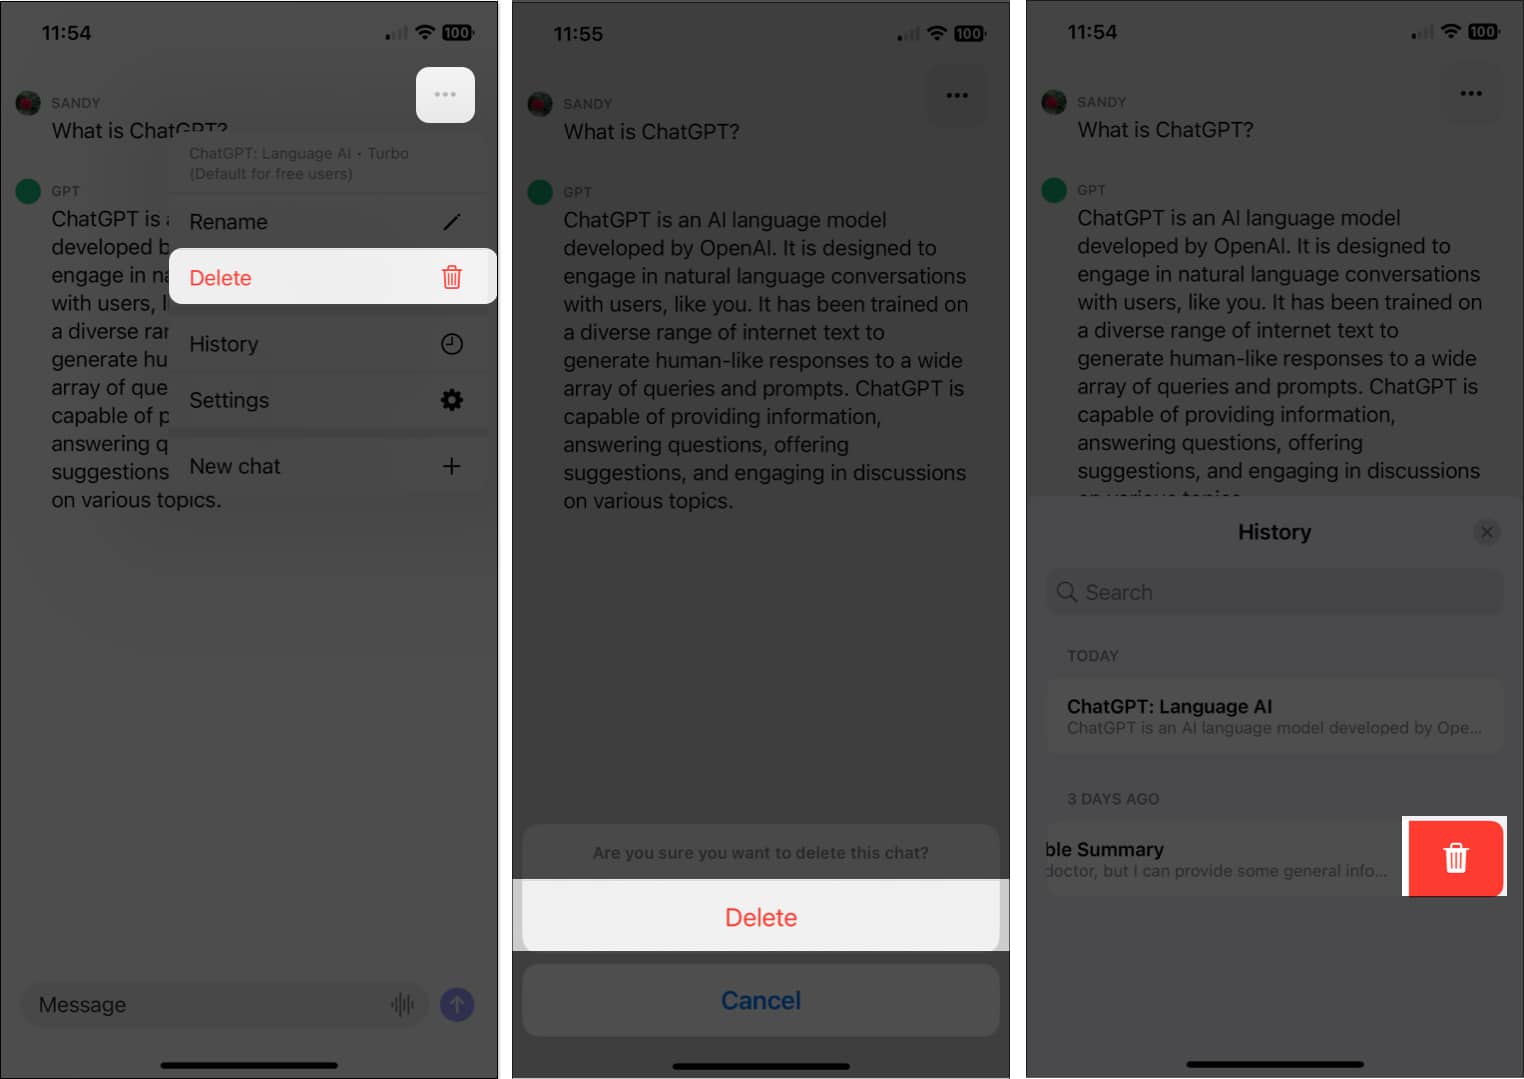
- Delete: Remove a conversation from your history. After you tap Delete, confirm by tapping Delete in the pop-up window.
- You can also delete a conversation in the History list. Swipe the chat from right to left and tap the Delete icon (trash can).
- You can also delete a conversation in the History list. Swipe the chat from right to left and tap the Delete icon (trash can).
In addition to the above actions, you can copy the response or only specific text as described above.
View the ChatGPT app settings
While you won’t find many settings for the ChatGPT app on iPhone, there are a few you should know about.
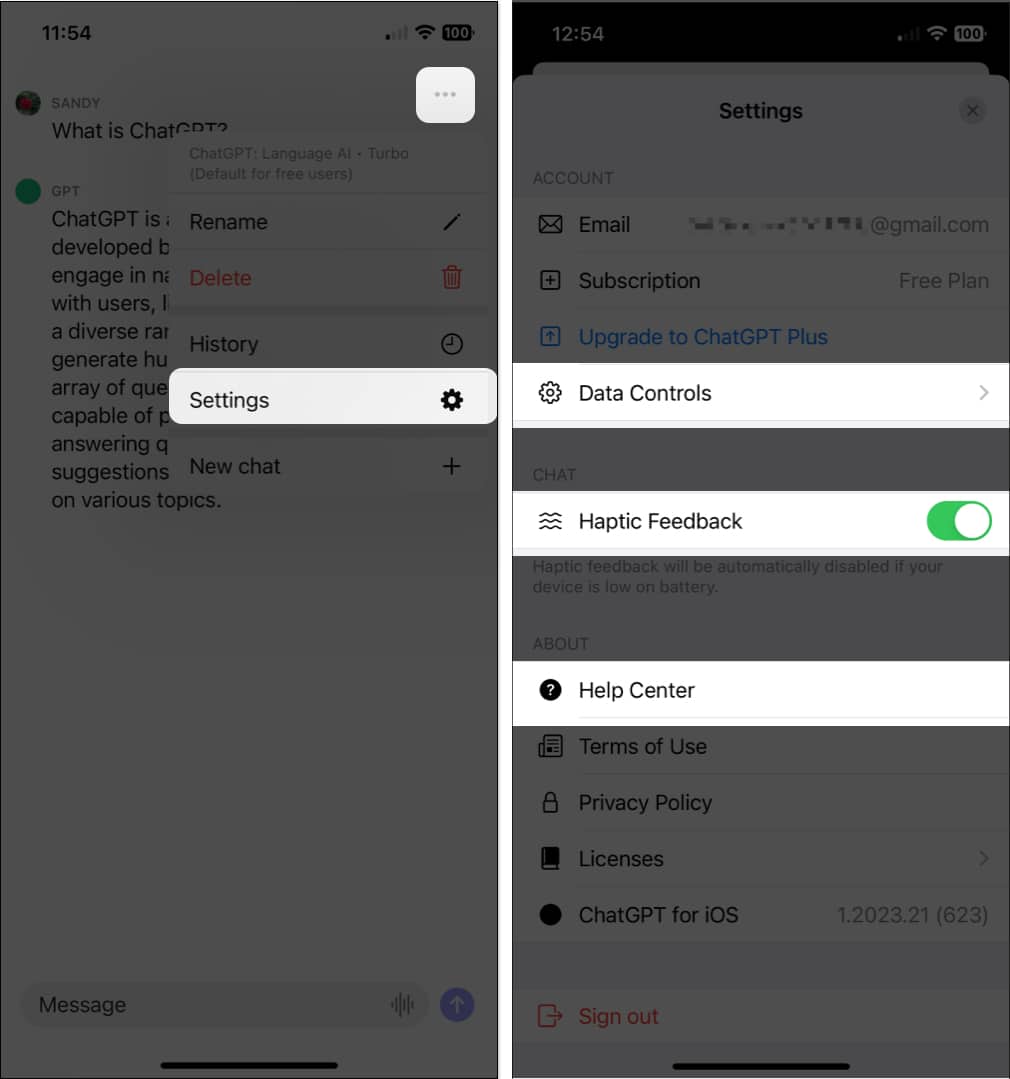
- Select the three dots on the top right of any chat screen and choose Settings.
- You can then tap Data Controls if you’d like to export your data or delete your account. You can also use the Haptic Feedback toggle turn the haptic feature off or on.
- If you have difficulties or would like assistance, select Help Center to visit the support site.
Handy help on the go with ChatGPT!
If you’ve been using the ChatGPT website for answers to questions, help with ideas or even advice, you can take the AI tool with you wherever you go. Pop it open on your iPhone whenever you need it.
Let us know what you think of the ChatGPT app on iPhone. And, share your thoughts in the comment section.
Read more:

