Apple is known for offering a wide array of accessibility features on iPhone, iPad, Mac, and even the Apple Watch to improve the usability of these devices. Continuing with this approach, Apple has added a new accessibility feature to iOS 17 called Personal Voice. It lets you create a copy of your voice that can be used to narrate phrases you type on your iPhone.
In this article, I will explain how to set up and use Personal Voice on your iPhone running iOS 17 and up.
What is Personal Voice on iPhone?
Personal Voice is a new accessibility feature on iPhone that allows users to create a digital copy of their voice that sounds just like them. This feature uses on-device machine learning to analyze your voice from 15 minutes of recorded audio clips and generates a custom voice model on your iPhone.
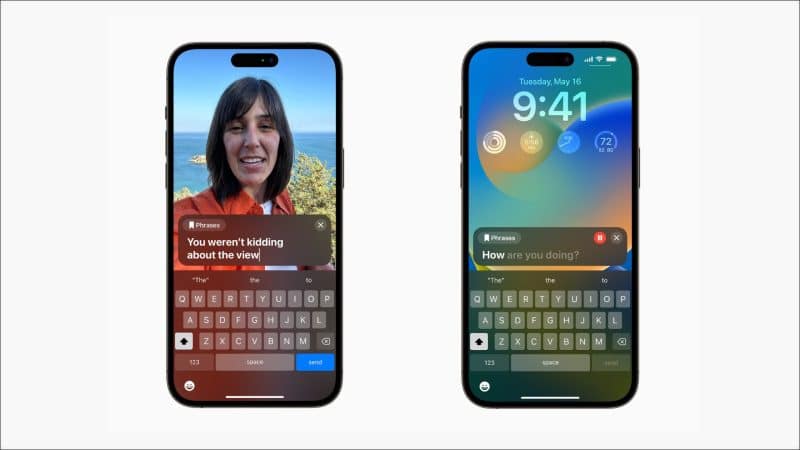
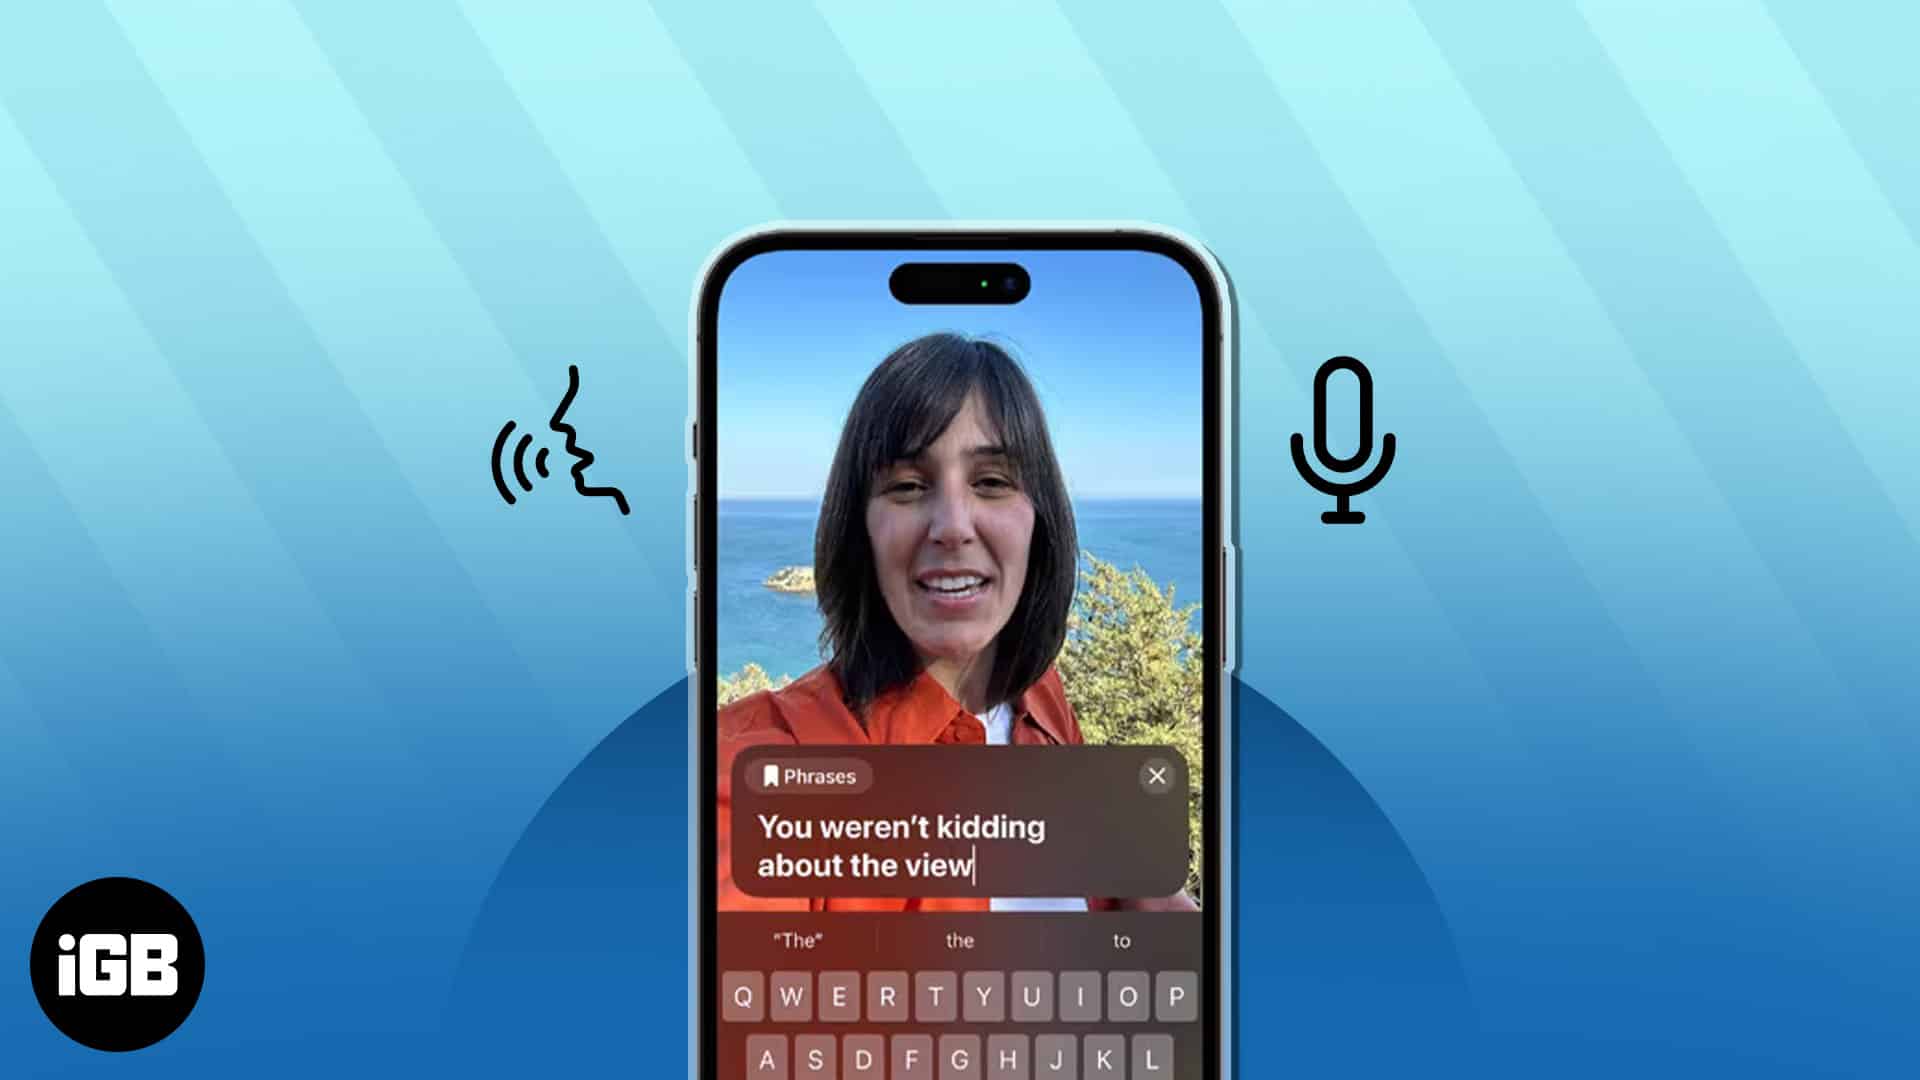
Once you create your voice model using Personal Voice, you can use Live Text to type out or select predefined phrases to have them spoken out loud in your voice during phone calls, FaceTime calls, or in-person conversations.
According to Apple, Personal Voice can help those who suffer from ALS (Amyotrophic Lateral Sclerosis) or other such conditions that can impact their ability to speak, preserve their voice, and communicate easily.
If you want to set up Personal Voice on your iPhone, you will need to record 15 minutes of your voice and wait for your iPhone to generate a voice model from the recorded audio. Here are the steps you can follow to set it up.
How to set up Personal Voice on iPhone
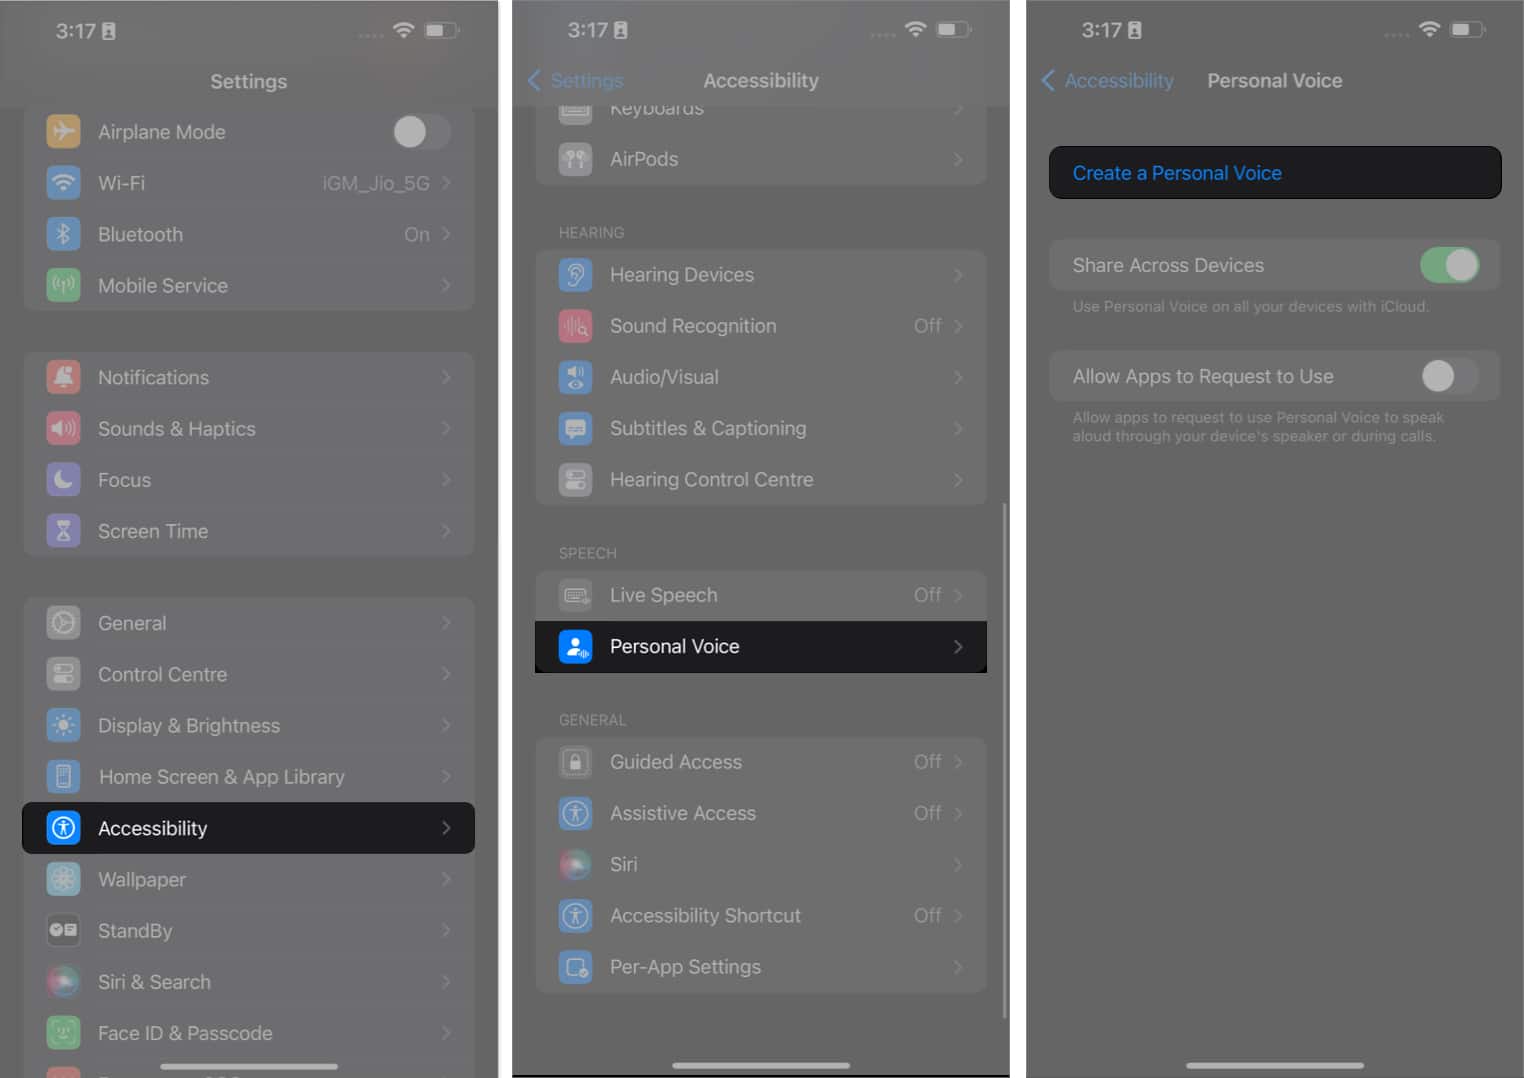
- Go to the Settings app → Choose Accessibility.
- Scroll down and select Personal Voice.
- Tap Create a Personal Voice.
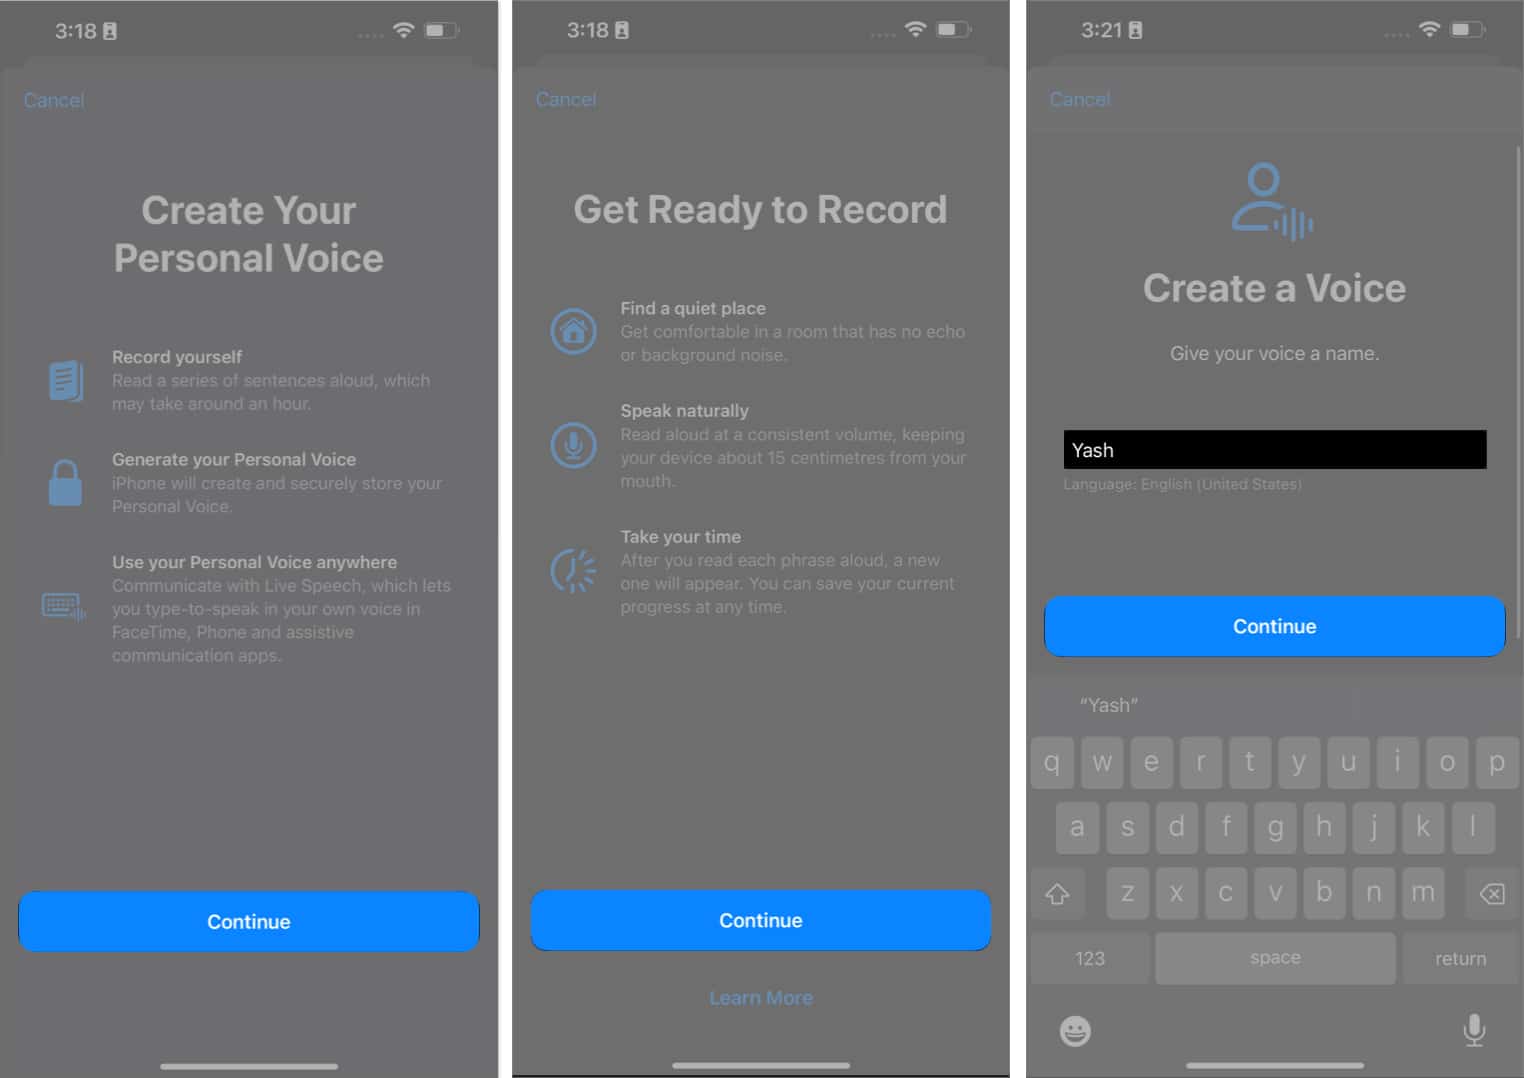
- Tap Continue → Once again, select Continue when prompted.
- Now, give your voice a name → Hit Continue.
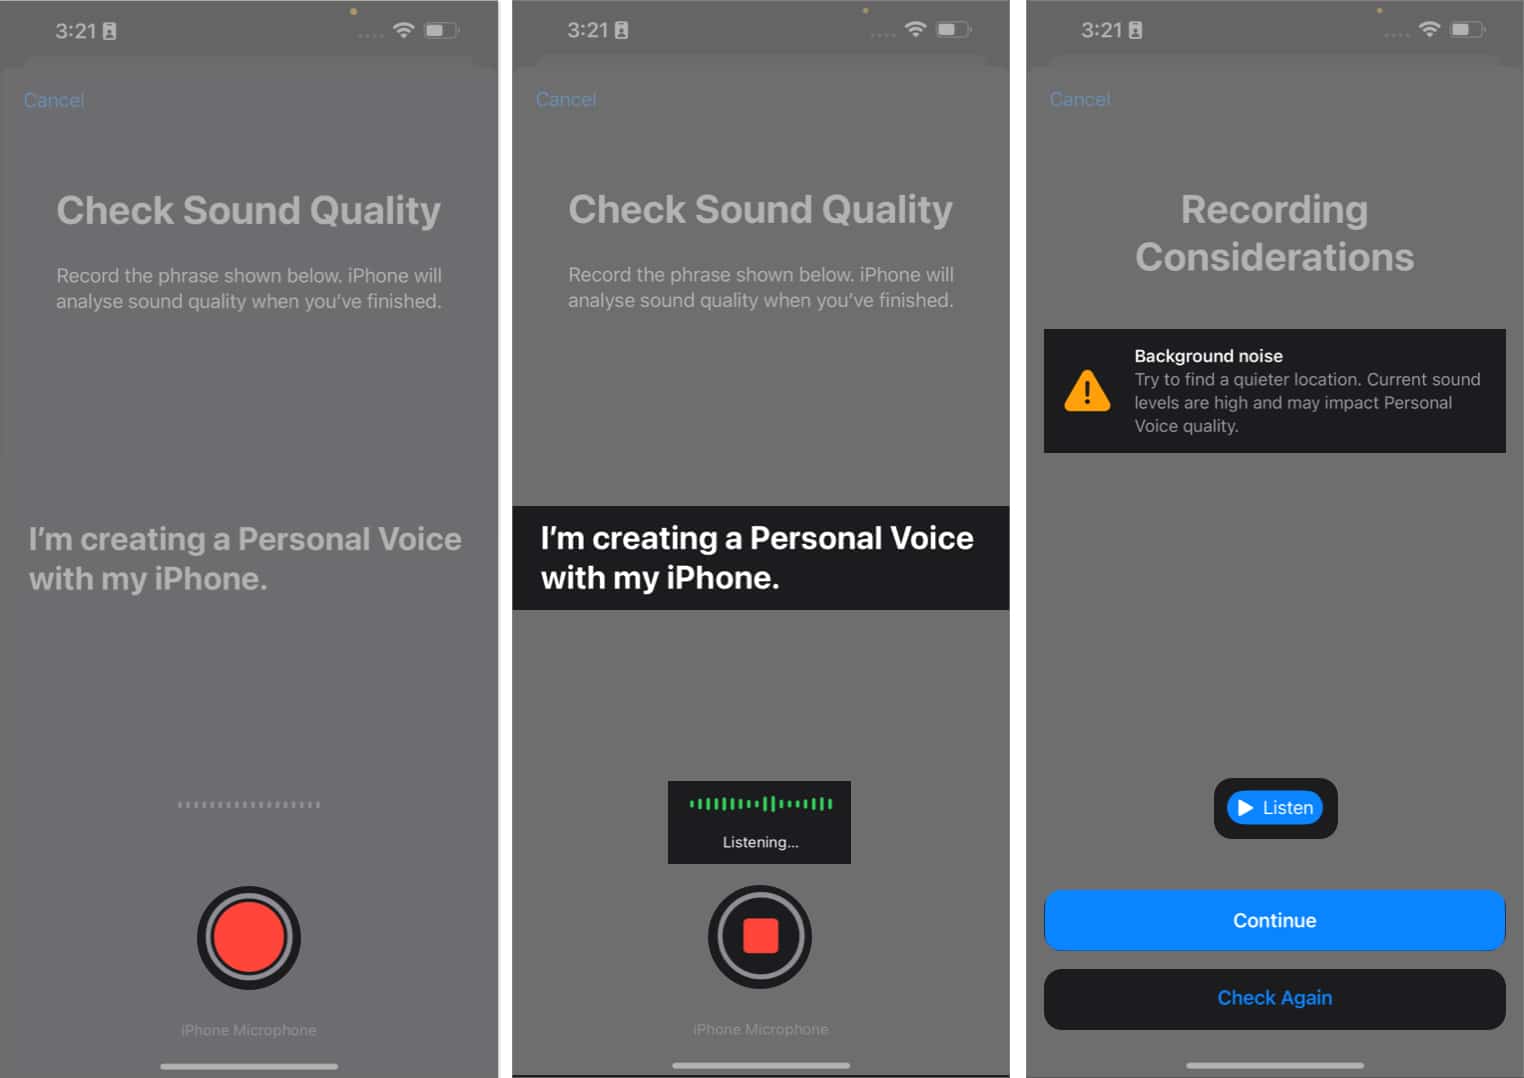
- Tap the Record icon and narrate the phrases as they appear.
- Wait for the recording to end, or tap the Stop icon.
- Tap Listen to hear your recorded audio.
- If your background is noisy, you’ll be notified. You can move to a quiet location and tap Check Again or tap Continue to keep recording.
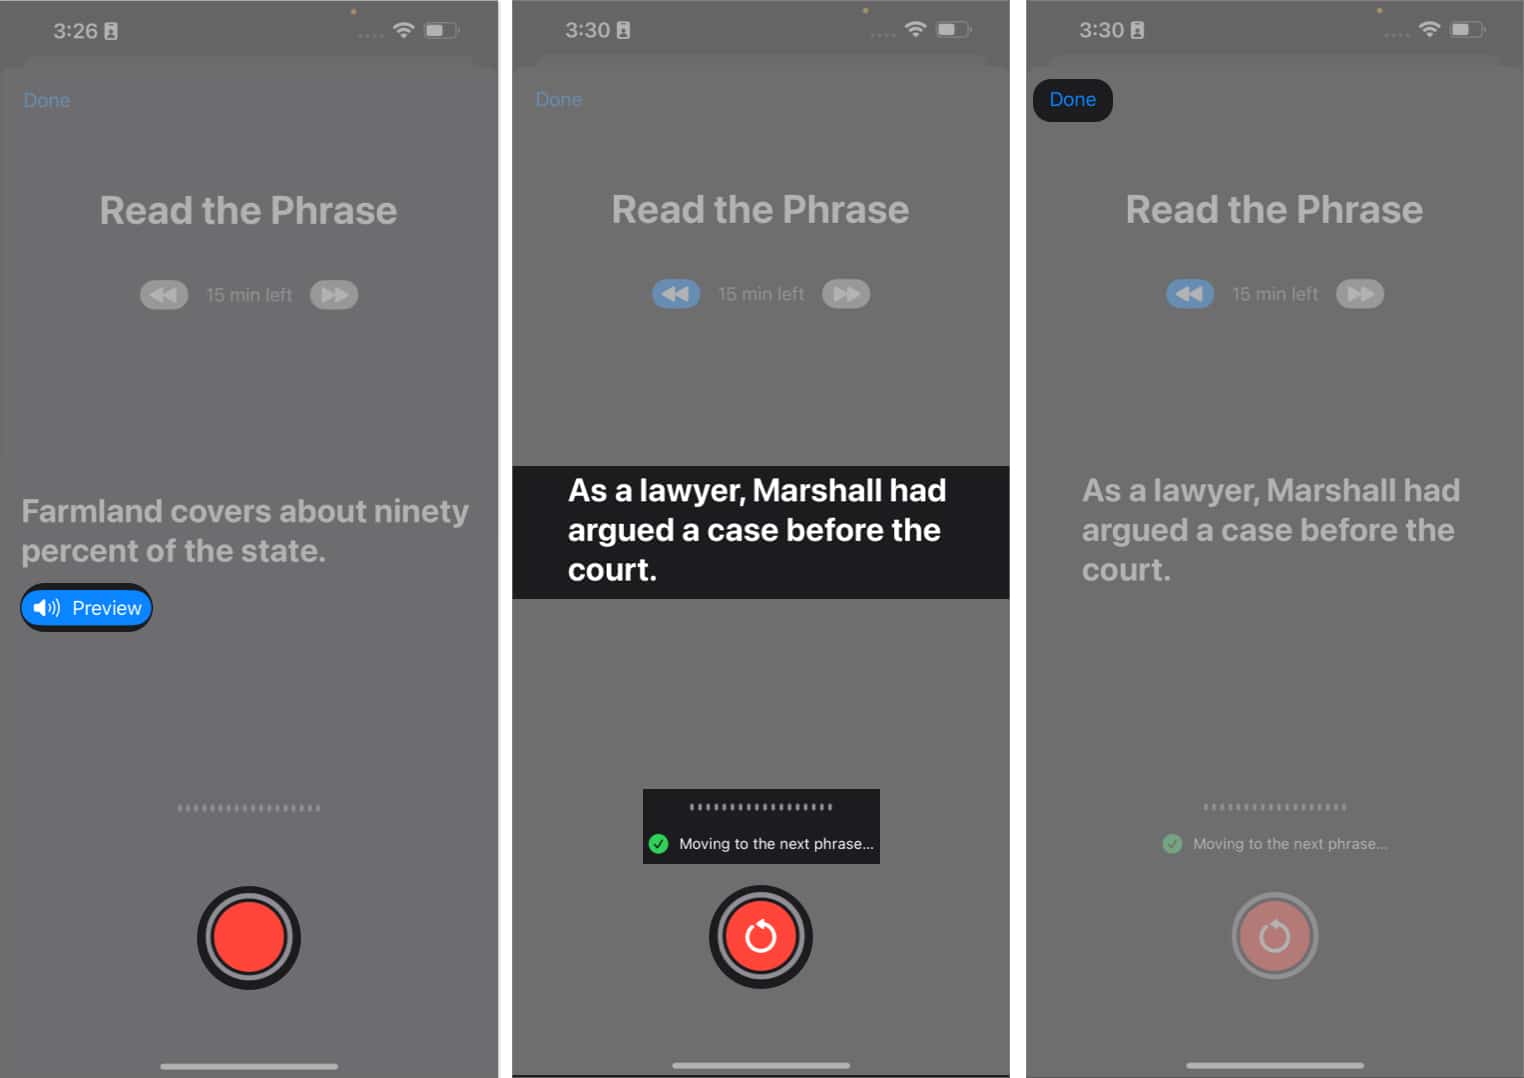
- Once you complete the sound check, you’ll have to complete a 15-minute voice-over session narrating the lines as they appear.
- Tap Preview to understand how the line sounds.
- Then, tap Record when you’re ready.
You’ll see “Moving to the next phrase” prompt as you proceed. - If you wish to record a particular phrase again, tap Replay.
- If you want to record these phrases afterward, tap Done. Don’t worry; you can continue recording from where you left off.
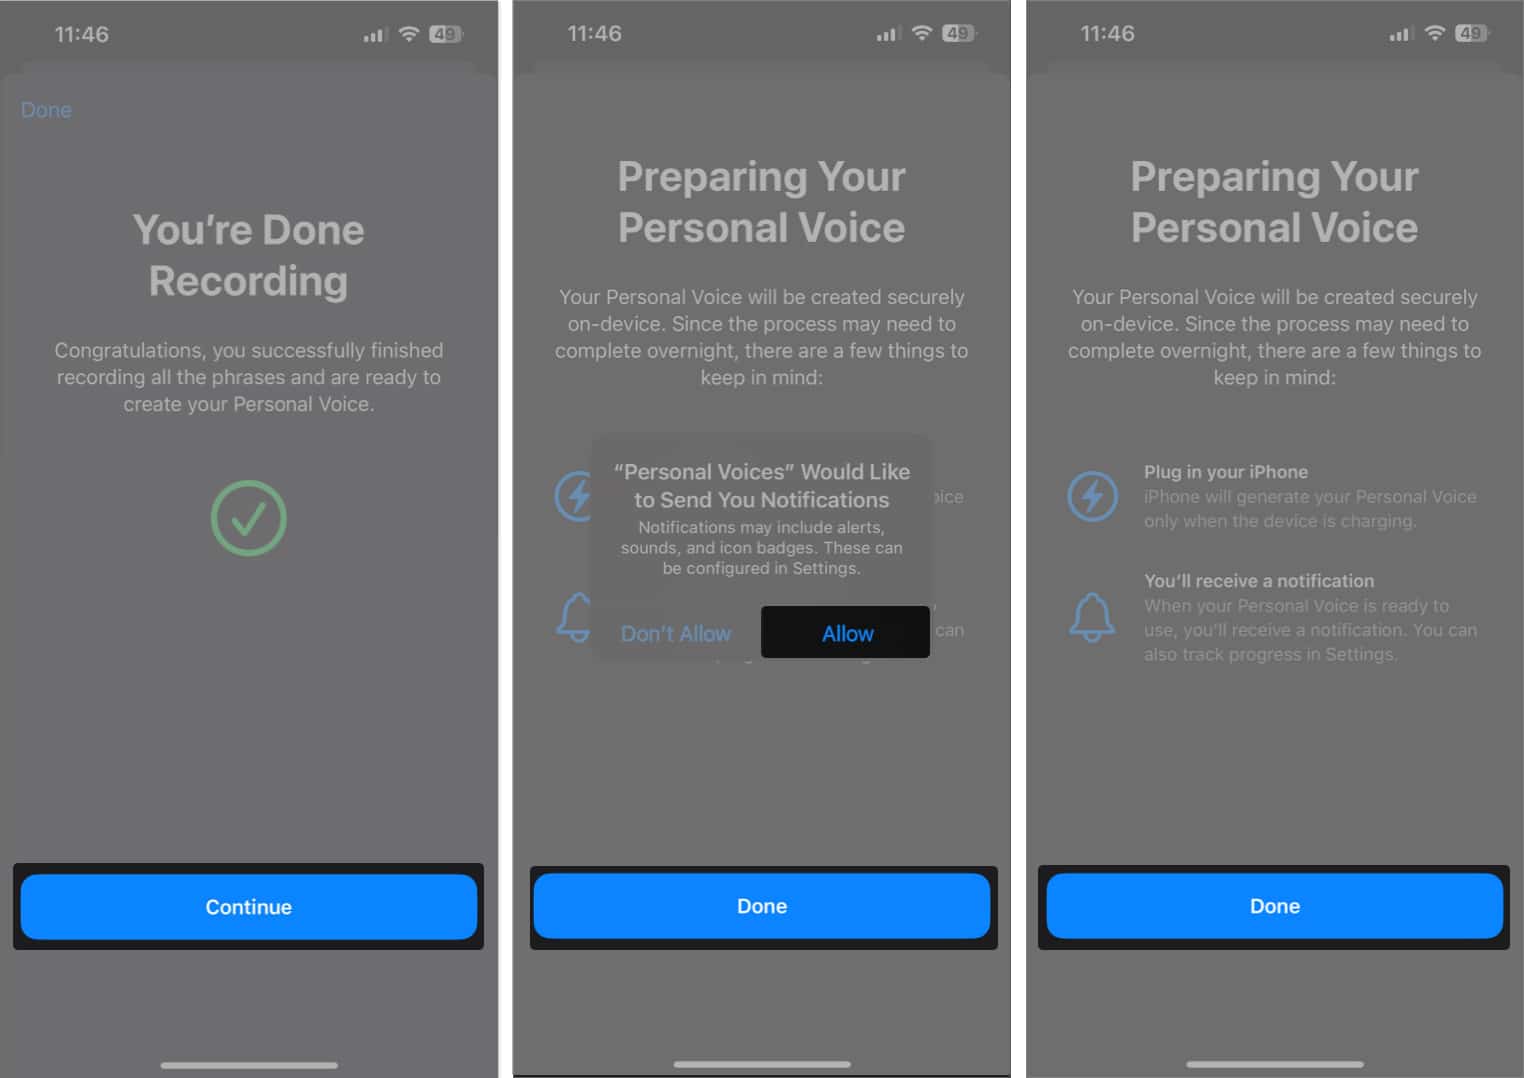
- Once you finish recording, tap Continue.
- Then Allow notification access and tap Done.
If you wish to delete a session of Personal Voice and start from scratch, select your voice model →. Enter your iPhone’s passcode and tap Delete Voice → Delete Voice and Recordings.
After you complete the initial setup, your iPhone will automatically generate your Personal Voice while it charges and the screen is turned off. You will also receive a notification once your Personal Voice is ready to use.
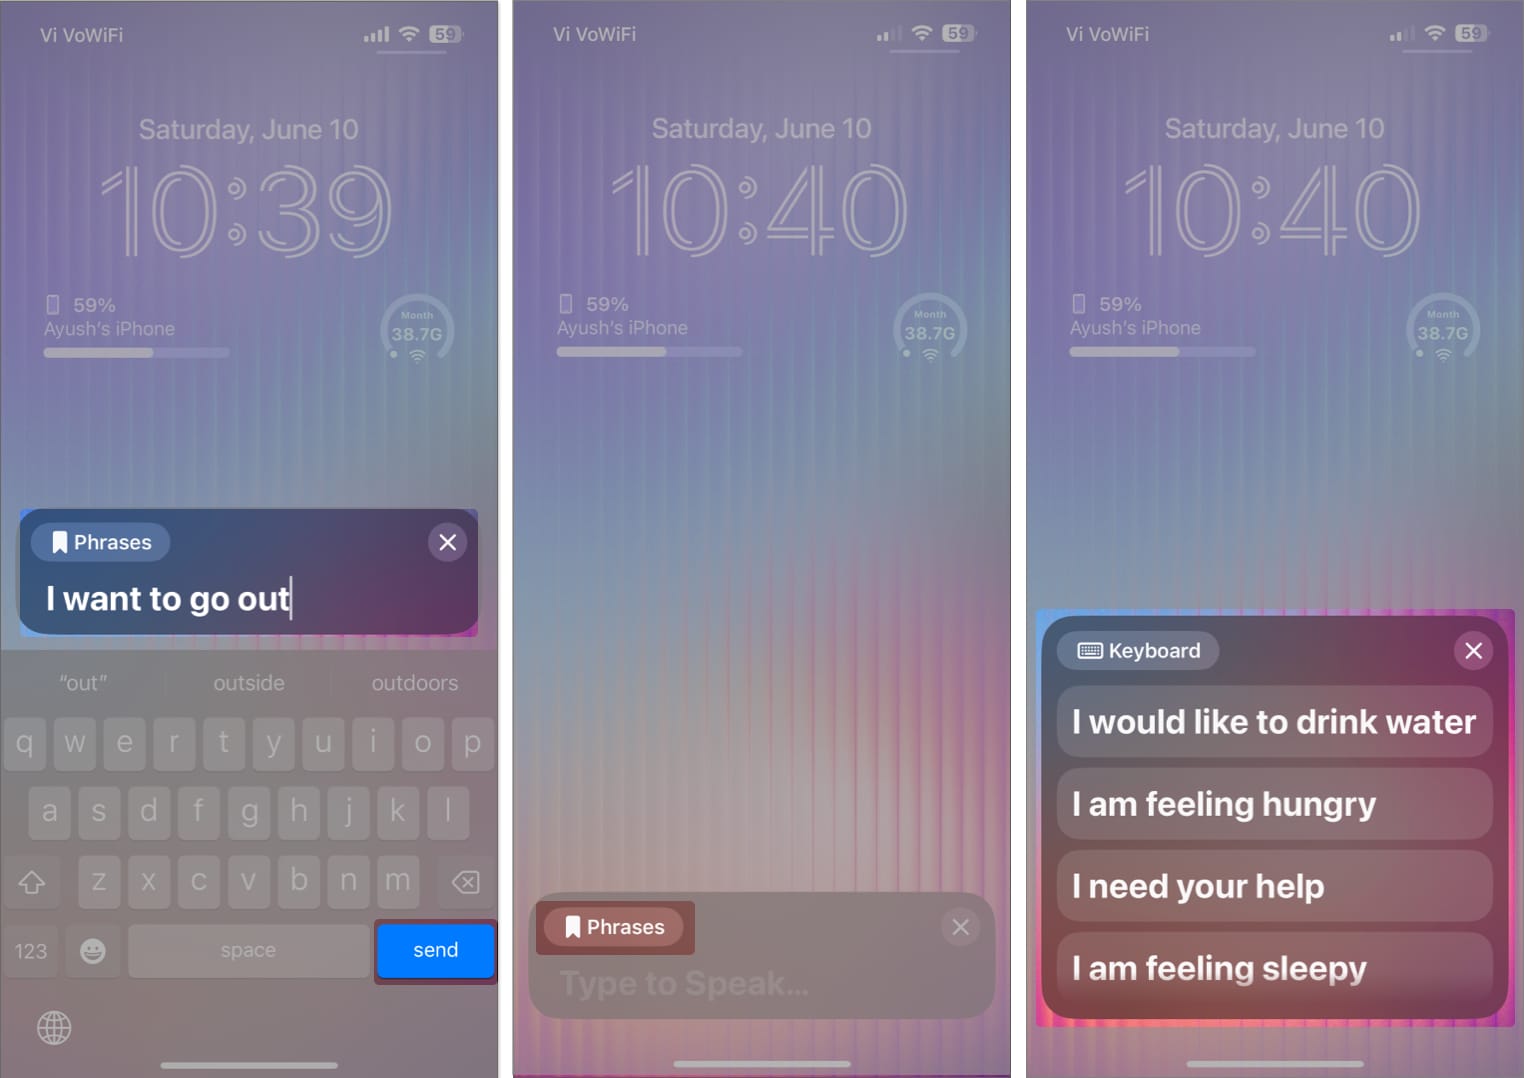
Currently, the only way to use Personal Voice on iPhone is through another new accessibility feature called Live Speech. With Live Speech, you can type what you want to say on your iPhone and have it narrated using your Personal Voice. Here’s how it works!
How to use Personal Voice on iPhone
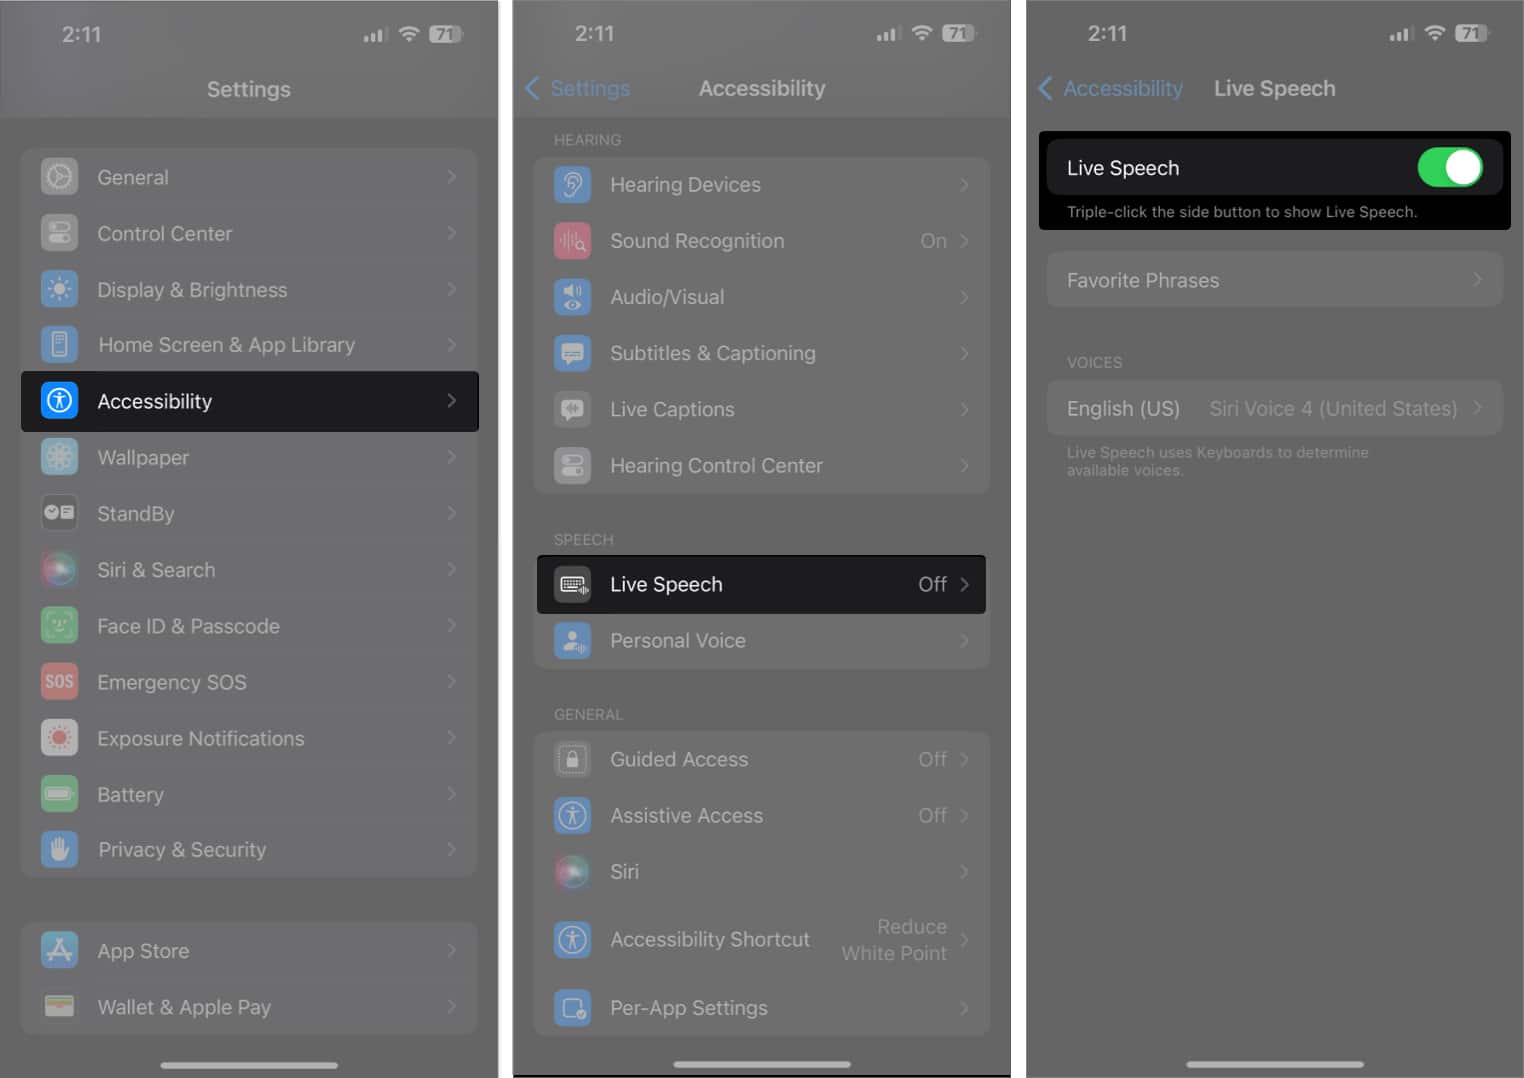
- Go to Settings → Accessibility.
- Scroll down and tap Live Speech → Toggle on Live Speech.
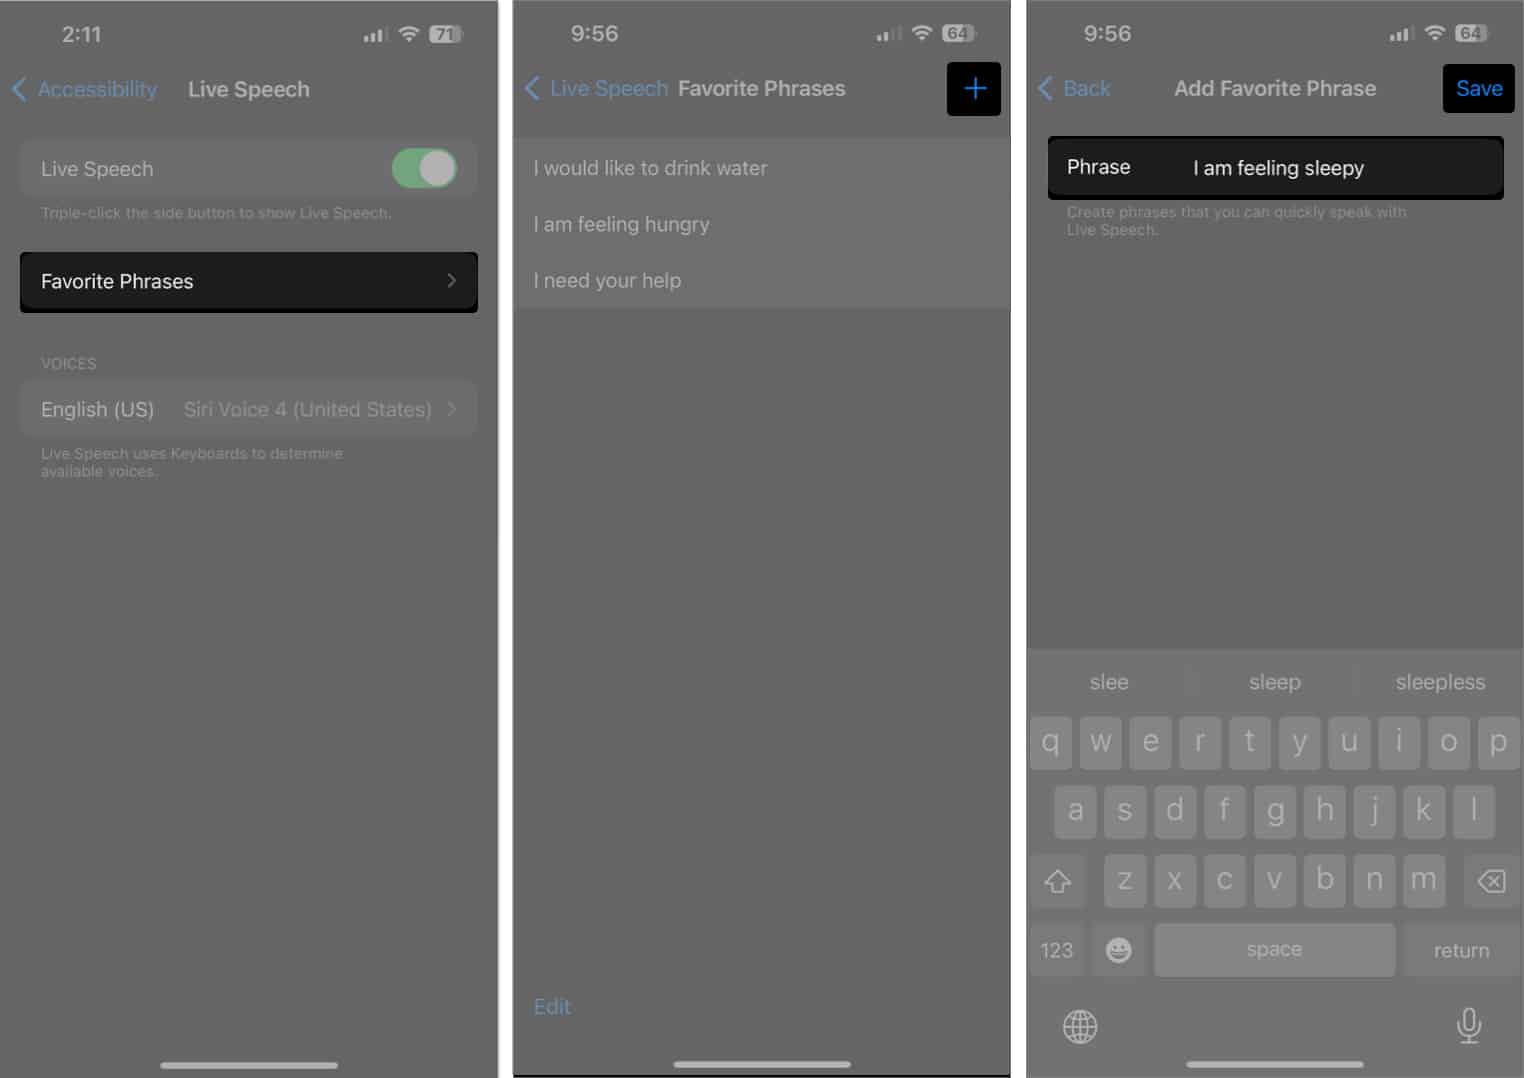
- Select Favorite Phrases → Tap the Plus icon.
- Type a phrase of your choice and tap Save.
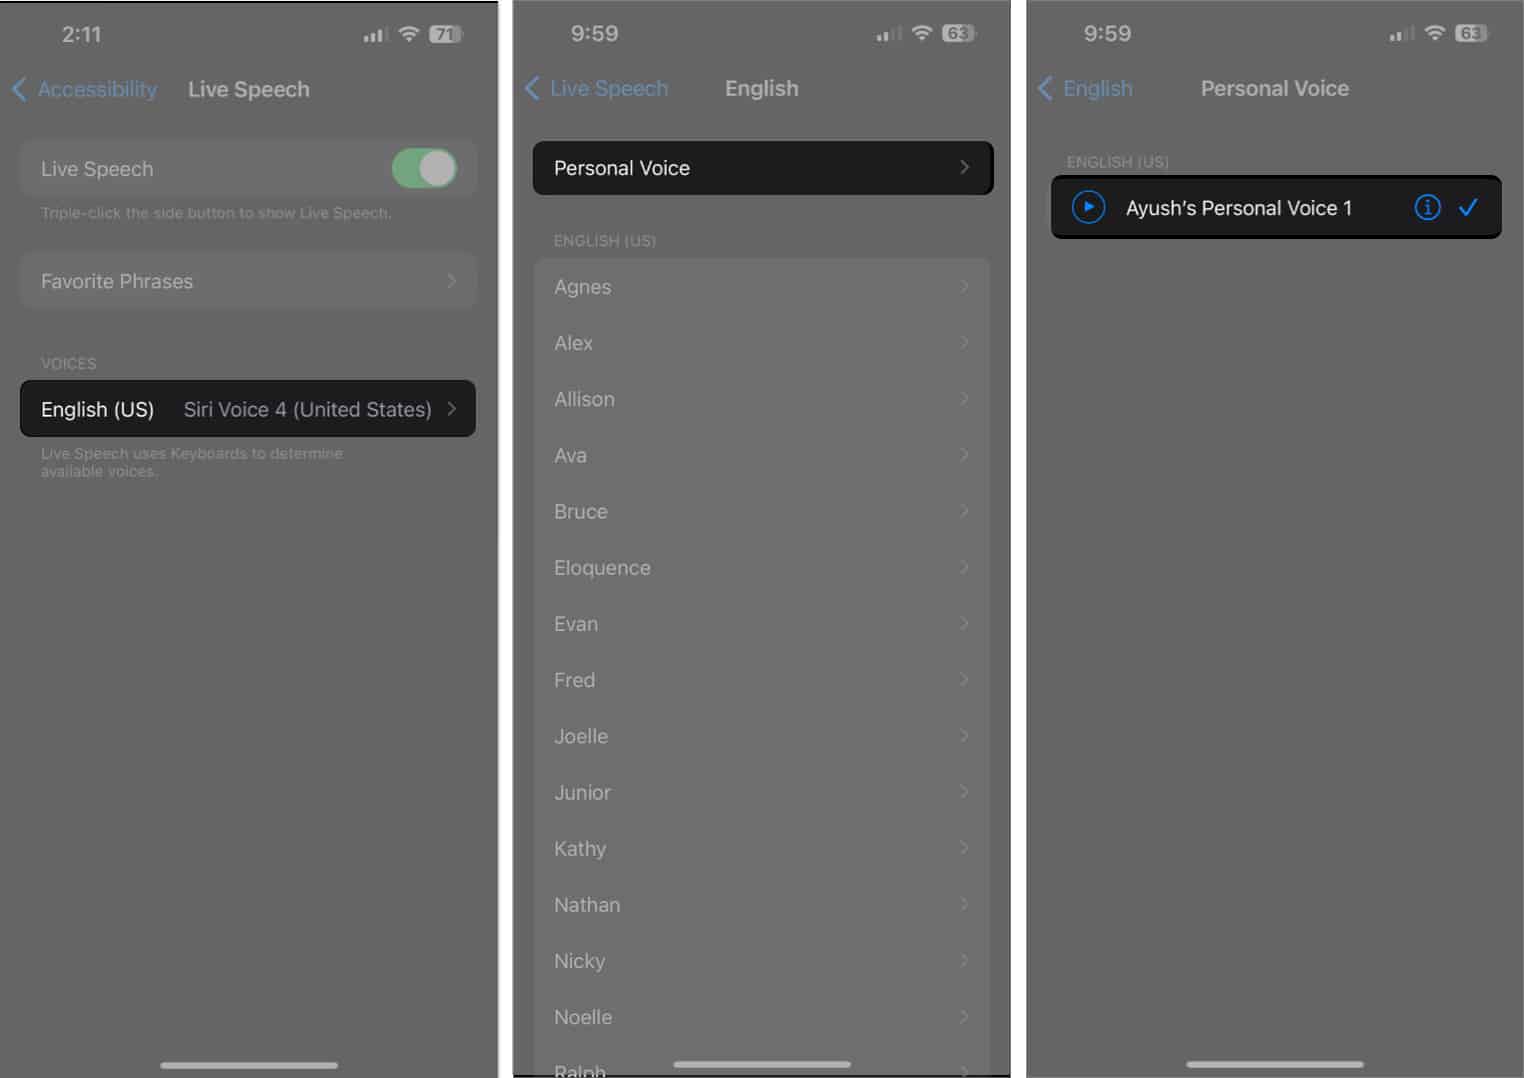
- Go to the previous page and tap the option under the VOICES label.
- Tap Personal Voice and choose the one we generated earlier.
- Now, whenever you want a phrase narrated in your voice, triple-press the power button to access Live Speech.
- Type in a phrase you want to be spoken and tap Send. Or you can tap on Phrases and choose a Favorite Phrase.
Wrapping up…
All things considered, Personal Voice is a very useful accessibility feature built into iOS 17 that can help people with degenerative speech disorders communicate effectively. Besides that, you can also use Personal Voice to preserve the voice of your loved ones when they are no longer with you.
I hope you find this guide helpful. However, if you have any further queries or suggestions, feel free to leave them in the comments section below.
FAQs
Recording the audio clips required to generate your voice model takes exactly 15 minutes. In comparison, analyzing and generating the voice model can take about two days of overnight charging (or 24 hours in one go).
You can use your Personal Voice on all supported iPhone, iPad, or Mac connected with iCloud. However, you must go to Settings → Accessibility → Personal Voice and enable Share Across Devices.
No, Apple cannot access your Personal Voice data in any way. Personal Voice only uses on-device machine learning that’s supported by the Neural Engine to analyze and generate your voice model.
Read more:

