How to screenshot or record your view on Apple Vision Pro

- You can easily capture a screenshot on Apple Vision Pro by pressing the Digital Crown and the top button.
- To screen record a view on Apple Vision Pro, go to Control Center > Select the Screen Recording icon.
- You may also use the Screen Mirroring feature to share the Vision Pro view with others.
I hope you are already enjoying the immersive experience on your Vision Pro. How about sharing this view with others? Vision Pro lets you capture a screenshot and record a video of the screen view like other Apple devices and save those in the Photos app by default.
You can get a 2D view of what you see inside the headset, including your real-life space, the virtual environment, and immersive apps. If you find this intriguing, let’s learn how to screenshot and record a view on Apple Vision Pro!
How to take screenshot of your view on Apple Vision Pro
Screenshots are the easiest way to share your view with others as they produce small-sized files. Also, you can quickly edit and annotate any screenshot from Photos.
Apple Vision Pro offers two methods to take a screenshot of the view. You may use anyone as per your preference. After the screenshot is taken, the image is saved to Photos automatically.
Note:
To protect user and data privacy, the Vision Pro won’t let you capture the view while inputting a password or viewing copyrighted media.
Method 1: Using physical buttons
When you wish to take a screenshot, simply press the Digital Crown and the top button together on your Apple Vision Pro. This action will capture your view.

Method 2: Ask Siri
If your hands are engaged, you may invoke Siri and give a voice command to screenshot of the view on Apple Vision Pro.
You can also capture screenshots of the visionOS interface from your Mac. For that, you need to install XCode and connect your Vision Pro to your Mac. After that, open Developer Tool in XCode and go to Reality Composer Pro.
Now, click File from the menu bar and select Developer Capture. Here, you must choose your Vision Pro from the list. Finally, click the camera icon to capture the screenshot or select the movie camera icon to record the screen recording.
How to do screen recording of your view on Apple Vision Pro
If you want to share a more real-like experience, you can record a video of the Apple Vision Pro view. It will capture all your navigation and activities on your headset.
So, if you have something sensitive on your screen, hide it from the view and follow the below steps:
- From your view, look up and select the down arrow with a pinch gesture.
It will show the Control Center. - Select the Control Center icon from the menu.

- Choose the Screen Recording icon.

- It will now begin to capture and record view on your Vision Pro screen.
- Once done, select the red status bar at the top → Choose Stop.
Note:
that Apple TV and Disney+ prohibit screenshots and screen recordings to avoid piracy. However, you may record YouTube videos.
If you can’t find the Screen Recording icon in the Control Center, you need to add it to the menu. From that,
- Go to Home view → Open the Settings app.
- Select Control Center.
- Add Screen Record control.
How to view Vision Pro screen recording
Similar to screenshots, all your screen recording video is saved automatically to your gallery. So, go to the Photos app on your Vision Pro and play the recording.
You can also share the media from there.
How to share your view on Apple Vision Pro
The screen recording video of Vision Pro will accumulate a lot of storage space and be difficult to share quickly. Also, the video quality may be compressed when shared. So, for a better experience, you can mirror your Vision Pro screen view to a compatible screen.
This way, your friends and family nearby may view what you’re watching on your Apple Vision Pro. Let’s learn how to do this. First, connect your device and Vision Pro to the same Wi-Fi network.
- Open Control Center from your view.
- Select the Control Center icon.
- Tap the Screen Mirror icon from the menu.

- Choose your device from the list shown.
Share an immersive experience in 2D!
Capturing screenshots and recording a view on your Apple Vision Pro can be a breeze once you get the hang of it. With just a few simple steps, you can capture important moments, share information, and create engaging tutorials.
If you face any issues while performing the steps, please let me know in the comment below; I will be happy to help!
Image Credits: Apple.com
Explore more:
Topics

Written by
Ava BiswasAva is a die-hard Apple aficionado and seasoned writer with a knack for breaking down complex tech concepts into easily digestible content. Having honed her writing and editing skills over 4 years at renowned media houses like TechBurner, Ava crafts informative and engaging articles including troubleshooting guides, product reviews, editorials at iGeeksBlog. When not typing, you can find her exploring the latest Apple releases or pondering the future of tech innovation.
View all posts →More from How-to
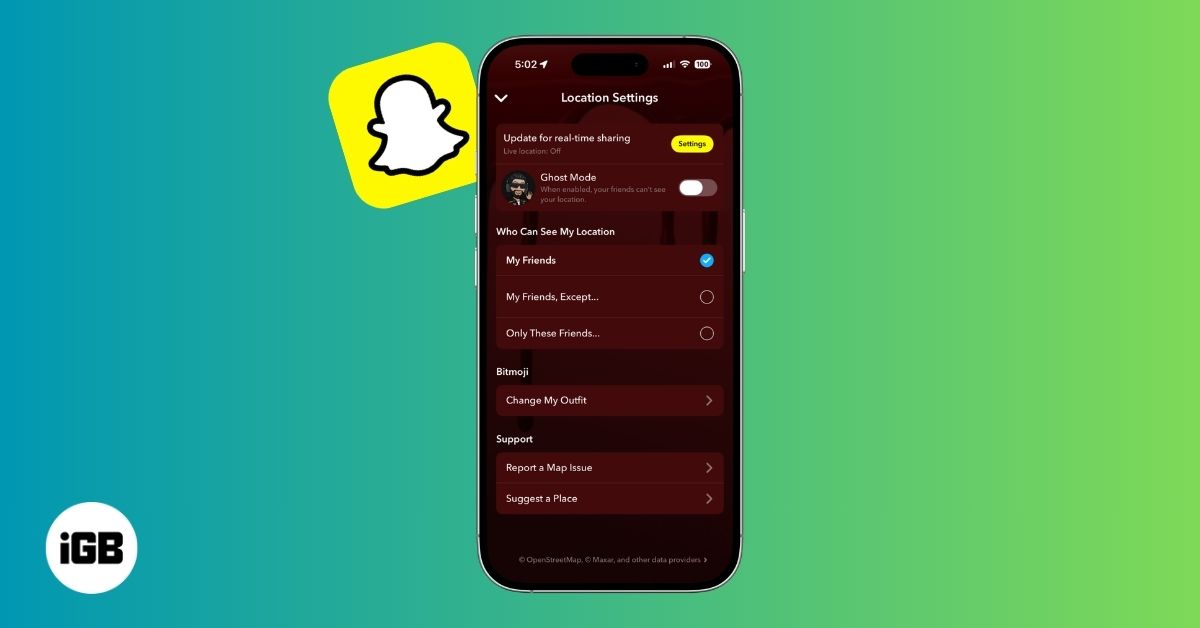
How to Turn Off Location on Snapchat (Step-by-Step Guide)
Want to stop sharing your location on Snapchat? This guide explains how Snapchat location sharing works and shows simple ways to turn off your location using Ghost Mode or phone settings. Stay in control of your privacy in just a few steps.

Snapchat Parental Controls: How to Set Up Family Center and Keep Your Teen Safe
Snapchat’s Family Center lets parents monitor their teen’s friend activity and screen time without reading private messages. Here’s how to set it up and what to expect.

How to Block and Unblock Someone on Instagram
Instagram lets you block or unblock someone in seconds. Follow these simple steps to take full control of your privacy and online peace.