How to Organize Photos on Mac Like a Pro
Struggling with a messy photo library? Learn how to organize photos on Mac, remove duplicates, and free up storage.
If your Photos library feels chaotic, it is usually the same mix every time: duplicates wasting storage, screenshots and downloads blending into real memories, and photos scattered across devices and random folders. And if you are a photographer or content creator, it gets 10 times worse with the management. In this guide, I will show you how you can optimize your photos and maybe even other folders on your Mac. Let’s begin.
How Photos Are Stored on Mac
On a Mac, photos usually live in two places, and each one works differently.
Photos imported into the Photos app are stored inside a single Photos Library file in the Pictures folder. You do not see or manage individual image files in Finder. The Photos app controls storage, edits, and organization for you.
If iCloud Photos is turned on, this same library is shared across your devices. Edits and deletions sync automatically, and macOS may keep smaller versions on your Mac while storing full originals in iCloud.
Photos that are not in the Photos app are just normal files. Anything in Downloads, Desktop, project folders, or external drives is handled by Finder. You can move, rename, and back up these files freely, and they do not sync unless you set that up yourself.
Before organizing, you need to know which photos are managed by Photos and which ones are regular files. Everything you do next depends on that.
Photos App vs Finder: Which Should You Use
For most users, the Photos app should be the main method. It is built to handle huge libraries because it relies on search and metadata, not manual folder browsing.
Photos app is best when you want to search by date, place, person, object, or event. It also gives you People and Places grouping, Smart Albums, and iCloud syncing.
Finder based organization makes sense when you need strict file control. For example, you are keeping a separate archive on an external drive, or you are managing client and project folders where filenames and folder paths matter.
The safest approach is simple: use Photos for your main library, and use Finder only for archives or advanced workflows. Do not try to replace Photos search with endless Finder folders.
Prepare Before You Start Organizing
Before you start organizing, take a few minutes to set things up so you do not create more mess later.
- Make sure macOS and the Photos app are updated.
- If you use iCloud Photos, check that the same Apple Account is signed in on all devices.
- Find your Photos Library in the Pictures folder so you know which file matters.
- Delete obvious blur shots, accidental screenshots, and junk you do not need.
- Fix wrong dates and locations for scanned or old imported photos.
- Back up your photo library using Time Machine, or quit Photos and copy the Photos Library to an external drive.
- Import photos from phones, cameras, old drives, and folders like Downloads and Desktop into one main Photos library. Start with the most recent year if you have a lot.
Once this is done, organizing is faster and much safer.
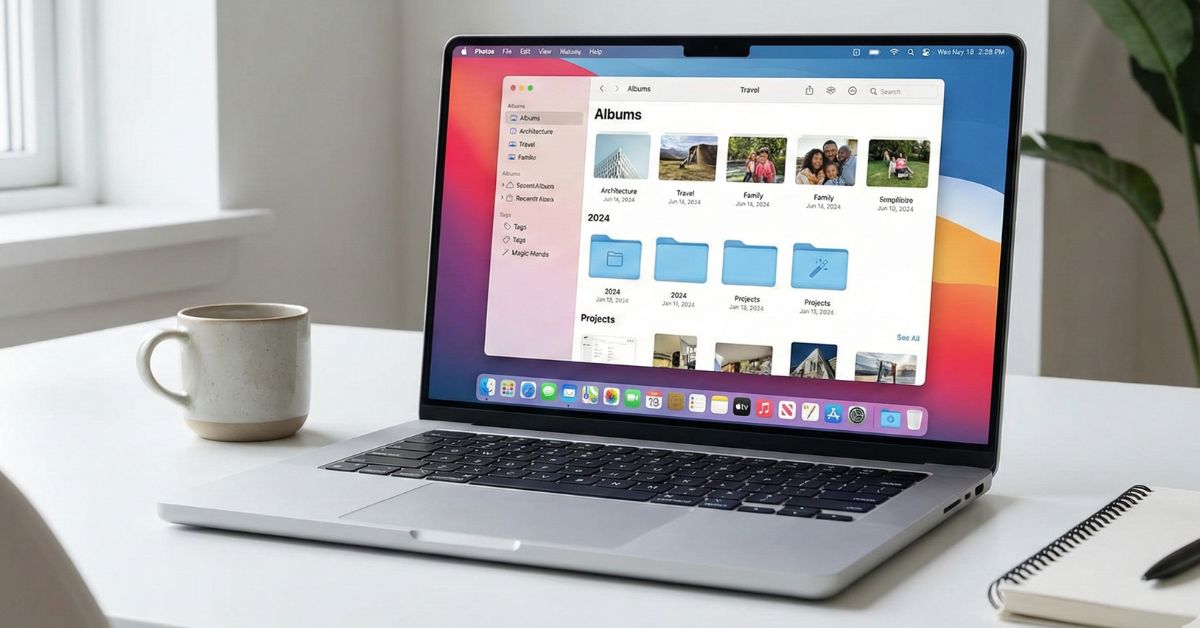
Use the Photos App to Organize Photos on Mac
The Photos app is designed to manage large libraries without you manually moving files around. The platform already offers the needed features and options. Here’s how you can use them to organize and manage your photos on Apple Photos.
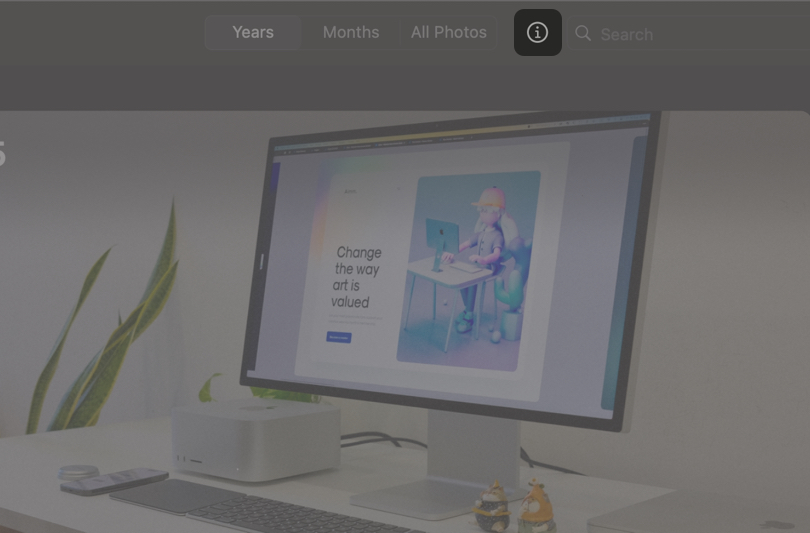
1. Use Years, Months, and Days to Navigate First
Photos automatically organizes your entire library by time, and this should always be your starting point.
Use Years to jump to a broad time period, Months to spot trips or events, and Days when you remember roughly when something happened. This is often faster than browsing albums.
If scanned photos or old imports appear in the wrong year, fix the date so time-based browsing works correctly.
To fix dates:
- Right-click on the image
- Select Get info.
- Click on the date and time.
- Correct the year or date and click Adjust.
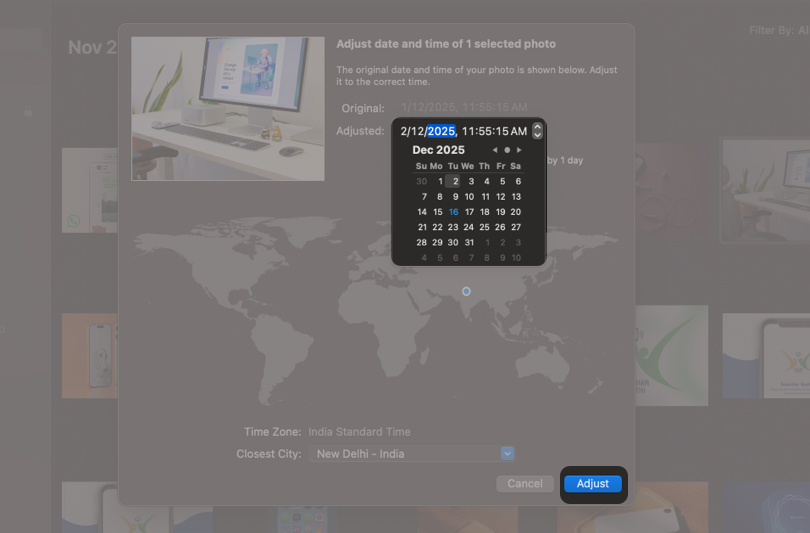
Once dates are correct, browsing works consistently everywhere in Photos.
2. Create Albums and Folders Without Overdoing It
Albums help group photos you actually revisit. They are collections, not storage locations, so adding a photo to an album does not move it or create duplicates. Folders are only used to organize albums in the sidebar.
A structure that works long-term:
- Year folders for personal photos
- Event albums only for meaningful trips or moments
- One small “Useful” folder for receipts, documents, and reference images
You can create albums and folders that make more sense to your needs.
To create an album: You can do that directly by clicking the plus icon beside Albums option in sidebar. Alternatively, you can
- Select all the photos that you want to place in an Album.
- Click File → New Album
- Name the album

Albums can be renamed, reordered, or moved into folders at any time without affecting the photos themselves. You can also add and remove photos to and from the album anytime.
3. Use a Clear Album Naming Strategy
Album names should sort themselves so you do not need manual ordering.
Use date-first naming:
- YYYY-MM Event name
This keeps albums in order automatically. For old scanned photos, use the closest known year or group by decade so they do not mix with recent photos.
4. Use Search, People, and Places Instead of More Albums
Search is often more powerful than albums.
You can search by people, pets, places, objects, scenes, or even text inside images. This removes the need to manually organize everything.
In People, name important faces once, and Photos groups them automatically. If the same person appears twice, merge them sothe results stay clean.
Places uses location data and helps when you remember where something happened, but not the date.
This is why you do not need an album for every topic.
5. Use Smart Albums to Handle Repeat Clutter
Smart Albums update automatically based on rules, which makes them ideal for things that keep piling up.
To create one:
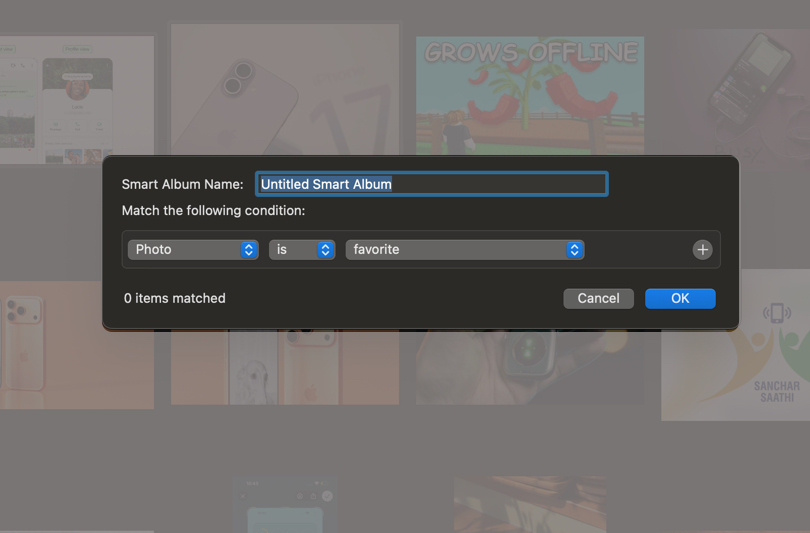
- Click File → New Smart Album
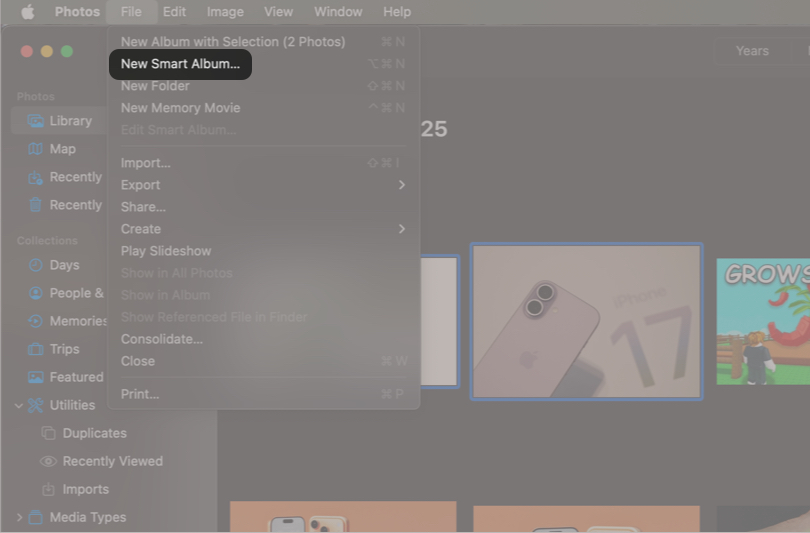
- Name the album
- Set conditions like media type, date range, favorites, or keywords
- Click OK
Smart Albums that actually help:
- Screenshots
- Videos
- Last 30 Days
- Favorites this year
These Smart Albums also make cleanup easier later because clutter gathers itself.
6. Use Favorites and Keywords Sparingly
Favorites are the fastest way to surface photos you care about. Click the heart and move on.
Keywords are simple labels added from the Info panel.
To add keywords:
- Open a photo.
- Press ⌘ (command) + I.
- Add keywords like receipts, documents, travel, work, or family.
Keep keywords small and practical. This improves search and Smart Albums without adding maintenance work.
7. Clean Up Regularly in Small Passes
Organizing without deleting junk never feels finished.
Start with obvious blur shots, accidental screenshots, and images you clearly do not need. Do cleanup in short sessions so it does not feel overwhelming.
Deleted photos go to Recently Deleted, giving you a safety window before permanent removal.
8. Remove Duplicates and Similar Photos Carefully
On newer macOS versions, Photos includes a Duplicates section where exact copies can be reviewed and merged.
Review before merging. Similar-looking photos are not always true duplicates.
If your Mac does not show a Duplicates section, review manually or use a trusted tool, but always preview before deleting.
9. Tidy Screenshots and Random Images
Screenshots often create the most noise in a library.
Use Media Types or the Smart Albums you created earlier to gather screenshots automatically. Keep what matters and delete the rest. If some screenshots are important, move them into a dedicated album like Receipts or Reference. This keeps personal photos easy to browse.
10. Hide Photos from Library
If you prefer to keep some photos hidden from others or you just wanna keep clutter away from daily use, you can hide the photos completely. You can unhide them anytime if you want, and you can even select multiple and hide all of them at once.
11. Curate Burst Photos and Live Photos
Burst photos are created when you hold the shutter button and capture many frames in a second.
To clean them:
- Open the burst
- Select the best frame
- Delete the rest
Live Photos include a few seconds of motion and sound. Keep them when movement adds value. If not, converting them to still photos helps reduce clutter.
Organize Photos Using Finder (Advanced Users)
Finder-based organization is useful when you need real files in real folders. This applies to long-term archives, photography projects, or client work where folder paths, filenames, and exports matter. It is not meant to replace the Photos app for everyday memories.
The biggest risk here is mixing systems. The Photos library and Finder archives must stay separate. You should never move or rename files inside the Photos Library package, and you should be clear about which photos live in Photos and which live in Finder.
1. Know When Finder-Based Organization Makes Sense
Use Finder when:
- You need exact file paths and filenames
- You work with clients or external tools
- You want a long-term archive independent of Photos
Do not use Finder to manage photos that already live inside the Photos app unless you export them first. Treat Photos Library.photoslibrary as untouchable.
If iCloud Photos is enabled, remember that deleting a photo in Photos removes it across devices. This is another reason to keep Finder archives clearly separate.
2. Create a Clear Finder Folder Hierarchy
Start with one top-level folder, then organize by year, then by event or shoot. Date-first naming keeps everything sorted automatically.
A simple structure that scales:
- Photos Archive
- 2024 Images
- 24-01-24 Blackpool
- 2025 Images
- 25-06-10 Wedding – Anya
- 2024 Images
Keep names predictable. This makes folders sortable, searchable, and easy to restore later.
Never edit anything inside Photos Library.photoslibrary. If you want photos in Finder, either export them from Photos or copy originals directly from your camera into this archive.
3. Export Photos From Photos Before Using Finder
If photos already live in the Photos app, export them properly instead of dragging files around.
To export safely:
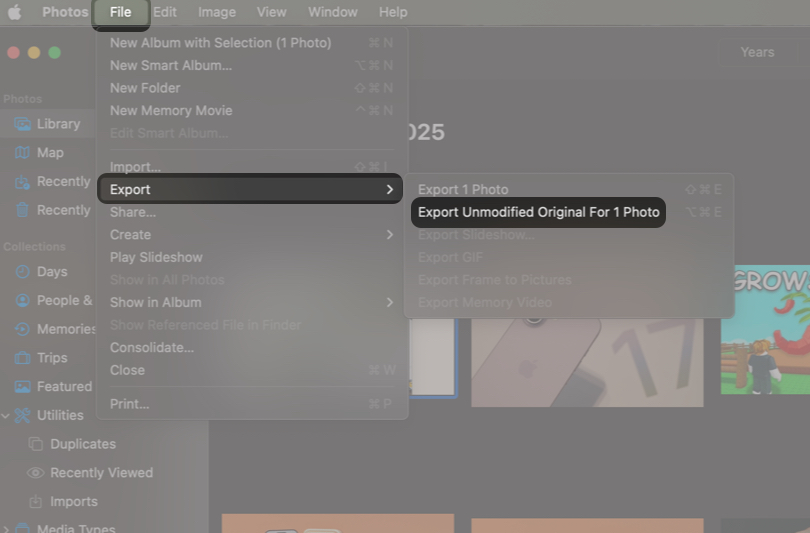
- Open Photos and select the images
- Click File → Export → Export Unmodified Originals
- Choose your Finder archive folder
This keeps Photos intact and gives you clean files to work with in Finder.
4. Rename Photo Files Only When It Matters
Renaming is useful for client delivery, shared folders, or long-term archives you might access outside Photos.
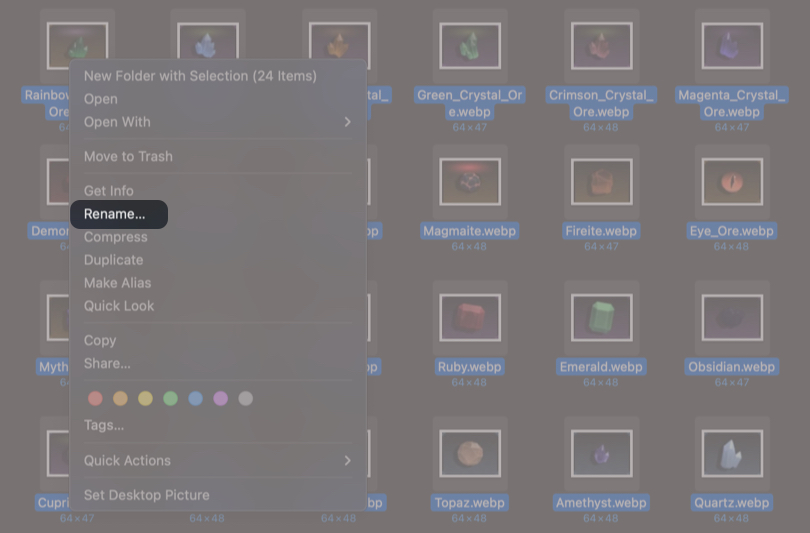
Finder makes batch renaming easy:
- Select multiple files
- Right-click and choose Rename
- Use Add Text, Replace Text, or Format
Inside the Photos app, filenames matter much less. Photos relies on dates, metadata, People, Places, keywords, and search. Do not waste time renaming files that stay inside Photos.
5. Manage Storage With External Drives and iCloud
Finder-based archives are often used when storage is tight.
A clean setup is to keep your current year photos inside Photos and move older years to a Finder archive on an external drive. This keeps your daily library fast while preserving everything.
If you use iCloud Photos, enabling Optimize Mac Storage allows macOS to keep smaller local versions while full originals stay in iCloud. This does not change how your photos are organized, only how they are stored.
The key is consistency. Photos manages your active library. Finder manages your archives. Mixing the two without a plan is how photos get lost.
Optimize Mac Storage With iCloud Photos
Optimize Mac Storage keeps smaller versions on your Mac and pulls originals when needed. Your albums, People, Places, and search still work the same. It is a storage strategy, not an organization change.
1. Move or Create a Photos Library on an External Drive
Move a library safely like this:
- Quit Photos.
- Copy
Photos Library.photoslibraryto the external drive. - Hold Option while opening Photos.
- Choose the library on the external drive.
Photos can open only one library at a time. Multiple libraries make sense only if you truly want separation, like a personal library and a work archive.
2. Daily and Monthly Habits to Stay Organized
The easiest way to stay organized is to do tiny actions regularly, instead of massive cleanups once a year. Favorite your best shots when you notice them. Drop big events into the right album. Delete obvious junk quickly so it does not pile up.
3. Quick Weekly Photo Organization Routine
Spend 10 to 15 minutes once a week:
- Import new photos.
- Delete obvious junk.
- Favorite the best shots.
- Add major events to an album.
- Confirm iCloud finished syncing if you use it.
4. Monthly Deep Clean and Backup
Once a month: Review duplicates, clean screenshots and downloads, fix People names, and confirm your backups are current. A recurring reminder helps because this is easy to forget.
Conclusion
Start with a backup, consolidate into one main library, then organize inside Photos using time views, a small album and folder structure, People, Places, and a few Smart Albums.
You do not need to finish everything at once. Start with the most recent year first. That is where you search the most, and it gives you quick wins.
Frequently Asked Questions

Written by
Ravi Teja KNTSI’ve been writing about tech for over 5 years, with 1000+ articles published so far. From iPhones and MacBooks to Android phones and AI tools, I’ve always enjoyed turning complicated features into simple, jargon-free guides. Recently, I switched sides and joined the Apple camp. Whether you want to try out new features, catch up on the latest news, or tweak your Apple devices, I’m here to help you get the most out of your tech.
View all posts →More from How-to
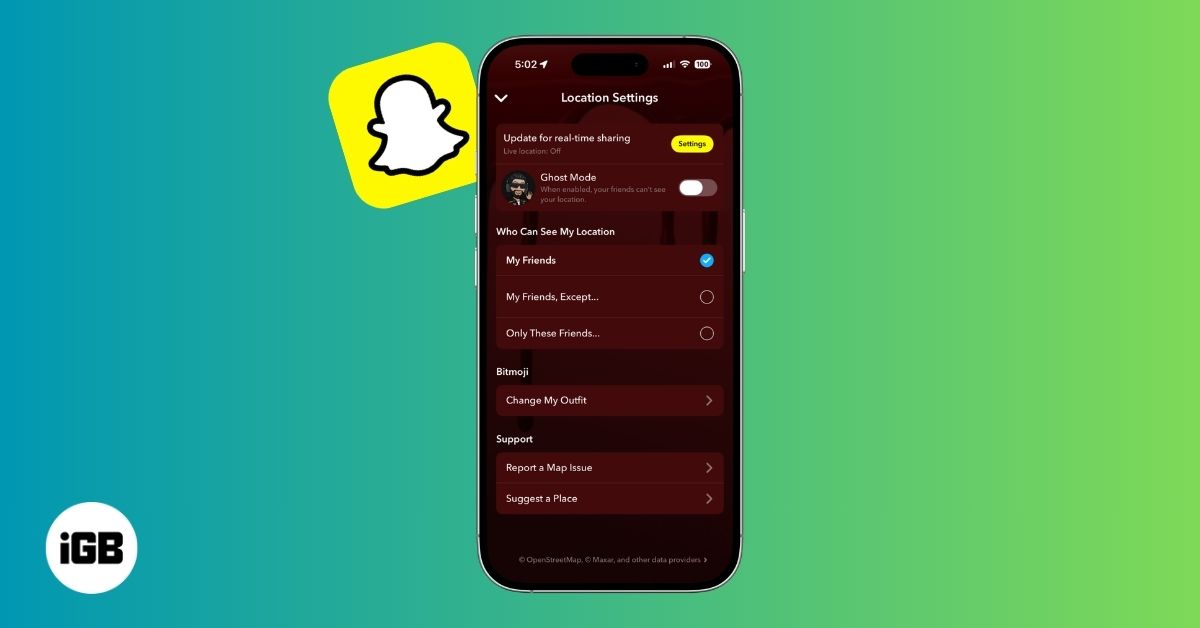
How to Turn Off Location on Snapchat (Step-by-Step Guide)
Want to stop sharing your location on Snapchat? This guide explains how Snapchat location sharing works and shows simple ways to turn off your location using Ghost Mode or phone settings. Stay in control of your privacy in just a few steps.

Snapchat Parental Controls: How to Set Up Family Center and Keep Your Teen Safe
Snapchat’s Family Center lets parents monitor their teen’s friend activity and screen time without reading private messages. Here’s how to set it up and what to expect.

How to Block and Unblock Someone on Instagram
Instagram lets you block or unblock someone in seconds. Follow these simple steps to take full control of your privacy and online peace.