Whether you have hundreds or tens of thousands of pictures in the Photos app on Mac, finding the one you want can be time-consuming. Luckily, Apple provides a variety of ways to locate the photo you need.

We’ll show how to find photos by text, content, or date in Photos on Mac as well as tips for using the search, filter, and Smart Album features. No matter when, where, or how you captured the photo, these tricks will help you find it.
1. Search photos by date on Mac
One of the best ways to find a photo, if you know when it was taken, is to search by date. It’s helpful whether you know approximately or exactly when you captured the photo.
- Launch the Photos app on your Mac.
- Select Library on the left and use the buttons in the top toolbar to choose Years, Months, or Days.
When your window is condensed, you’ll see a drop-down menu instead of buttons. - You can further narrow down your search:
- If you choose Years, you can then choose a year and see a breakdown by month.
- If you choose Months, you can pick a month and see results by day or day timeframe.
2. Find photos by location in Photos app
Another easy way to find a picture in the Photos app is to search by location. Apple makes this simple by providing you with a Places album.
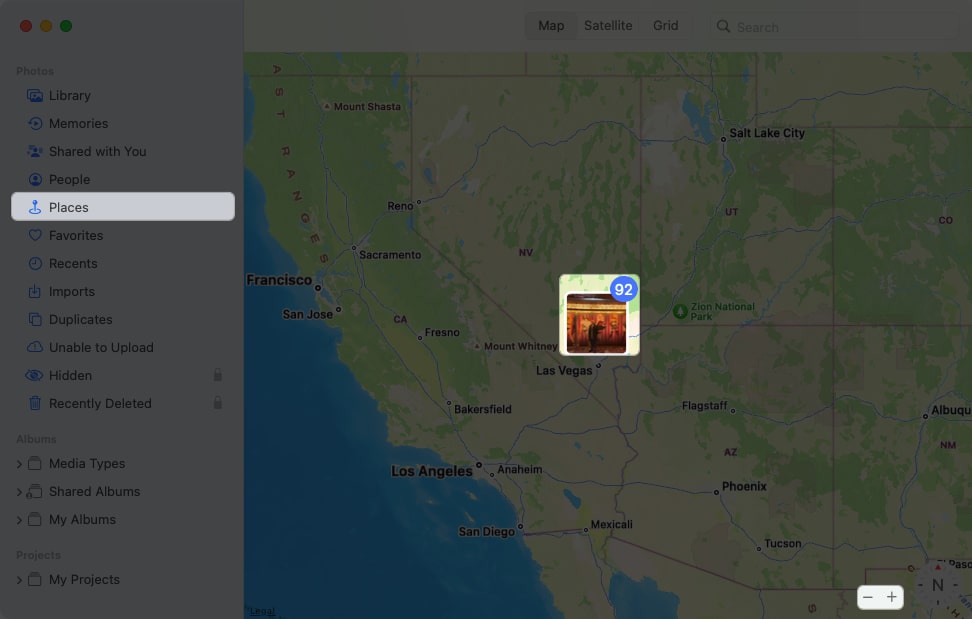
- Select Places on the left, and you’ll see a map display on the right. This gives you a top-level view, usually by country or region, of where your photos were taken.
- You can then zoom in on the map to drill down to more detailed locations within that area. Use the plus sign on the bottom right to zoom in and the minus sign to zoom back out. Drag the map to pan in any direction.
- When you see the spot you want, click the thumbnail to view the photos taken there. You’ll then see your photos from that location sorted by date.
This is a great way to find photos from a vacation or weekend getaway from home.
3. Search by person
Similar to searching by location using the Places album, you can search for friends and family using the People album.
- Select People on the left, and you’ll see a collection of your contacts.
- Choose one to see all photos of that person. This includes individual pictures, those with other people, and if applicable, a map with the locations of the photos.
To make the People album even better, you can mark your favorites and name the people.
- To mark a favorite, click the heart in the lower right corner on the collection screen. Then, when you open the People album, you’ll see those favorites right at the top.
- To add a name, either click +Name by hovering over the person in the collection or choose Add Name on the top left if you’re viewing the person’s photos.
When you capture additional photos of people, you’ll see the People album update accordingly. So, you’ll always have new photos you take of a friend or family member in one handy spot.
4. Search photos with keyword
Keywords in Photos give you another terrific way to find the pictures you want. Using the Search box, you can enter a word related to the photo you want. For example, you can search for “dog” and see all photos with your family dog Fluffy.
Along with relying on the Photos app for finding pictures based on a word, you can add your own keywords. You can assign a keyword to an individual photo, reuse the keyword for other photos, and manage all of your keywords. Using keywords, you can search more easily and find what you want faster.
To quickly add a keyword to a photo, follow these steps:
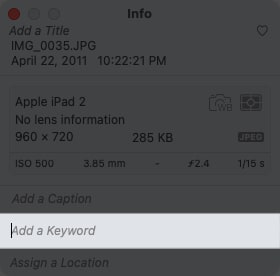
- Select the picture and click the Info button (letter “i”) in the toolbar, or right-click the picture and choose Get Info.
- Enter a word in the Add a Keyword field.
- Press Return to save the keyword.
Use the Photos Keyword Manager
You can view, add, and remove keywords in the Keyword Manager. Select Window in the menu bar and pick Keyword Manager.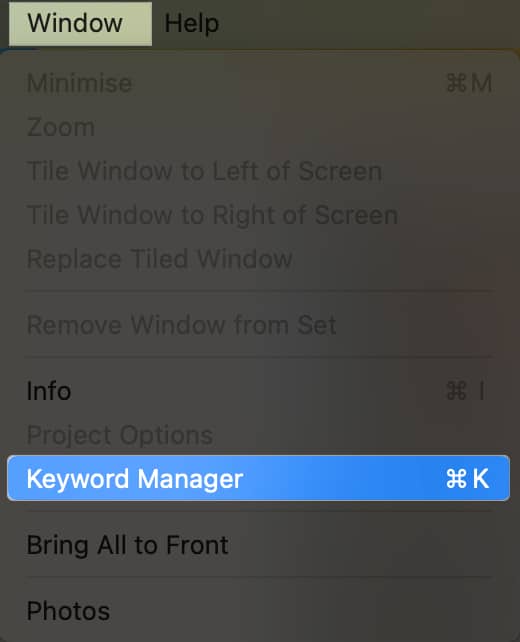
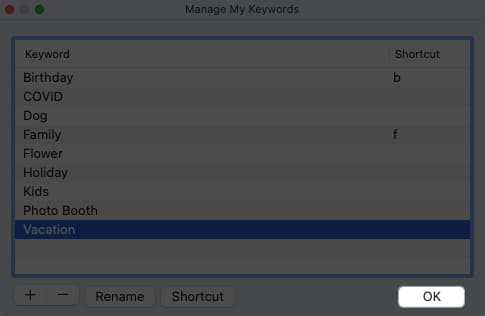
You’ll see a list of all your keywords. To assign one to a photo, select the photo and then pick the keyword.
You can also do the following:
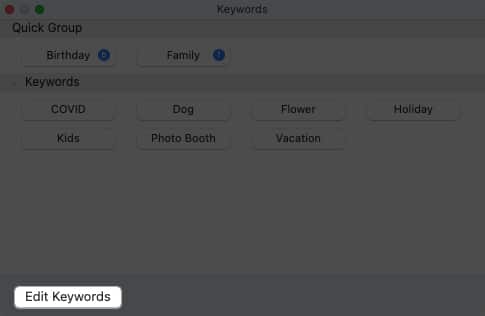
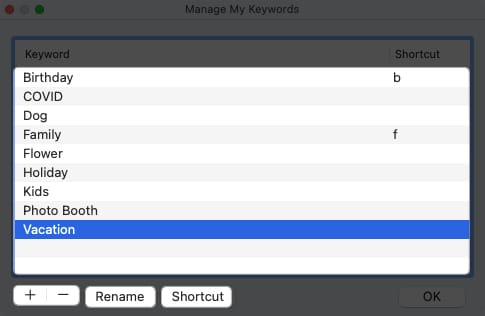
- To add or remove keywords, select Edit Keywords. To add a keyword, click the plus sign button and give it a name.
- To remove one, select it and click the minus sign button.
- To rename a keyword, select it, click Rename, and enter the new name.
- To assign a shortcut, select a keyword, click Shortcut, and add the keyboard shortcut.
- When you finish editing your keywords, click OK to save your changes.
You can also add keywords from the list at the bottom to the Quick Group area at the top. This allows you to quickly tag photos with keywords using shortcuts you set up. Photos also place those keywords in the Filters (described below) and provides them as suggestions when you assign keywords.
Just drag a keyword from the list at the bottom to the Quick Group at the top.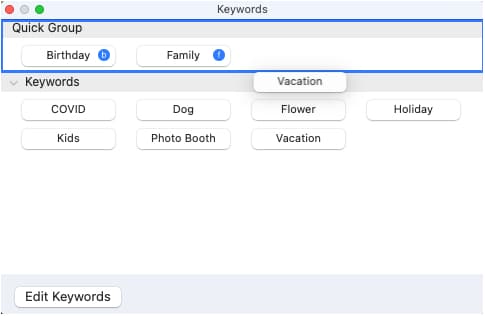
5. Search by content
Another way to search in Photos is to enter metadata content in the Search box. You can enter the title, caption, or date of the picture and see suggestions which are additional words that can help you narrow down the results.
For example, here, we searched using the name “Tired Bailey,” and here’s our result. 
Tip: Be sure to use the same letter case as how the title appears on your photo.
6. Use search suggestions in Photos app
When you use the Search box in Photos, whether to add content or a keyword, you’ll see suggestions appear. These suggestions help you narrow down your search results to find the exact photo you want.
Let’s walk through an example.
- Here, we enter the word “car” in the search box. We then see 273 results for “car.”
- We select that word in the suggestions and then see additional options related to “car” like Home, Florida, and Winter, along with the numbers of those results.
- If you choose one of those suggestions, you’ll see another set with the numbers of those results.
You can continue this process to narrow down the photos until you find the picture you want.
7. Find items with filters in Mac Photos app
When you view your Library or a particular album, you can also find photos using Filters instead of the Search field.
- On the top right, open the Filter By drop-down list and pick an option.
You’ll see default filters like Favorites, Edited, Photos, Videos, and Shared with You. But you’ll also see keywords that you add to the Quick Group in the Keyword Manager as explained earlier. - After you select a filter, you’ll see only those photos that apply.
What’s nice about the filters is that you can also apply more than one. Choose the first filter to see the results, and then pick another filter to narrow them down. You’ll see each filter you apply marked with a checkmark.
You can turn off a filter by deselecting it to remove the checkmark or remove all filters by choosing All Items at the top of the list.
8. Set up Smart Albums on Mac
One more way to find the pictures you want in Photos is to use Smart Albums. Using this feature, you set up conditions so that any current or new photos that meet those conditions automatically appear in the Smart Album.
This is a super way to go if you are frequently searching for photos based on the date they are added, if they contain a particular keyword, or were captured with a certain camera feature.
Because we have a complete tutorial on setting up Smart Albums in the Photos app, we’ll just list a summary of the steps here. Be sure to have a look at that tutorial for complete details and additional options for Smart Albums.
- Go to File in the menu bar and pick New Smart Album.
- In the pop-up window, enter a Smart Album Name.
- Use the first drop-down box on the left to set up the condition. Then, use the subsequent boxes that appear to the right, which change based on your choice in the first box.
- To add another condition, click the plus sign and follow the same step above.
- When you finish, select OK to save the album, which then appears in the left-hand navigation under Albums → My Albums.
Again, when new pictures appear in the Photos app on Mac that match the conditions you set up, those photos automatically appear in the Smart Album for you to view with a click.
Find your photos fast!
With these handy tips to find images in the Photos app on Mac, locating that picture of your pet or partner should be a quicker and easier process. Let us know which method for searching Photos on Mac works best for you!
Read more:


