How to eject an external drive on Mac? 7 Quick ways explained!
When transferring files using an external USB drive or an SD Card on your Mac, it’s essential to properly eject the drive once you’re done. Improperly ejecting these drives can lead to data corruption or even physical damage to the drive itself. In this blog post, we’ll delve into the simple yet crucial process of safely ejecting external USB drives on your Mac, ensuring the integrity of your valuable data, and extending the lifespan of your storage device.
There are seven quick and easy methods to eject an external USB drive or SD card on your Mac. Let’s take a closer look at all of them.
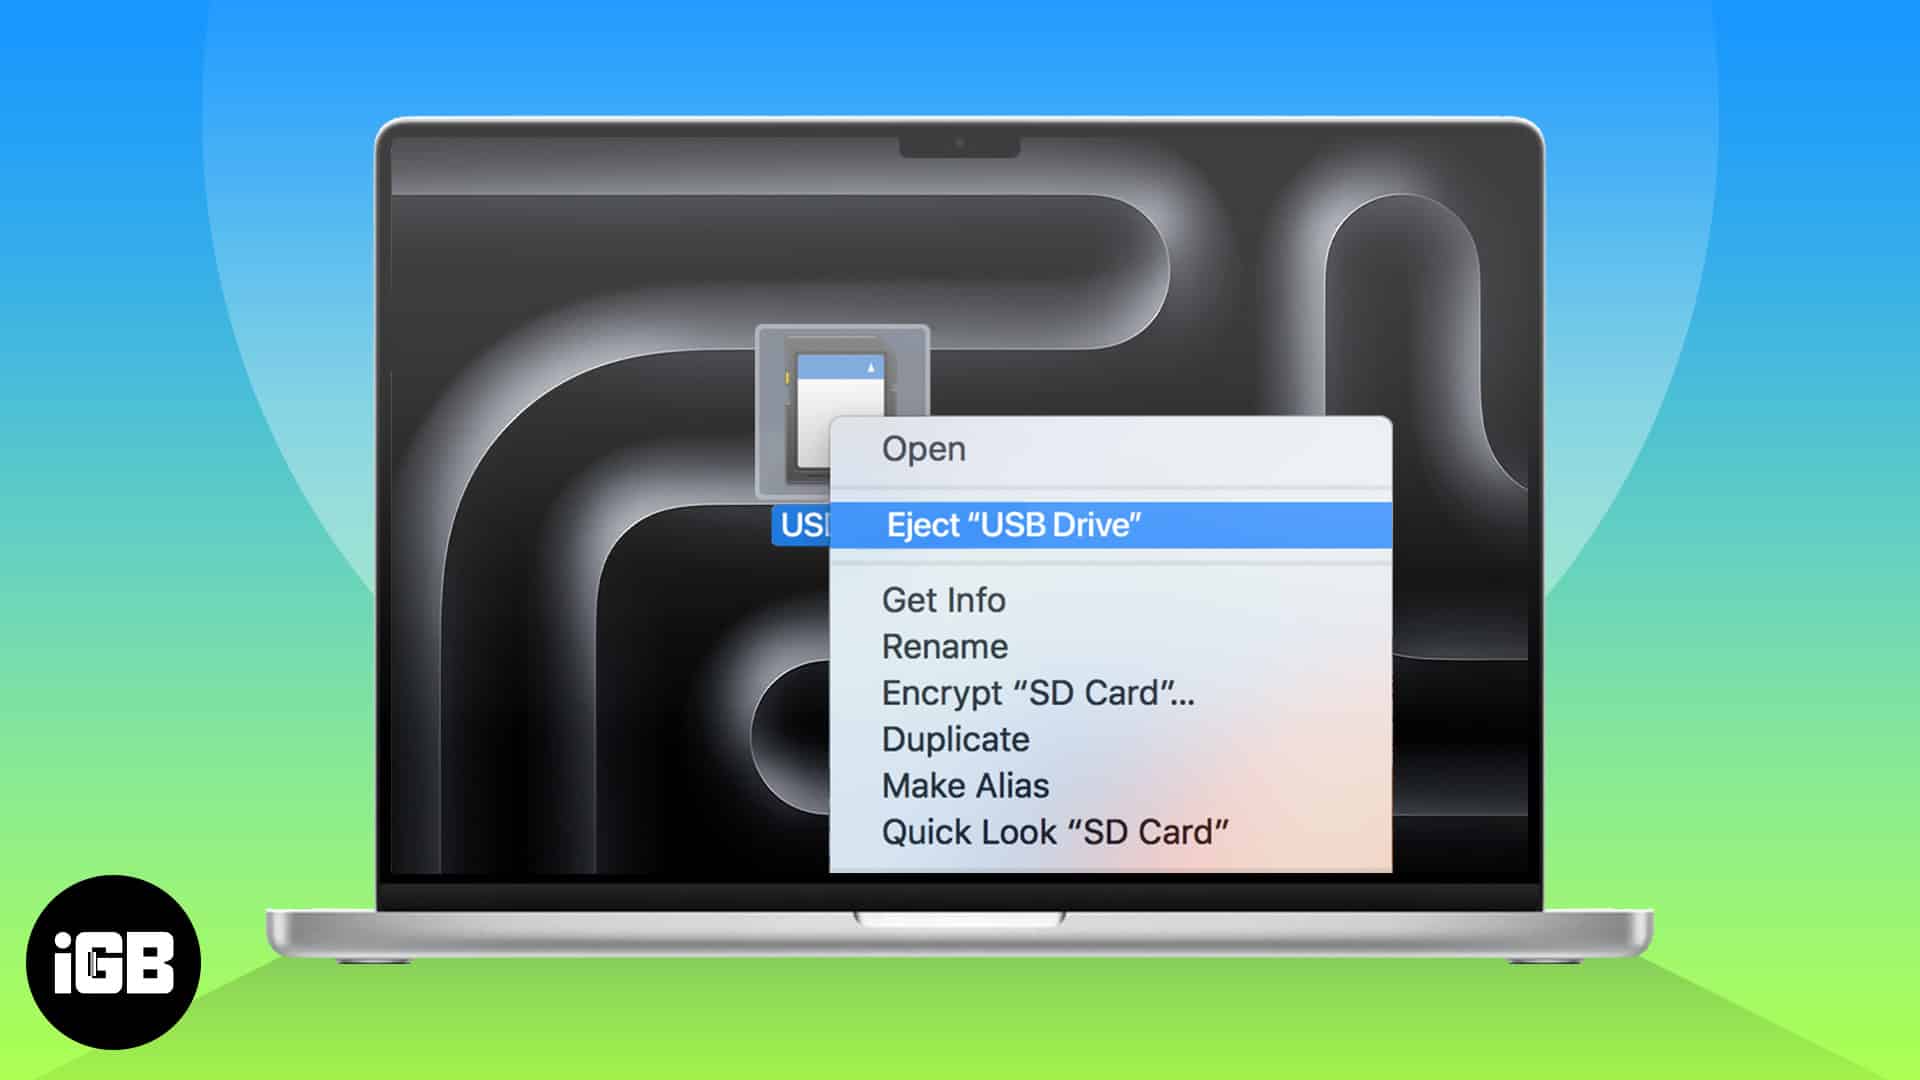
1. Eject external drive from the Desktop on Mac
- Go to the Desktop on your Mac.
- Right-click on an external USB drive or SD Card → Select Eject.

This is the easiest way to safely eject a USB from a Mac. However, it’s always good to be in the know of a few more. Keep reading.
2. Eject an external drive using keyboard shortcut on Mac
- Select an external USB drive or SD Card from the desktop.
- Press Command ⌘ + E on your keyboard to eject the drive.

3. Eject drive from File menu
- With the Finder running in the foreground, go to the Desktop on Mac.
- Click File from the Menu Bar → Select Eject.

4. Eject USB drive using Bin
- Select an external USB drive or SD Card from the desktop.
- Drag and drop the USB drive or SD Card onto the Bin on the Dock.

5. Eject external drive from the Finder sidebar
- Locate and open Finder from the Dock on your Mac.
- Click the triangle eject icon ⏏ next to the external disk on the sidebar.

6. Eject drive using Disk Utility on Mac
- Open Disk Utility on your Mac using the Launchpad or Spotlight.
You can also find the Disk Utility in Finder → Applications → Utilities. - Click the triangle eject icon ⏏ next to the external disk on the sidebar.

7. Eject external drive using the Terminal
- Open Terminal on your Mac using Launchpad or Spotlight search.
You can also open Terminal from Finder → Applications → Utilities. - Type
diskutil list external→ Hit Return on the keyboard.
This will reveal all the external drives connected to your Mac. - Note down the identifier of the external drive you want to eject.

- Type
diskutil eject (ID)→ Hit Return on the keyboard.
Replace (ID) with the identifier of the external drive to eject it.
Wrapping up...
Whether you want to safeguard your data from corruption or minimize the risk of drive failure, the methods in this guide should allow you to properly eject any external USB drives or SD cards connected to your Mac without any hassle. Let us know which method to eject external drives on Mac you found to be the most convenient in the comments section below.
Frequently Asked Questions

Written by
Ayush PatelAyush is a writer with a keen interest in consumer technology and the Apple ecosystem. He has over three years of working experience at several big-name publications, including Guiding Tech, TechPP, and MobiGyaan. Here at iGeeksBlog, he specializes in crafting how-to guides, buying guides, and editorials related to all things Apple.
View all posts →More from How-to
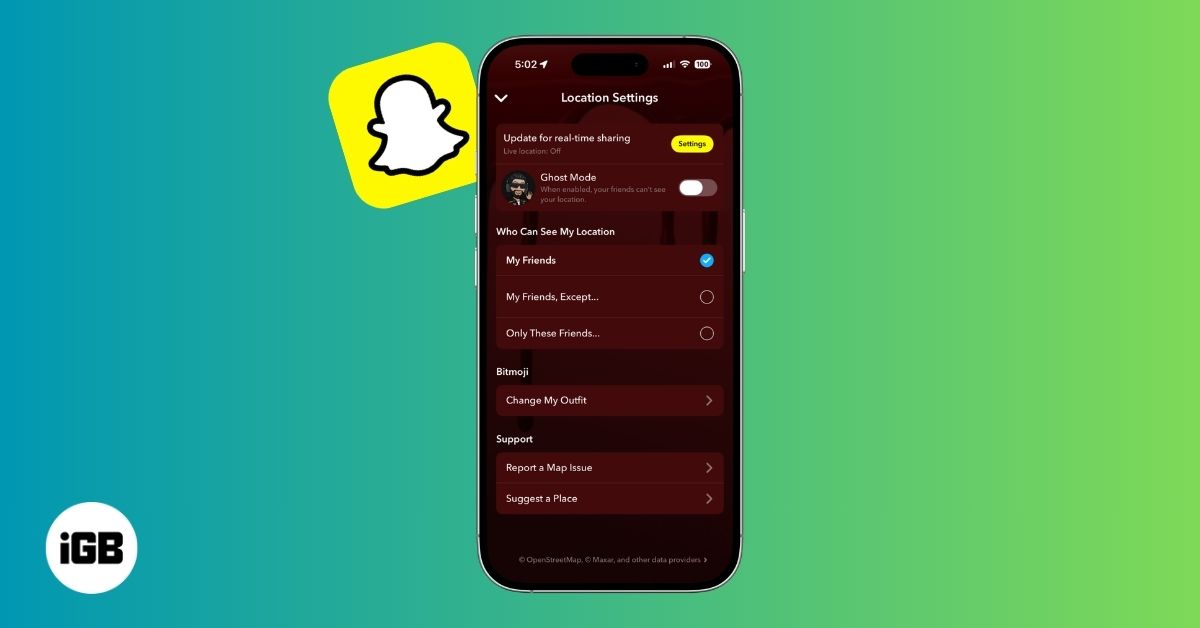
How to Turn Off Location on Snapchat (Step-by-Step Guide)
Want to stop sharing your location on Snapchat? This guide explains how Snapchat location sharing works and shows simple ways to turn off your location using Ghost Mode or phone settings. Stay in control of your privacy in just a few steps.

Snapchat Parental Controls: How to Set Up Family Center and Keep Your Teen Safe
Snapchat’s Family Center lets parents monitor their teen’s friend activity and screen time without reading private messages. Here’s how to set it up and what to expect.

How to Block and Unblock Someone on Instagram
Instagram lets you block or unblock someone in seconds. Follow these simple steps to take full control of your privacy and online peace.