High-Efficiency Image Container (HEIC) has advanced significantly after being adopted by Apple in 2017 for iOS 11. However, HEIC is not a popular format, and at times, you may feel the need to convert HEIC to JPG for universal use. Fortunately, there are several methods for converting HEIC to JPG on a Mac.
Let’s take a closer look at how we can change HEIC to JPG, and if you want to know more about HEIC files and the need to convert them, then make sure to stay tuned till the end.
How to convert HEIC to JPG using Preview app on Mac
- Launch the Preview app on your Mac.
- Open the HEIC image you wish to convert.
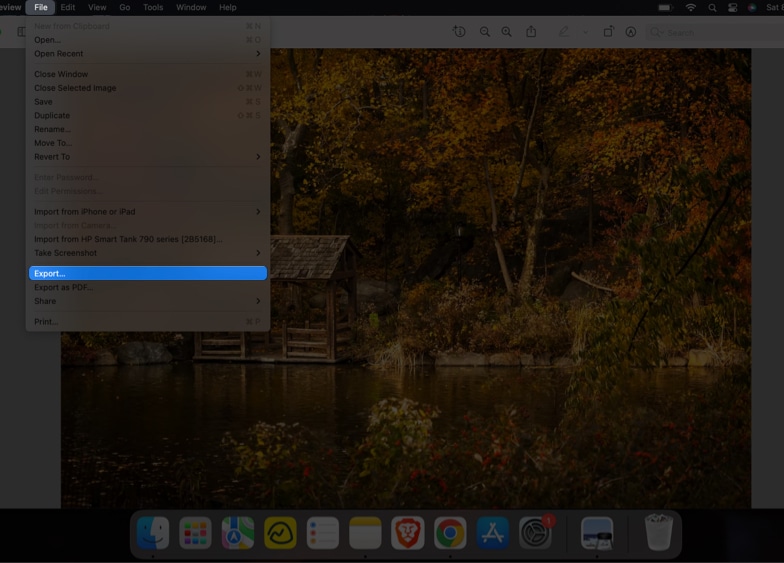
- Now, from the top left of your screen, click File → Export.
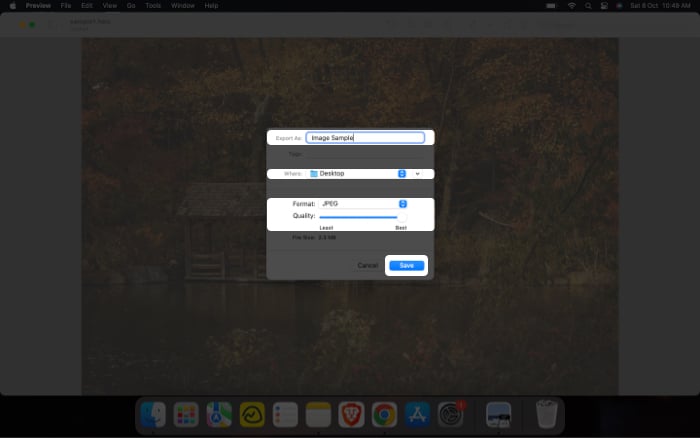
- In the Export As tab, you may rename the file.
- Next to the Where tab, select the location.
- In the Format tab, choose JPEG and adjust the Quality dragger to set the compression level.
- Click Save.
Note
- You can convert multiple HEIC images at once. Select the images, then right-click and select Open. Click Edit → Select All and follow Steps 2–7 as shown above.
Convert HEIC images to JPG using Photos app
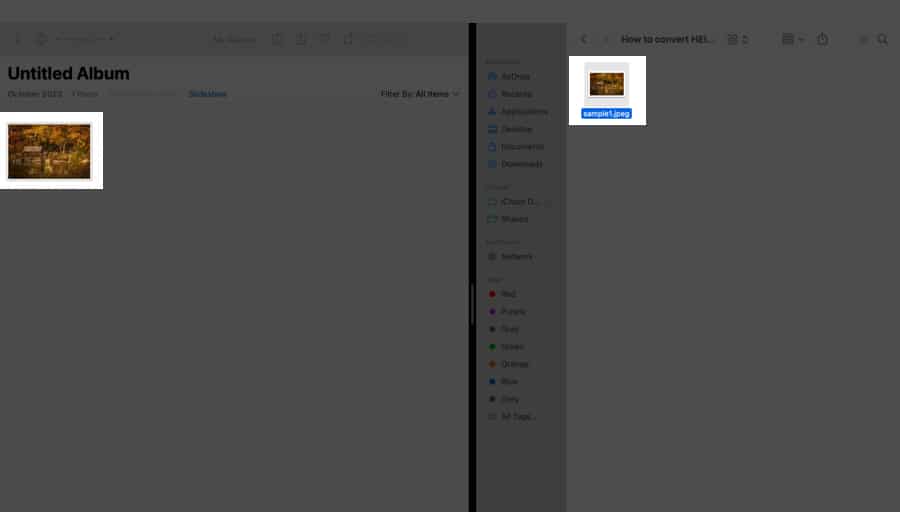
- Drag and drop your HEIC images to Photos.
- Select the images you wish to convert and drag them to Desktop or Finder window. The image will be automatically converted to JPG.
Turn HEIC to JPG on Mac using Automator
- Launch Automator on your Mac.
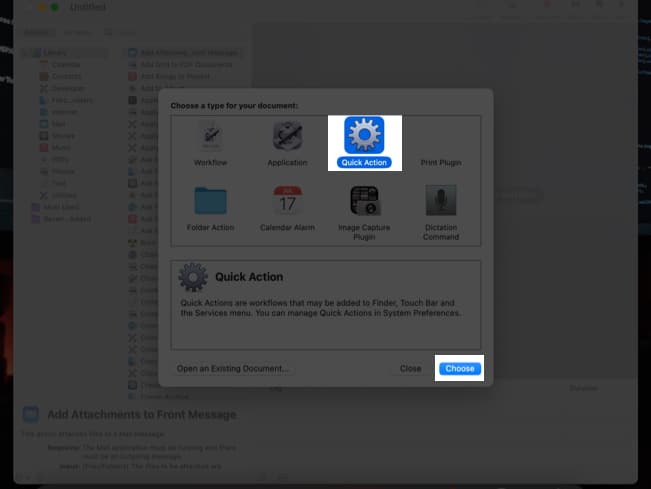
- Choose Quick Action → click Choose.
- From the left menu, double-click (or drag) Copy Finder Items.
- From the same menu, double-click Change Type of Images.
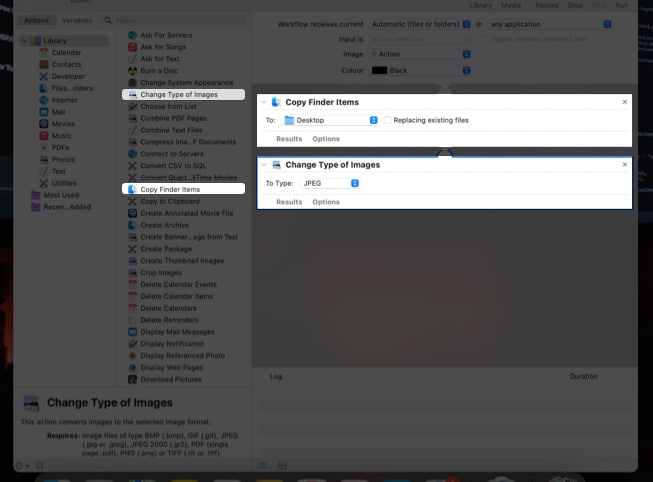
- Now, in the To Type tab, choose JPEG.
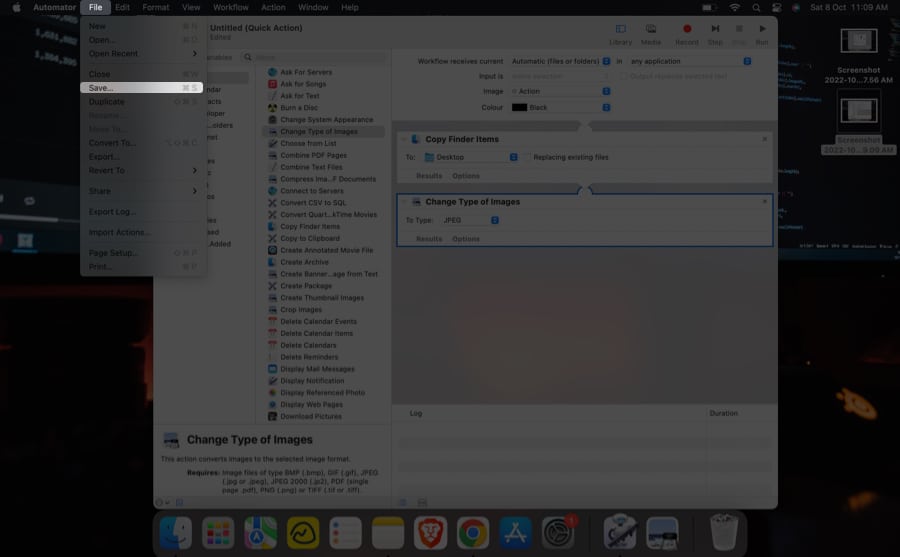
- At the top of your screen, click File → select Save.
- Rename the action in the Save quick action as tab → tap Save.
The quick-action shortcut is now ready.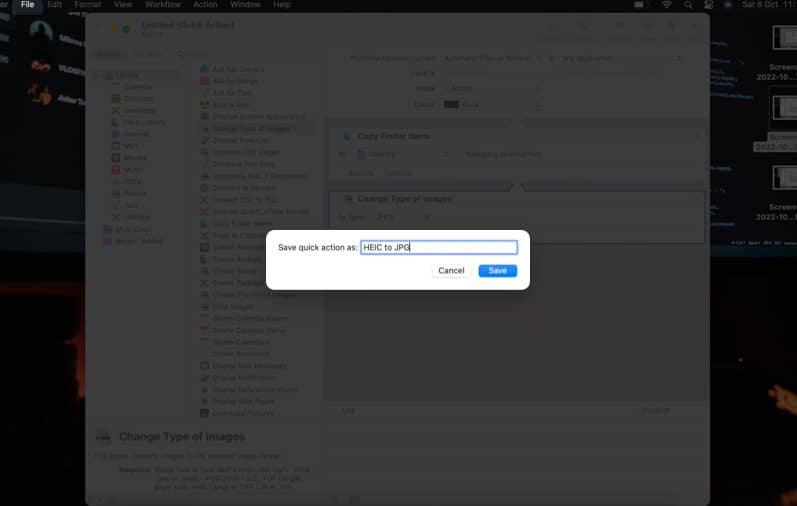
- Now, from the Photos or Finder app, right-click on the image convert and go to Quick Actions → tap the name you saved in Save quick action as.
(The converted image will appear on the desktop by default.)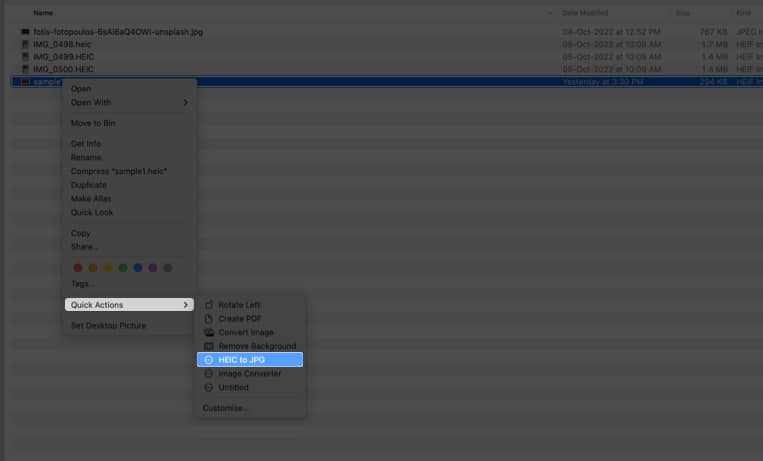
Change HEIC to JPEG on Mac using third-party apps
We used the built-in default applications Preview and Photos for the above-mentioned techniques. There are several Mac third-party applications that can easily convert HEIC to JPEG. I suggest these two apps:
These apps are available for download on the App Store and have easy-to-navigate UI.
If you don’t want to get into the trouble of storage issues, you can always use online methods for conversion.
Convert HEIC files to JPEG on Mac online
Do you dislike downloading or using new apps? You might always utilize free internet tools that allow you to convert HEIC to JPG. I suggest visiting the following two websites to convert HEIC photos to JPEG:
These were some of the simplest methods for converting your HEIC files to JPG. As promised above, I’ll now explain HEIC files and the need for their conversion.
What is an HEIC file?
A variation of the High-Efficiency Image File Format (HEIF) is called High-Efficiency Image Container (HEIC). The Moving Picture Experts Group (MPEG) introduced the High-Efficiency Image File Format (HEIF) in 2015. Apple was the first big user of the media standard on iOS 11 and macOS High Sierra.
According to MPEG, the HEIC file format consumes half as much storage space as JPG for photos of the same quality. Now, let’s investigate why you might need to convert HEIC files to JPG.
Why do you need to convert HEIC to JPG?
Though HEIC images have several benefits over JPGs, they also have a few drawbacks. One of the most prominent drawbacks is that HEIC is still not universally accepted. Many programs won’t allow you to view or edit an HEIC file, and many websites won’t accept it. That’s why you might need to convert those images to JPG.
On your iPhone, go to Settings → Camera → Formats → Most Compatible. Now, your iPhone is all set to take images in JPG format and videos in H.264 format. Read the following article to learn more about stopping iPhones from taking photos in HEIC.
Wrapping Up…
These were methods for converting HEIC images to JPEG on a macOS device. In the comments, let me know if you found this article helpful. Also, don’t forget to read the below-recommended articles.
Read More:
- How to Save Screenshots as JPG on Mac?
- How to convert WebP images to JPG or PNG on Mac
- 7 Ways to fix CoreServicesUIAgent verifying stuck on Mac
- How to set a video as a screensaver on Mac
🗣️ Our site is supported by our readers like you. When you purchase through our links, we earn a small commission. Read Disclaimer.

