MacBook camera not working? Learn how to fix it!

If your camera is not working on MacBook or is unavailable, it hinders your ability to FaceTime, connect with colleagues over video calls, and beyond. Thankfully, if it is not a hardware issue, you can most likely fix it on your own.
Let me show you 11 easy fixes and get your MacBook built-in camera working again.
Common reasons why MacBook camera is not working
Here are some of the common reasons why your Mac’s camera isn’t working properly:
- Lack of internet connection
- Software malfunction
- Changes in camera settings
- Corrupted app or settings
- Incompatibility with software updates
- Physical damage
- Wear and tear
What to do when MacBook camera not working?
Before we go to the troubleshooting tips, it’s essential to understand that Mac’s built-in FaceTime or FaceTime HD camera automatically turns on whenever you open an app that can use it. A green indicator light will glow beside the camera to indicate that your Mac is actively using your camera.
But each app also has its own dedicated settings that control the camera. Just open the app, go to the menu bar, select Preferences, then look for Video or Camera settings. Now that we have taken care of the basics, let’s go through some quick fixes for Mac camera not working.
1. Force quit conflicting apps
If you are facing issues with the MacBook camera on apps like FaceTime, Skype, Photo Booth, Zoom, etc., force quit these apps.
Note:
This will close the apps without saving any pending work. So, save your work before force quitting apps.
- To resolve this, check any open app in the Dock that you aren’t actively using. Control-click the app and select Quit.
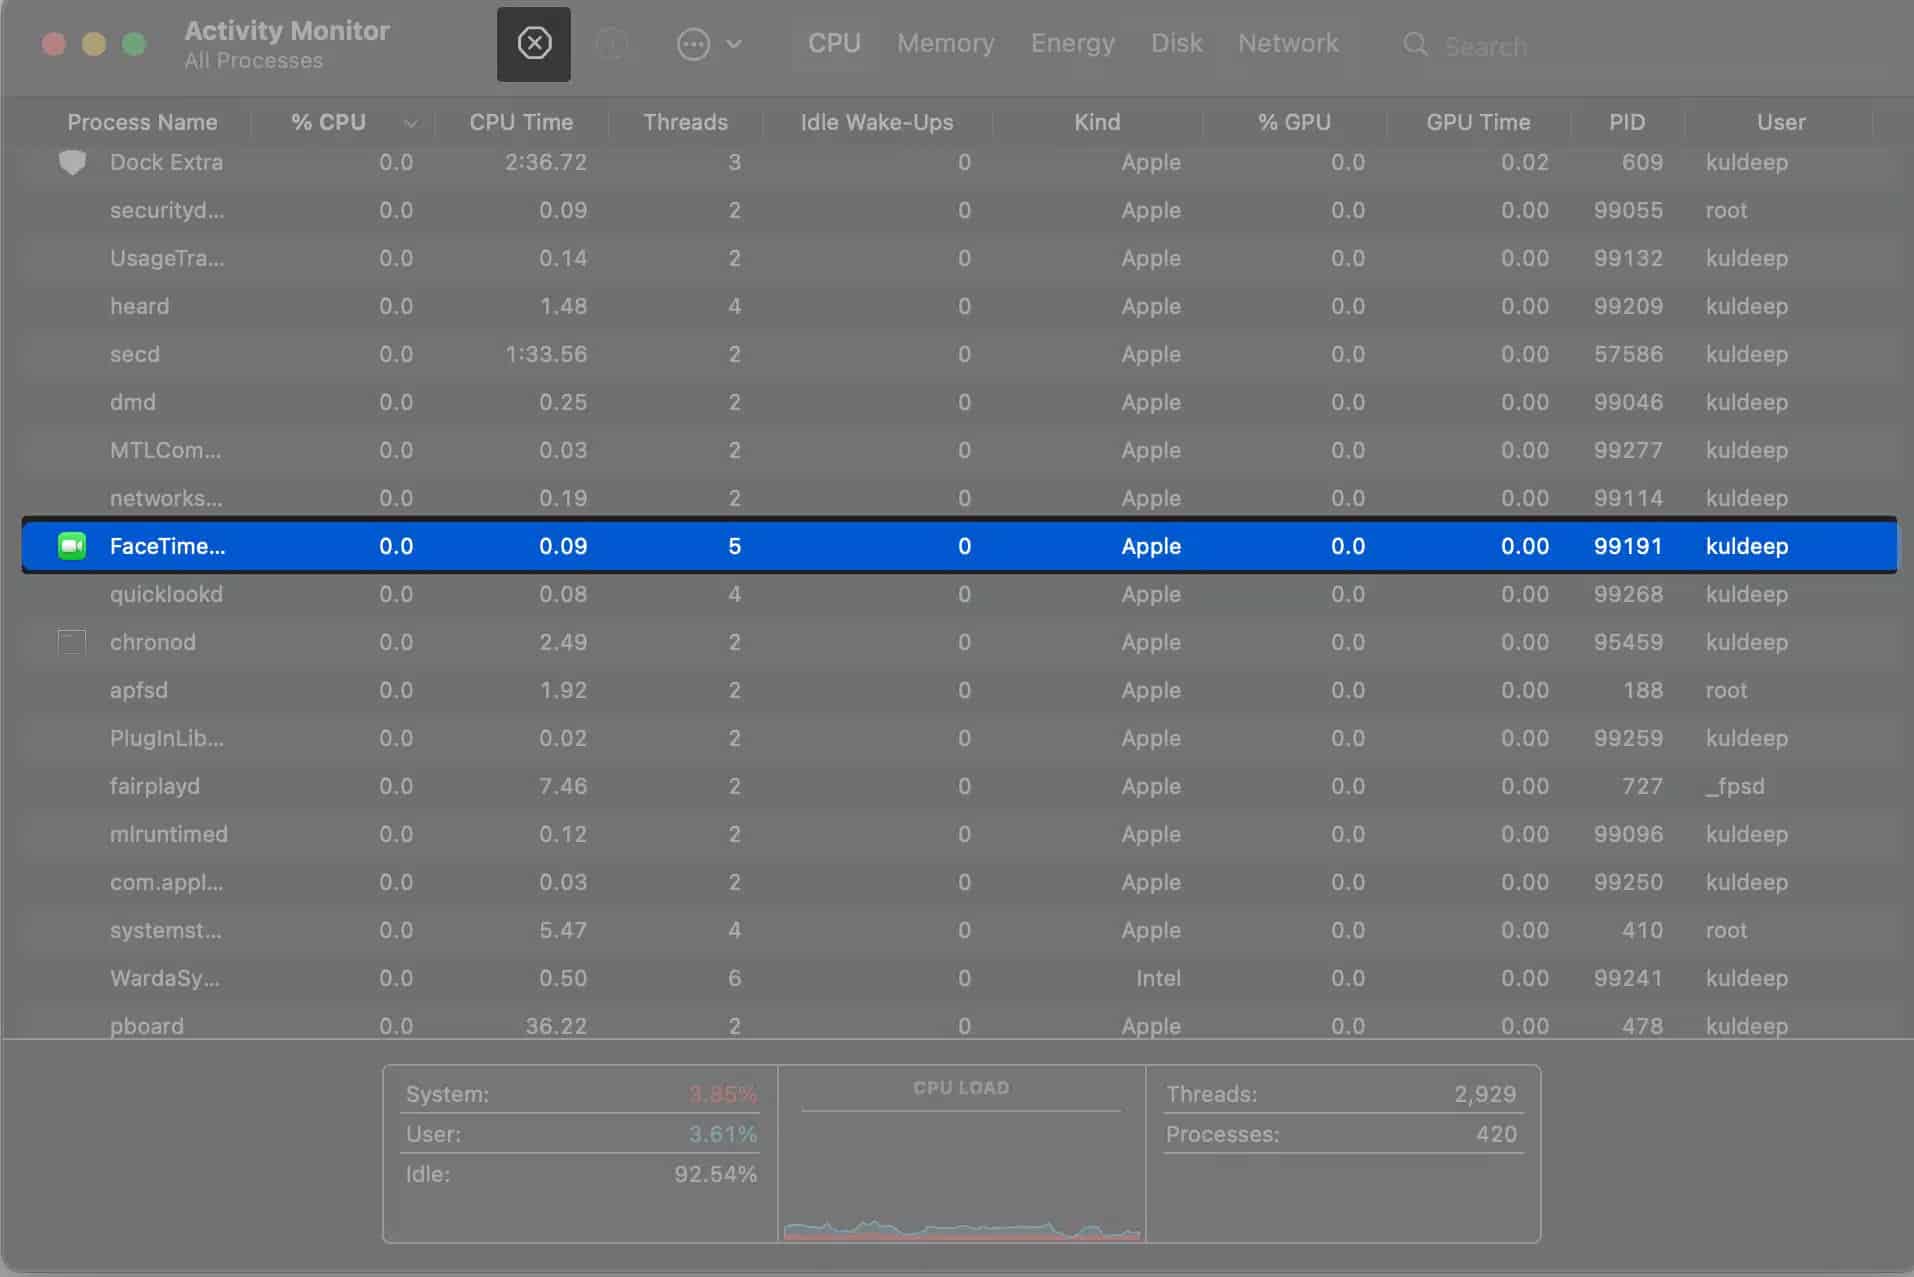
- If the app remains in the Dock, open Finder → Applications → Utilities → Activity Monitor. Select the app and click the X at the top → select Force Quit.
2. Restart you Mac
Click the Apple logo at the top right → choose Restart. Now, try using your Mac’s camera. It should work.
Tip:
If a simple restart does not fix the problem, try to start your Mac in Safe Mode and see if the camera works.
Additionally, you may also open Terminal and run this command to kill camera assistants.
- Copy and paste the following command in Terminal –
sudo killall VDCAssistant;sudo killall AppleCameraAssistant - Press the enter key.
- Next, type your Mac’s password.
3. Update your OS
Make sure that your Mac is running the latest OS. Software updates fix bugs and glitches that may prevent built-in apps and features from working desirably.
4. Check Screen Time settings
If you’re using Screen Time, it’s possible that the feature is either restricting you from using the camera or the app you want to use doesn’t have remaining time available. To check:
- Go to Apple menu → System Settings.

- Select Screen Time from the sidebar → Tap Content & Privacy

- Select App Restrictions → Toggle on Allow Camera → Click Done.
- Go to App Limits.
Make sure the app you want to use camera with is turned off or not selected to prevent Screen Time from restricting you from using the app.
5. Allow Camera Access
As an added security feature that came with macOS Mojave, you can now choose which specific apps can access your Mac’s built-in camera. It’s possible that you can’t access the camera on your Mac because it doesn’t have access.
To give the app access:
- Choose Apple menu → System Settings.
- Select Privacy & Security on the sidebar → Camera.

- You’ll see a list of all the apps you have that need access to the camera. Toggle all the apps you want to use your camera in.

- You may be prompted to quit and reopen the apps to be able to use the camera in them.
Choose the right camera in the app’s settings
If you have more than one camera connected to your Mac, head to Preferences to see the app’s Camera settings and select Mac’s built-in camera.
Double-check: Use another app that needs the camera
Sometimes, the issue isn’t your Mac’s camera but an app. To check, open a different app that utilizes the camera, such as a video conferencing app, and see if everything works. If it does, then the issue is with the app and not on your camera.
6. Check your antivirus
If you installed an antivirus on your Mac, check its settings and ensure the software isn’t restricting apps from accessing your camera.
7. Create a new user account
Creating a new user account may help you gain access to your Mac’s camera.
To do this:
- Open the Apple menu → System Settings.
- Select Users & Groups → Add Account.
You might be prompted to enter your password.
- Be sure to choose Administrator as a type of user.
- Enter all the necessary details, including the Full Name, Account Name, and password.

- Select Create User.
Check if you can access your MacBook’s camera using your new administrator account.
8. Check for hardware problems
Here are different ways to see if there’s a hardware problem and what you can do with it.
Check the camera indicator light
Open an app that uses the camera, such as FaceTime. Check if the camera indicator light glows on your Mac. If not, it may be a hardware issue.
See if Mac detects its camera
For your MacBook to use its camera, it’s crucial that it can detect it. To check:
- Go to the Apple menu → System Settings.
- Select General in the sidebar → About.
- Click System Report at the bottom.

- Under Hardware, select Camera. See if you see FaceTime HD Camera and its Model ID and Unique ID.

If you don’t see FaceTime HD Camera listed under Camera or its details, then your Mac may not be detecting its camera.
Reset your Mac camera
You may try resetting your Mac’s Camera in Terminal using the VDCAssistant Command. VDCAssistant is a process that runs camera controls. Sometimes, this process continues to work despite already closing the app that uses the camera. This may prevent any other apps from using the camera on your Mac. To reset it:
- Launch Terminal.
- Type the following in the Terminal window: sudo killall VDCAssistant;sudo killall AppleCameraAssistant

- You may be prompted to enter your administrative password to run the command.
9. Run Apple Diagnostics
Running Apple Diagnostics can also help you identify which hardware component is the culprit behind the camera issue. Once you run Apple Diagnostics, you’ll see a report on your screen. If you see error codes beginning with N, this confirms that you have a problem with your MacBook’s camera.
You’d better go to the nearest Genius Bar or Apple Store for further help.
External webcam not working on Mac
If you’re not using your Mac’s built-in cam, but are encountering problems with your external webcam, here are some potential solutions to help it work again:
- Make sure your cable and port are clean. Dust and grime can interfere with the connection.
- Try plugging the camera into a different port.
- Check for hardware compatibility.
- Update the webcam’s software.
Wrapping up…
Did any of the above solutions help you restore your MacBook camera’s function? If so, share your experience below!
Read more:

Written by
Nidhi BohraA tech-aficionado whose superpower lies in blabbering interminably about new technologies. After 4+ years and 4500+ content pieces that helped diverse companies grow, I followed my passion and made iGeeks Media my home. When not gushing over technology, you will find me immersed in a fictional world, either reading or creating one.
View all posts →More from How-to

Snapchat Parental Controls: How to Set Up Family Center and Keep Your Teen Safe
Snapchat’s Family Center lets parents monitor their teen’s friend activity and screen time without reading private messages. Here’s how to set it up and what to expect.

How to Block and Unblock Someone on Instagram
Instagram lets you block or unblock someone in seconds. Follow these simple steps to take full control of your privacy and online peace.
Apple Watch Not Responding? 8 Fixes That Actually Work
Is your Apple Watch unresponsive or stuck on a black screen? Here are 8 proven fixes to help you unfreeze it and get it working again quickly.