- Mac microphone issues often stem from permissions, wrong input, or software conflicts, but hardware problems like debris or accessory interference can also cause failures.
- Quickly test your mic with Siri, QuickTime, or Voice Memos, which helps confirm whether the microphone is detecting sound properly.
- Check input settings in System Settings > Sound, making sure the correct device is selected and the input volume is set high enough.
- Revisit Privacy & Security settings to grant microphone access, since apps need explicit permission before they can record audio.
- Restart your Mac or reset NVRAM/PRAM if needed, and try Safe Mode to clear bugs or conflicts that may block microphone function.
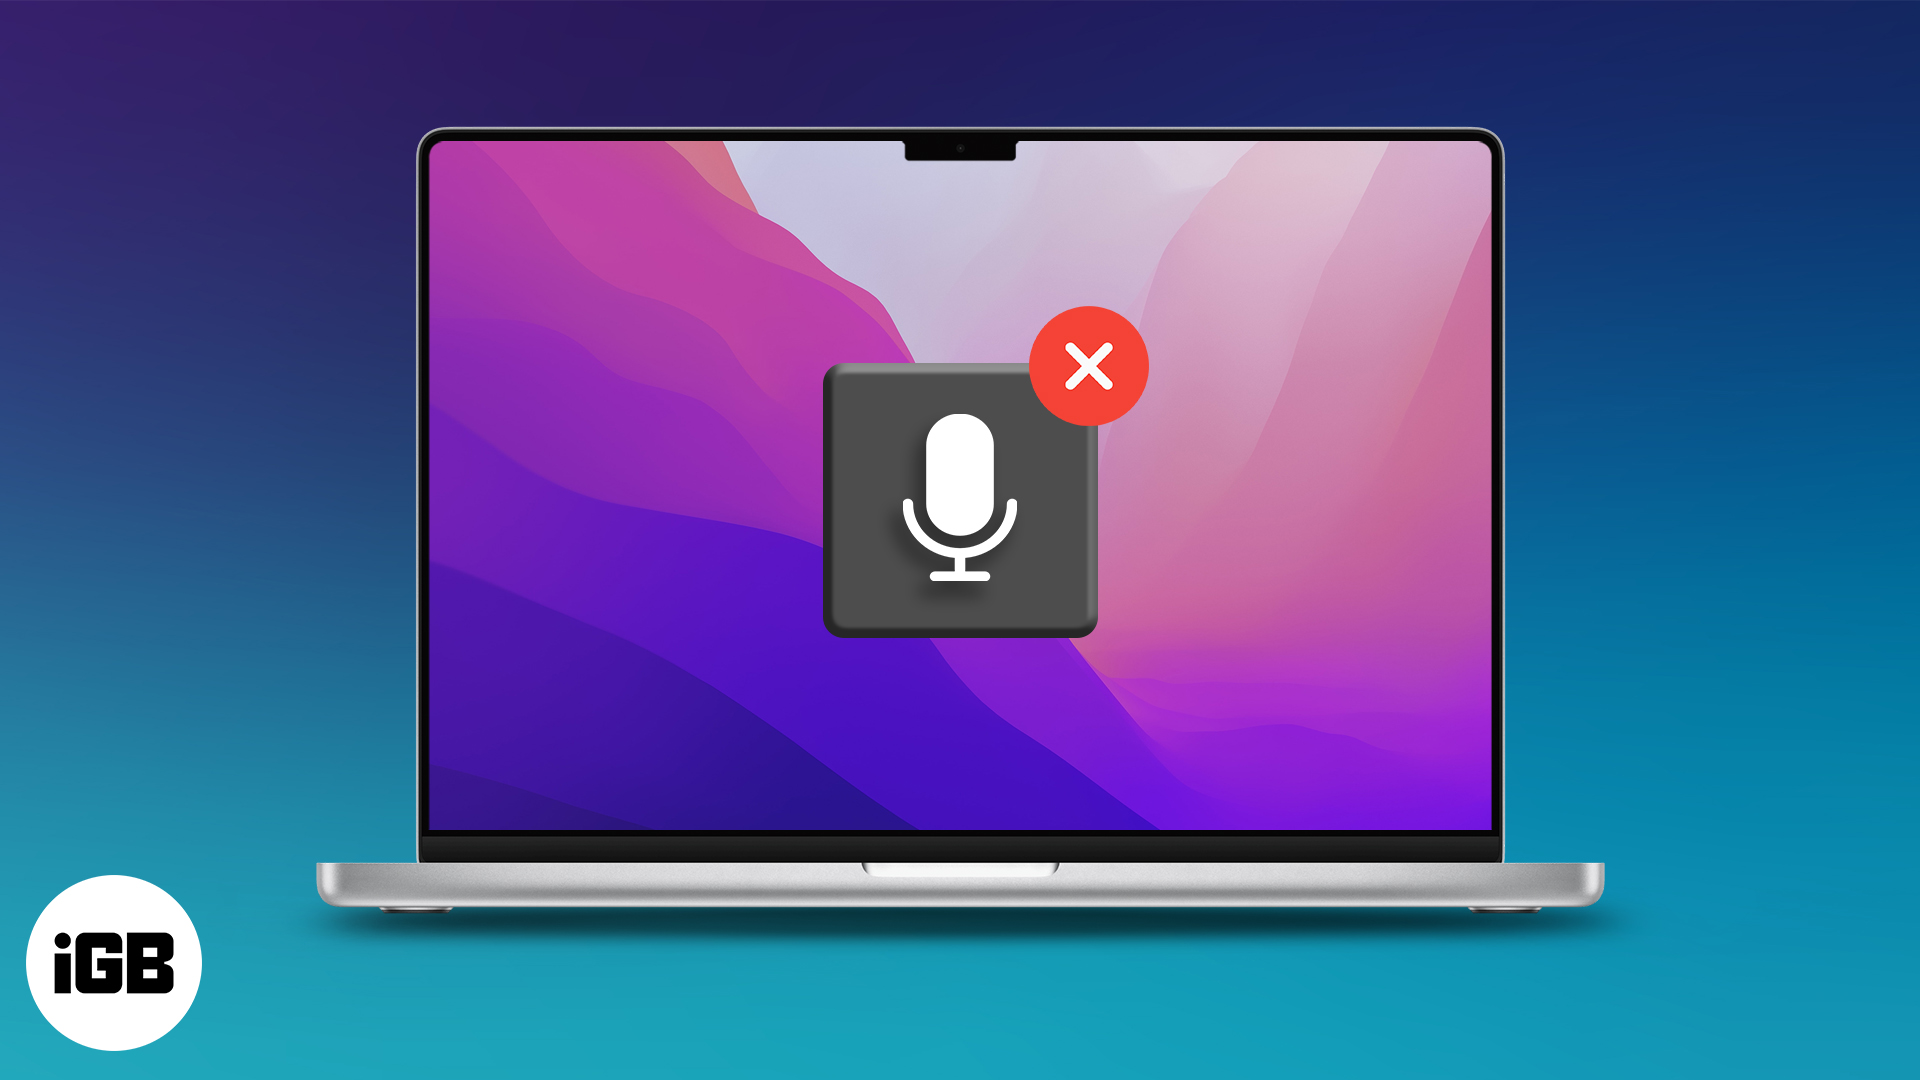
You’re about to join a Zoom call, send a voice message, or ask Siri something, but your Mac isn’t picking up a single word. The microphone just isn’t working. Don’t panic. It’s a common issue, and in most cases, the fix is simple. Keep reading to learn what causes the microphone on a Mac to stop working and the solutions you can try to fix it.
Common Reasons Your Mac Microphone Fails
Before jumping into solutions, it helps to know what might be causing the issue. Here are some of the most common reasons your Mac’s microphone stops working:
- Microphone permissions are disabled: macOS might be blocking apps from using your microphone.
- Wrong input source selected: Your Mac may be trying to use a different microphone.
- Low input volume: If the input volume is too low, it might seem like the microphone isn’t working.
- Dust or debris blockage: Physical debris near the microphone holes can affect sound pickup.
- External microphone conflicts: AirPods or USB mics might override the internal microphone.
- Temporary software glitches or macOS bugs: Minor issues that a restart or update can fix.
- Malware or background apps: Some apps can interfere with microphone functionality.
How to Test Your Microphone on a Mac
Now that you’re aware of all the possible causes, let’s verify if it’s your microphone that’s actually causing the problem. You can use built-in tools to do this quickly, as shown below:
- Ask Siri a question: Toggle on Siri and ask something like, “What’s the weather?” If Siri can hear and respond, your microphone is working fine.
- QuickTime Player: Open QuickTime and go to File > New Audio Recording, then speak and watch the input levels.
- Voice Memos: Open the Voice Memos app, record a short message, and play it back.
If none of these methods detect your voice, move on to the fixes below.
How to Fix the Microphone on Your Mac
Let’s go through every possible fix, starting from the simplest, to fix the microphone on your Mac. These steps work for most MacBook Air, MacBook Pro, and even iMac models.
1. Adjust the Audio Input Settings
Your Mac might be using the correct microphone, but the input volume may be too low to pick up your voice. This is often the most overlooked reason, but you can fix it like this:
- Open System Settings.
- Select Sound, scroll down to the Output & Input section and go to the Input tab.
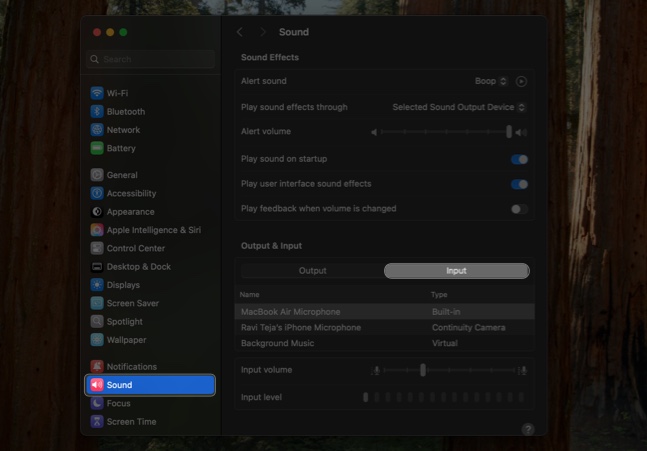
- Speak something into your Mac’s microphone. If the Input Level bars move, the microphone is picking up sound.
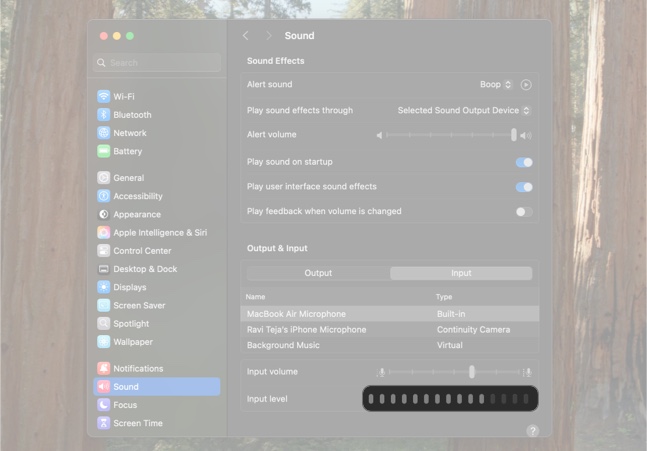
- If the bars don’t move, slide the Input Volume slider to the right. This makes the microphone more sensitive and helps it capture quieter sounds.
Use this step first to confirm your microphone is even being recognized.
2. Choose the Right Microphone in Settings
Your Mac can automatically switch to an external microphone (like AirPods or USB mics), which may not be the one you intend to use. This step helps you make sure the right microphone is selected:
- Go to System Settings > Sound and select the Input tab under the Output & Input section.
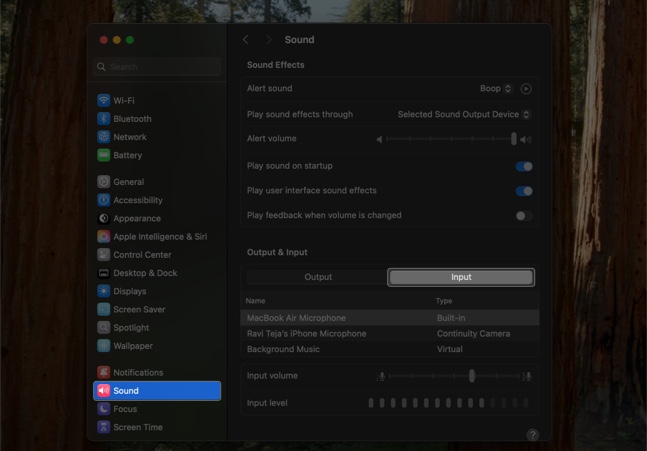
- You’ll see a list of all active microphones. Select MacBook Microphone if you want to use your Mac’s built-in microphone.
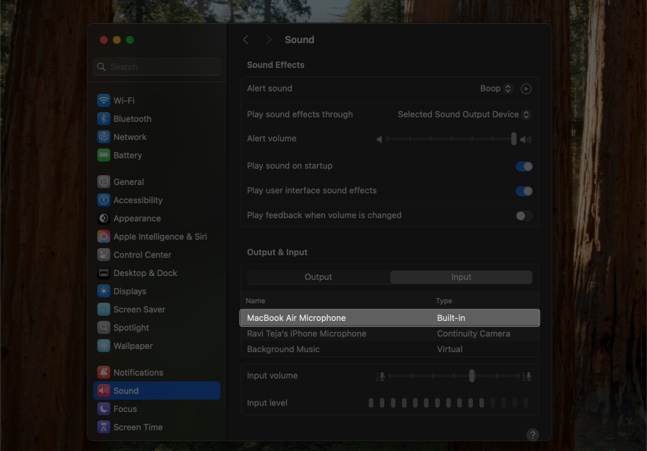
- You can also unplug or disconnect any external devices to switch back to the built-in microphone.
3. Allow Apps to Use Your Microphone
macOS blocks apps from accessing your microphone unless you grant the permissions manually. If your microphone works in one app but not another, this is likely the issue. You can check the microphone permission for an app and grant it (if it doesn’t have it) using these steps:
- Head to System Settings > Privacy & Security > Microphone.
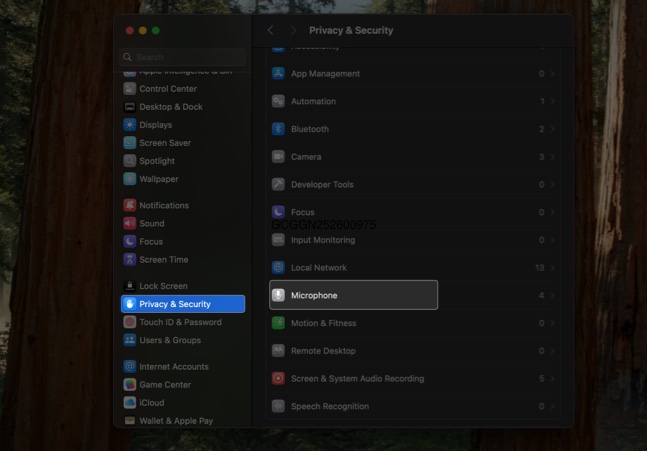
- You’ll see a list of apps requesting microphone access. Make sure the app you’re using (like Zoom, Skype, or Discord) is toggled on.
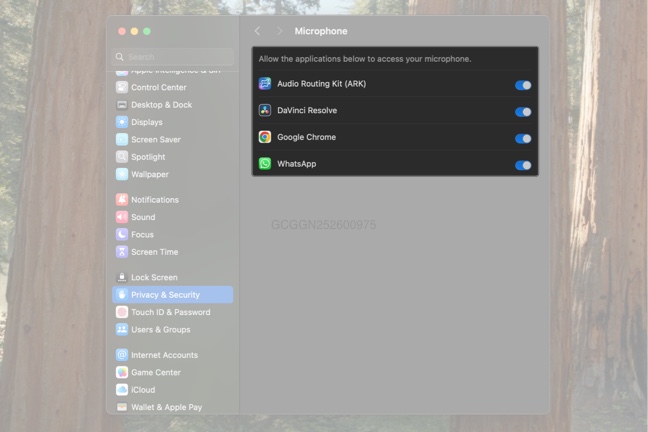
- If the app is already open, you may see a prompt to Quit & Reopen. Do that so the new permissions take effect.
This step is essential when the microphone works system-wide but not within specific apps.
4. Check the App’s Internal Audio Settings
Many apps have their own audio settings, and they may be set to the wrong microphone, even if the system settings are correct. Follow these steps to verify and fix them:
- Open the app where your microphone isn’t working (e.g. Zoom, Skype).
- Go to Settings or Preferences > Audio or Microphone settings from the app menu.
- Choose the correct microphone from the drop-down list (e.g. Internal Microphone).
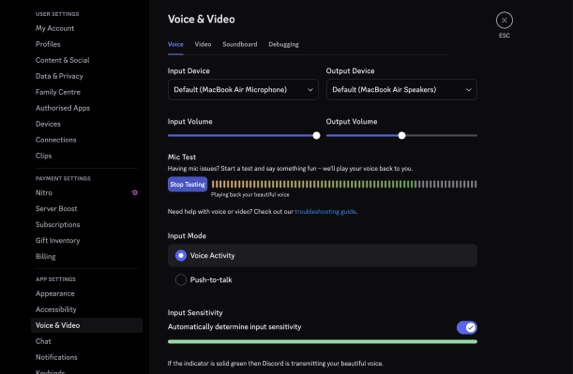
- Speak and use the app’s test tool, if available, to check if your voice is detected.
Use this step when your microphone works elsewhere, but not in a specific app.
5. Restart Your Mac (Yes, Really)
Sometimes, your microphone might stop working due to a temporary software glitch or an app that’s hogging system resources. Restarting your Mac often fixes such problems.
- Click the Apple logo in the top-left corner and select Restart.
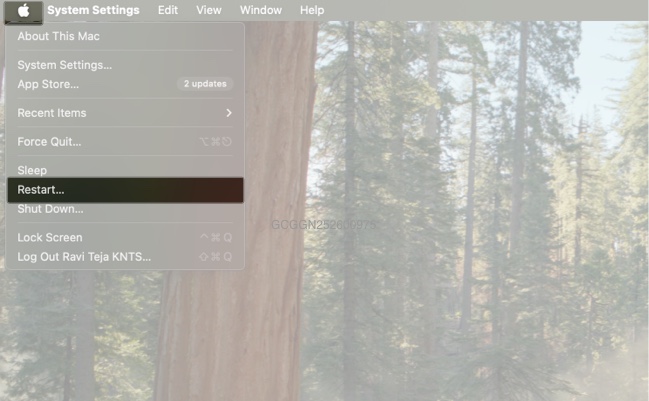
- Once your Mac restarts, open the app and try using your microphone again.
If restarting doesn’t help, try putting it into Safe Mode, which loads only essential system files, helping identify if a third-party app is causing the issue. To enter Safe Mode on an Intel Mac, restart your Mac and immediately press and hold the Shift key until you see the login window. On Apple Silicon Macs, shut down your Mac, then press and hold the power button until you see Loading Startup Options on the screen. Select your startup disk, hold Shift, then click Continue in Safe Mode.
6. Turn on Dictation (Weird Fix That Works)
It might sound unrelated, but enabling the Dictation feature forces your Mac to download system files that support speech input. This can sometimes fix underlying issues with microphone drivers.
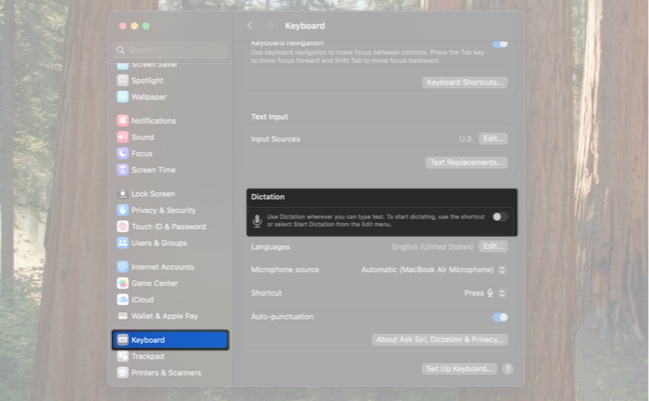
- Go to System Settings > Keyboard > Dictation.
- Toggle Dictation on and click Enable when prompted.
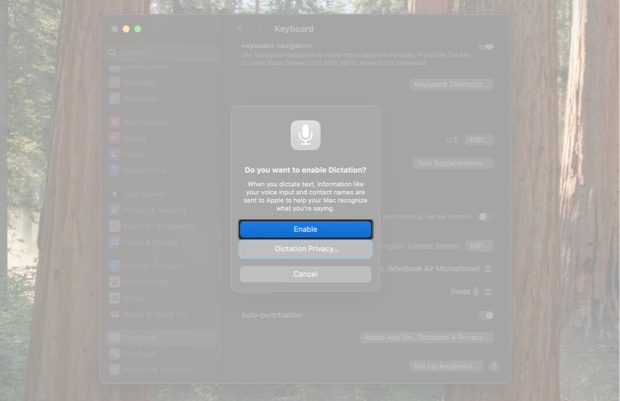
- Wait a few moments while the necessary files are installed, then test your microphone.
If none of the obvious fixes have worked, try this. It can quietly resolve missing or broken microphone support files.
7. Reset NVRAM/PRAM (Intel Macs Only)
If you have an Intel-based Mac and your microphone still isn’t working after trying all the earlier steps, resetting NVRAM (Non-Volatile Random Access Memory) might help. NVRAM stores small bits of system settings like speaker volume, display resolution, startup disk selection, and more. If these settings get corrupted, your microphone might stop responding properly.
- Shut down your Mac completely.
- Press the power button, and immediately hold down Command+Option+P+R before the screen turns on.
- Keep holding the keys for about 20 seconds until you hear the startup sound twice or see the Apple logo appear and disappear twice.
This resets system preferences stored in memory to default, which often fixes microphone-related issues without affecting your data. For more details, check out our detailed guide on resetting NVRAM/PRAM on a Mac.
Note:
You don’t need to perform this solution on Apple Silicon Macs.
Mic Still Isn’t Working? Do This
In most cases, your Mac’s microphone might not be working due to a bad setting, app permission, or a small glitch, and the above solutions should help fix the issue on your Mac.
However, if none of the solutions work, your microphone might have been broken. For the time being, you can try using external headphones with a microphone or AirPods. You may also use your iPhone as a microphone for your Mac. Alternatively, you can reach out to Apple—contact Apple Support or visit an Apple Store—to get your Mac’s microphone checked.
Related articles worth reading:


