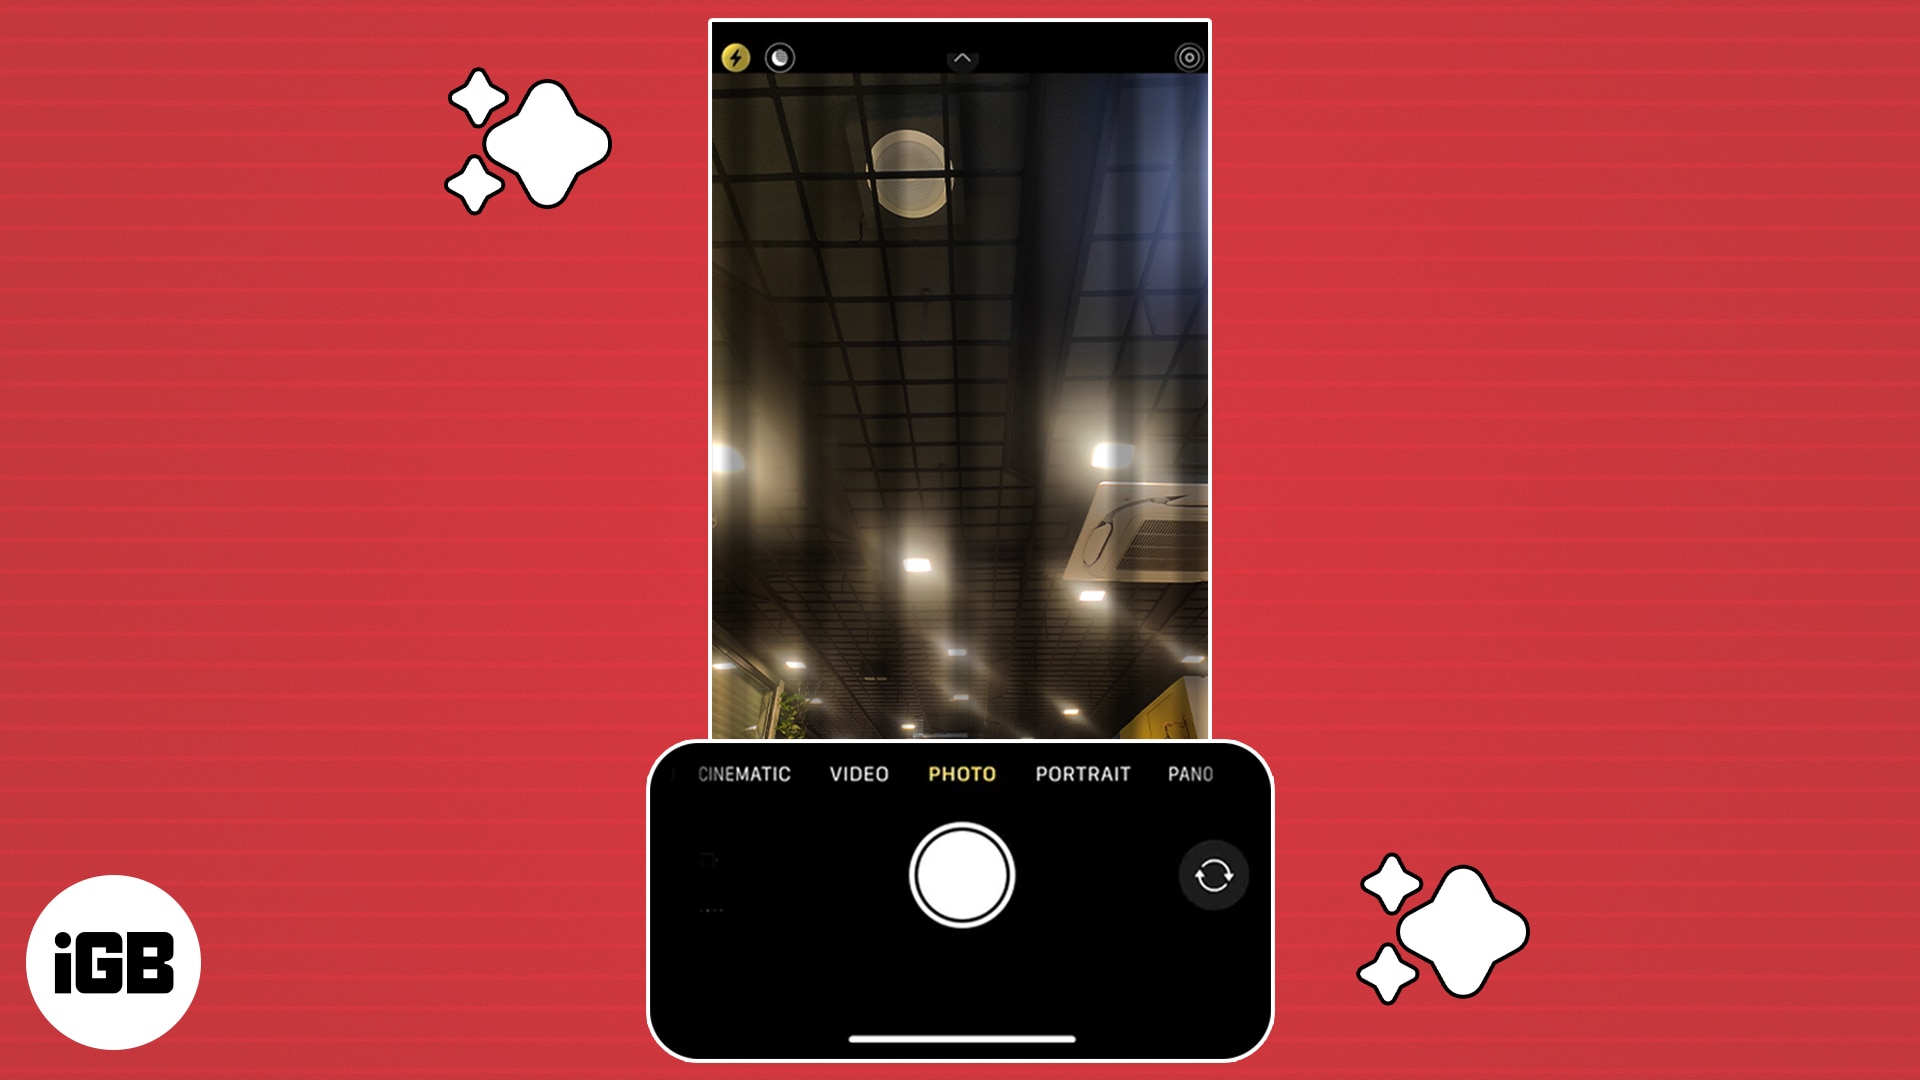
If your iPhone’s camera is blinking, you’re not alone. Unfortunately, it’s a fairly common problem reported by many Apple users. It can be frustrating when your iPhone hinders your ability to capture clear, focused photos and videos.
But don’t worry; we’re here to help. In this article, we will explore potential solutions to figure out why your iPhone camera is blinking so you can get back to capturing flawless photos and videos.
Why does my iPhone camera keep blinking?
There are a few main reasons that could cause a blinking iPhone camera. Namely, settings that need to be enabled or disabled, a pending iOS update, a dirty camera lens, lighting problems, or hardware issues.
How to fix iPhone camera blinking
Luckily, we have the solutions you need. If nothing on this list works for you, there’s always Apple Support. But before then, let’s get into the fixes.
1. Disable Macro mode
Macro mode on the iPhone 13 Pro, iPhone 14 Pro, and iPhone 15 Pro models enables itself automatically when the subject of your photo is too close to the camera. This helps you capture a crisp picture with more details. But sometimes, your iPhone struggles to achieve accurate focus and repeatedly changes between its Wide and ultra-wide lenses, causing the camera to flicker.
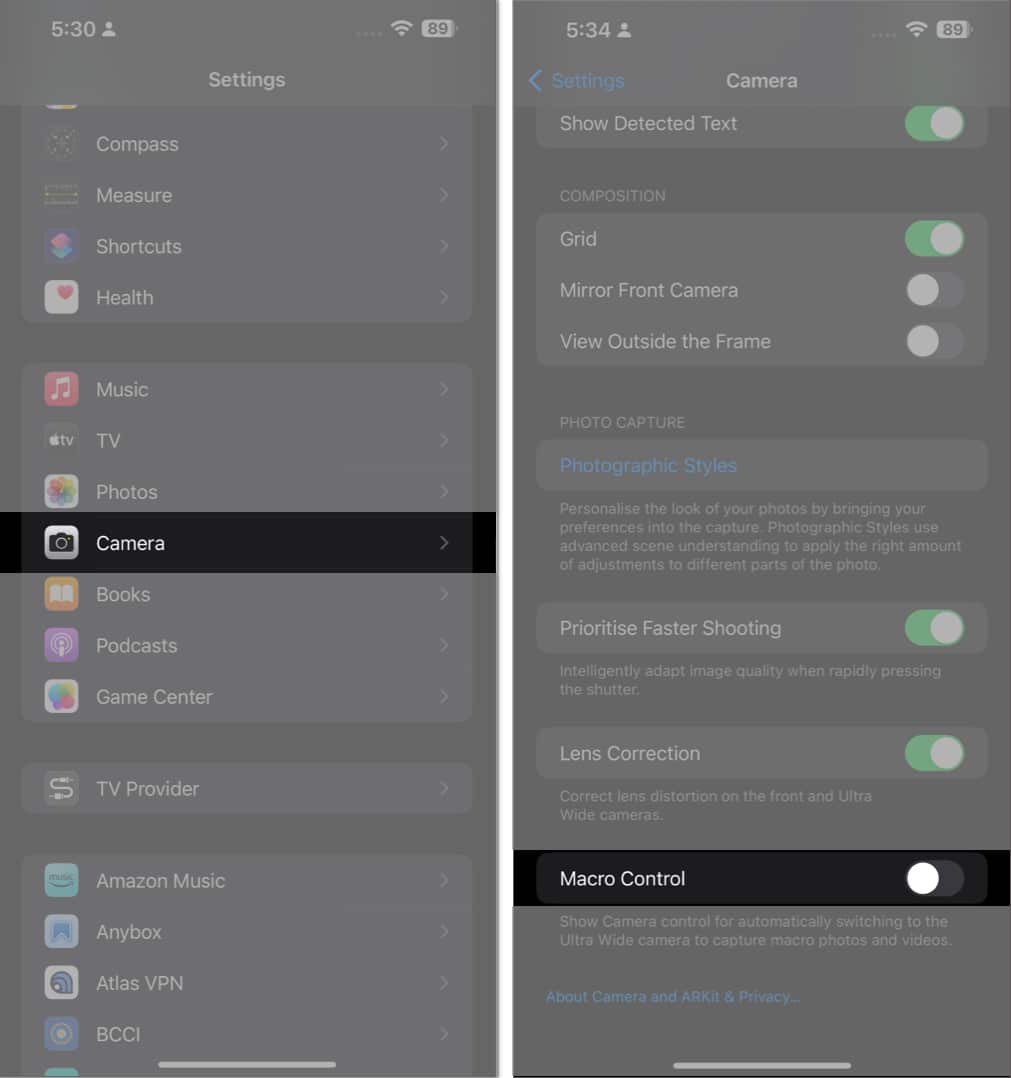
If your iPhone camera keeps blinking, try turning off the automatic Macro mode feature:
- Open the Settings app → tap Camera.
- Toggle off Macro Control.
You can also disable it while taking photos by tapping the flower symbol. Changing the zoom level to .5x may help resolve the problem as well.
If that doesn’t work and your iPhone’s camera is still blinking, try cleaning off your camera’s lenses.
2. Clean your lens
If dust and debris accumulate on your iPhone’s camera lenses, they may blink when you try to capture photos. To clean your iPhone camera lens, use a lint-free microfiber cloth and wipe it gently.
You can use a microfiber cloth included with an eyeglasses kit or any microfiber cloth you have on hand as long as it’s soft and clean. If you notice any residue stuck to the cameras, Apple’s how to clean your Apple Products page recommends using “a 70 percent isopropyl alcohol wipe, 75 percent ethyl alcohol wipe, or Clorox Disinfecting Wipes” to gently wipe off the affected areas.
Still blinking? Let’s head back into the Settings app and take a look at camera lock.
3. Lock the camera
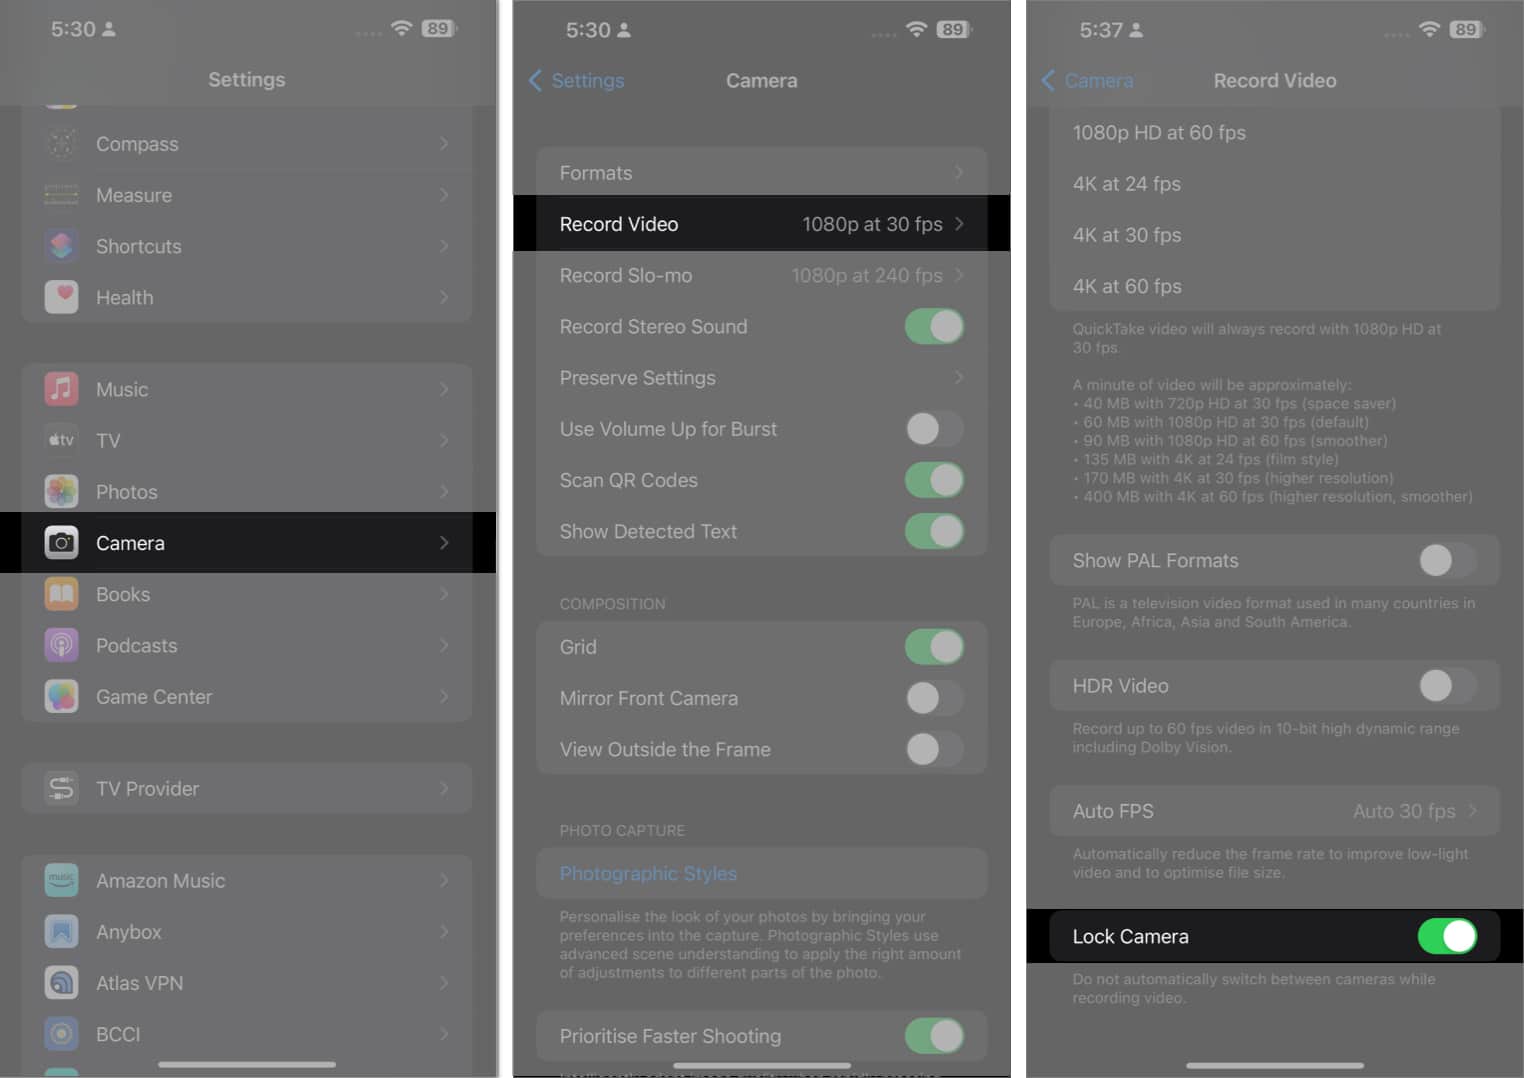
If you face camera flickering issues while recording a video, it might be because your iPhone is unable to decide on the best lens to capture the video. To prevent camera switching while recording, you have to lock your camera. Here’s how:
- Go to Settings → Camera → Record Video.
- Turn on Lock Camera.
Note: You can also set the recording resolution to 1080p at 60FPS for a smoother video.
If your iPhone camera keeps blinking after locking the camera, the lighting may be at fault rather than the cameras themselves.
4. Balance the exposure
It’s also possible that your iPhone camera doesn’t cause the flickering or blinking, but the room lights are at fault. LED or fluorescent lighting might be interfering with the shutter rate.
In low-light settings, your iPhone camera attempts to maintain automatic exposure and works to achieve a proper balance. So, you may see flashing or blinking while it attempts to find stable lighting values.
Our guide on changing the exposure is a potential fix for a flickering iPhone camera. Here’s a quick step-by-step snippet:
- Launch the Camera app.
- Select Photo mode → Tap the up arrow at the top.
- Tap the exposure icon (±) → Adjust the slider.
If the exposure wasn’t the problem, take a look at PAL formatting.
5. Shoot in PAL format
When shooting in 30 or 60 frames per second under artificial light, your iPhone might face flickering or blinking issues. Fortunately, Apple has come up with a solution to fix this issue: PAL format.
With the PAL format, you can prevent flickering issues in your iPhone camera. All you have to do is record your iPhone videos in the PAL format.
- Scroll down and tap Camera.
- Tap Record Video.
- Enable Show PAL Formats.
- Tap to select 1080p HD at 25 fps (PAL) or 4K at 25 fps (PAL).
If your iPhone camera is still blinking regardless of PAL formats, the Live Photos setting may be the issue instead.
6. Turn off Live Photos
Using Live Photos, your iPhone captures what occurs 1.5 seconds before and after you snap a photo. Sometimes, this feature interrupts your still photos.
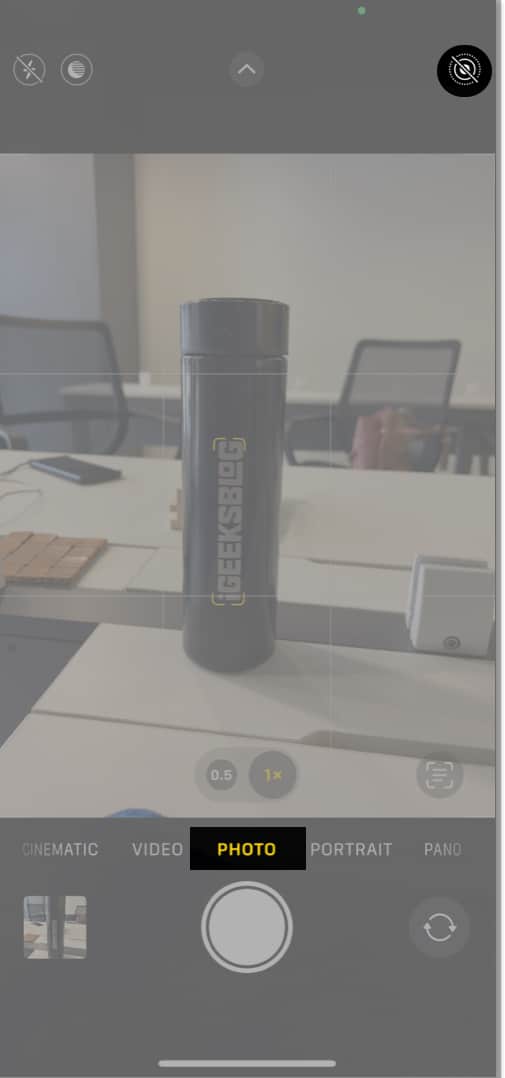
- Open the Camera in Photo mode.
- Tap the Live Photos button (circle icon at the top right corner) to turn it off.
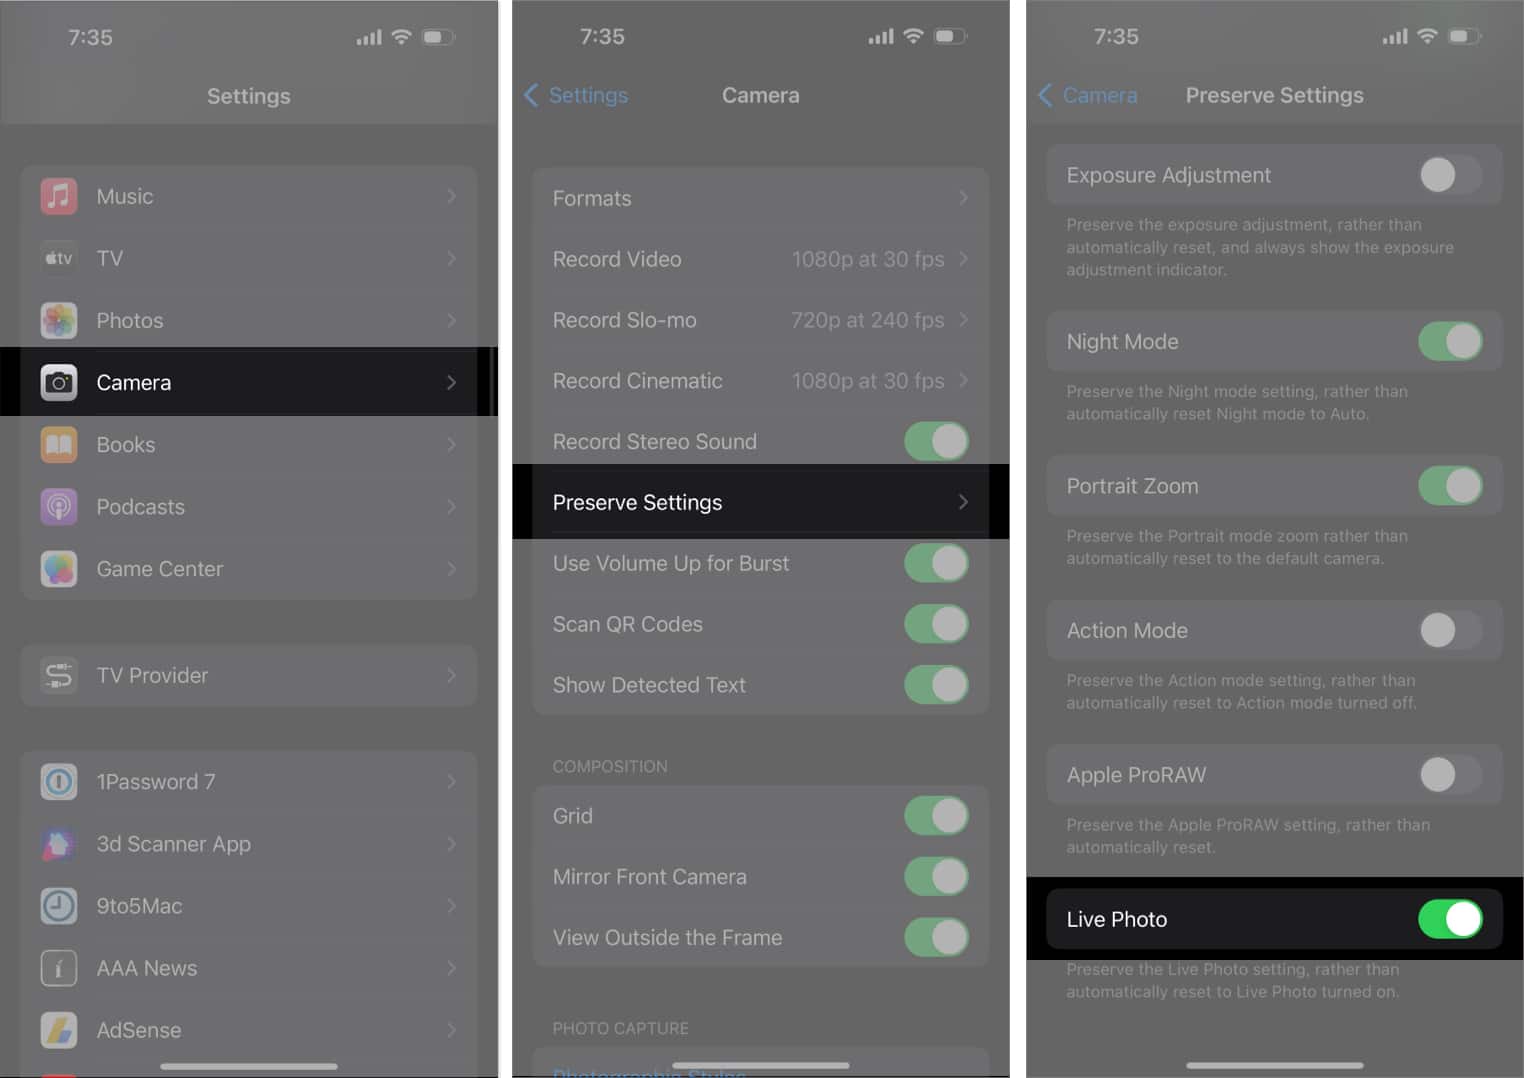
It will turn off Live Photos until you close the Camera. If you want to disable Live Photos permanently, go to Settings → Camera → Preserve Setting → turn on Live Photos.
Try taking another photo. If your camera is still glitching out on you, give your iPhone a restart.
7. Force Restart iPhone
Sometimes software bugs can cause the iPhone camera to blink or flash. This can happen after an iOS update or if there are issues in the camera app.
The best way to iron out these temporary bugs is to force restart your iPhone.
For iPhone models 8 and later:
- From the left side of the device, press and quickly release the Volume Up button.
- Next, press and immediately release the Volume Down button.
- Finally, from the device’s right side, press and hold the Side button.
- Release the Side button when you see the Apple logo on your iPhone screen.
If you’re still facing the same issue, take a look at any potential iOS updates.
8. Update iOS
Every iOS update brings new features and enhancements to system apps to increase stability. If you don’t install these updates regularly, your iPhone and its camera may malfunction.
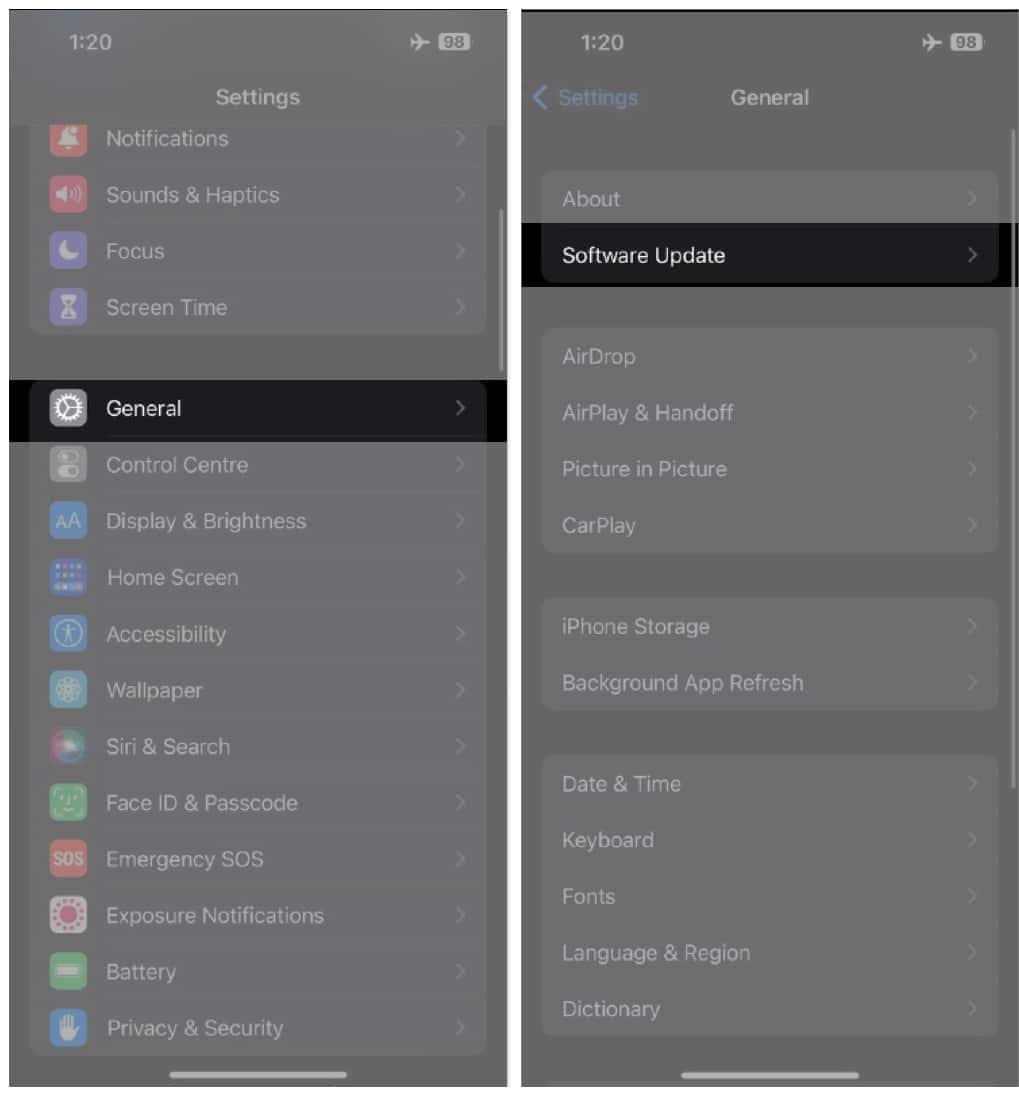
- Go to Settings → General → Software Update.
- Tap Download and Install if any update is pending.
If the installation is improper and causing trouble, you can downgrade your iOS or delete the software update and reinstall it. Remember to back up your iPhone before downgrading.
Still blinking? You’re down to a few options.
9. Reset to Factory Settings
If the problem persists and your iPhone camera just won’t stop blinking, it’s time to look at a factory reset.
Keep in mind that resetting your iPhone to factory settings WILL delete any photos, videos, and files you have stored on your device. For this reason, it’s important to back up your iPhone before proceeding.
See our guide on how to factory reset your iPhone for an in-depth tutorial. Here’s the quick solution:
- Go to Settings → General.
- Select Transfer or Reset iPhone.
- Pick Erase All Content and Settings.
- You’ll be prompted to back up your device.
- Tap Continue → Erase iPhone → Enter the iPhone Passcode. Then, you can follow the on-screen instructions once the automatic iCloud backup is complete.
If you’ve tried everything else, and a factory reset doesn’t solve your issues, you can be relatively certain there’s a hardware problem with your iPhone. In that case, it’s time to contact Apple Support.
Contact Apple Support
A failure in your iPhone’s optical stabilization mechanism can cause the camera to blink. Water or moisture exposure to your iPhone can damage the camera module, leading it to malfunction, too.
If nothing else on this list has worked for you, we suggest contacting Apple Support or booking a Genius Bar appointment to have your iPhone physically examined.
Video: How to fix iPhone camera blinking
No more blinking!
Your iPhone camera blinking issue can prevent you from capturing your precious moments. First, identify the possible causes of this issue so that troubleshooting can be done, and take the necessary steps to fix it quickly. This may require some patience and trial and error.
Hopefully, you have returned your camera to its normal state after following the solutions outlined in this guide. If not, let us know in the comment section, and we may be able to help with a specific issue. Do you know of any other solutions? Drop them down below!



Leave a Reply