If you want to cite a paragraph or two in your note, you can use the block quote feature in Apple Notes. Block quote is one of the new features of iOS 17 and macOS Sonoma, and it provides the proper way to format lengthy quotes in an attractive and easy-to-read style. In this article, I’ll show you how to insert and remove block quotes in Apple Notes and how well it works when transferring a note!

How to add block quotes to your notes on iPhone and iPad
You can insert a block quote in Apple Notes before or after you enter your text. Just follow these simple steps.
- Open the Notes app → You can go to a new or existing note.
- Place your cursor where you want the block quote.
- If you already have your text, place it anywhere within the text.
- For more than one paragraph, select all of the text by double-tapping a word and dragging the highlight through it.
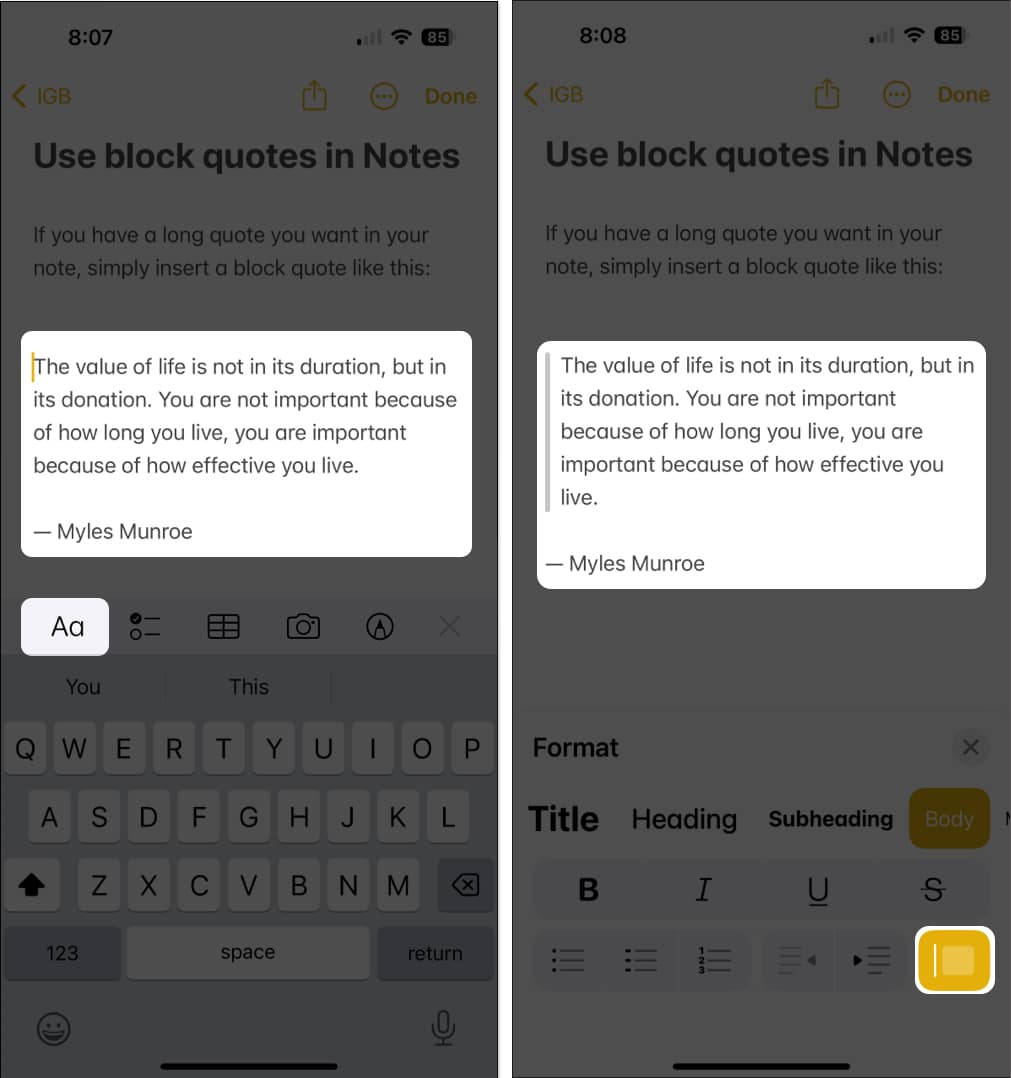
- Select the Formatting (Aa) icon above the keyboard on iPhone or in the toolbar at the top on iPad.
- Tap the Block Quote icon (box and line) in the lower right corner of the format tools.
You’ll see a vertical gray line appear on the left that runs the length of your text. Your block quote is also indented slightly.
Remove block quotes from your notes
You can easily remove a block quote in Notes on iPhone and iPad.
- Place your cursor anywhere within the block quote.
- Select the Formatting (Aa) icon.
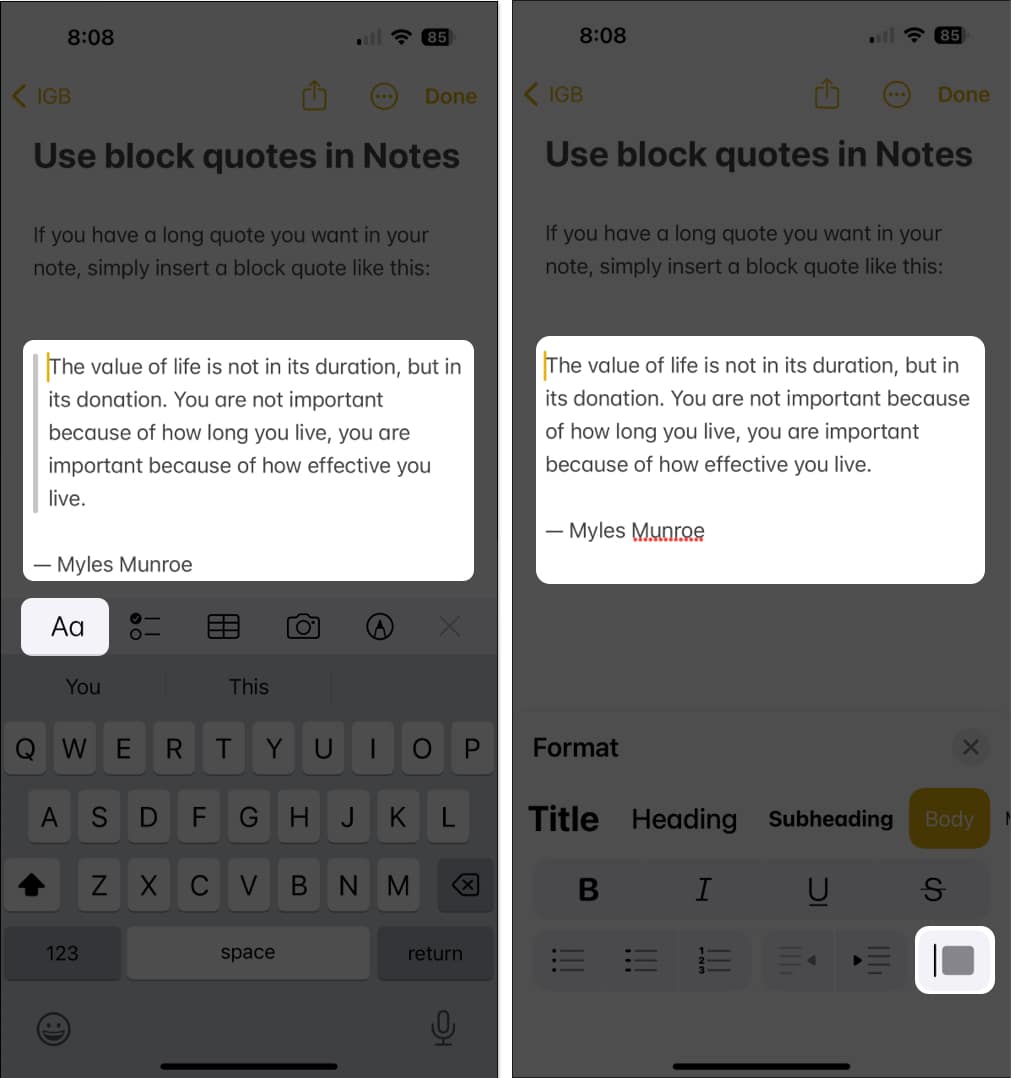
- Tap the Block Quote icon to deselect it.
You should then see your text return to the original formatting for your note.
How to add block quotes to your notes on Mac
Adding a block quote in Notes on Mac is just as simple as on your mobile device, and you can apply this format before or after you enter your text.
- Place the cursor where you want the block quote.
- If you already have the text, place your cursor anywhere within the text, or if you have more than one paragraph, select the text by dragging your cursor through it.
- Then, do one of the following:
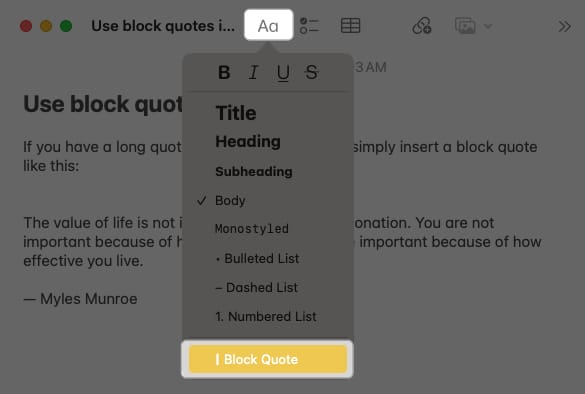
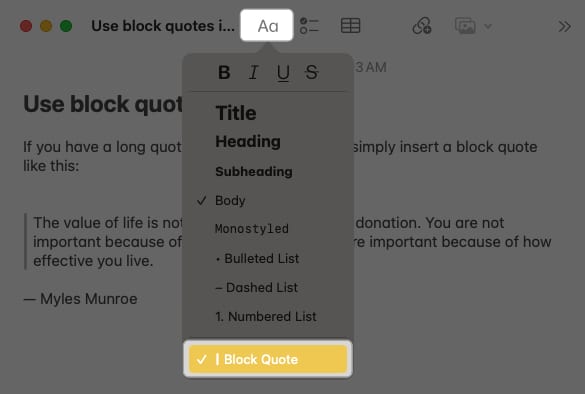
- Click the Formatting (Aa) icon in the toolbar.
- Right-click and move to Paragraph Styles in the shortcut menu.
- Pick Format in the menu bar.
- Select Block Quote, which places a checkmark next to it.
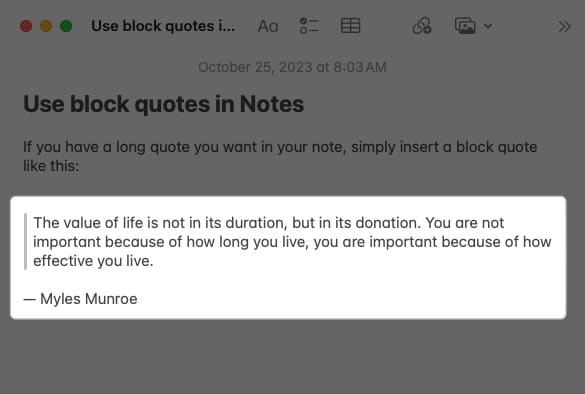
You’ll then see your quote with the vertical line on the left and slightly indented.
Remove block quotes from notes
If you want to remove a block quote from your note after you add it, it’s just as easy as adding it on Mac.
- Put your cursor anywhere within the text of the block quote.
- Then, click the Choose a Style icon, right-click and move to Paragraph Styles, or pick Format in the menu bar.
- Deselect Block Quote, which removes the checkmark next to it.
You’ll then see your text in its original format.
How to move block quotes from Apple Notes to Apple Pages
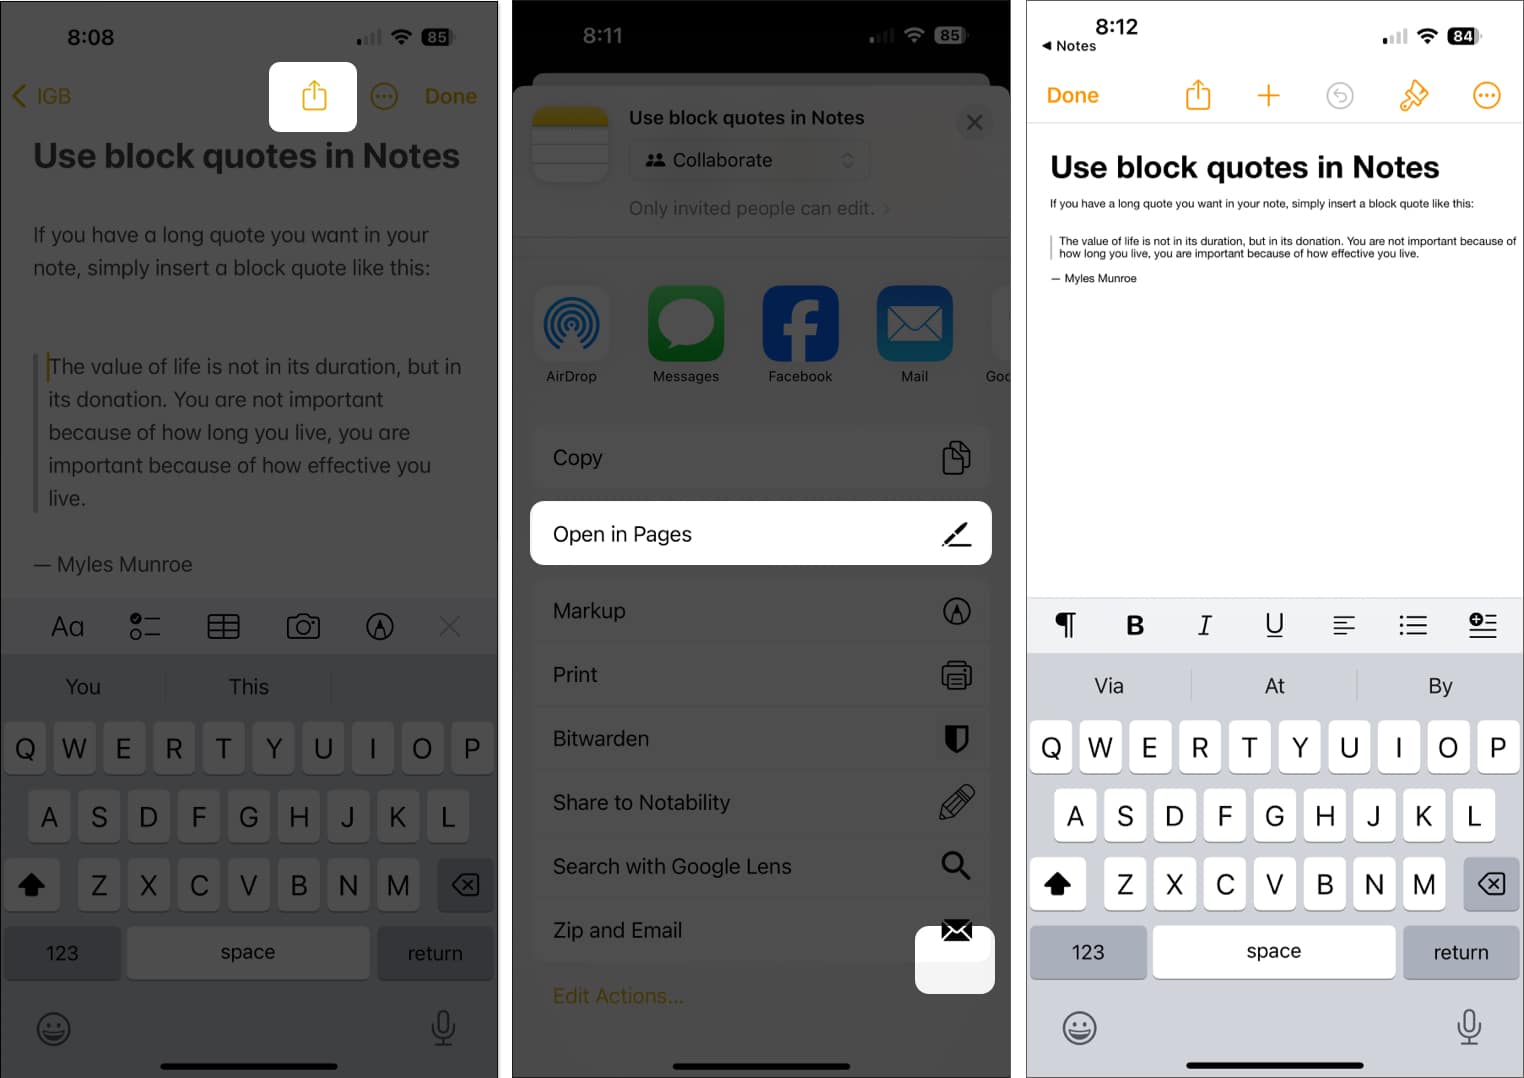
Have you been using the “Open in Pages” feature in Apple Notes? If so, you’ll be glad to know that when you add a block quote in Notes and open the note in Pages, that block quote carries over. Because Pages doesn’t currently offer a built-in block quote feature, this makes it even more useful.
- On iPhone, iPad, and Mac, add the block quote as described above → Select the Share icon.
- Pick Open in Pages, and you’ll see your note along with its block quote in a new Pages document.
Block quotes made easy!
Rather than indenting text or using quotation marks, you can use the block quote feature in Apple Notes for lengthy quotes. This gives you a nicely formatted note or one that you can open in Apple Pages. Are you happy to see the block quote option in Notes? Let us know!
Read more:

