It would be unfair to think of the Apple Watch as just another smart wearable device. If you have a cellular Apple Watch model, it’s a full-fledged mini iPhone that keeps you connected even when you’re away from your iPhone. You can make calls, send and receive messages, stream music, and more—all while your paired iPhone stays at home.
However, to use these features, you must first set up a cellular plan on your Apple Watch, as it isn’t activated automatically. Keep reading to learn how.
Requirements for setting up cellular on Apple Watch
While the initial set up process for a cellular and GPS Apple Watch is similar, setting up cellular services requires you to meet the following requirements:
- You must own an Apple Watch Series 3 (GPS + Cellular) or later that supports cellular connectivity. There are several ways to identify which Apple Watch model you have.
- The paired iPhone must be an iPhone 8 or newer and run the latest available iOS.
- Ensure your carrier supports cellular service for the Apple Watch.
- Cellular Apple Watches use an eSIM, so no physical SIM card is required.
- The iPhone should be connected to Wi-Fi or cellular data during set up.
How to set up cellular on Apple Watch
Once you meet the requirements, you can move ahead with the set up process:
- Press and hold the Side button on the Apple Watch until the Apple logo appears on the screen.
- Now, hold your Apple Watch near your iPhone and tap the Continue button on the “Use your iPhone to set up this Apple Watch” pop-up message that appears.
- Next, follow the on-screen instructions to pair and set up your Apple Watch.
- During the set up process, the Watch app will ask you whether you want to set up mobile on your Apple Watch. Follow the instructions to do so.
- Alternatively, you can set up cellular later via the Watch app.
Use the Watch app to set up cellular on your Apple Watch
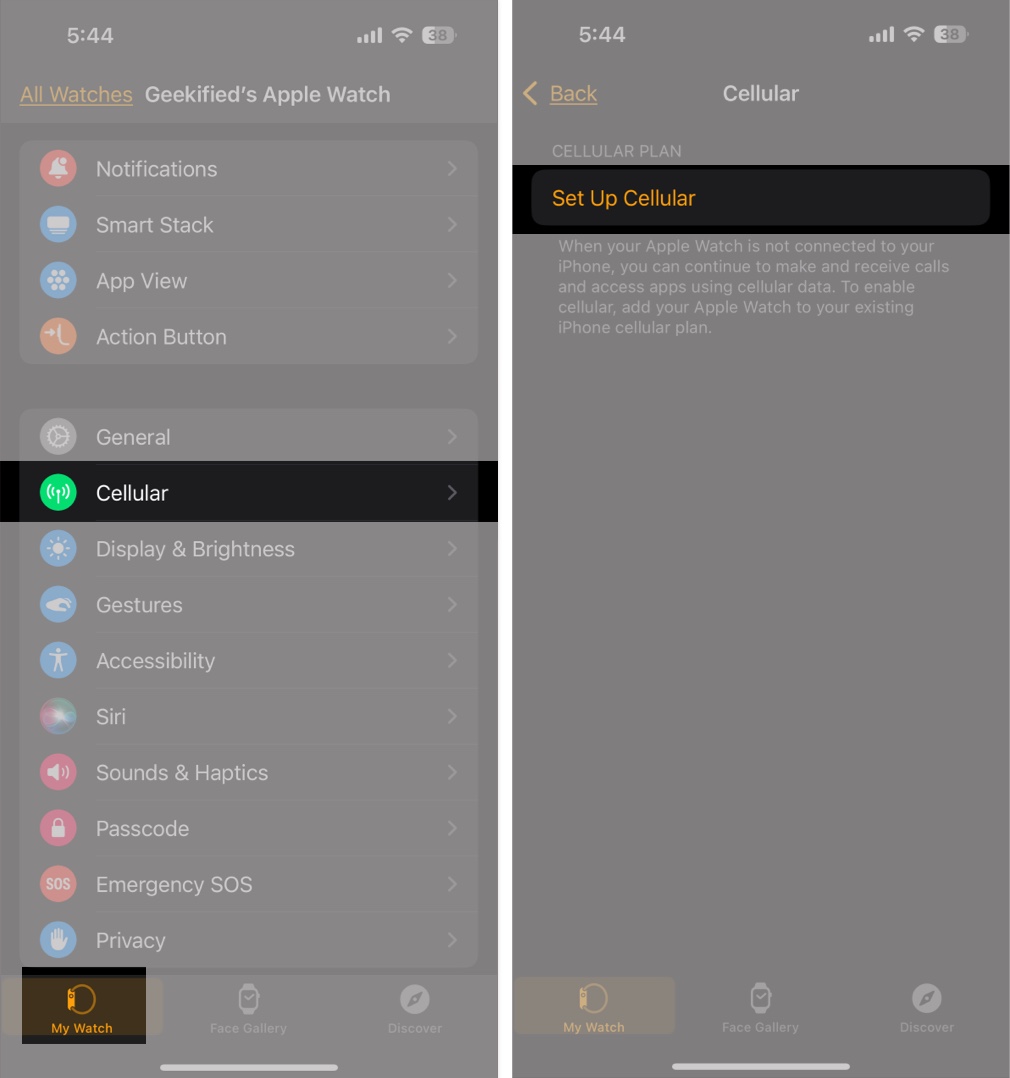
- Open the Watch app on the paired iPhone and make sure you are on the My Watch tab.
- Here, locate and tap on Cellular.
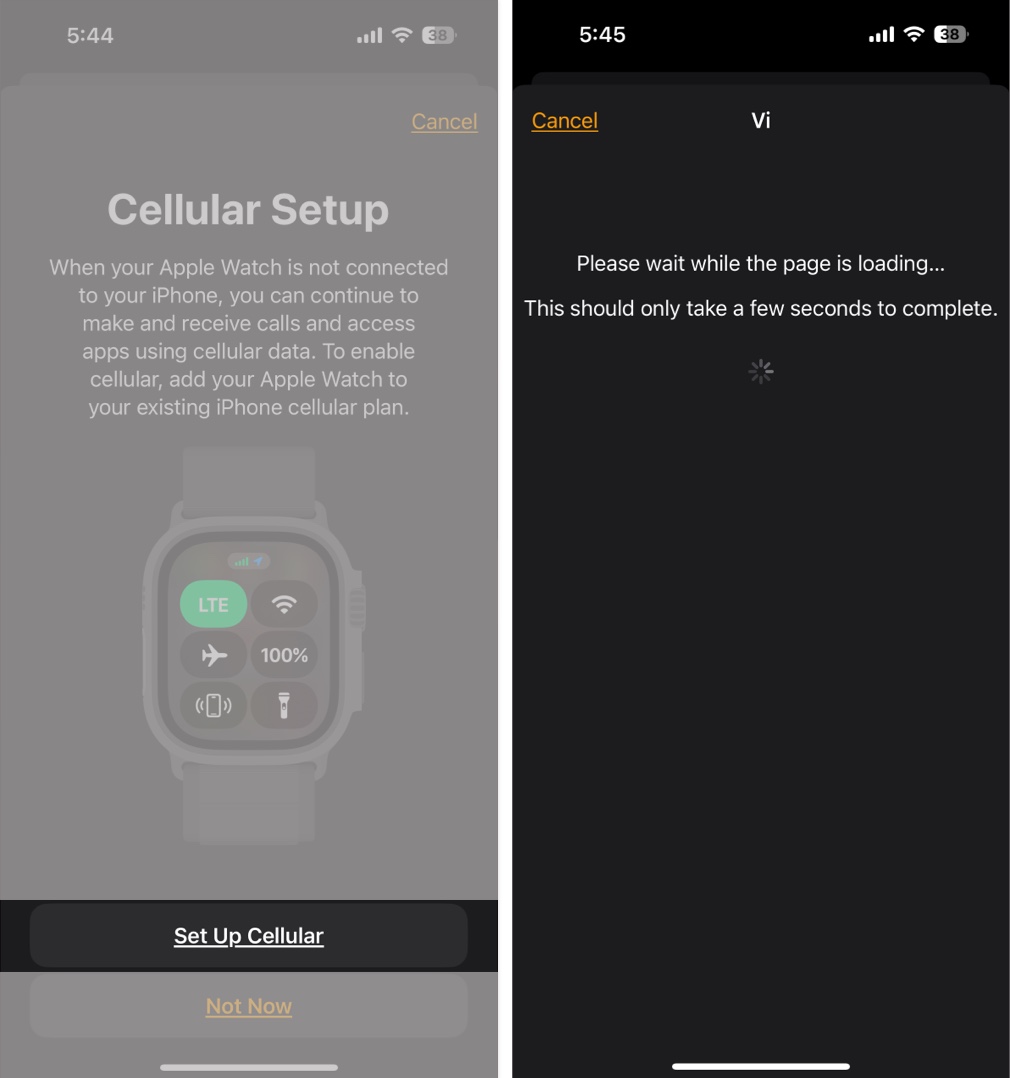
- Now, if your mobile carrier account is eligible to enable cellular on your Apple Watch, tap the Set Up Cellular button. If not, the button will be greyed out.
- Next, tap Set Up Cellular again and follow the on-screen instructions to sign in to your carrier account and activate cellular service.
Note:
How to check if cellular is active on your Apple Watch
To conserve battery life, Apple has designed the Apple Watch to automatically switch to the most power-efficient wireless network. This means that if your paired iPhone is nearby, the Apple Watch will connect to it. Otherwise, it will connect to a Wi-Fi network if available, rather than unnecessarily draining the battery by staying on the cellular network.
Here’s how to check whether your Apple Watch is connected to a cellular network or your paired iPhone:
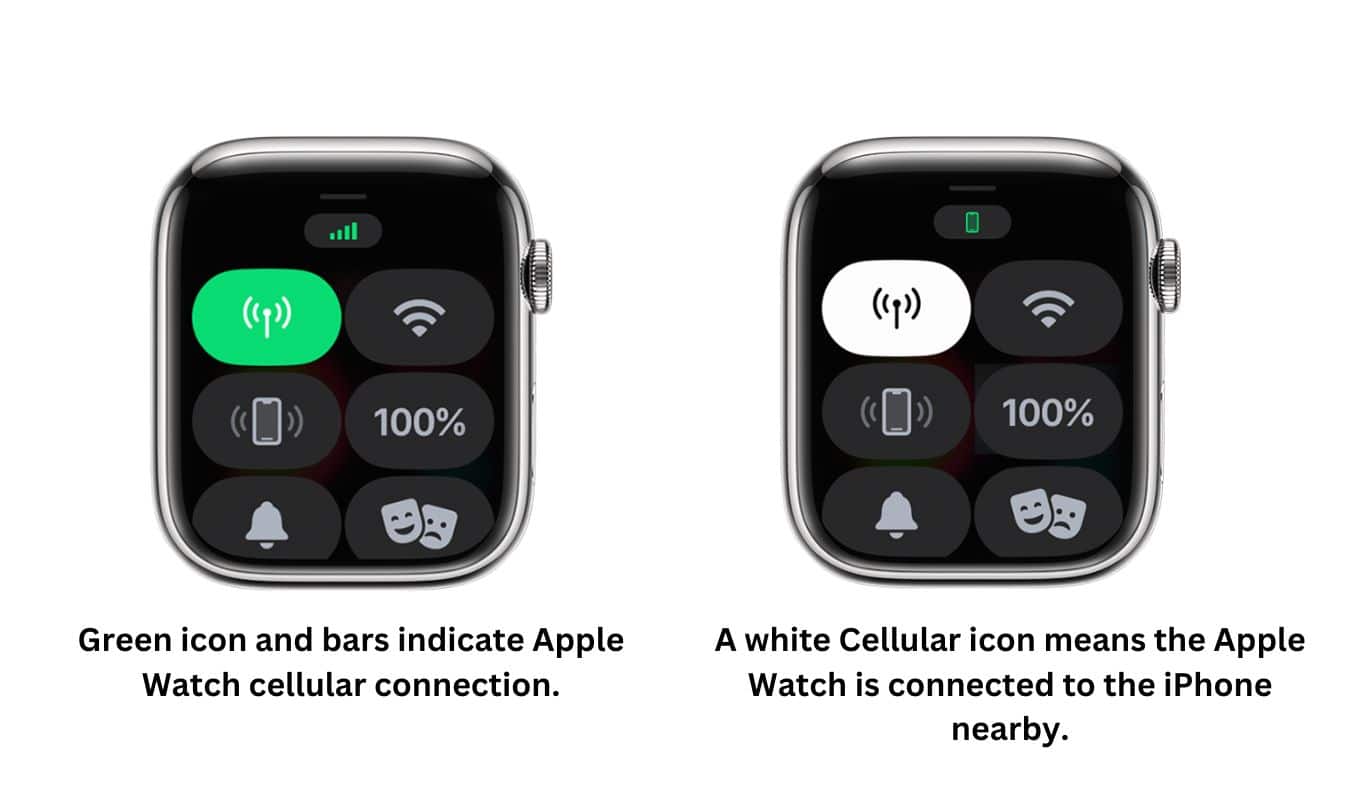
- Press the Side button to access the Control Center on your Apple Watch.
- If the Cellular icon is green, the Apple Watch is connected to the cellular network, and green bars at the top center represent the signal strength.
- If the Cellular icon is white, and a mobile icon appears at the top center, the Apple Watch is connected to the paired iPhone as it’s nearby.
- You can manually enable or disable cellular on your Apple Watch by tapping the Cellular button on the Control Center.
Manage cellular data on Apple Watch and tips to avoid extra costs
No one can deny the convenience of using cellular data on an Apple Watch, but managing it effectively is essential to avoid unnecessary charges. Here’s how:
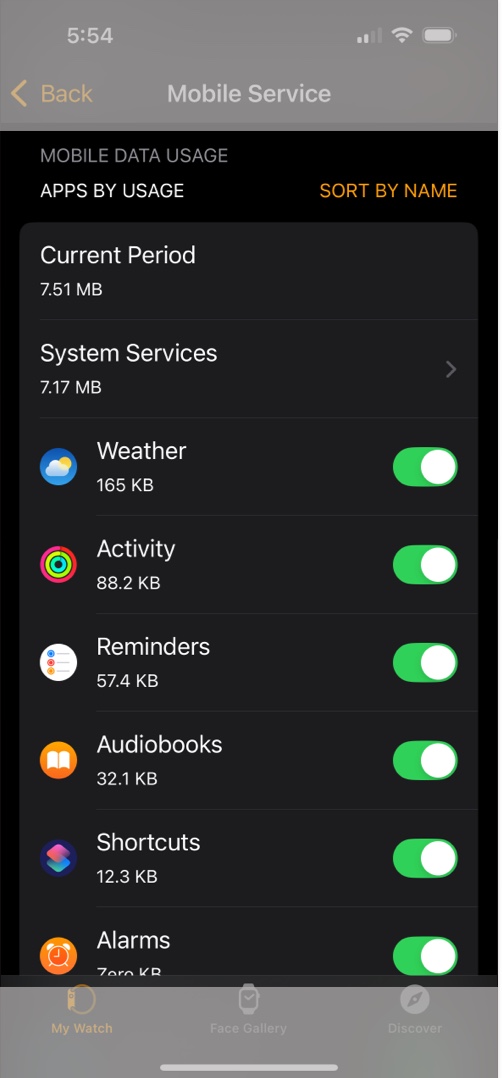
Monitor data usage
- Open the Watch app on the paired iPhone.
- Tap on Cellular.
- Check your data consumption under the Mobile Data Usage section.
Reduce data consumption
While the Apple Watch automatically prefers switching to Wi-Fi if available, you can manually disable cellular in the Control Center when you don’t need it to save unnecessary data consumption.
Save money
- Some carriers offer dedicated Apple Watch plans; check them to find the most cost-effective one.
- If you travel frequently, confirm whether international roaming is included in your plan.
- Streaming music or podcasts over cellular can consume a lot of data. Download content over Wi-Fi instead.
Remove your mobile plan
If, for whatever reason, you no longer wish to use cellular on your Apple Watch, you can remove your mobile plan easily. Here’s how:
- Open the Watch app and tap on Cellular.
- Here, tap the i button next to your carrier plan.
- Next, tap Remove [your mobile carrier name] plan.
Go iPhone free…
Setting up cellular connectivity on your Apple Watch adds a new level of convenience, allowing you to stay connected without carrying your iPhone everywhere. It can also help reduce screen time. However, be sure to monitor your data usage to avoid extra charges.
Have any questions? Drop them in the comments, and I’ll be happy to reply!