Contact Posters are one of the most fun and personal features on the iPhone. They allow you to design a full-screen contact card that appears when you call or FaceTime someone. You can customize them with photos, Memoji, colors, and different fonts.
In this guide, you’ll learn how to create, customize, and change Contact Posters on your iPhone. We’ll also cover ideas, privacy tips, and how to set posters for your contacts. Let’s jump in.
Table of Contents
- What You Need Before Creating a Contact Poster
- How to Create and Personalize Your Contact Poster on iPhone
- How to Manage Contact Poster Sharing in Phone, FaceTime, and Messages
- Switch Between Multiple Contact Posters
- How to Update Your Contact Photo on iPhone
- How to Assign Contact Posters to Other Contacts
- Tips for Using Contact Posters Safely and Effectively
- Fix Contact Poster Not Working on iPhone
- Customize Your Contact Card!
What You Need Before Creating a Contact Poster
Before setting up a Contact Poster, make sure:
- Your iPhone is running iOS 17 or later. The contacts should also have the latest iOS to see your custom poster
- Name & Photo Sharing is enabled (you turn it on during setup).
- FaceTime and Messages are signed in with your Apple ID.
- You have a clear photo or Memoji ready.
If everything checks out, you’re ready to design your poster.
How to Create and Personalize Your Contact Poster on iPhone
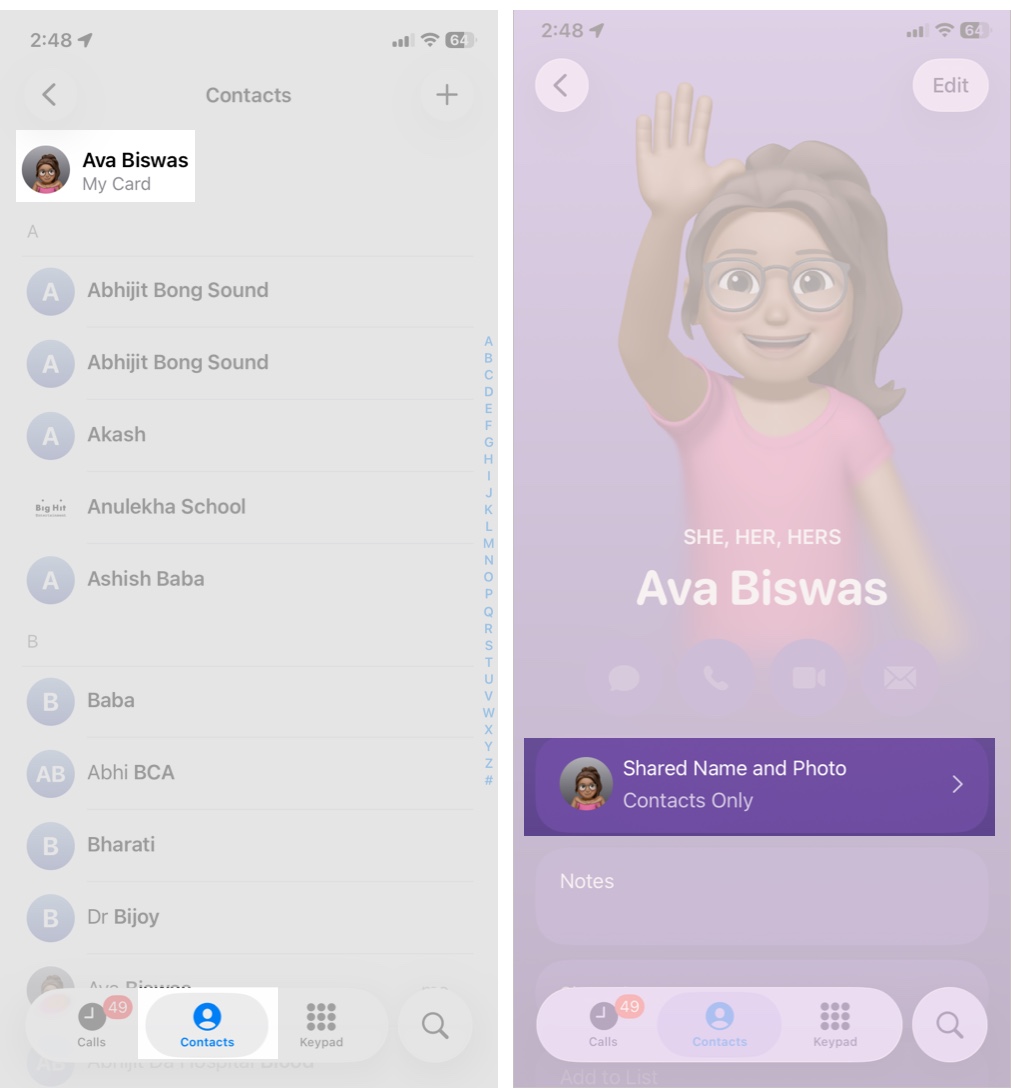
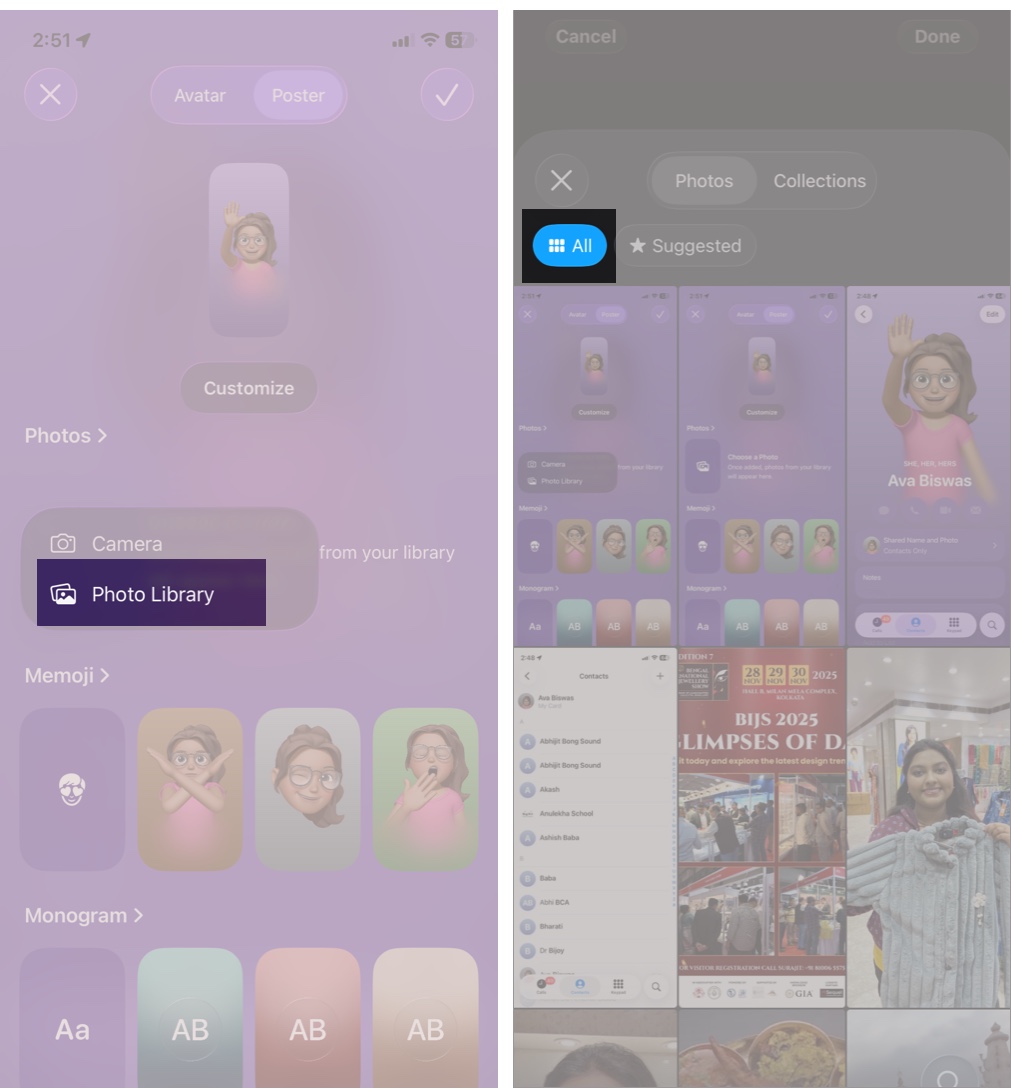
- Open the Phone app and tap the Contacts tab. Or launch the Contacts app directly.
- At the top, select My Card, then tap Shared Name and Photo.
- Move to the Poster tab at the top. Now, you will see three options: Photos, Memoji, and Monogram.
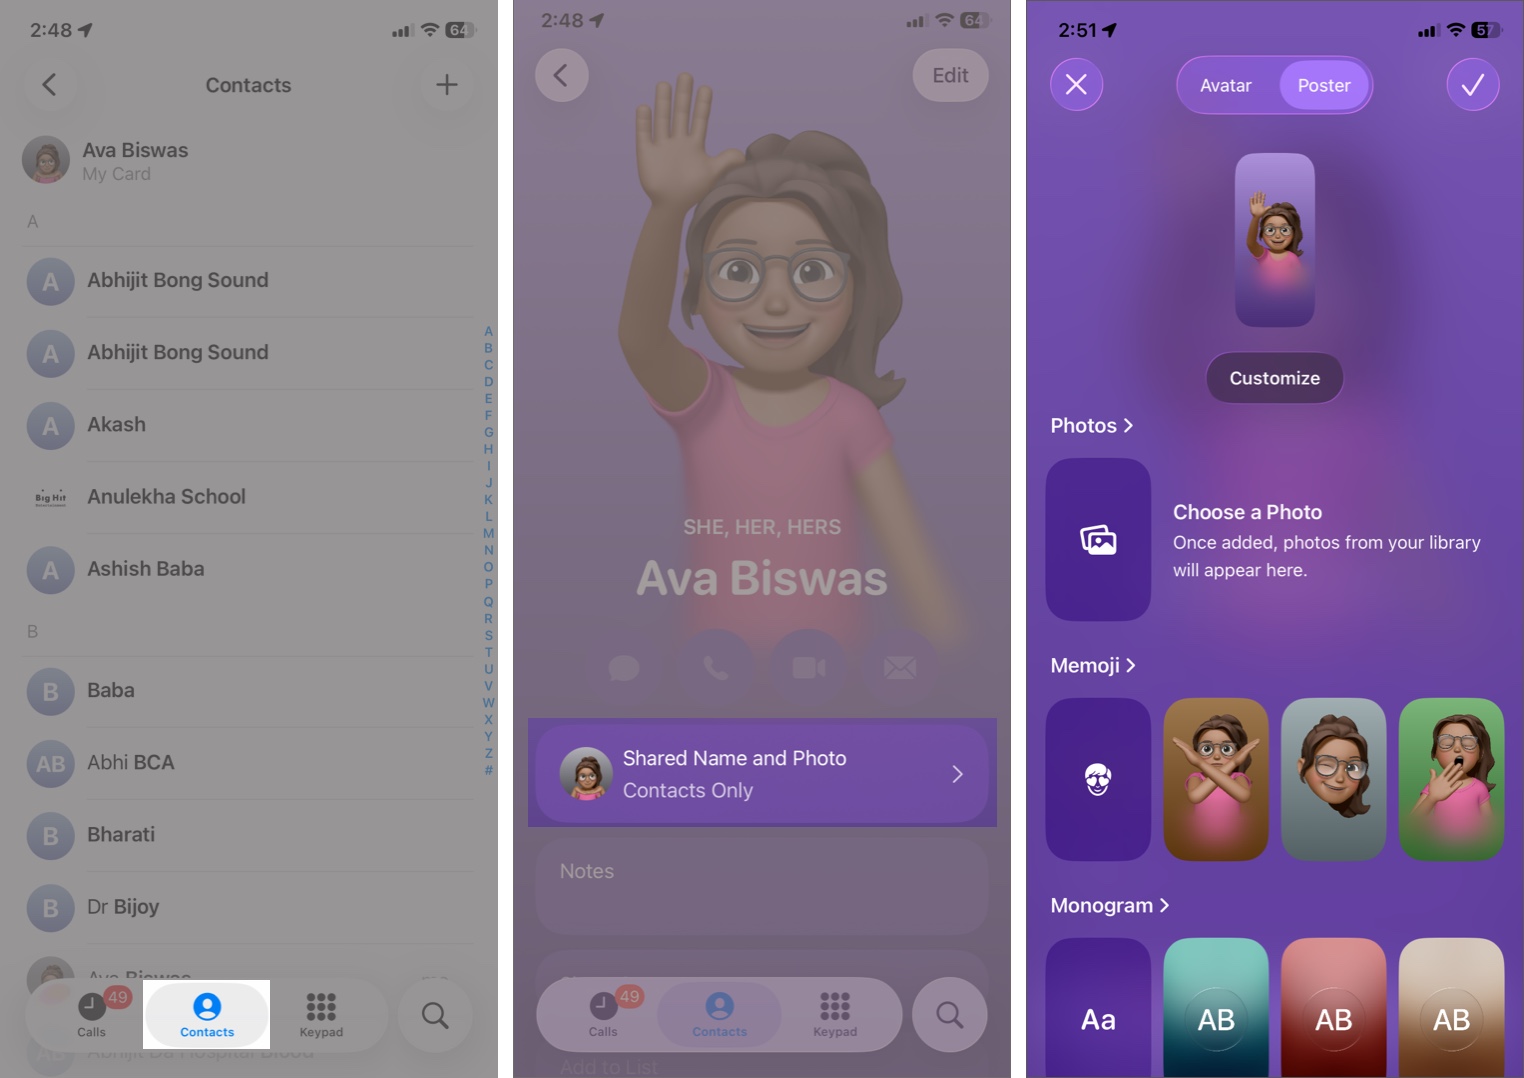
- Choose one style you like. Here I am tapping the image icon under Photos. Select Photo Library to add your favorite photos.
- Your iPhone will suggest the best-looking ones. You can go to the All tab and choose one. Portrait photos work great in this feature.
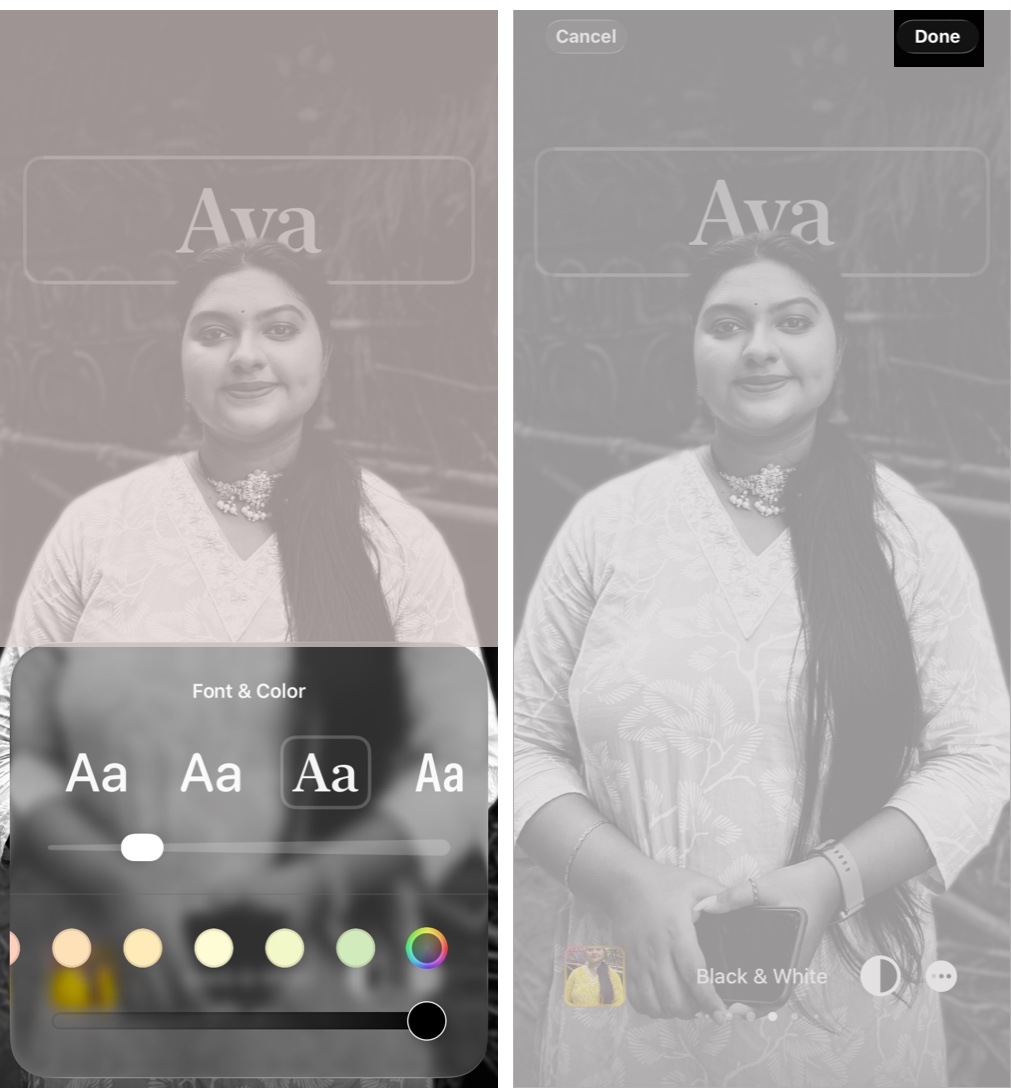
- Now, your iPhone crops out the photo and adds your name on top. Swipe left to add filters and color effects.
- To customize the font, tap on your name and select a style. You can also change the font color and weight.
- Once satisfied, tap Done at the top right corner. It will ask you to set an Avatar. We will discuss it later.
If you want to create a fun Memoji Contact Poster, follow the steps below:
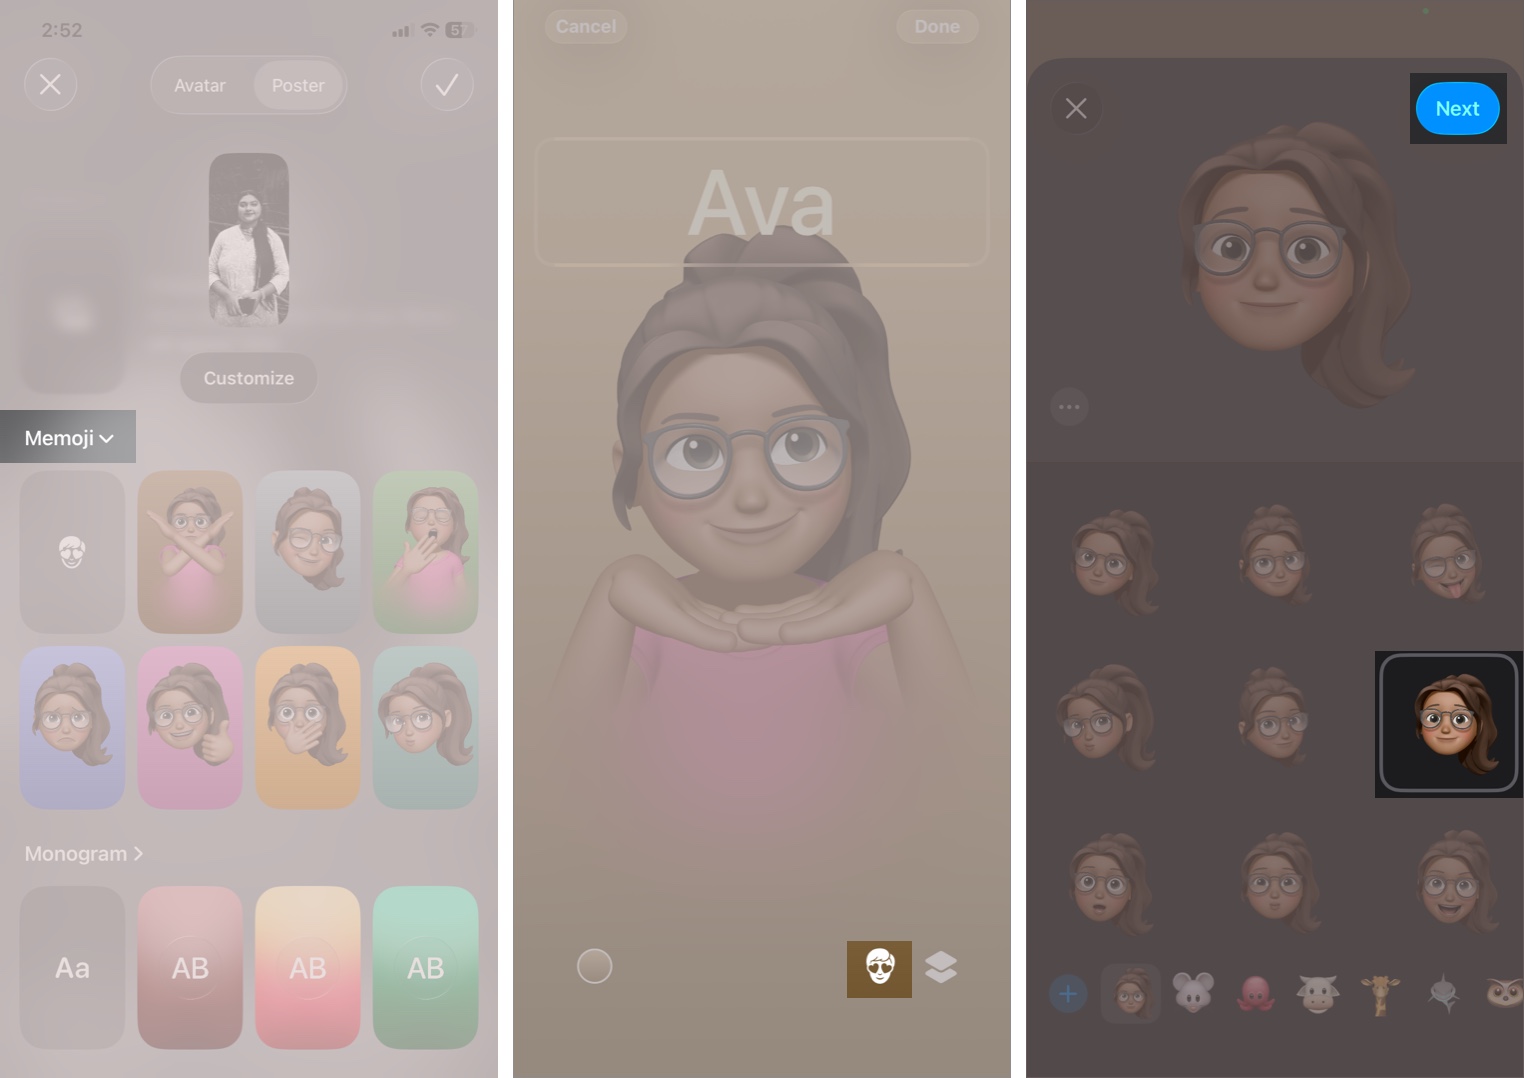
- Select the Memoji icon under the Poster tab. It will show your Apple ID Memoji on the editing screen.
- Tap the Memoji icon again at the bottom right corner.
- Now, make an expression looking at the camera or choose from a predefined Memoji. Tap Next in the top right corner.
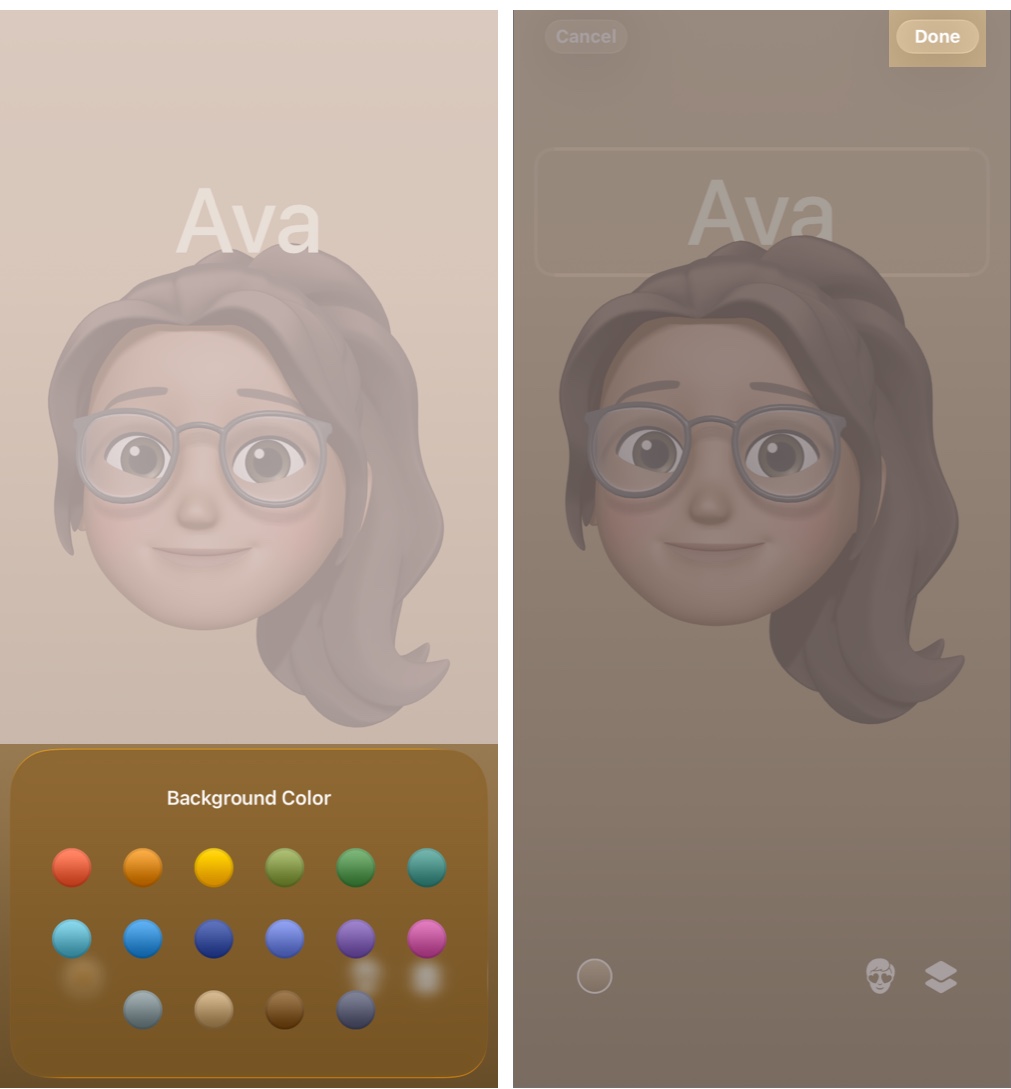
- Then select the color icon on the left and set a background color.
- Customize the font and tap Done to save the poster.
Inspiring iPhone Contact Poster Ideas
Want to make a unique Contact Poster? Try these:
- Minimalist: A simple monochromatic background with clean typography.
- Professional: A portrait photo in neutral colors for a polished look.
- Playful: A Memoji expression that reflects your personality.
- Color-blocked: Vibrant backgrounds, bold text.
- Themed: Pictures from travels, favorite hobbies, or seasonal looks.