How to Reset AirTag the Right Way (Works Every Time)
Reset your AirTag in minutes—swap, sell, or solve glitches with this quick, no-fuss guide!
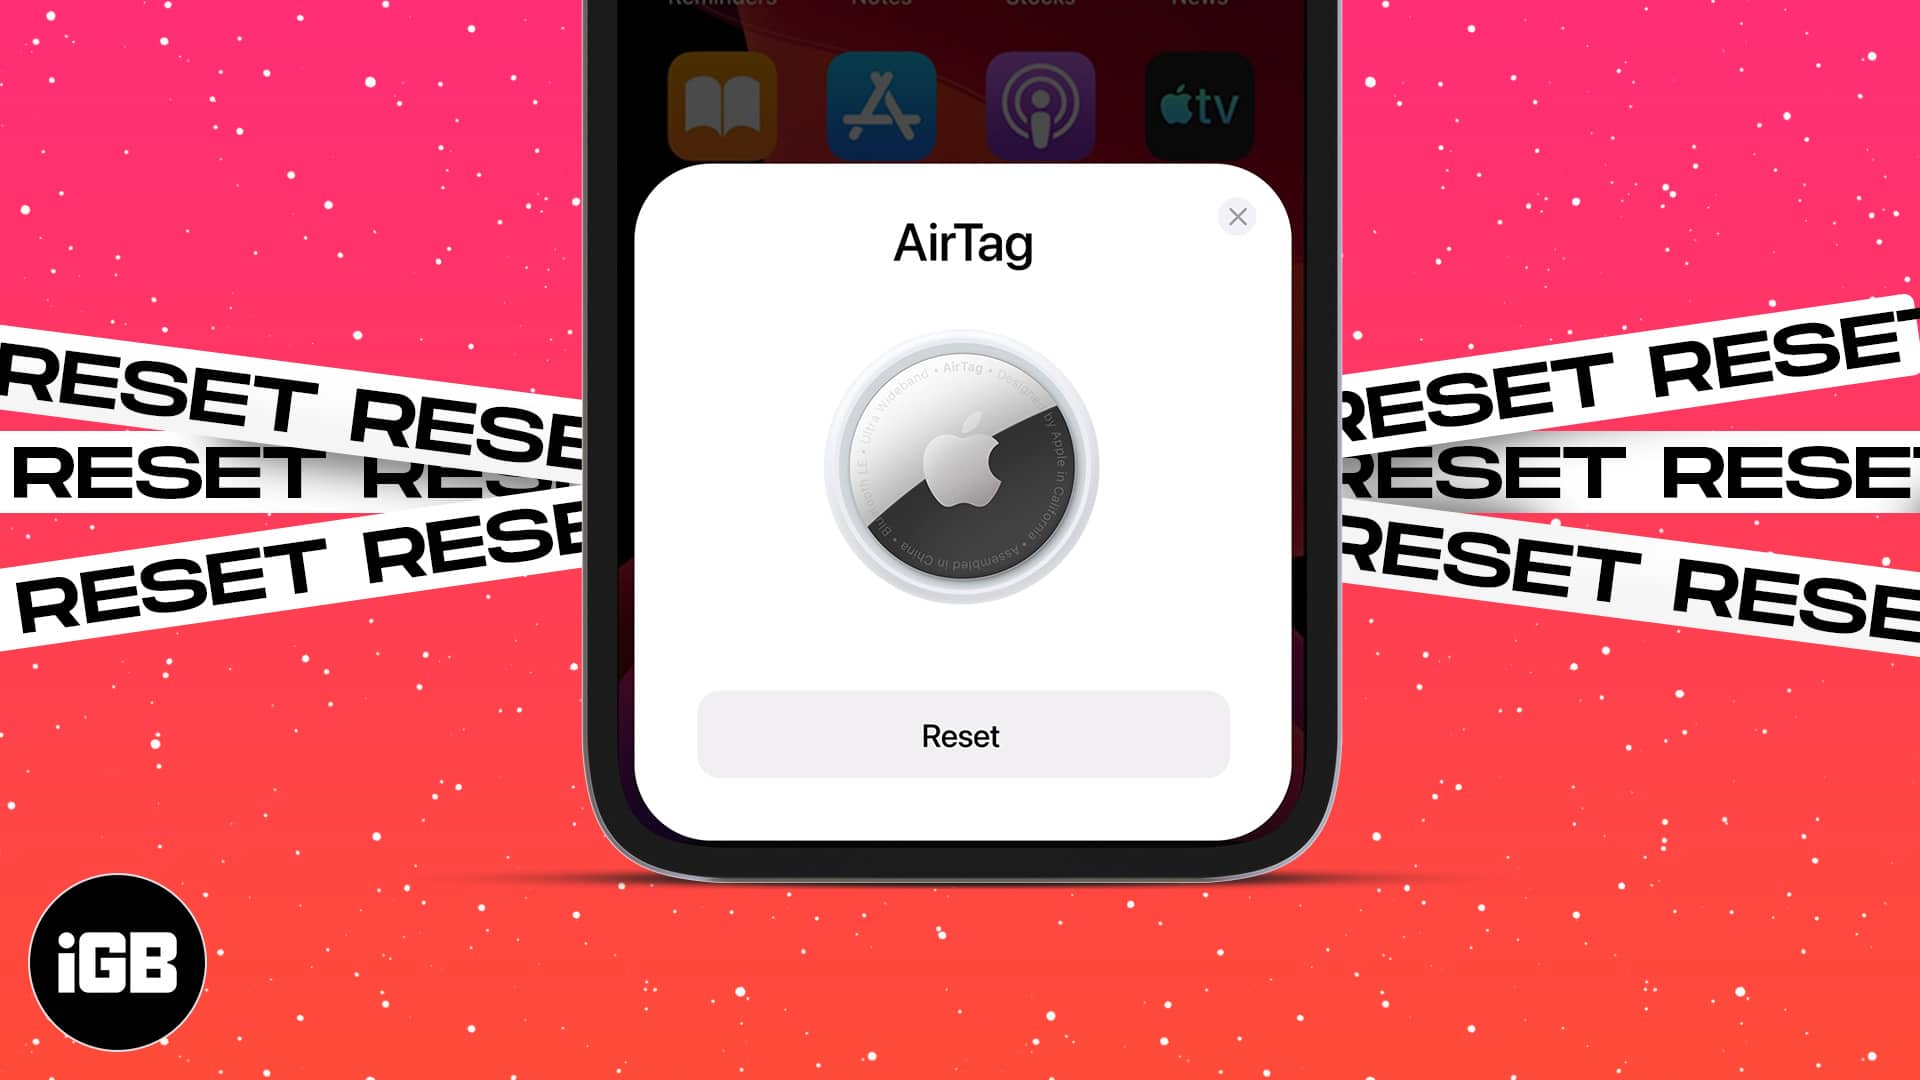
- Resetting your AirTag is useful when it’s acting up, you’re giving it to someone else, or just want to start fresh.
- Start with the Find My app: Remove the AirTag from your Apple ID while it’s nearby—this disconnects it from your account.
- Then do a manual reset: Take out the battery and reinsert it five times until you hear a different chime on the fifth—this wipes it clean.
- AirTags are locked to your Apple ID: Only the original owner can remove that lock. Apple can’t override it, so unlink it before selling or gifting.
- Buying a used AirTag? Always check that it’s been removed from the seller’s account before handing over your money.
- Run into issues? Try a fresh battery, make sure Bluetooth and Location Services are on, and keep the AirTag close to your phone during the reset.
- Found an AirTag? If it’s still linked to someone else, don’t use it. Try returning it—or at least recycle it responsibly.
Ever lost your keys and felt that mini panic? That’s where Apple’s AirTag and the Find My app really shine—they help you keep tabs on your most important stuff. But what happens when your AirTag starts acting up, or you want to pass it along to someone else?
Don’t worry—resetting your AirTag is actually pretty simple once you know how. I’m here to walk you through each step, from fixing glitches to getting your AirTag ready for a new owner (or a new adventure). I’ll also share tips to avoid common mistakes and help you handle even those tricky situations when your AirTag isn’t linked to your Apple ID.
Why Would You Reset an AirTag?
Resetting your AirTag is helpful in several scenarios:
- Fixing Glitches: If your AirTag isn’t updating its location or connecting properly, a reset can resolve these issues.
- Transferring Ownership: Planning to give your AirTag to someone else? You’ll need to unlink it from your account first.
- Reassigning Items: Want to move your AirTag from your keys to your backpack? Resetting makes it easy.
- Troubleshooting: Address persistent problems that aren’t resolved with basic fixes.
Before You Begin: Preparation Checklist & Pitfalls to Avoid
Set yourself up for a smooth AirTag reset with these simple preparations:
What You’ll Need:
- Your AirTag (within Bluetooth range for software removal)
- An iPhone or iPad with the latest iOS/iPadOS and the Find My app installed
- Your Apple ID credentials (in case re-authentication is required)
- A fresh CR2032 coin cell battery (recommended for troubleshooting or if the reset fails)
- Optional: A rubber jar opener pad, rubber gloves, or a grippy cloth to help open a stubborn AirTag cover
- A small tray or table to work over so you don’t lose the battery or cover
Pro Tip:
Avoid Common Pitfalls:
If your AirTag is at home and you try to remove it from your Apple ID while you’re at work, it won’t fully reset until you follow the manual steps with the device. Also, a weak battery or a cover that’s hard to open can make resetting difficult—getting ready ahead of time can save you trouble later.
Important Security Note: Pairing Lock
Apple AirTags are protected by a feature called Pairing Lock. Only the original owner can remove an AirTag from their Apple ID using the Find My app. Apple Support cannot remove this lock for you. If you bought or found a secondhand AirTag, it must be unlinked by the previous owner before you can use it.
Pro Tip:
How to Reset Your AirTag
Step 1: Unlink your AirTag from your Apple ID (Software Reset)
- Open the Find My app on your iPhone or iPad.
- Tap the Items tab at the bottom, then choose the AirTag you want to reset.
- Scroll down and tap Remove Item, then confirm by tapping Remove again.
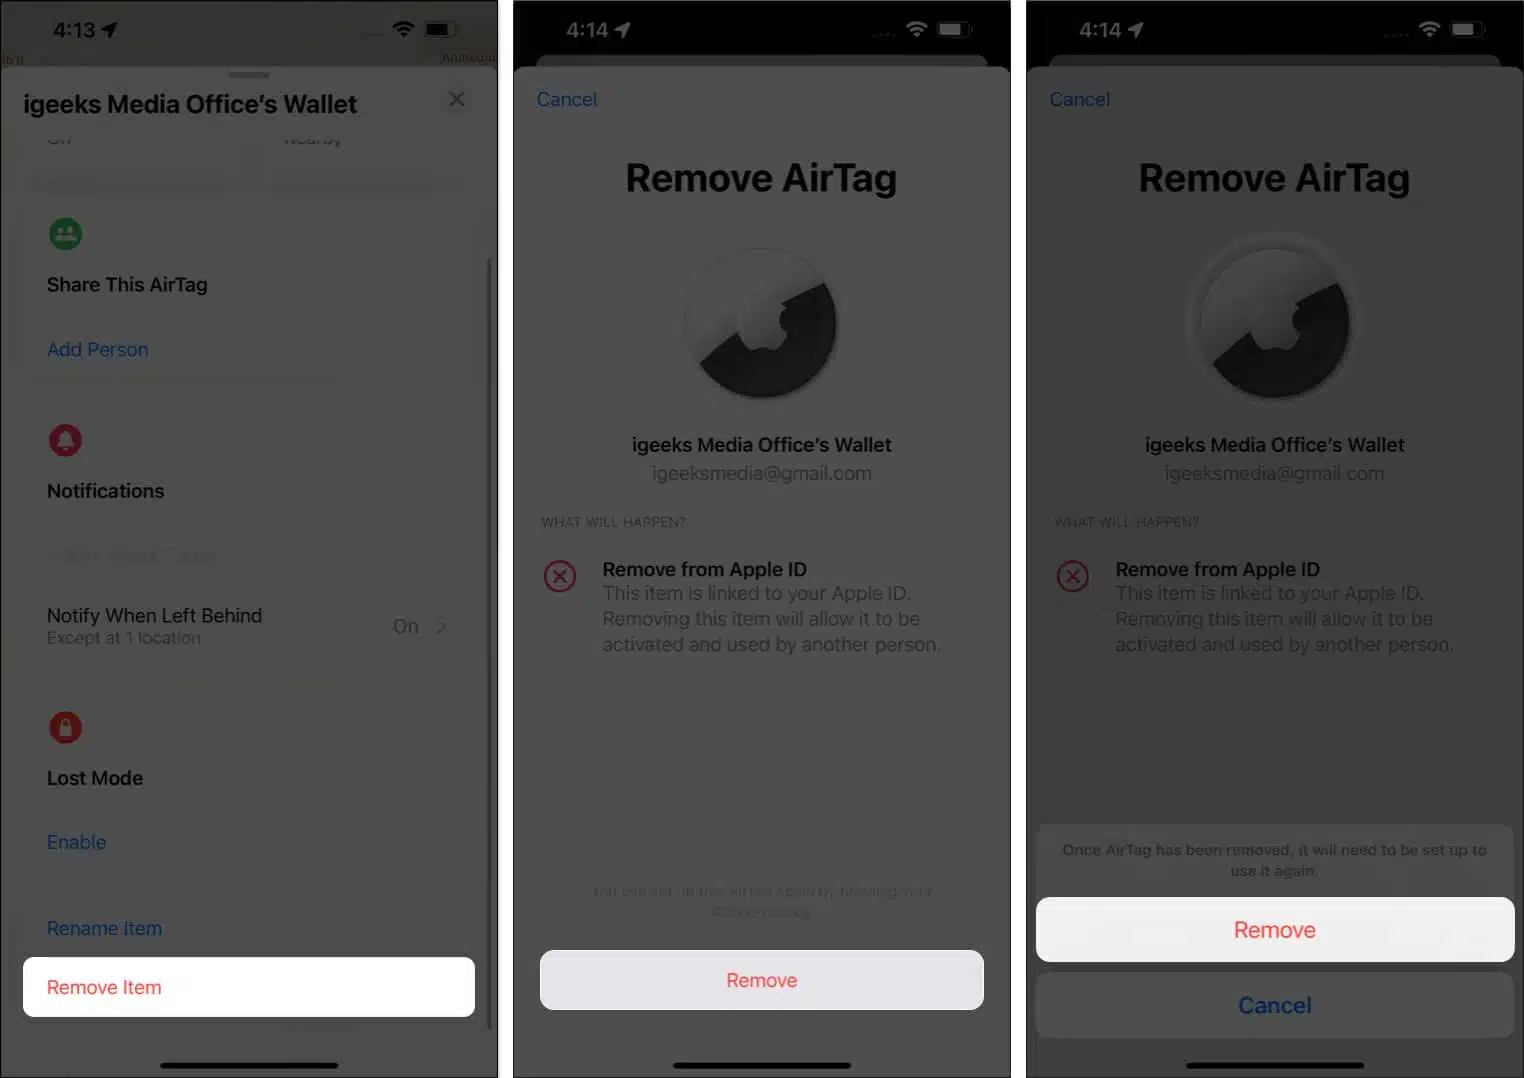
That’s it—your AirTag is now disconnected from your Apple ID.
Important:
If the AirTag is not within Bluetooth range during this process, you’ll need to complete the manual reset below.
Step 2: Manually Reset the AirTag (Physical Reset)
If your AirTag wasn’t nearby during removal, or you’re transferring ownership, follow these steps for a full factory reset:
- Hold the AirTag with the shiny stainless steel side facing up.
- Press down and twist the cover counterclockwise to open it. Tip: If it’s hard to grip, use a rubber jar opener pad or gloves for extra friction.
- Remove the battery (AirTags uses a CR2032 coin cell battery).
- Insert the battery and press down until you hear a chime.
- Remove and reinsert the battery, pressing down for a chime four more times (for a total of five chimes).
- On the fifth chime, the sound will be slightly different—this means the AirTag is fully reset.
- Replace the cover and twist it clockwise until it clicks.

Why five times?
Apple requires this five-step battery sequence as a security measure to ensure the AirTag’s memory is entirely wiped and ready for a new user. If you don’t hear all five chimes, repeat the process.
What to Do After Resetting
- Pair Again: Bring the reset AirTag near your iPhone and follow the on-screen prompts to set Airtag as new.
- Gift or Sell: The new user can now add it to their Apple ID without issues. Want to share your AirTag instead? Learn how to share AirTag on iPhone, iPad, or Mac.
- Store Safely: With a fresh battery, your AirTag is ready for use whenever you need it.
Troubleshooting: Common Problems & Solutions
Even with careful preparation, you might encounter a hiccup. Here’s how to solve the most common problems:
1. AirTag not responding to reset:
- Try a fresh CR2032 battery.
- Wait about 10 seconds after removing the battery before reinserting it if you’re having trouble.
- Ensure your device’s Bluetooth and Location Services are enabled.
2. “AirTag not reachable” error:
- Make sure the AirTag is within Bluetooth range of your device during removal.
3. Cannot remove AirTag from the previous owner:
- Only the original owner can unlink it from their Apple ID. If you bought a used AirTag, ask the previous owner to remove it.
- If you can’t contact the previous owner, try scanning the AirTag with an NFC-enabled phone (tap it to the white side). If the owner set up “Lost Mode,” their contact information may appear, allowing you to reach out.
Pairing failure after reset:
- Update your iOS device and ensure that Bluetooth and Location Services are enabled.
What If You Find an Unknown AirTag?
If you find an AirTag that does not belong to you, you cannot add it to your account unless the original owner removes it from their Apple ID. For privacy and safety, try to return it to its owner. If you cannot do that, responsibly recycle the AirTag. Do not try to use a found AirTag that is still connected to someone else.
Legal and Privacy Reminder:
If you’re using a found or secondhand AirTag, make sure it’s been unlinked from the previous owner. In some places, using a device that’s still tied to someone else’s account could break privacy laws. Always play it safe and do the right thing—respect other people’s property.
How to Spot a Counterfeit or Tampered AirTag
With the popularity of AirTags, counterfeit devices are on the rise. Protect yourself by:
- Checking the serial number in the Find My app during setup.
- Inspecting build quality—genuine AirTags have precise, high-quality construction.
- Avoiding deals that seem too good to be true or sellers unwilling to prove unblinking.
Related: How to find the serial number of AirTag
Quick Reference: AirTag Reset Checklist
| Step | Action |
|---|---|
| 1 | Remove from Apple ID |
| 2 | Use Find My app (with AirTag nearby) |
| 3 | Manual reset |
| 4 | Remove & reinsert battery 5 times |
| 5 | Replace battery cover |
| 6 | Twist clockwise until it clicks |
| 7 | Ready to pair |
| 8 | Bring near iPhone and follow prompts |
Your AirTag Is Now Reset and Ready to Go!
Resetting your AirTag is easy once you know how. Always remove your AirTag from your Apple ID before giving it to someone else, and follow the manual reset steps if needed. If you’re buying or selling a used AirTag, make sure it’s unlinked before exchanging money or items. Still need help? Contact Apple Support—they can assist you.
Have more questions or run into an issue? Drop your question in the comments—I’m always happy to help!
You may also check out related posts:
Topics

Written by
HarshankiAn entrepreneur by heart, I am obsessed with the world of Apple. I survive on Apple products and their updates. Over the last five years, I have been writing all kinds of content that are remotely connected to Apple and sharing across digital platforms. When not writing, you will find me on the court playing basketball or in my room playing the sitar.
View all posts →More from How-to
How to Turn Off Location on Snapchat (Step-by-Step Guide)
Want to stop sharing your location on Snapchat? This guide explains how Snapchat location sharing works and shows simple ways to turn off your location using Ghost Mode or phone settings. Stay in control of your privacy in just a few steps.

Snapchat Parental Controls: How to Set Up Family Center and Keep Your Teen Safe
Snapchat’s Family Center lets parents monitor their teen’s friend activity and screen time without reading private messages. Here’s how to set it up and what to expect.

How to Block and Unblock Someone on Instagram
Instagram lets you block or unblock someone in seconds. Follow these simple steps to take full control of your privacy and online peace.