
Time Machine backups offer an excellent way to create copies of your data, which you can use to restore your system if anything happens to your Mac. While this is useful, your backups can sometimes be too large and take up a lot of space on your drive.
Deleting your old Time Machine backups is the best thing you can do in such situations. Keep reading as we show you how to delete Time Machine backups on a Mac. We’ll also teach you how to delete Time Machine snapshots stored locally on your Mac, should you need to get rid of them, too.
4 Ways to delete Time Machine backups
Depending on your requirements and level of expertise, you can delete Time Machine backups on a Mac in four ways:
How to delete backups from the Time Machine app
The easiest way to delete Time Machine backups on a Mac is via the Time Machine app. Using this app, you can quickly scroll through your recent Time Machine backups and delete them individually.
- Connect your Time Machine drive to your Mac.
- Open the Time Machine app using Spotlight search. You can access Spotlight by pressing Command + Space.
- Use the arrows to find the backup you want to delete.
How to delete Time Machine backups in Finder
Time Machine backups are stored in an organized fashion on your Time Machine backup disk for easy access. As a result, you can quickly find your old backups and delete them through Finder. But do bear in mind that this process is risky, and you can corrupt the backup if you aren’t careful enough.
- Connect your Time Machine drive to your Mac.
- Locate and open Finder from the Dock on your Mac.
- Click the Time Machine drive from the left sidebar.
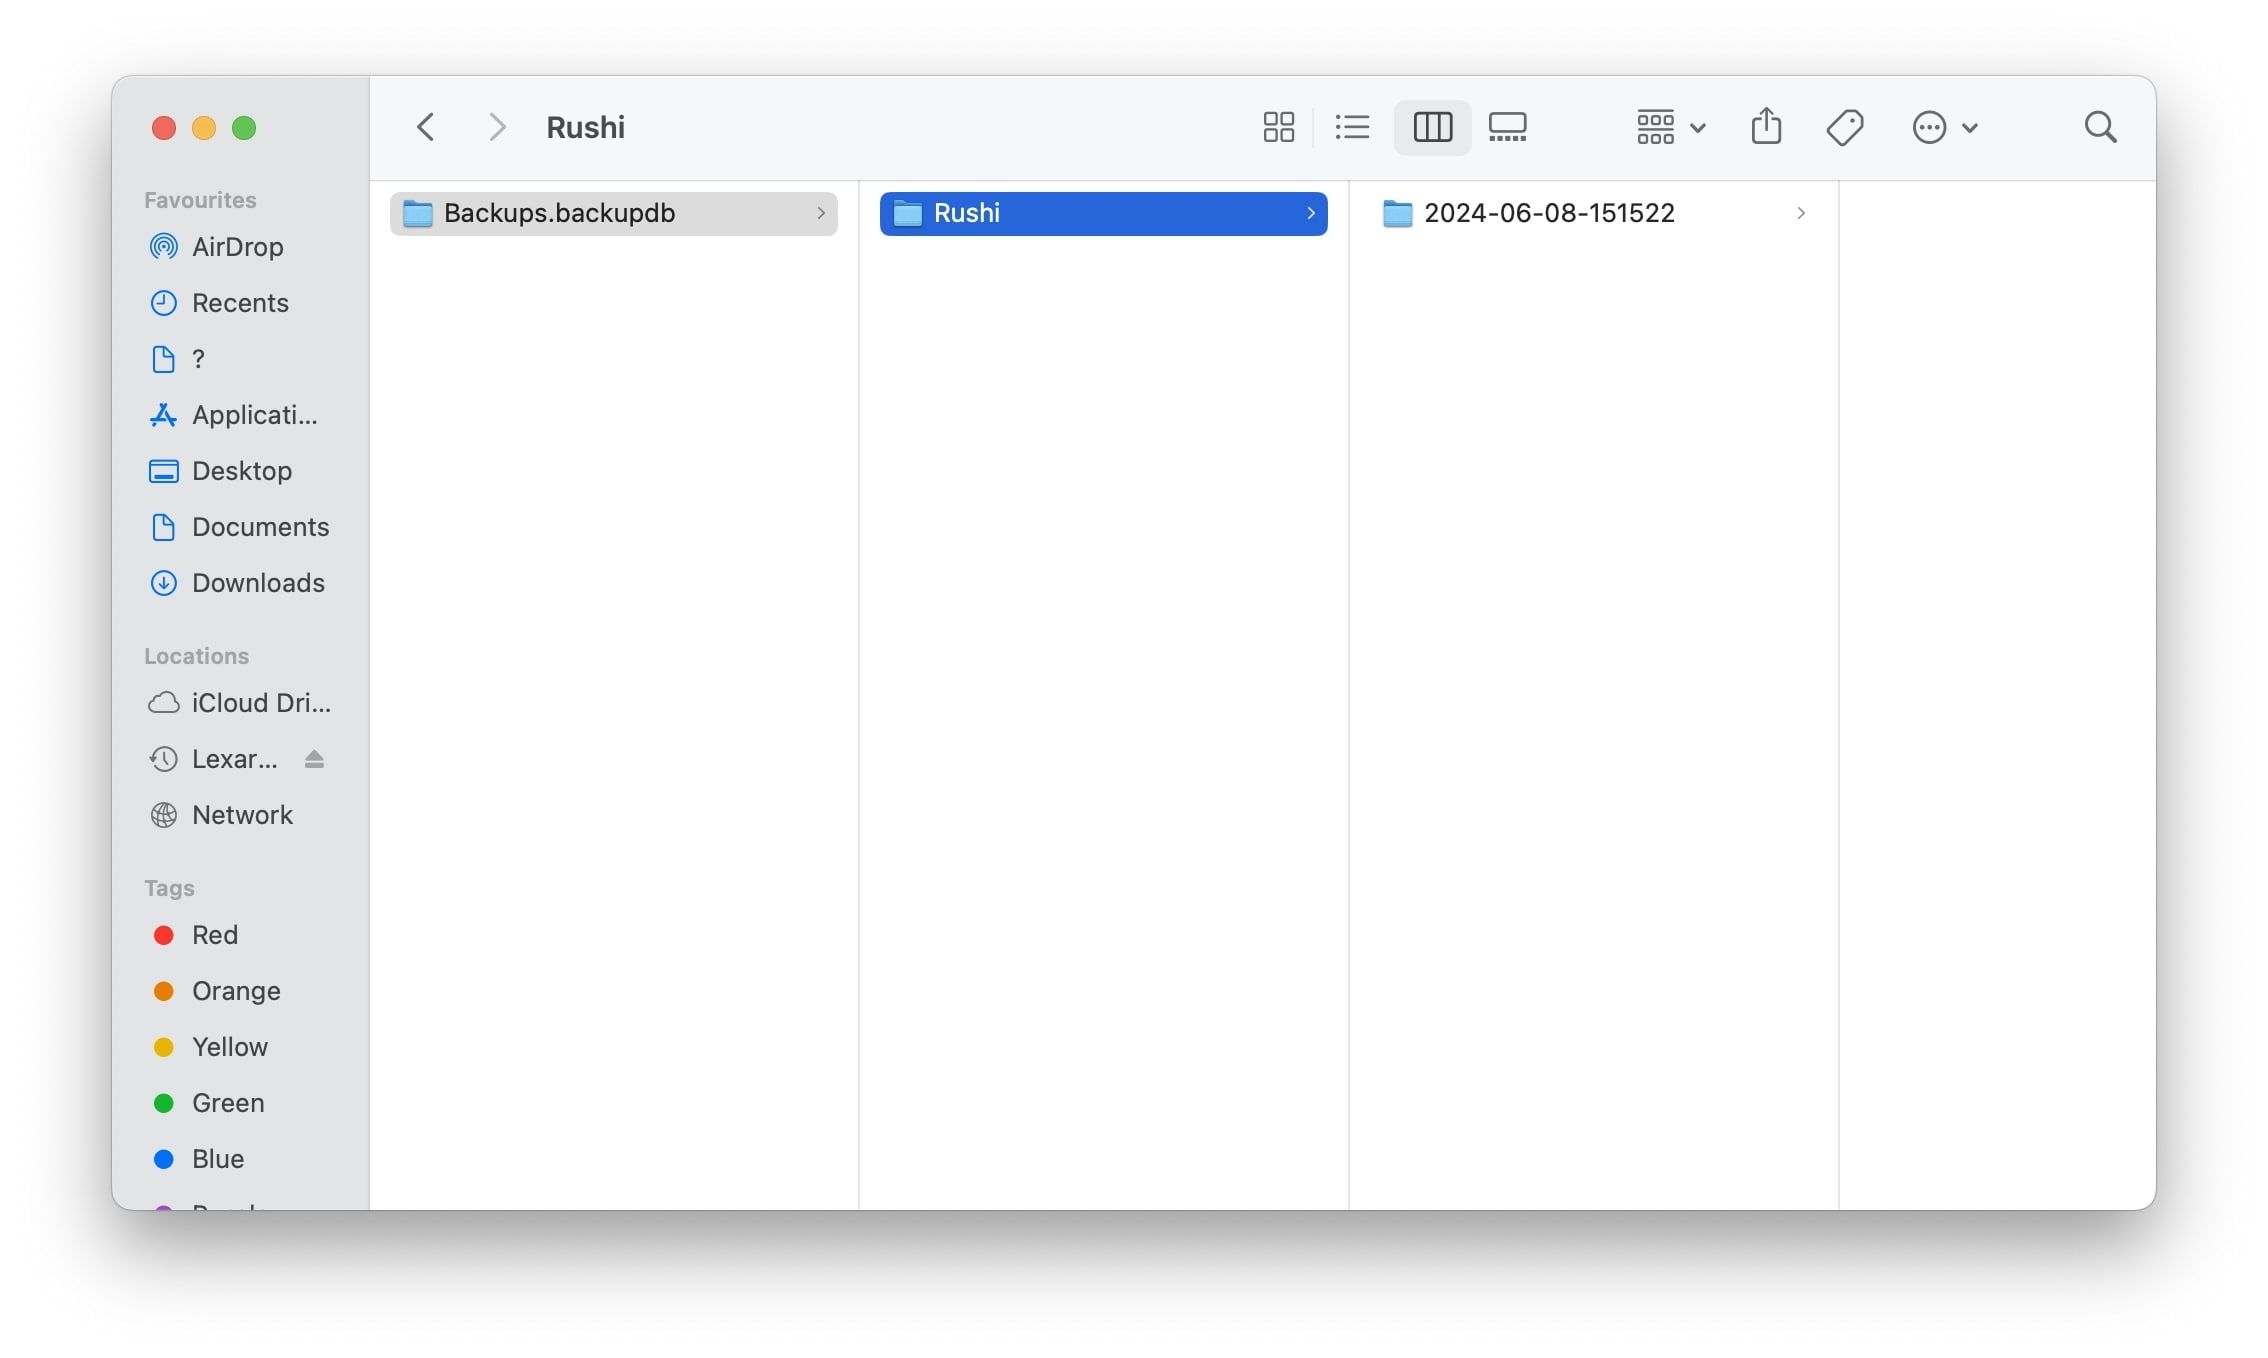
- Now, double-click on the Backups.backupdb folder to open it.
- Open the folder labeled with your Mac’s name to find the backups.
- Right-click on a backup you want to delete and select Move to Trash.

How to erase Time Machine backups using Terminal
Apart from the methods we’ve listed so far, you can also use Terminal commands to view all the Time Machine backups stored on your external backup disk and delete them.
Here are the steps for the same:
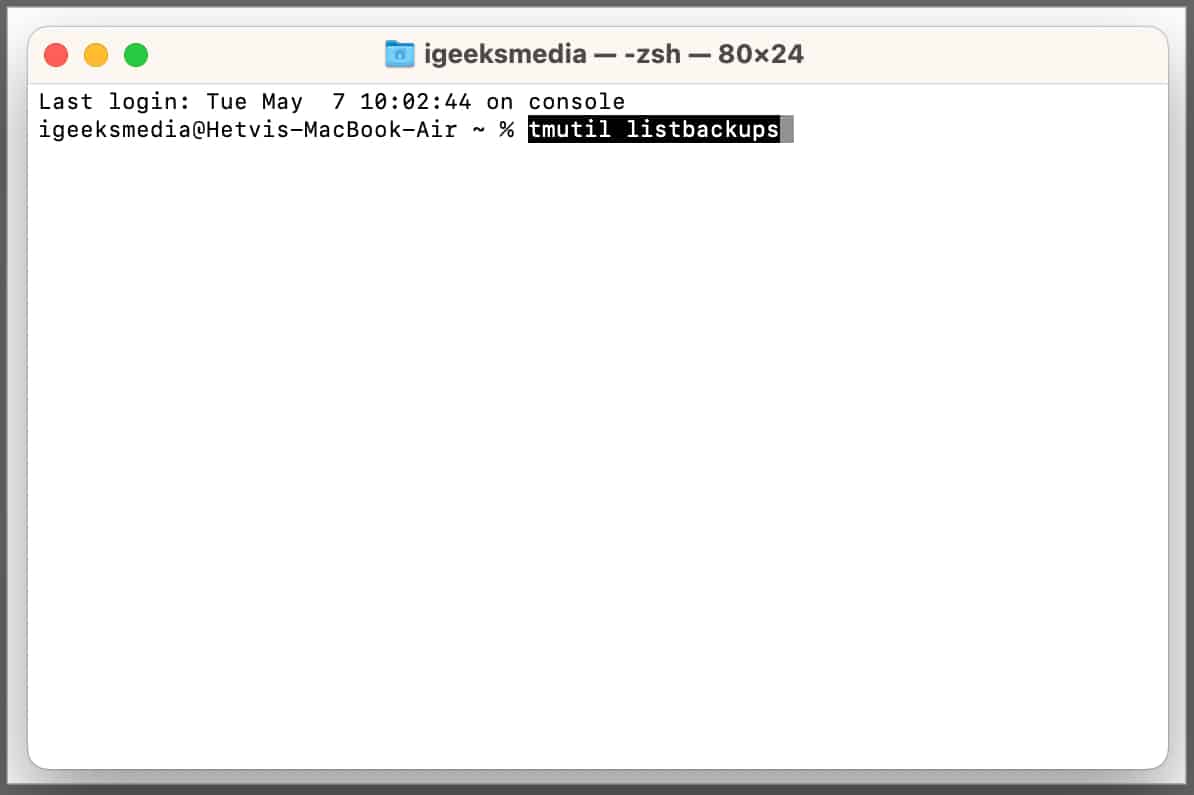
- Open the Terminal app on your Mac.
- Type
tmutil listbackupsinto the Terminal and press Return.
- Copy the path of the Time Machine backup you want to remove.
- Type
sudo tmutil delete [backup path]and press the Return key. - Enter your Mac’s password and press Return to erase the backup.
How to delete all backups using System Settings and Disk Utility on Mac
The previous methods offer a way to delete individual backups, but what if you need to delete all backups so you can use your drive to store other files? In that case, you can deselect your drive as a backup destination and reformat it.
- Connect the Time Machine backup drive or NAS to your Mac.
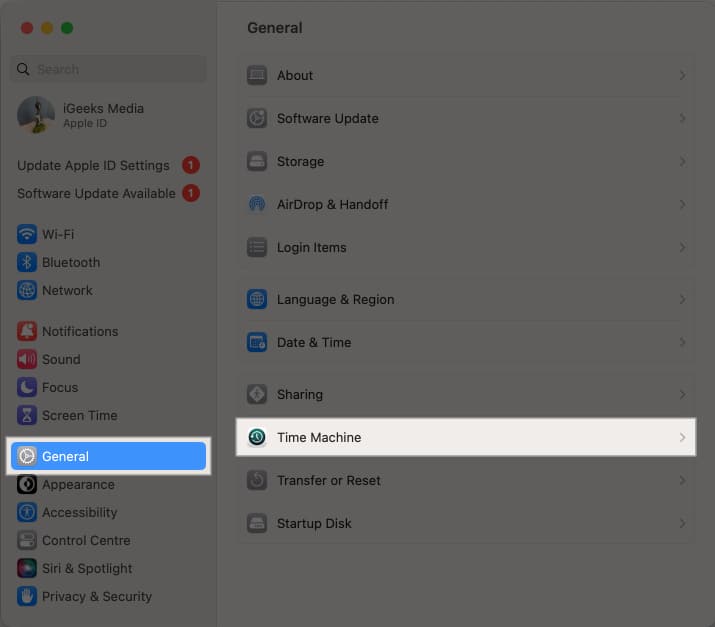
- Click the Apple logo in the menu bar and select System Settings.
- Now, go to General from the sidebar and select Time Machine.

- Select a Time Machine backup disk and click the + icon.

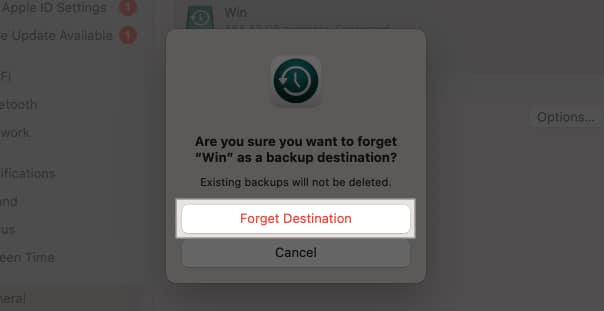
- Click Forget Destination to stop using the drive for backups.

After you deselect your Time Machine drive as a backup destination in System Settings, you must format the drive using Disk Utility on your Mac before you can use the disk to store your other files.
How to delete Time Machine snapshots on Mac
Besides creating backups that live on a separate disk, your Mac also stores temporary backup images locally on its internal drive. This ensures you can restore files even when the backup disk isn’t connected to your Mac.
Follow these steps to delete local Time Machine snapshots on your Mac:
- Open Terminal on your Mac.
- Type
tmutil listlocalsnapshotdates /and press Return. - Copy the date of the Time Machine backup that you want to remove.
- Type
tmutil deletelocalsnapshots [backup date]and press Return. - Enter your Mac’s password and hit Return to remove the local snapshot.

Wrapping up…
Those are all the ways you can delete Time Machine backups on your Mac. Regardless of the method you choose, deleting Time Machine backups can ensure your backup drive has ample storage space for new backups. Additionally, you can even delete all backups to use the hard drive for other purposes.
There’s no fixed time period for how long Time Machine keeps your files; the length of time that files are retained depends on the storage capacity of the disk you’re using to create backups. The Time Machine app automatically deletes older backups to make space for new ones whenever the backup drive fills up.
All Time Machine backups are automatically stored in a Backups.backupdb folder. You can find this folder on your backup disk or network-attached storage that you selected when creating a Time Machine backup for the first time.
Time Machine maintains a series of incremental backups, each representing the state of your Mac at different points in time. When you delete a specific backup, you’re only removing a particular snapshot from the backup history. The remaining backups will remain intact, and you’ll still be able to browse and restore files for your entire system from your existing Time Machine backups.
More things to explore:
- Migration Assistant not working on Mac? 8 Ways to fix it!
- How to fix a corrupted hard drive and recover data on Mac
- How to eject an external drive on Mac


Leave a Reply