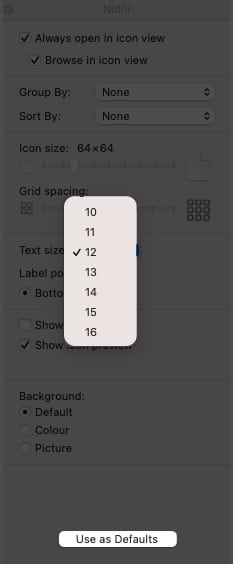
Mac users tend to change the font size of file names, folders, and other text in Finder. Users who have weak eyesight can benefit as some default text size of Finder fonts is very small and difficult to read. Therefore, adjusting the font size is the only solution. Let’s see how you can change the Finder font size on Mac.

Note: The default text size of Finder items is 12, which can be decreased to 10, and increased maximum up to 16.
How to adjust or increase text size of Finder fonts in macOS
- Choose any folder that contains files.
- Go to the View menu and click on Show View Options.

- Find the Text Size drop-down menu.
- Select the text size you want to keep and then click on Use as Default button seen under the same navigation panel.

This will adjust the font size in all other Finder windows. If you haven’t selected ‘Use as Default’, you can see the change in a text size only in that particular folder within Finder.
If you know any other method, please share with us.
Read more:


