Get ready to master the art of task management. With iOS 17 and macOS Sonoma, Apple has blessed us with auto-categorization in the Reminders app. It is a feature that can automatically sort your Shopping reminders into categories based on their content. This can make it much easier to find the tasks you need and also keep a tab on what you have completed.
In this guide, I will demonstrate how you can leverage auto-categorization to create a Grocery or Shopping List in Reminders on iPhone, iPad, and Mac.
What is auto-categorization in Reminders app?
Auto-categorization in Reminders is a feature that automatically assigns categories or labels to the reminder tasks. As a user creates a new shopping or grocery list, the auto-categorization system analyzes the content of the reminder based on keywords, phrases, and context.
- Suppose you’re running out of home essentials and are planning to restock your supply; Reminders can come in handy.
- Upon creating a shopping list, simply add the ingredients you’re looking to purchase. As soon as you hit Return, the respective product will be categorized under a new section.
- For instance, if you add “Soap” to the list, it’ll be enlisted below “Household Items.”
To me, it’s somewhat astonishing, as it works flawlessly even for the first item you add to the list. Hence, it’s safe to assume this list is not about a sequence or order and it’s about categories.
How to create Shopping List in Reminders in iOS 17 and iPadOS 17
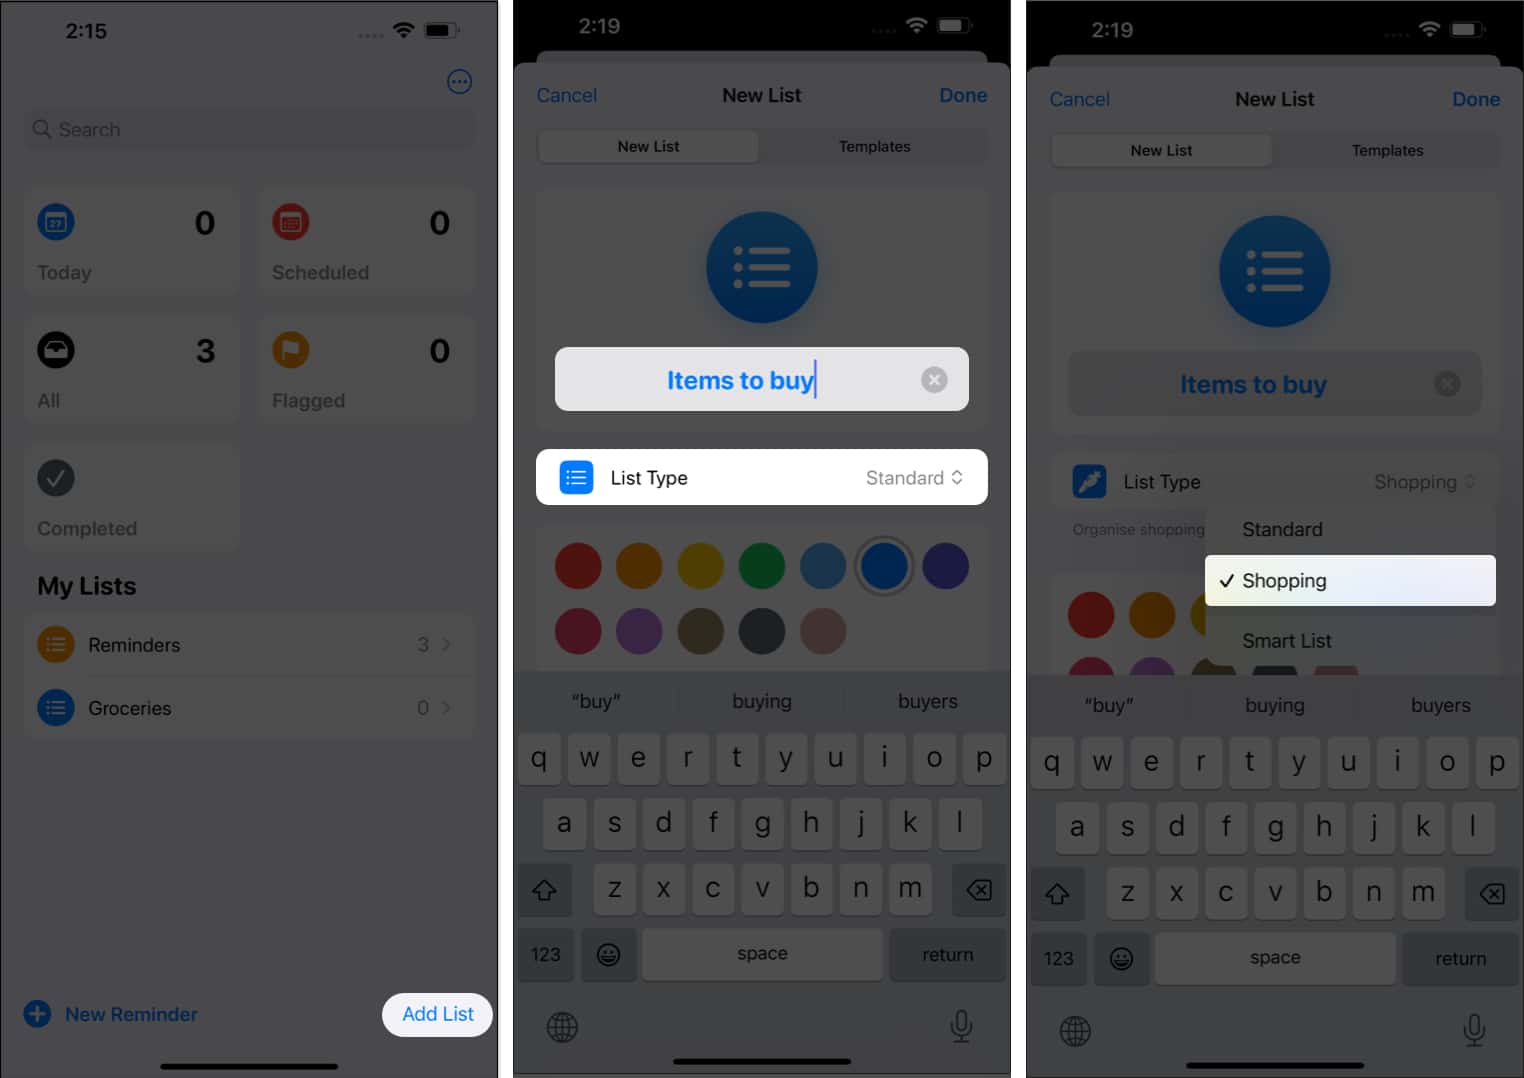
- Launch Reminders on your iPhone → Tap Add List at the bottom-right.
- Enter a name for your list.
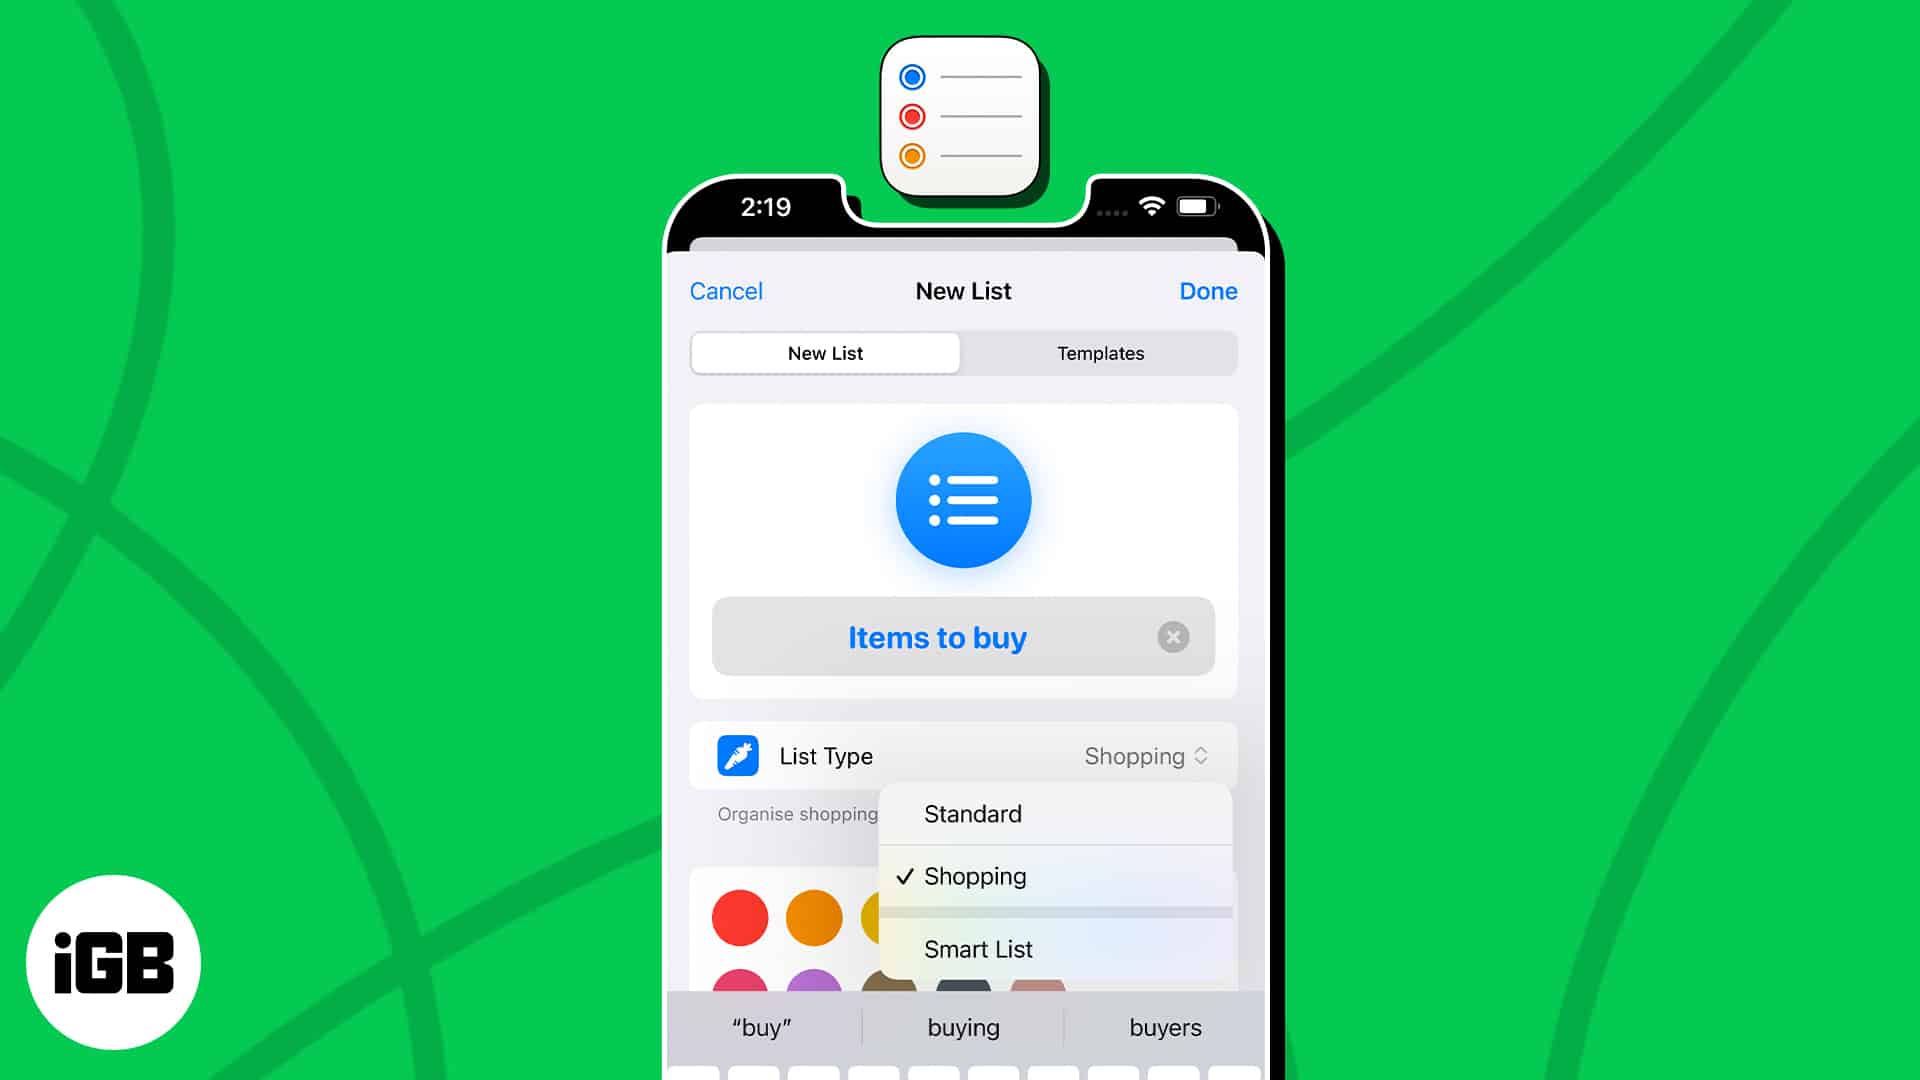
- Access the drop-down menu for List Type → Select Shopping.
In some regions, you might see Groceries instead of Shopping. - If you desire, choose a color and icon for your List.
- Select Done once you’re all set to proceed.
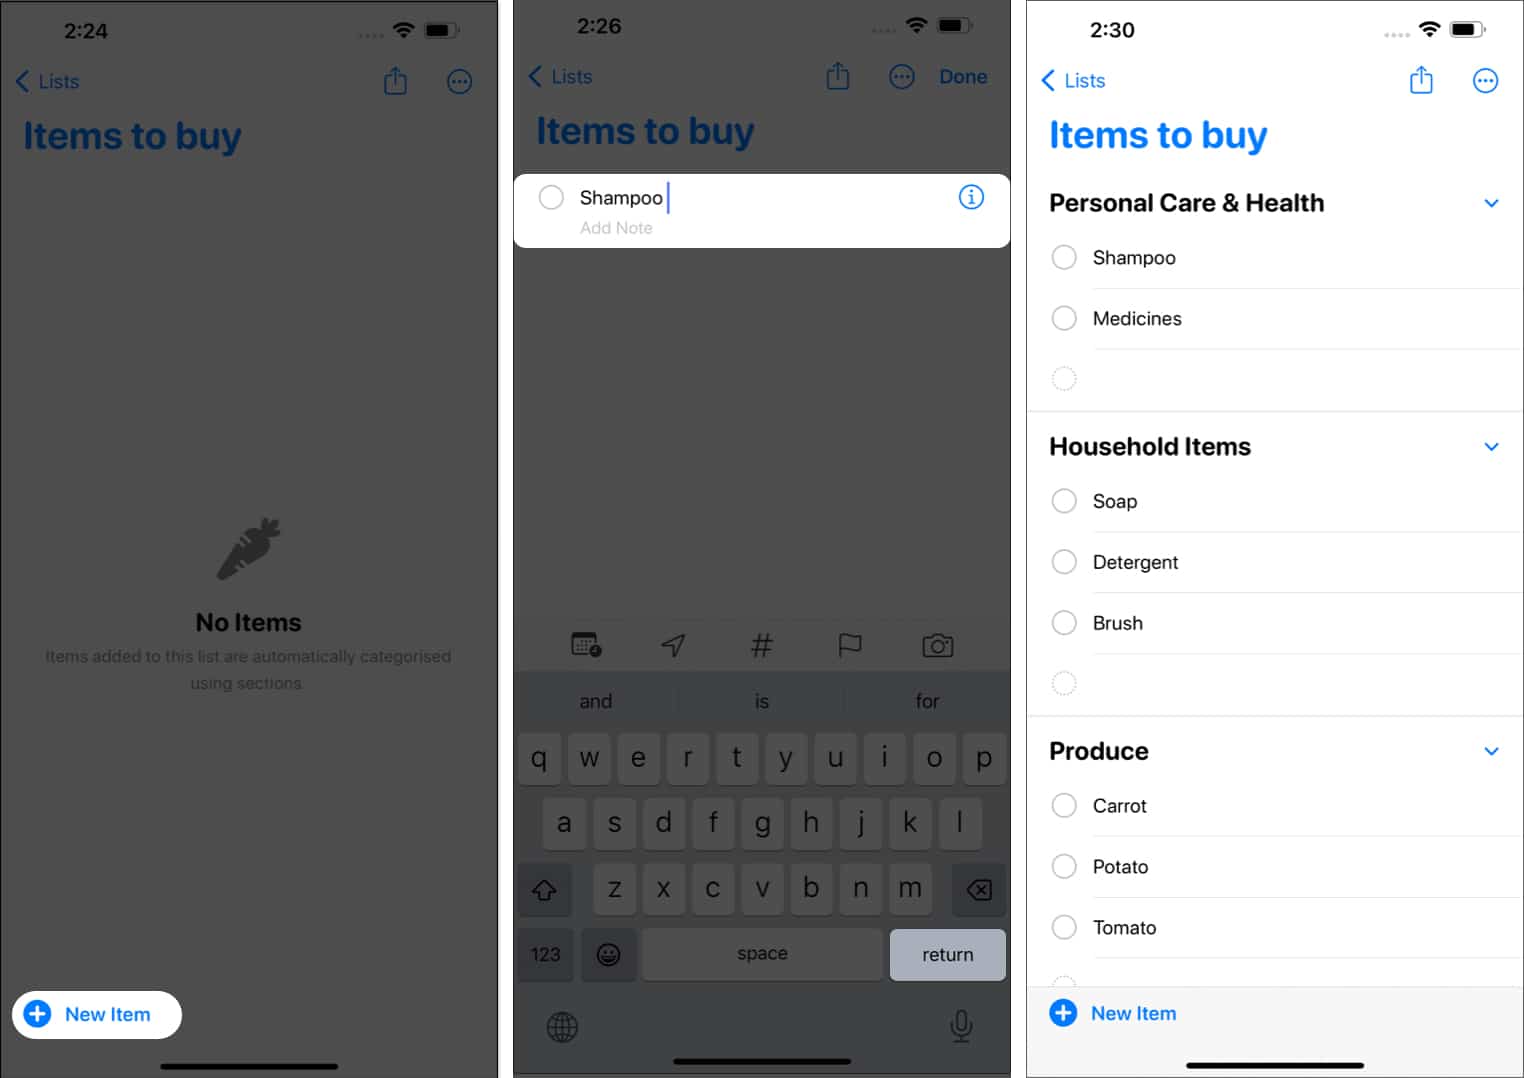
- Now, select New Item from the bottom-left corner.
- Create a new task and choose Return from the keyboard.
For instance, I created a task called Shampoo, and it automatically enlisted in the Personal Care & Health category.- Repeat the same for as many products as you wish.
- Eventually, a category will be assigned to each task.
- In every category, there is an empty space for adding extra tasks.
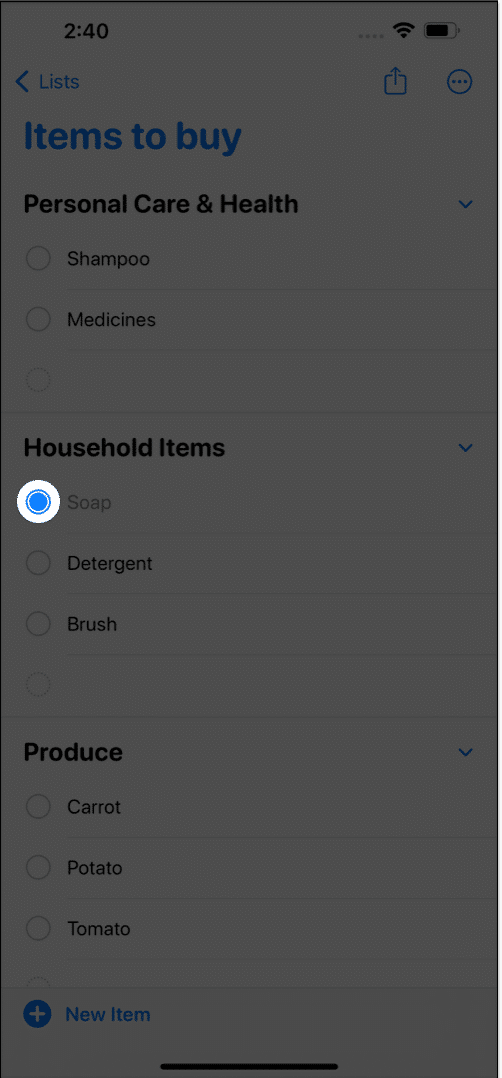
- When accomplished, simply tap the task to mark it as Completed.
- It’ll automatically be redirected to the Completed Tasks menu.
- Repeat the same for as many products as you wish.
How to create Shopping List in Reminders in macOS Sonoma
- Launch Reminders on your Mac.
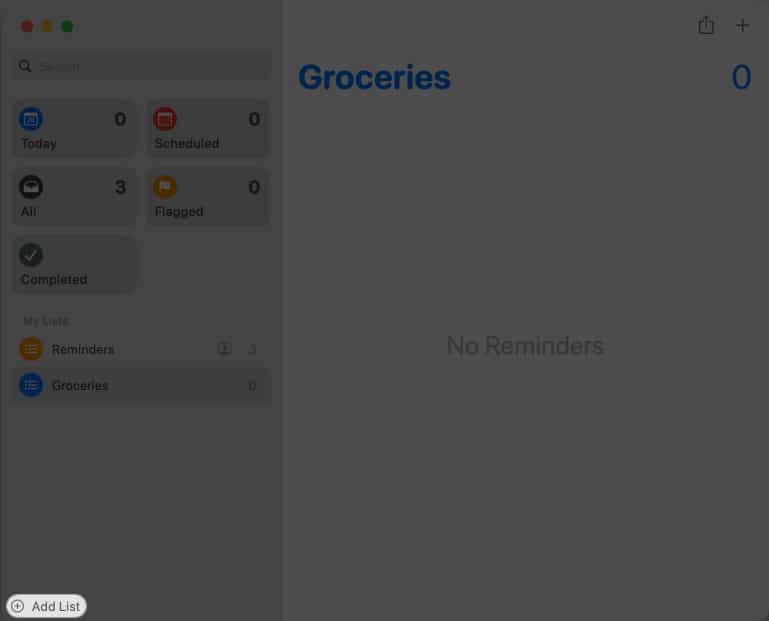
- Click the Add List option from the bottom-left corner.
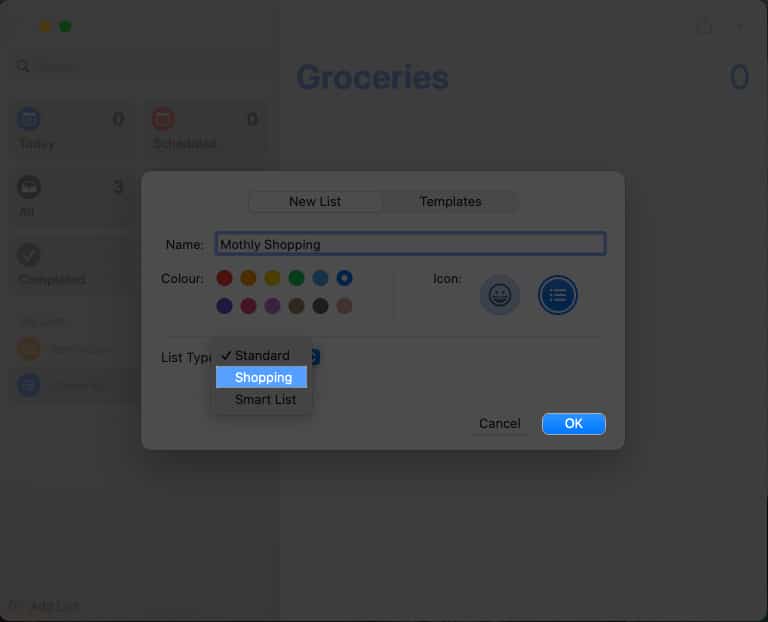
- Now, you can name your list, add colors, and choose icons according to your preference.
- Access the drop-down menu of List Type and select Shopping.
- Click OK to get started with the auto-categorization.
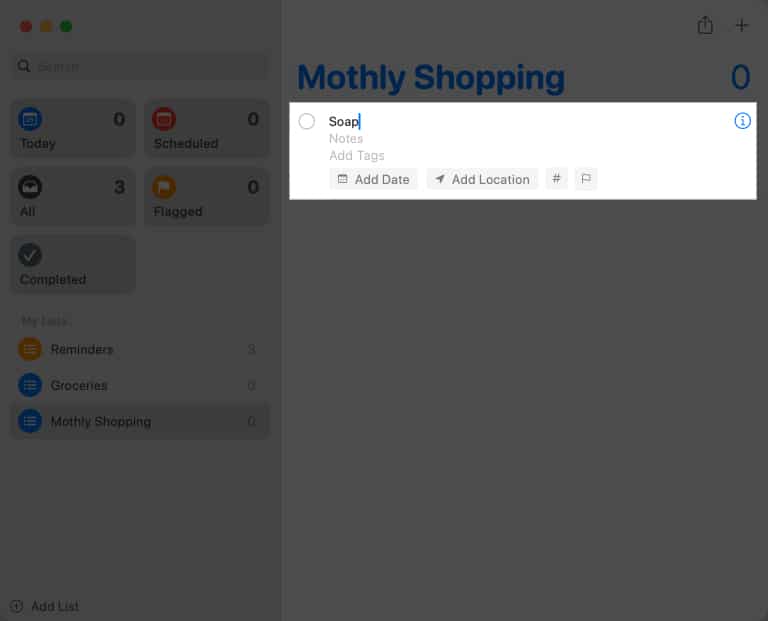
- Select the (+) icon to add a new task.
- Follow the traditional method to create and personalize a task and hit Return.
I demonstrated the process by entering Soap. - The system will automatically categorize the respective task when this occurs.
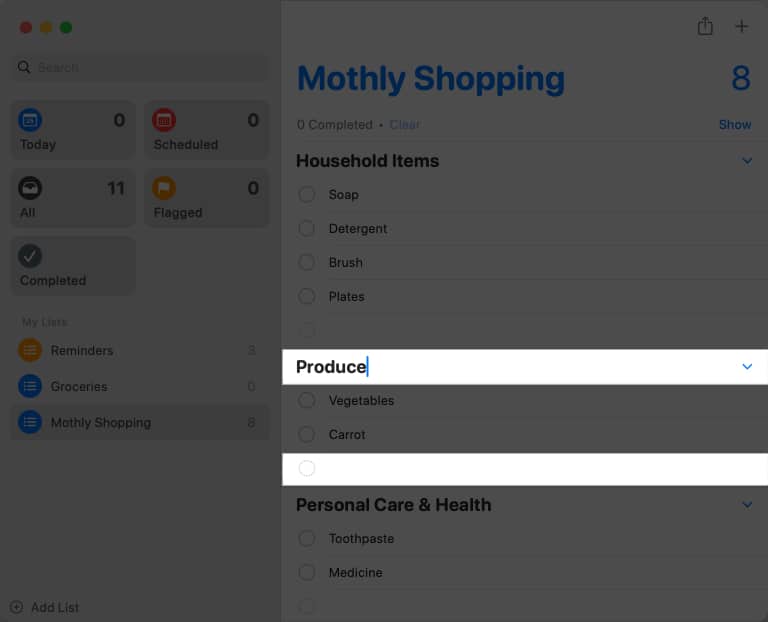
In this scenario, it’s Household Items. - Repeat the same for different items.
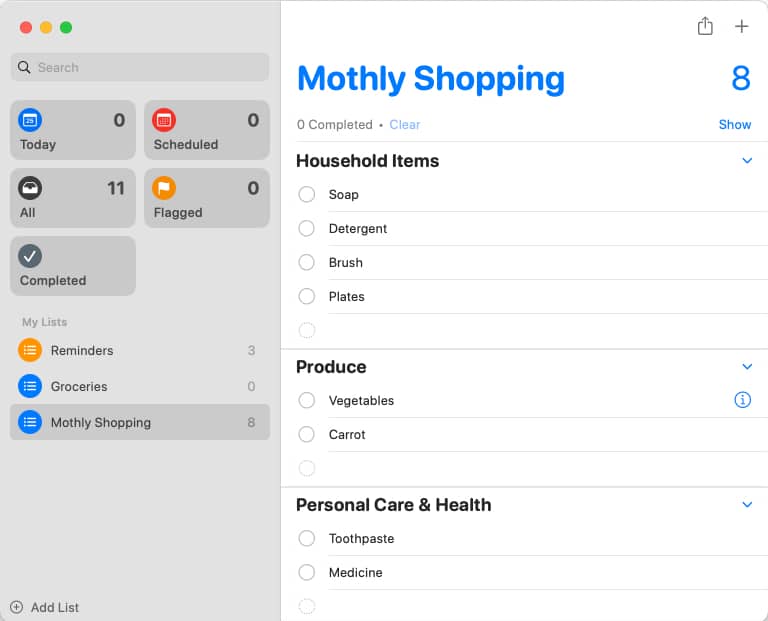
- Every task created will fall under the applicable category.
- You can further alter the predefined category to your will by clicking the title.
Rename it as you like. - Every category has a dedicated empty spot for those extra tasks you may wish to add later.
- Every task created will fall under the applicable category.
- When done, don’t forget to click the tasks to mark them as Completed.
It’s that simple! Now, you can effortlessly manage your to-do list without having to worry about a missing task.
Organize and forget!
Embrace seamless organization and productivity with auto-categorization for Shopping Lists in Reminders. Now, you can enjoy staying on top of your to-do lists with ease.
Thank you for reading. Please leave your thoughts in the comments below.
Read more:



Leave a Reply