I cleared Instagram cache and it actually fixed the lag
Instagram felt slow and inconsistent, so I tried clearing the cache. Here’s what changed and how to do it on iPhone and Android in minutes.

If Instagram has started feeling slow, glitchy, or unusually heavy on storage, you are not alone. I run into this quite often while testing features and scrolling for content ideas. At first, it usually feels like a network issue or a temporary bug. But in most cases, it comes down to cached data quietly building up in the background.
The good part is that you do not need any technical fix or third-party app to solve this. Clearing Instagram cache is simple, takes less than a minute in most cases, and can make the app feel noticeably smoother right away.
Here is the exact process that works right now.
What Instagram cache actually does (And why it slows things down)
Every time you scroll through reels, open profiles, or explore content, Instagram stores some of that data on your phone. This is called cache, and it helps the app load faster the next time you open it.
The problem starts when this data keeps piling up without any cleanup.
From my experience, this is when things start to feel off. The app does not break suddenly, but performance gradually drops.
You may notice:
- Instagram takes longer to open.
- Reels do not load smoothly.
- Storage usage increases without a clear reason.
- The app crashes or freezes.
How I clear Instagram cache: Step-by-step
I switch between Android and iPhone while testing apps and features, so I deal with cache issues quite often. The overall experience is similar, but the way you clear cache is different on each device.
How I clear Instagram cache on iPhone
On iPhone, there is no direct option to clear cache, so you need to rely on a couple of workarounds. I usually choose between these based on how the app is behaving.
When Instagram feels slow or uses too much storage
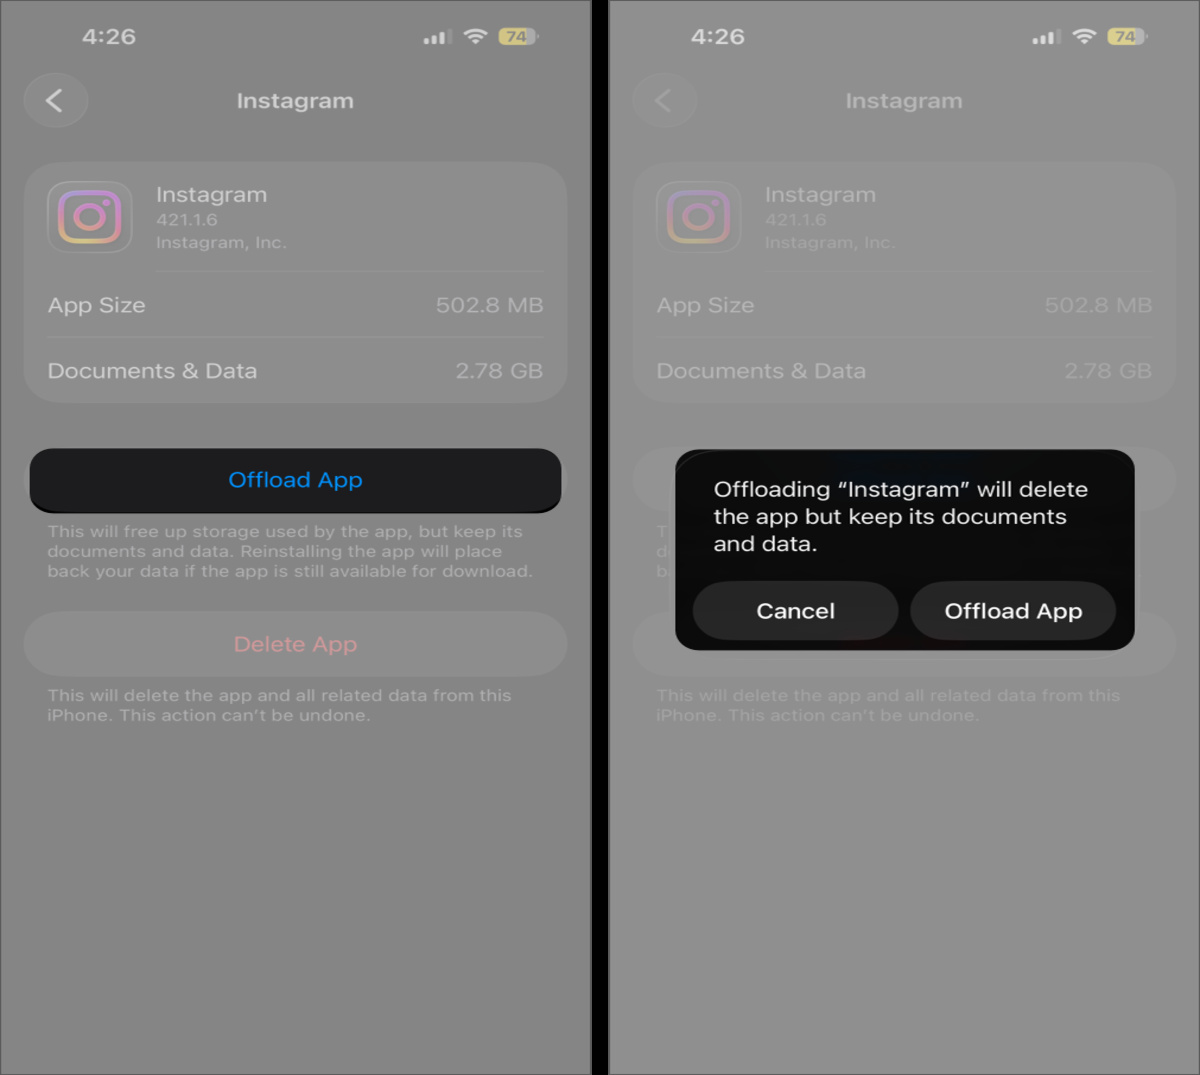
In this situation, offloading the app works best. It clears cached data without affecting your account or app setup.
- Go to Settings → General → iPhone Storage.
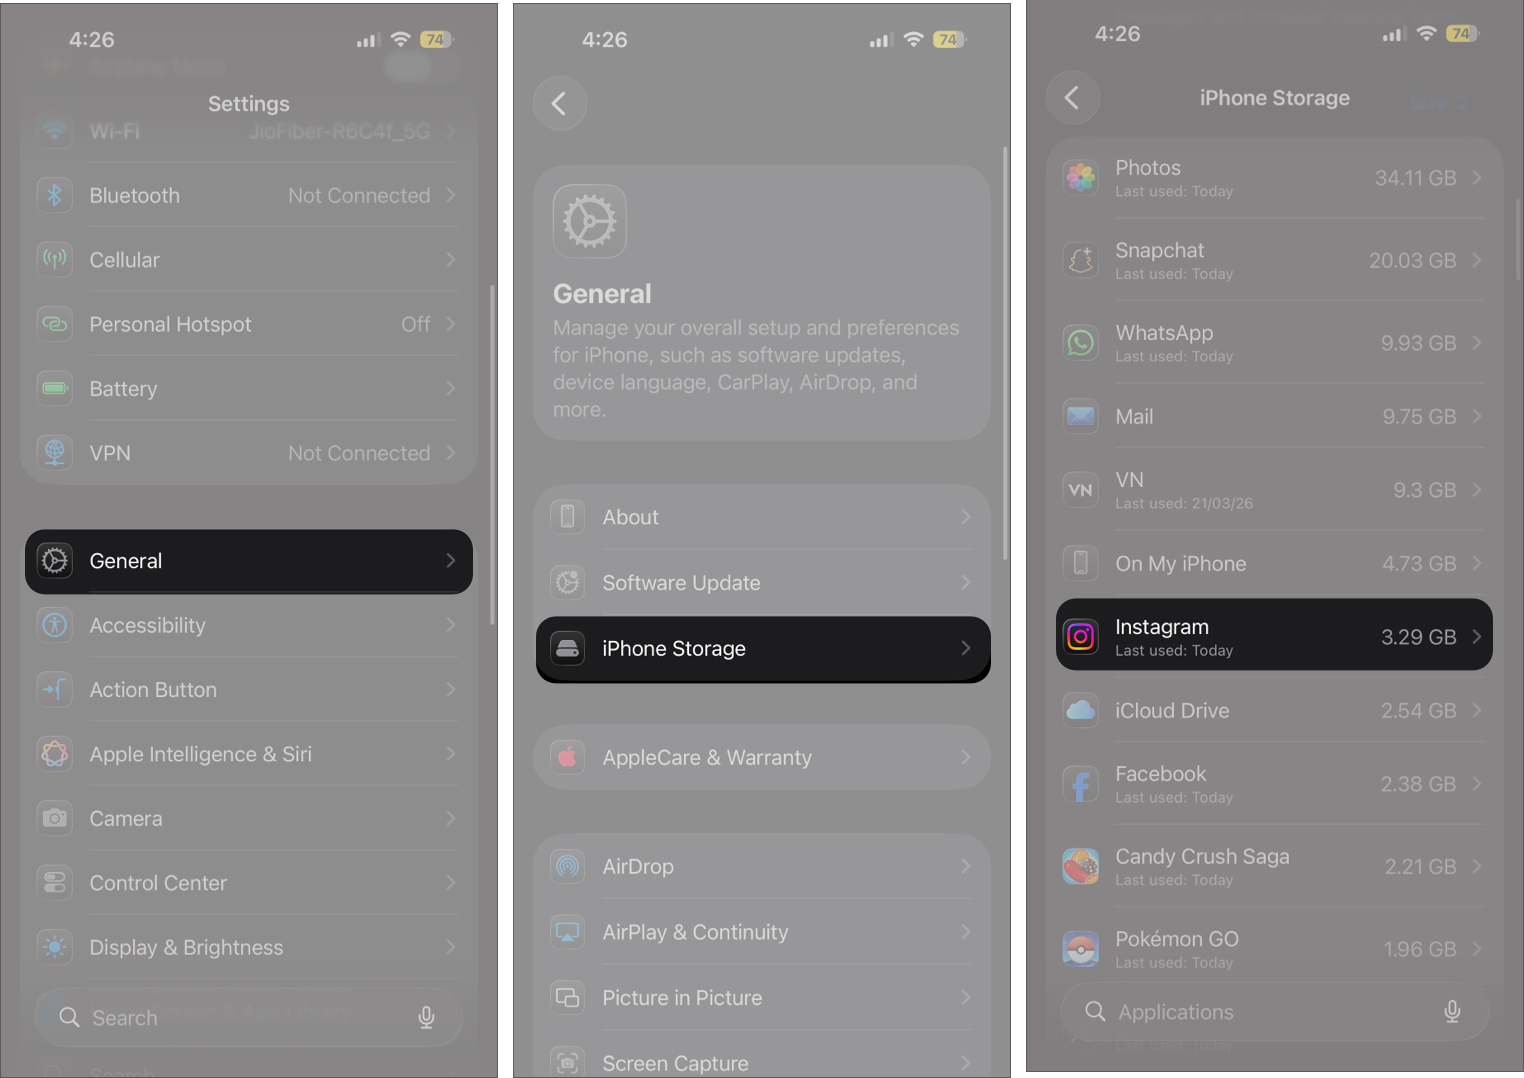
- Here, scroll down the list of apps and select Instagram.
- Now tap Offload app, then confirm.
When Instagram starts lagging or crashing
When the app starts crashing, freezing, or acting inconsistently after updates, a basic cleanup is not always enough. In these cases, I go for a full reset.
- Long-press the Instagram app icon on the Home Screen.
- Tap Remove App in the contextual menu that appears.
- Tap Delete App, then confirm.
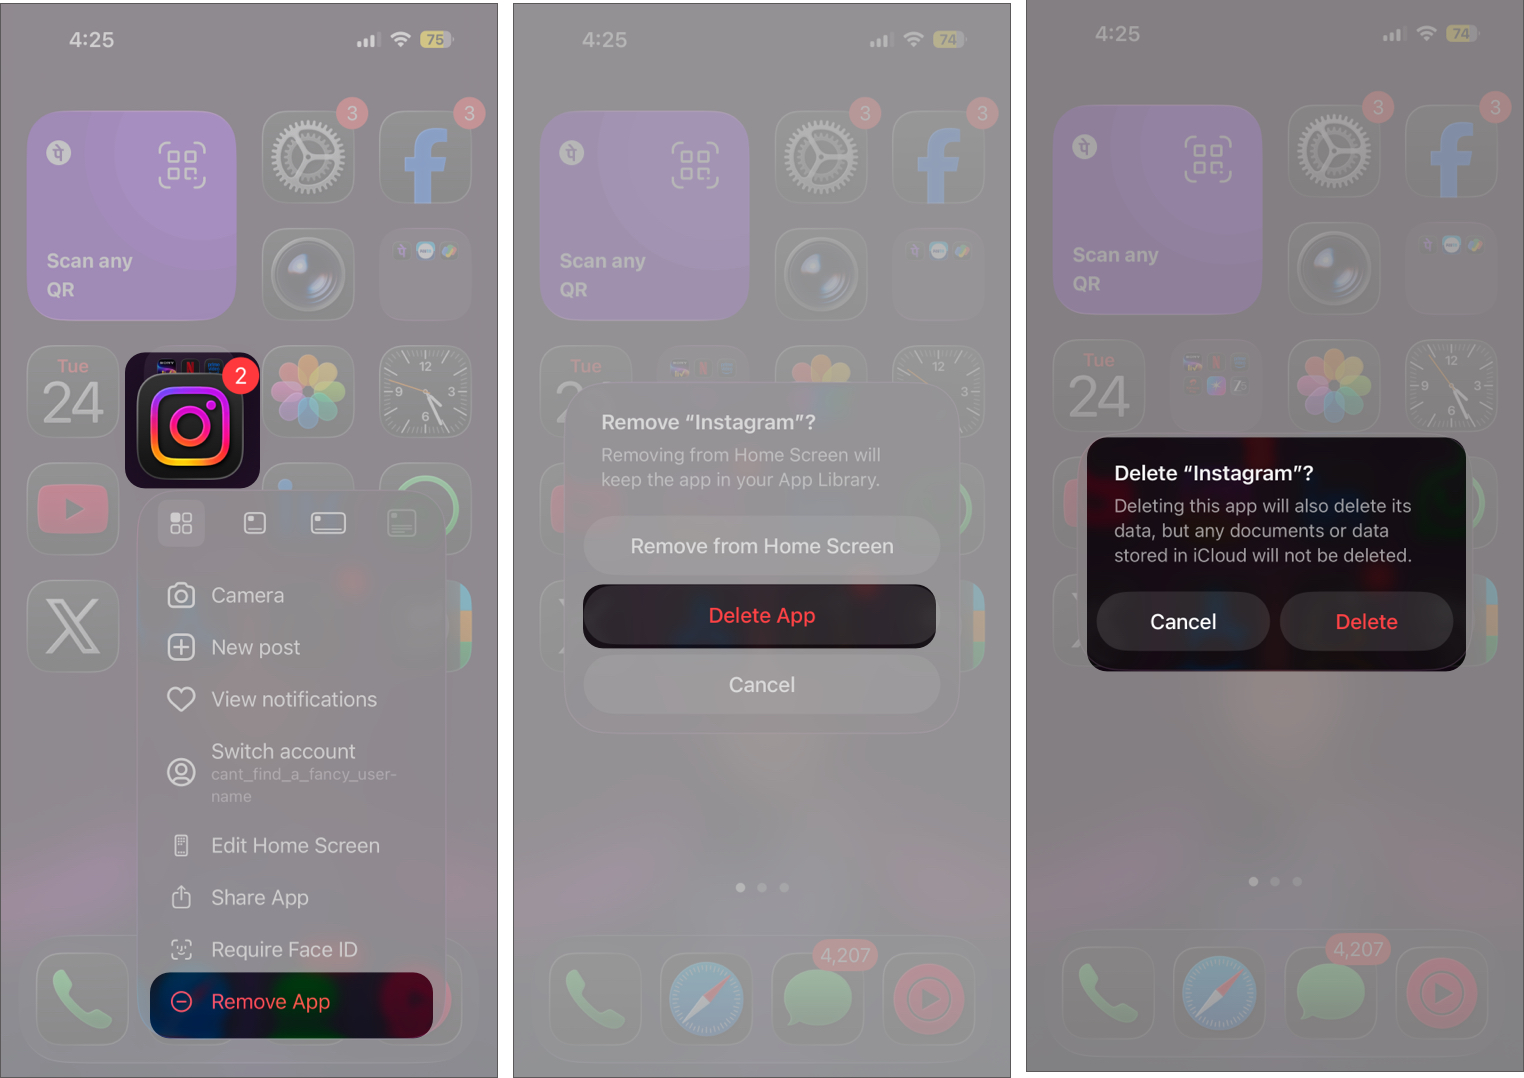
After that, reinstall the app from the App Store.
How I clear Instagram cache on Android
On Android, the process is much simpler. There is a direct option to clear cache, which makes regular cleanup quick and easy.
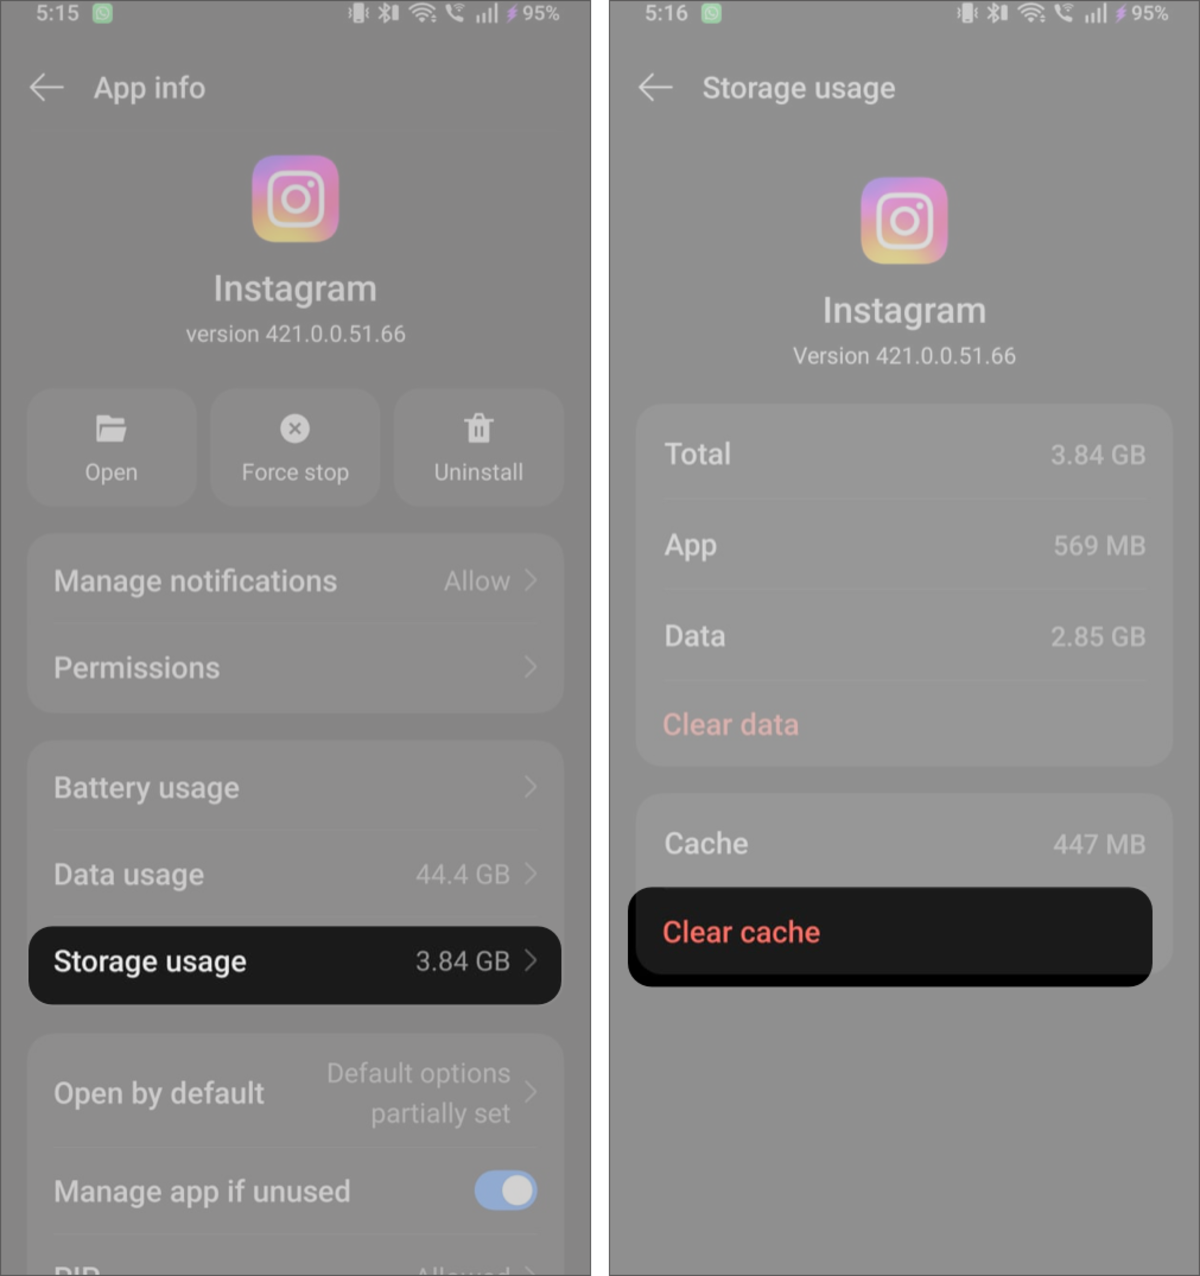
- Go to Settings → Apps → Instagram.
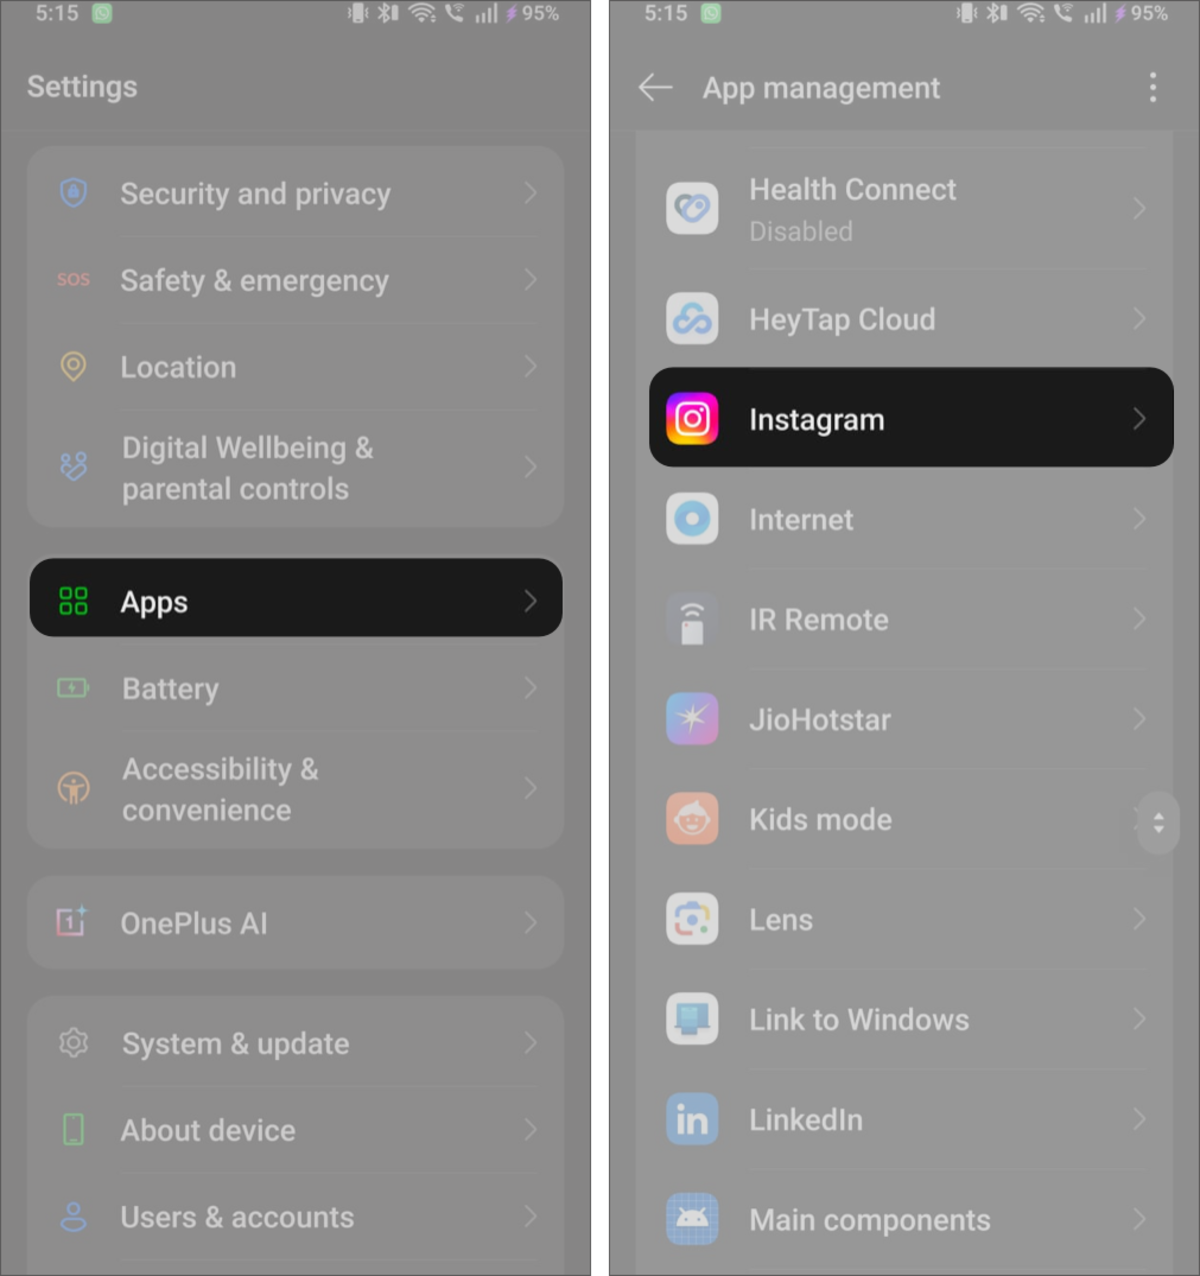
- Tap Storage & cache.
- Tap Clear cache.
This is usually the fastest way to fix minor performance issues.
How to clear Instagram’s In-app browser cache
Most people miss this, but Instagram also uses an in-app browser when you open links from stories, bios, or ads. Over time, this stores cookies and browsing data just like a regular browser.
I do not clear this often, but it helps when links feel slow or pages do not load properly.
Here is how to do it:
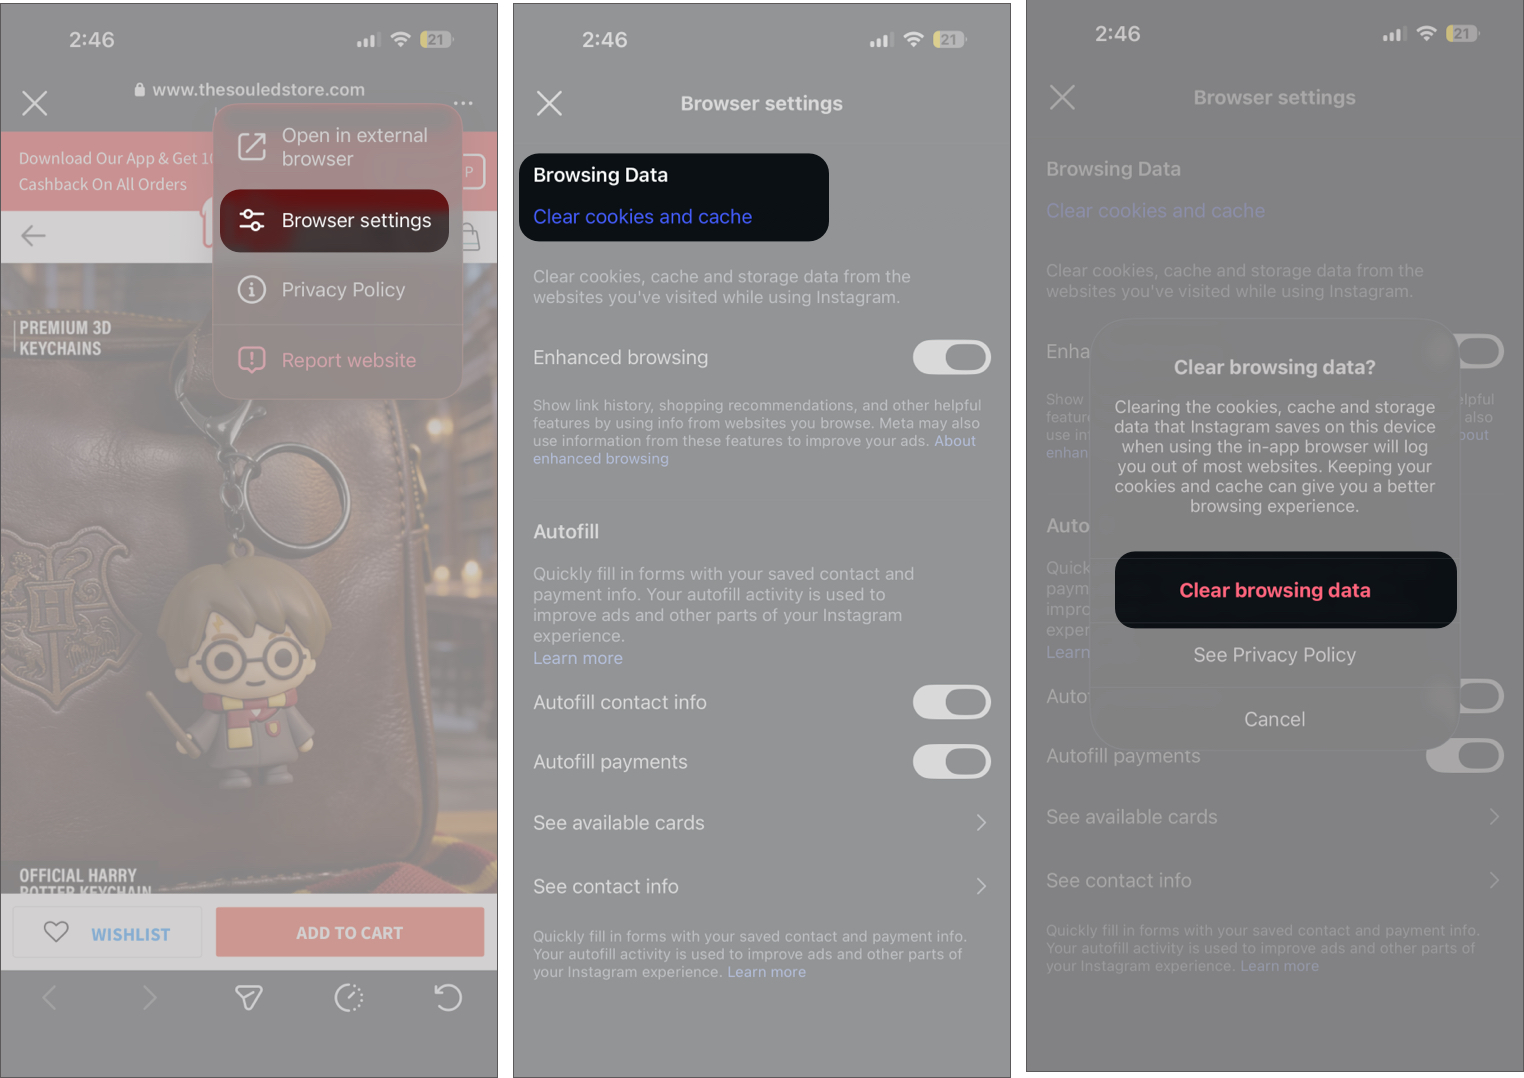
- Open any link in the Instagram app.
- Tap the three-dot (More) button in the top-right corner.
- Select Browser settings in the drop-down menu.
- Tap Clear cookies and cache under Browsing Data.
- Tap Clear browsing data on the confirmation prompt.
What actually changes after clearing Instagram cache
If you are clearing Instagram cache for the first time, you might wonder what actually changes.
In most cases, the difference is noticeable right away.
You will notice:
- The app feels smoother
- Storage space frees up
- Random glitches often disappear
Nothing important is affected::
- Your account remains logged in
- Messages and posts stay safe
- Saved content is not removed
The only small change is that content may take slightly longer to load at first while the app rebuilds a fresh cache.
When you should clear Instagram cache
You do not need to clear cache regularly, but certain signs make it obvious when it is time.
From what I have seen, these issues usually build up gradually rather than appearing all at once.
You should clear cache if:
- Instagram feels slower than usual
- Reels or the feed are not loading properly
- The app takes longer to open
- Storage usage increases without a clear reason
- Instagram crashes or freezes randomly
If you use Instagram frequently, especially for reels, clearing cache every few weeks helps keep things running smoothly.
My final take
Instagram cache builds up quietly and starts affecting performance over time. Most people do not notice it until the app becomes slow or unstable, but the fix is simple once you know where to look.
On Android, it takes just a few taps. On iPhone, offloading or reinstalling works well. Both approaches are effective, even though the steps are different.
Making this a small habit every few weeks keeps Instagram running smoothly without much effort.
Did clearing the cache make a difference for you? Share your experience in the comments below.
Frequently Asked Questions

Written by
Luqman AbdulkabirLuqman has a strong passion for technology and provides troubleshooting support and how-to guides for iOS and macOS. Additionally, he keeps up with the latest Apple updates to provide useful content.
View all posts →More from How-to

I Thought My WhatsApp Was Secure Until I Checked These Settings
WhatsApp is secure, but only with the right settings. Here are the changes that made my account safer.


What It Actually Takes to Get Verified on Roblox: Here’s How to Get It
What it actually takes to get verified on Roblox. Learn the real requirements, why you can’t apply, and how the blue checkmark is awarded.


How to Switch from Business to Personal Account on Instagram
Want to switch back to a personal account on Instagram? Here’s a quick guide to help you make the change and understand what happens next.
