Your Mac’s storage space may fill up pretty quickly, despite your best efforts to preserve it. The situation becomes particularly challenging if you have a base Mac with 128GB or 256GB storage.
Luckily, macOS offers the Optimize Storage feature that lets you clear out some storage space on your Mac. Read on, and I will explain what Optimize Storage is, when to use it, and how.
What is the Optimize Storage feature on Macs?
Optimize Storage is a macOS feature that helps remove Apple TV movies and TV shows you have already watched, clearing tons of disk space on your Mac. This can come in handy when you forget to delete your downloaded content after you have finished watching it.
When you use the feature, your Mac intelligently detects and deletes only the watched content. Any content that you haven’t watched yet is kept as it is, so you don’t have to worry about re-downloading it.
Who should use Optimize Storage?
The Optimize Storage feature is handy for those who frequently download and watch movies or TV shows in the Apple TV app on their Macs. It helps manage storage by automatically removing watched or old downloads, ensuring you always have space for new content.
However, keep in mind that this feature applies only to the Apple TV app content on your Mac. It won’t delete downloaded content from other streaming services like Netflix, Hulu, or Prime Video, so you will need to manage those separately. This feature might not even show up if you don’t use the Apple TV app on your Mac.
How to optimize your Mac’s storage using Optimize Storage
Using the Optimize Storage feature on your Mac is easy. Here’s what you need to do:
- Open System Settings on your Mac.
- Go to General > Storage.
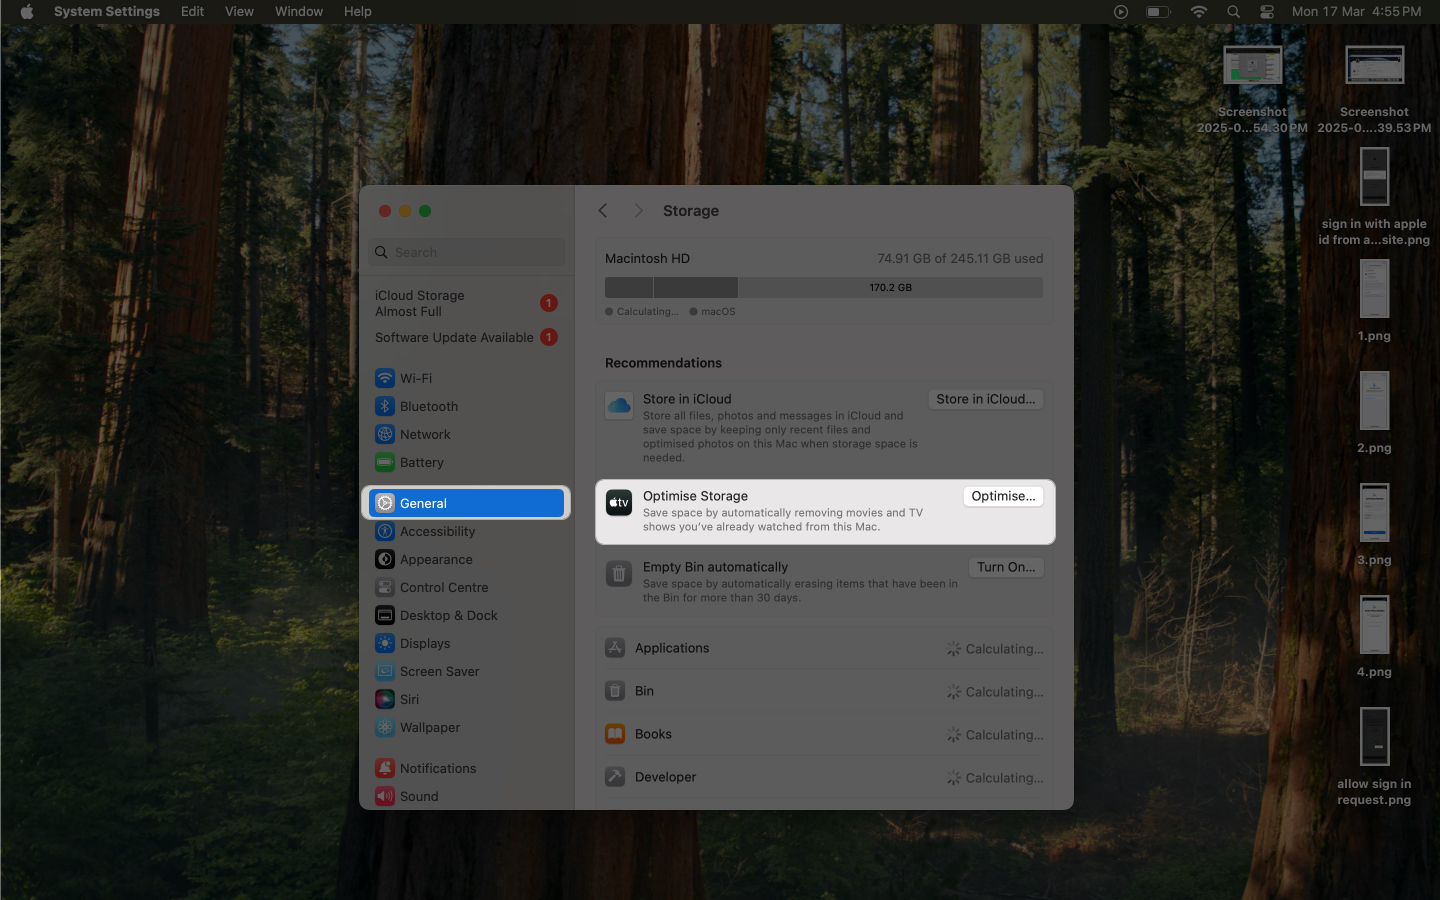
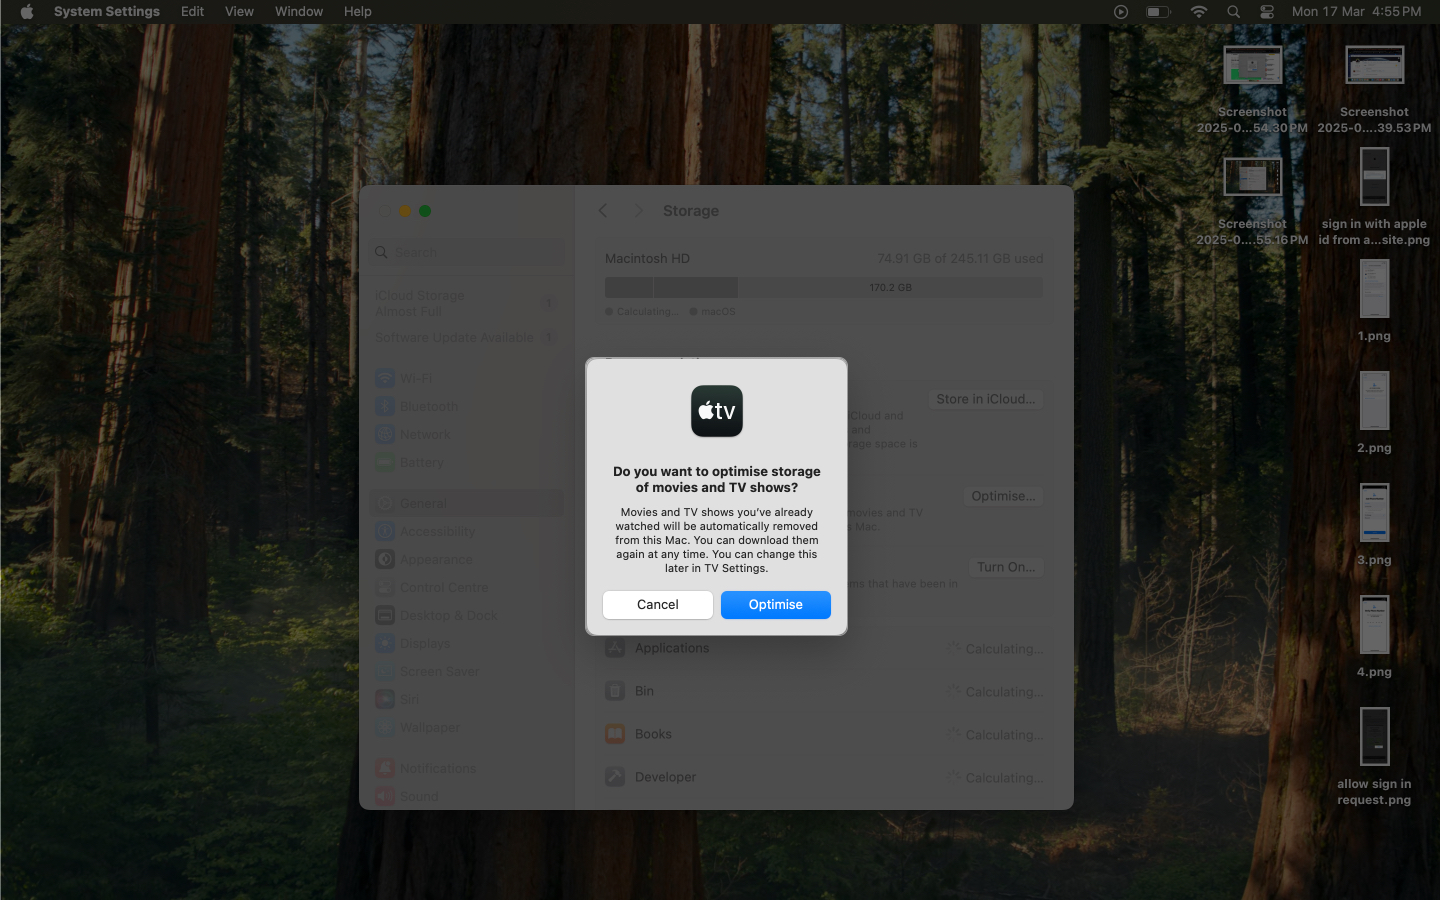
- Under the Recommendations section, you will find the Optimize Storage option. Click the Optimize button and confirm in the following popup by clicking Optimize again.
That’s it.
Optimize Storage will now automatically remove downloaded movies and TV shows you have watched on your Mac. However, it won’t clear the downloads from any of your other devices logged in with the same Apple Account.
Signing off
Optimize Storage is a simple yet useful feature for Apple TV app users who frequently download content on their Macs, as it saves the hassle of manually deleting downloads, which is quite tedious. While it won’t affect storage outside the Apple TV app, it’s a smart way to keep your download library organized.
For further cleanup, check out our in-depth guide on how to free up storage space on Mac.
You may also like to read these:


