Are you among those stargazers or amateur astronomers who often look at the beautiful night sky and wish you could seize the moment and capture its beauty? Well, if you have an iPhone, you indeed can.
Capturing the night sky with all its celestial elements via your iPhone’s camera can be a rewarding experience. Whether you are a photography enthusiast wanting to capture and document the cosmos or gain social media followers by sharing breathtaking night sky pictures, we are here to help.
All you need is a few pieces of equipment, some necessary, some optional, and you are all set. So, without further ado, let me guide you through the process to help you with iPhone astrophotography.
What is iPhone astrophotography?
The term iPhone astrophotography refers to the practice of using the iPhone camera to capture photos of the moon, stars and other celestial objects during a clear night sky. While people often associate astrophotography with high-end cameras and telescopes that can sometimes cost a fortune, the continuous advancement in the iPhone camera technology makes it the perfect pocket-friendly device to capture the night sky.
Night mode, long exposure shots, improved camera sensors & lenses, and ProRAW capabilities are some of the advancements that Apple has introduced to the iPhone camera over the past few years. With the right camera settings and a bit of post-processing, you can easily take a picture of the moon and other celestial objects on your iPhone.
What do you need for iPhone astrophotography?
Before heading out to capture the beautiful night sky, you must ensure that you have at least a particular iPhone model along with a few iPhone accessories for photography:
- An iPhone 11 or later model
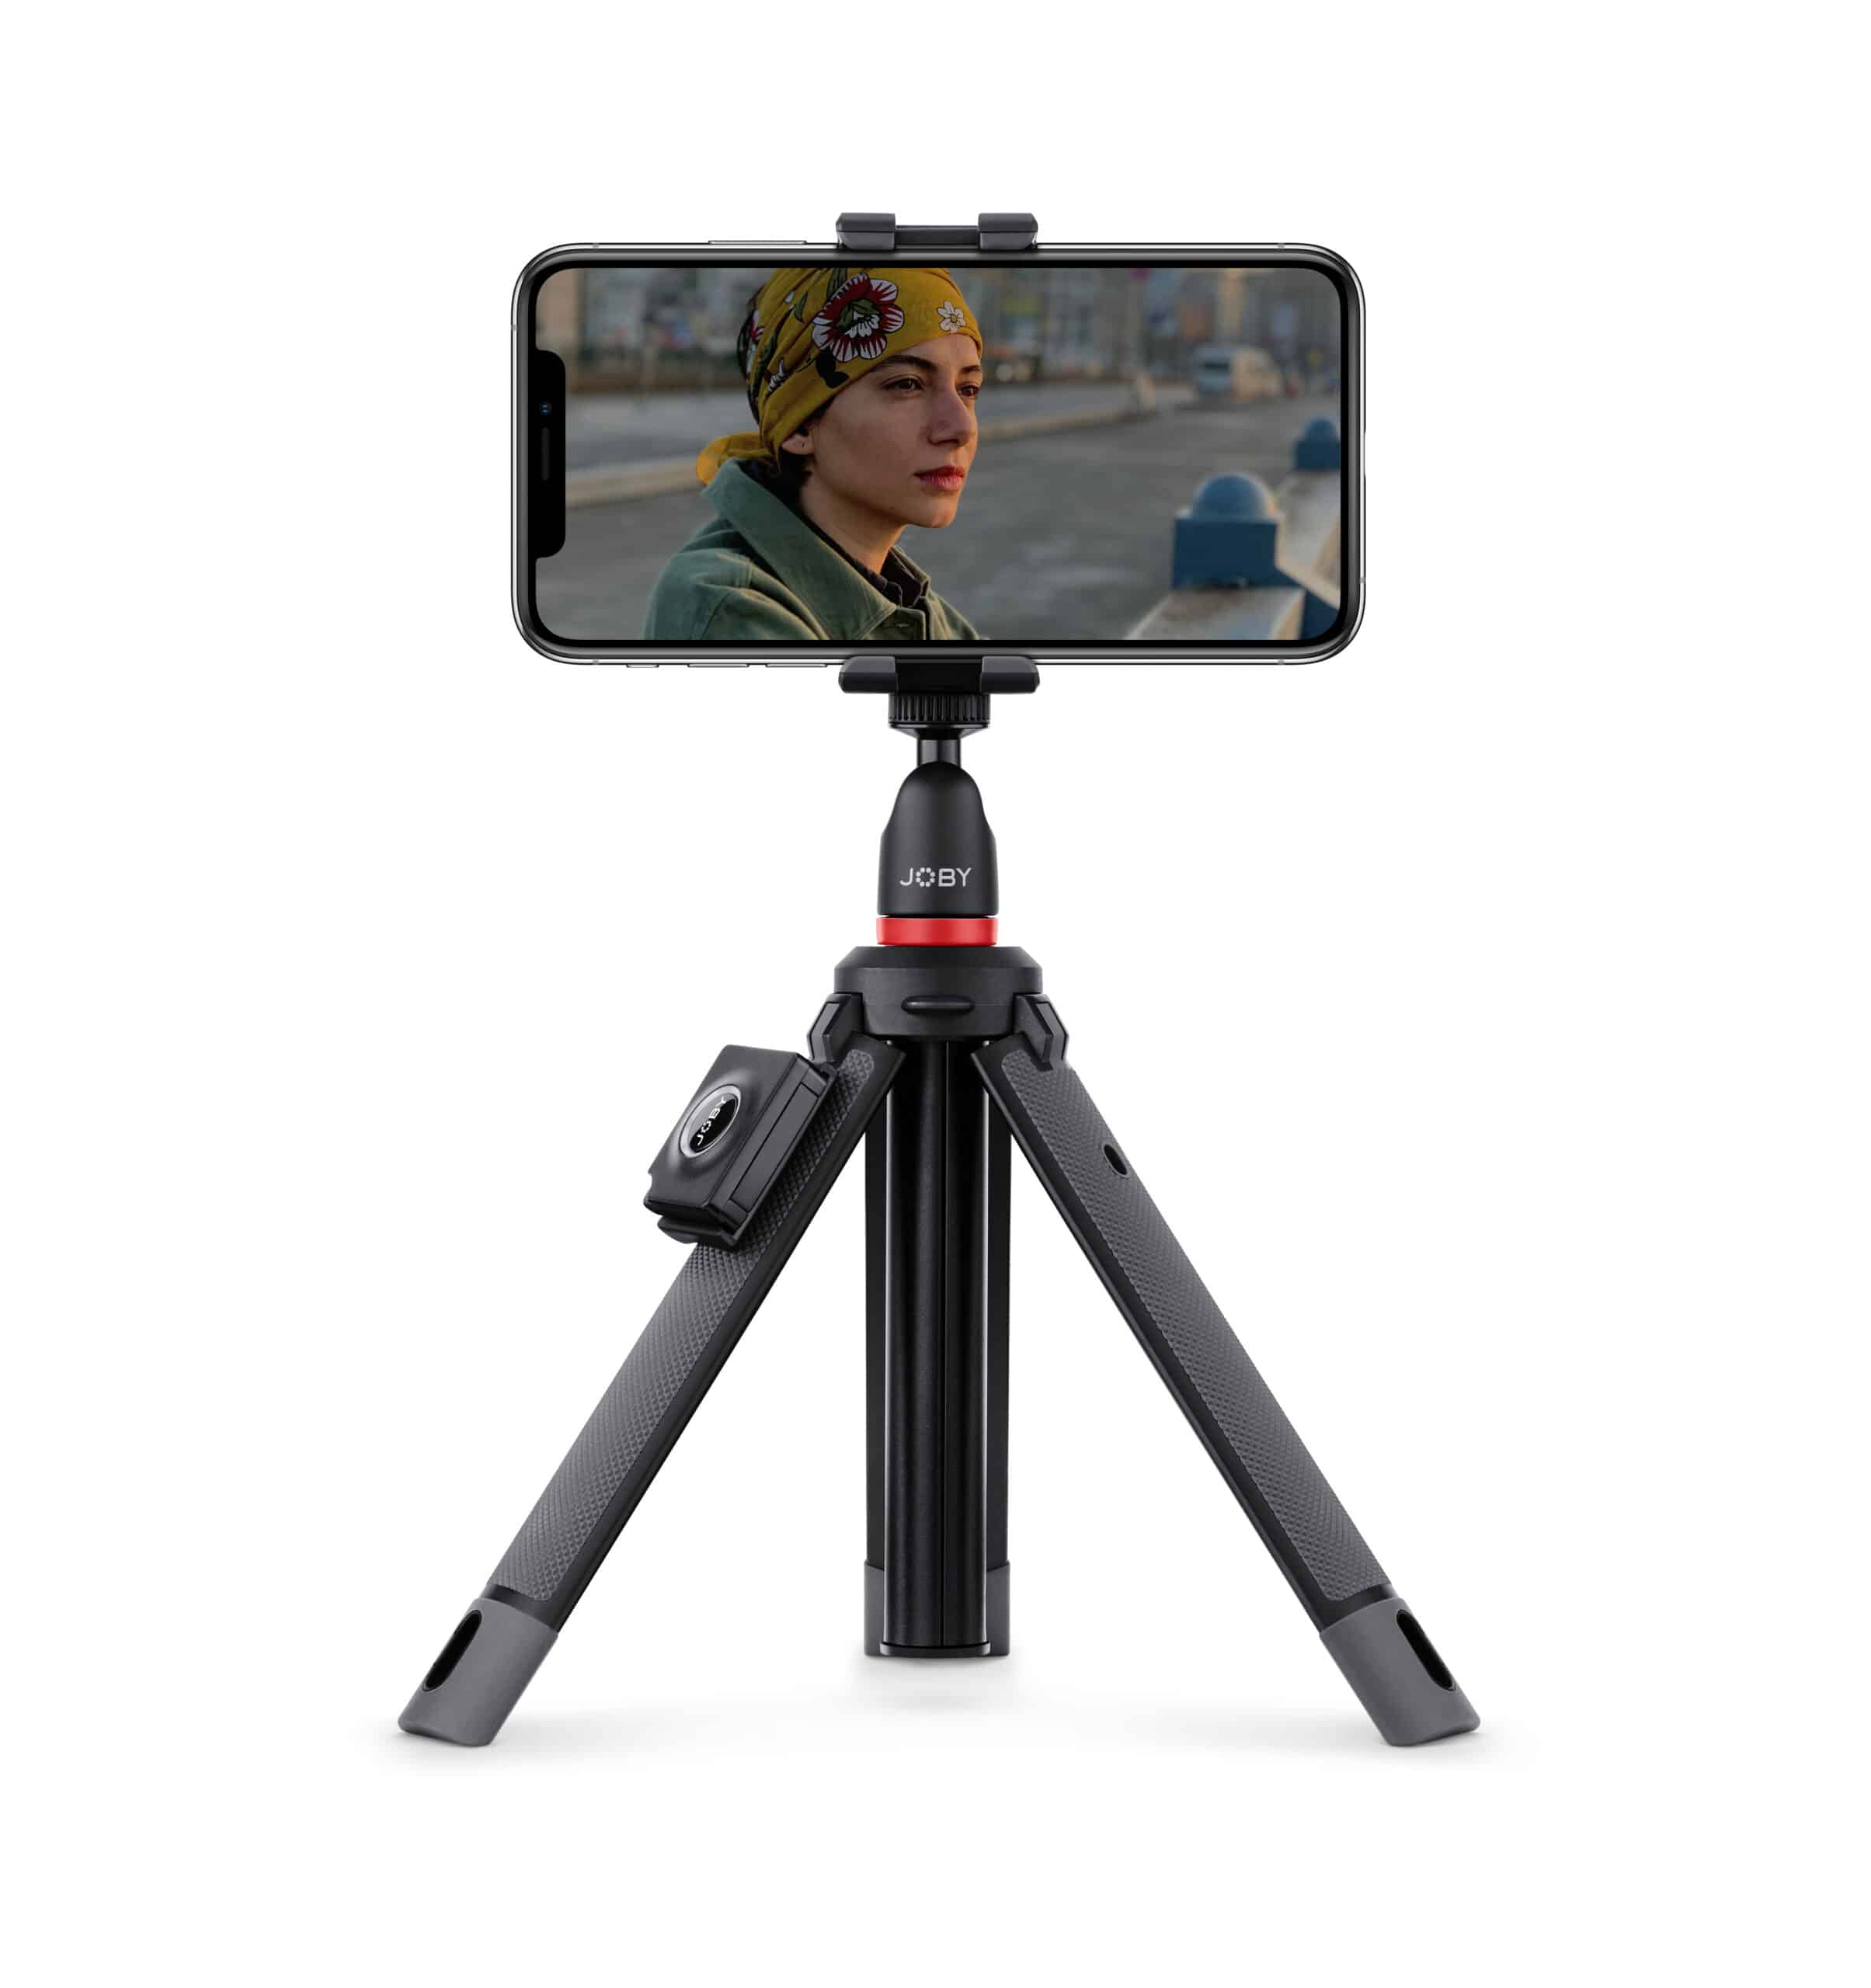
- A quality tripod
- A Bluetooth remote shutter (optional)
When is the best time to take astrophotography pictures with an iPhone?
Correct timing plays a huge role when it comes to clicking astrophotography photos with an iPhone. There’s a lot on which the quality of your night sky pictures depends, including but not limited to the moon phase, weather conditions, and time of the year. Below, I’ve explained the best timing for astrophotography on iPhone in detail:
- Clear cloudless nights: A cloudy sky can easily obstruct stars and other celestial elements behind it, making it difficult for the iPhone camera to detect and perfectly capture. So, it is important to check out the weather forecast using the iPhone Weather app for the particular location to which you are heading to capture the night sky in advance.
- Blue hour: The blue hour refers to the twilight period right after sunset; the remaining partial sunlight takes a blue shade during this time. The blue sky is dark enough for the stars to be visible, and you can also capture the beautiful landscape along with them.
- New moon nights: If it is the stars, not the moon, that you want to capture, then a new moon night or when the moon isn’t visible is the best time for you. The absence of moonlight results in a darker sky, making the stars and other celestial objects appear brighter.
- Meteor showers and celestial events: It would be best if you plan your shoots around meteor showers and other celestial events like eclipse, as it will give you a unique opportunity for astrophotography.
These are some of the best times for astrophotography on an iPhone.
Where can you take the best astrophotography shots with an iPhone?
The ideal timing alone isn’t the key to capturing breathtaking astrophotography shots; you need to look for the ideal location as well. Ideally, the best spots for astrophotography are the locations with minimal light pollution, along with a clear sky and a wide view of the horizon.
These locations can include but aren’t limited to national parks, deserts, mountain tops, remote beaches, vast open fields away from cities, dark sky preserves (DSP), and more. Choosing the right time and location ensures you capture the best possible night sky shot with your iPhone.
How to take night sky photos on an iPhone
Now that you know what iPhone astrophotography is and what equipment you need to perform it, you are more than ready to learn how astrophotography is done using an iPhone. Here’s what you need do.
Step 1: Mount your iPhone on a tripod
Even with great built-in stabilization capabilities, even a minor hand movement can result in blurry long-exposure shots. To avoid this and ensure you always get sharp and stable shots, mount your iPhone on a quality tripod or rest it on a flat surface.
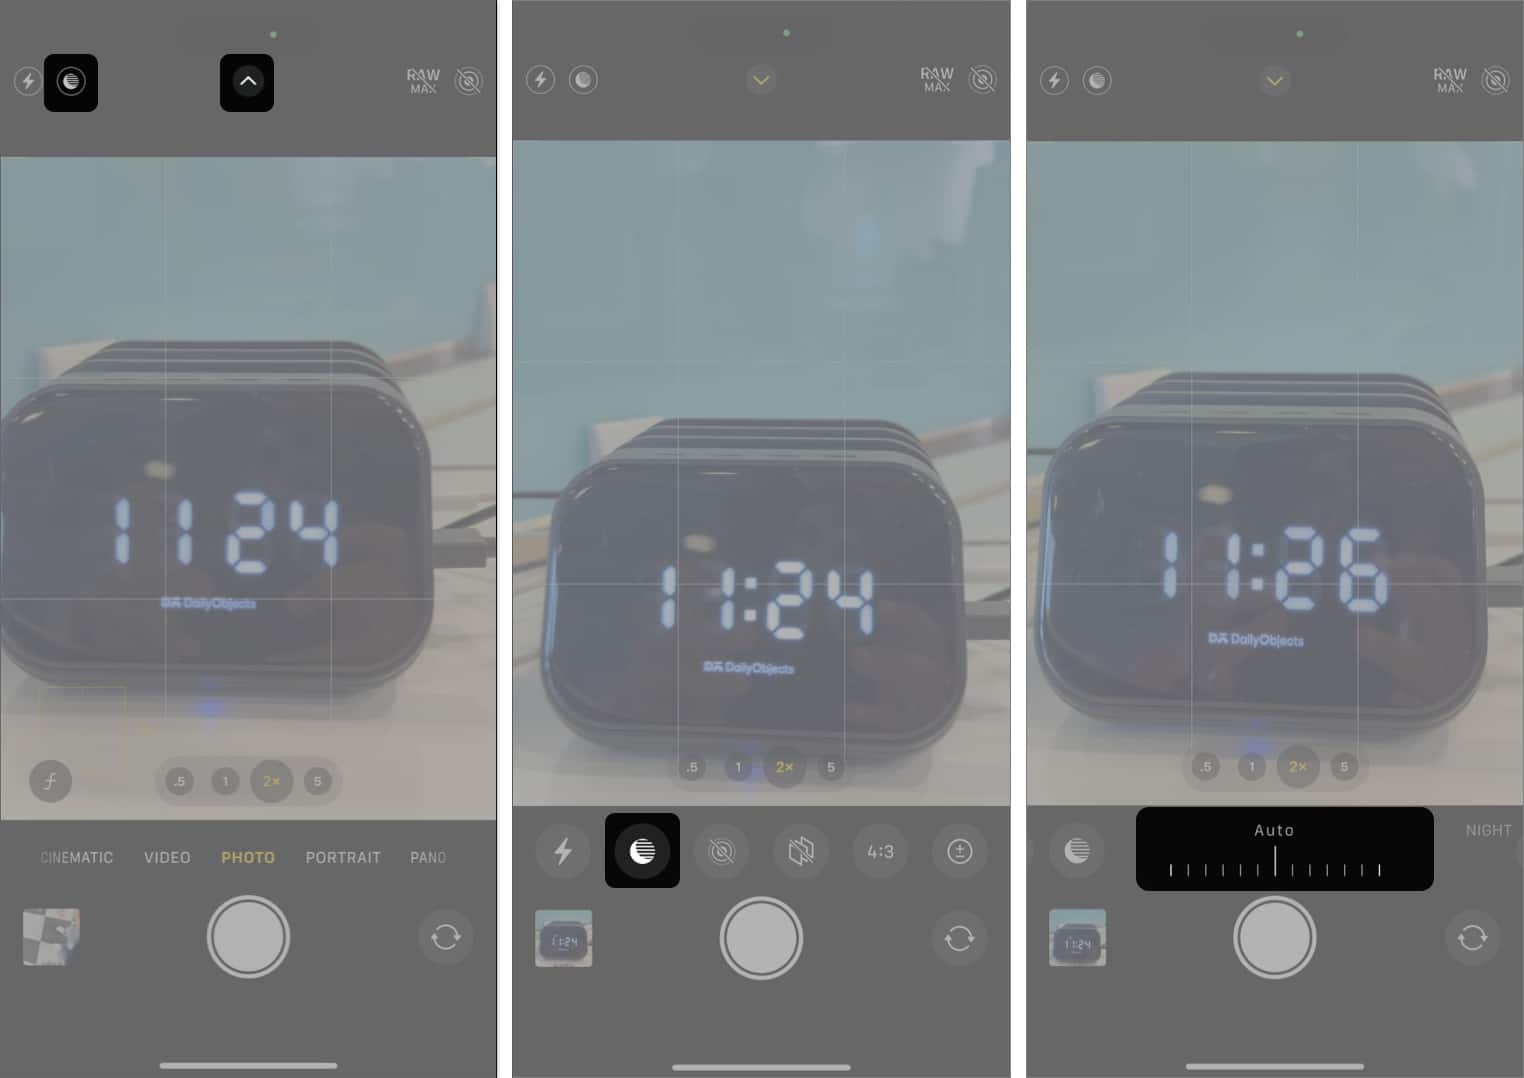
Step 2: Use Night mode
Starting with the iPhone 11 series, Apple introduced the Night mode functionality to the Camera app, which automatically activates every time your iPhone detects low light conditions. Using Night Mode is one of the essential steps of capturing the night sky on the iPhone as it allows the camera to take in more light and produce clearer and brighter photos, which otherwise wouldn’t be possible.
- Open the Camera app on your iPhone.
- Usually, the Night mode turns on automatically whenever your iPhone camera detects low lighting conditions, but if it doesn’t, tap the Night mode button (with a crescent Moon icon) next to the flash to turn it on manually.
- Once done, tap the upward-pointing arrow at the top center, then tap the Night mode button in the toolbar that appears above the shutter.
- Finally, use the sider that appears to adjust the capture timing. The longer the time, the more details the camera will capture.

Step 3: Adjust focus and exposure
The iPhone camera is getting better and better with every new iteration and has a great auto-focus capability. However, you’ll still need to adjust exposure and focus for a perfect night sky shot.
- Locate the star or the object you want to capture, then tap and hold on the main subject on the screen to lock the focus.
- A yellow box will appear over the object, indicating that focus is now set in the particular area of your frame. Slide your finger up or down on the screen to manually adjust the exposure around the subject.
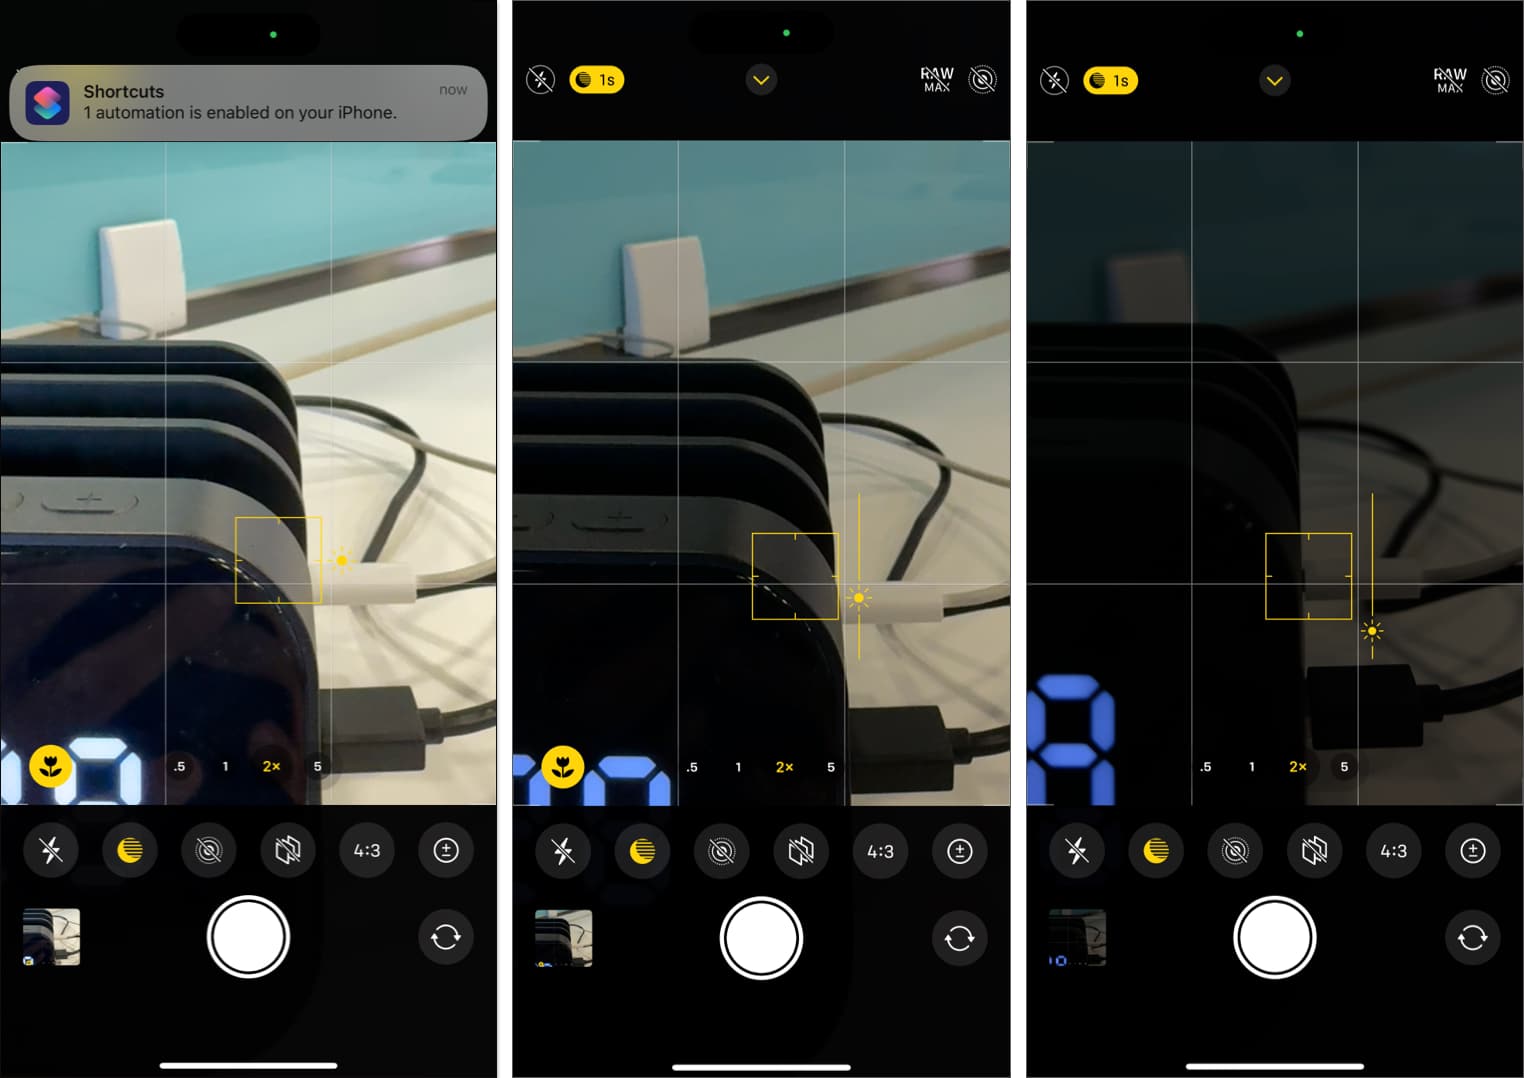

I would suggest you lower the exposure as this can reduce overexposure to bright stars or the moon.
Step 4: Use a Bluetooth remote shutter or timer
While the iPhone camera offers great stability, even the slightest shake due to tapping on the camera shutter during astrophotography can result in blurry shots. Thus, it would be best to use a Bluetooth remote shutter so you won’t have to touch your iPhone to capture a shot. If you don’t want to invest in a Bluetooth remote shutter, you can use your Apple Watch to control your iPhone camera.
Alternatively, you can set a timer in your iPhone Camera app. That way, you can tap the shutter manually, and the timer will click the shot after the pre-selected interval. Here’s how you can do this:
- With the Camera app already open, tap the upward-pointing arrow at the top center.
- Here, tap the Timer button in the toolbar that appears above the shutter.
- Next, choose the timer duration, which can be 3 seconds, 5 seconds, or 10 seconds.
- Finally, tap the shutter and move back, and the timer will do its job.
Step 5: Add a bit of post-processing
While the iPhone camera is capable enough of capturing great astrophotography shots, a little post-processing can add a significant touch of flair to your night sky photos. Although you do get the basic editing tools within the Photos app, you can opt for some third-party photo editing apps for iPhone if you are looking for some advanced editing tools.
Signing off…
That was all you need to know to capture alluring night sky shots on your iPhone, similar to those in the stargazing apps for iPhone. Remember, it is not just equipment like a tripod and Bluetooth remote shutter that can get you a perfect night sky shot, you must prepare in advance for the right timing, place, and weather conditions. Additionally, if the iPhone’s native camera app settings seem limited to you, you can use a third-party camera app.
Do not feel overwhelmed if the first few shots come out unsatisfactory. With some practice and patience, you will be able to click stunning night sky photos with your iPhone in no time.


