If you’re just using the Weather app on your iPhone as a simple forecast viewer, you’re missing out on a lot. With a few smart tweaks, you can get the most accurate information at a glance. It can give you minute-by-minute rain alerts, air quality insights, wind conditions, and even severe weather notifications.
Here are some pro tips to make the most of the Weather app on your iPhone or iPad.
Table of Contents
- 1. Add Multiple Cities and Rearrange Them Easily
- 2. Get Severe Weather Alerts Instantly
- 3. Turn on Next-Hour Precipitation Alerts
- 4. View Real-time Maps for Radar, Precipitation and Air Quality
- 5. Track UV Index and Sunrise or Sunset
- 6. Use the Ten-day Forecast for Planning
- 7. Check Humidity, Visibility, and Pressure
- 8. Check Air Quality and Wind Data for Health and Travel
- 9. Add Weather Widgets to the Home Screen and Lock Screen
- 10. Use Siri for Quick Weather Questions
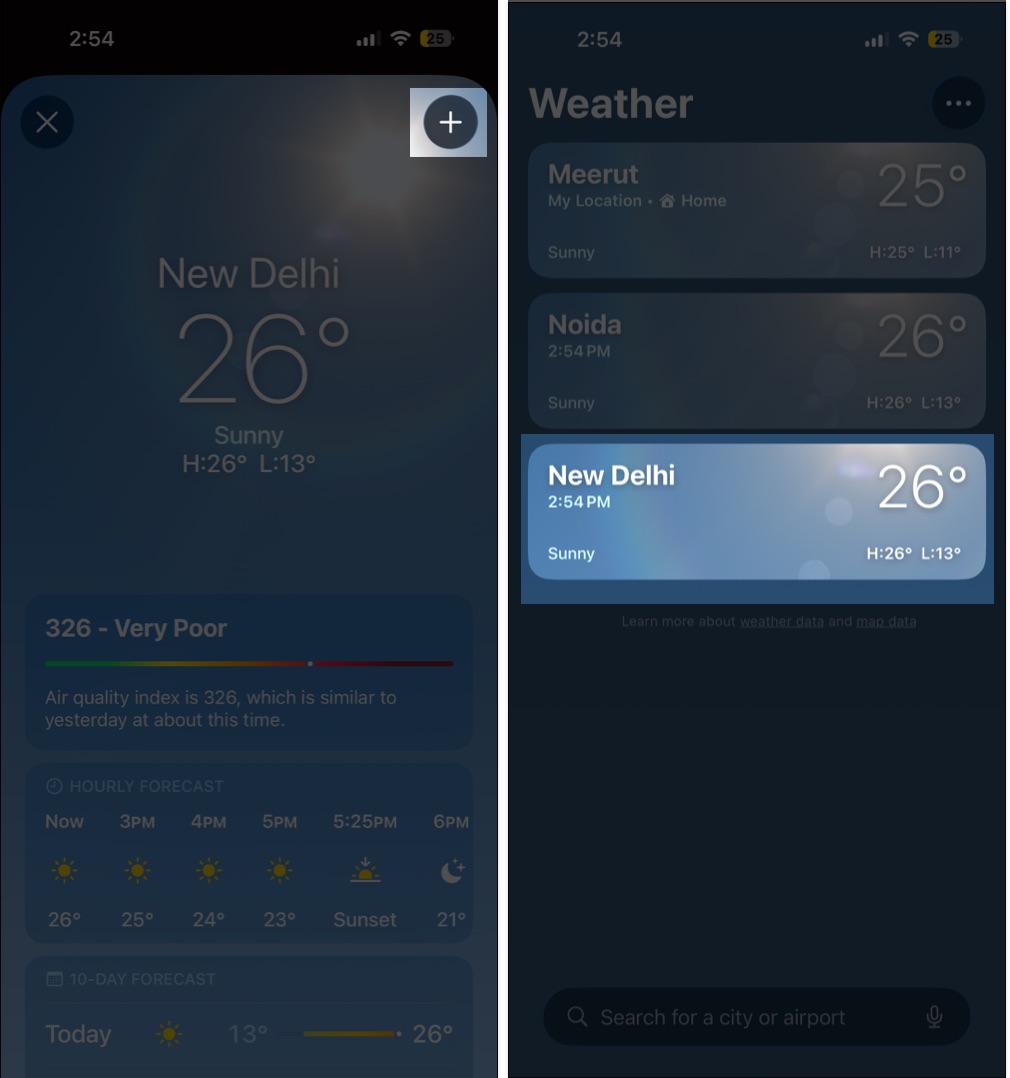
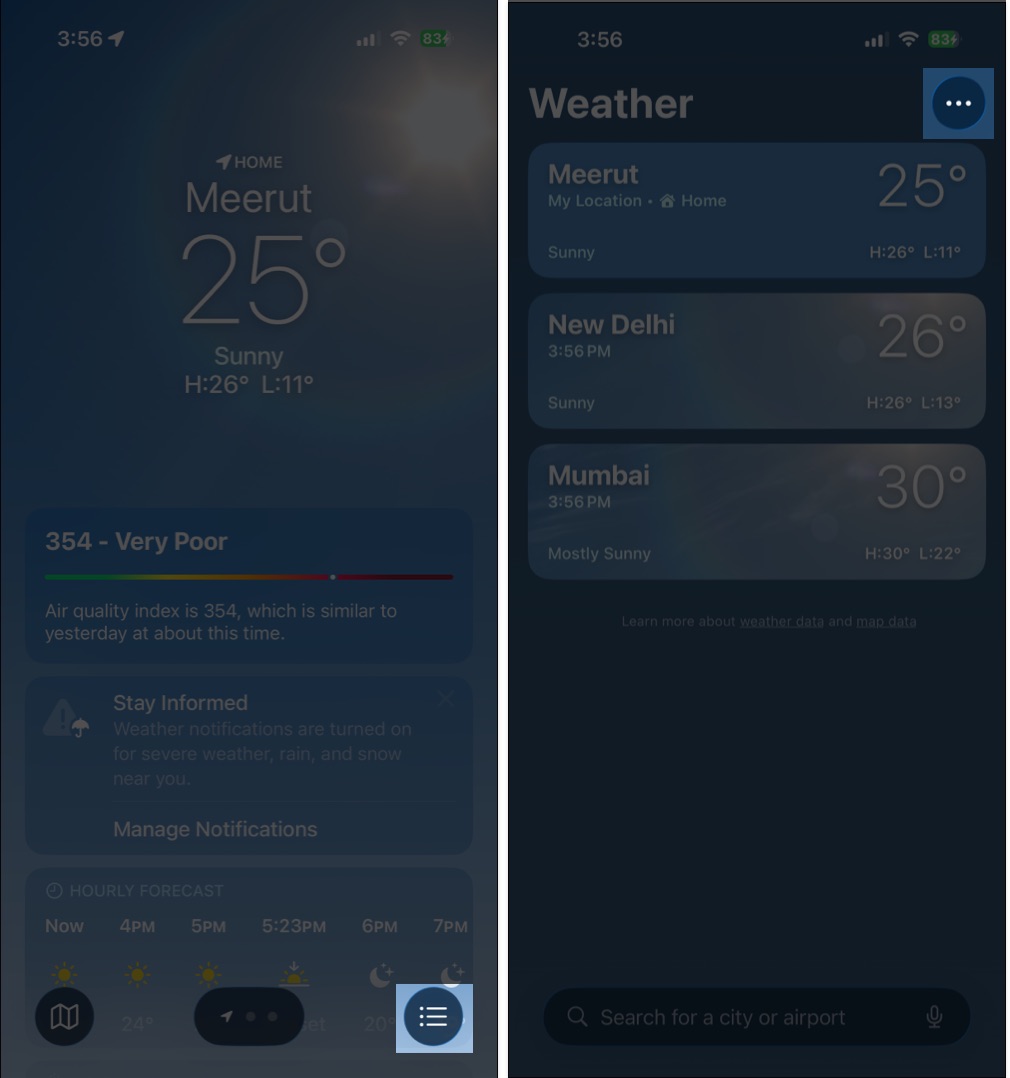
1. Add Multiple Cities and Rearrange Them Easily
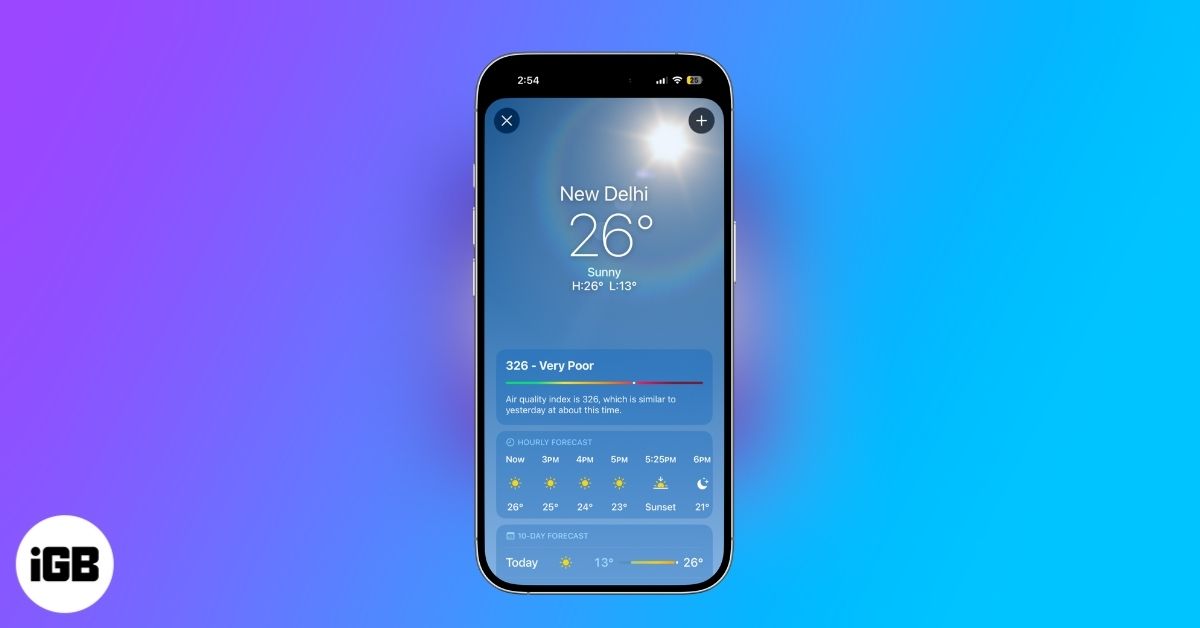
The Weather app is designed to help you monitor more than just your current location. You can add cities you frequently travel to, hometowns of family members, or places you simply want to keep an eye on. This makes it easy to compare temperatures, track storms in another region or check conditions before a trip.
Here’s how you do it:
- Open the Weather app and tap the three vertical dots and lines button at the bottom right corner.
- Search for the city you want to add.
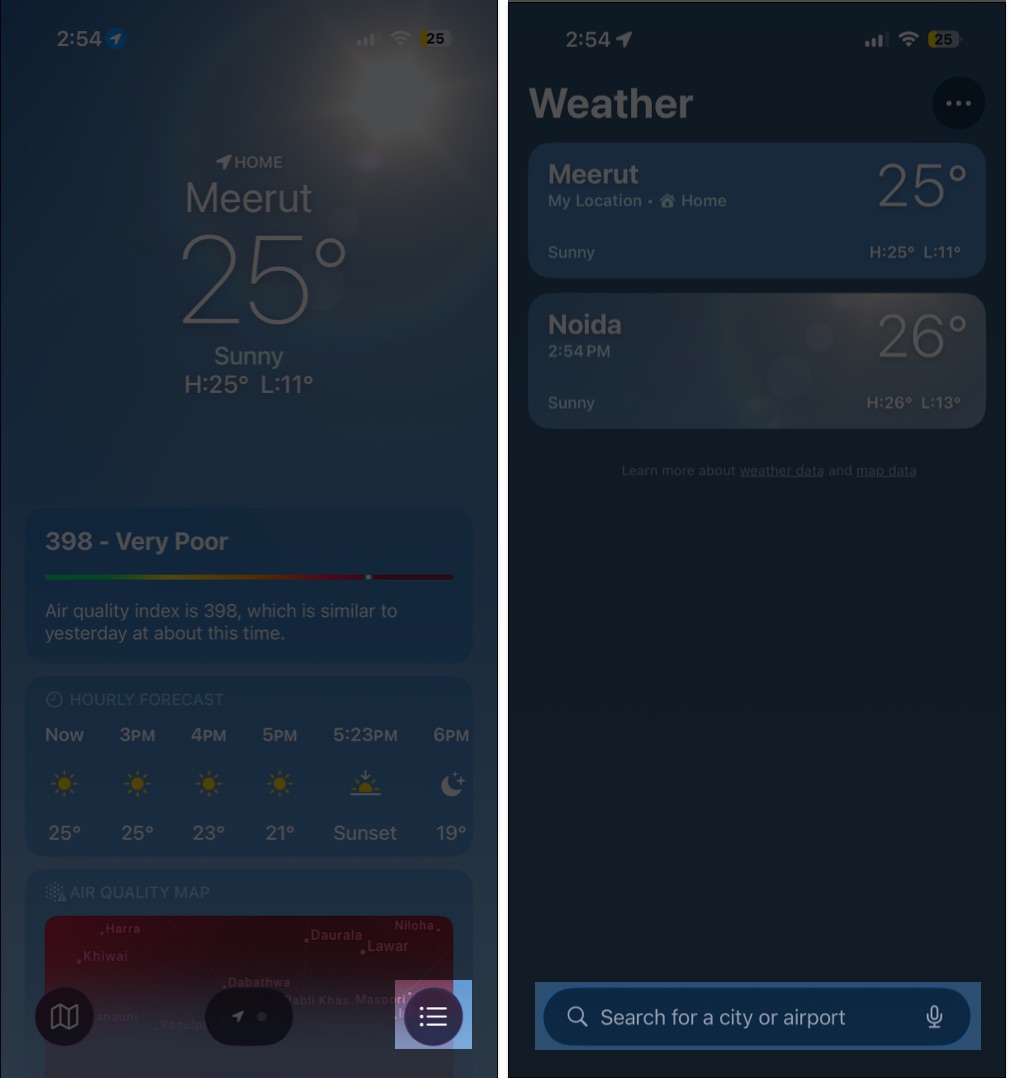
- Tap the + at the top right corner.
- To rearrange city positions, simply drag and drop to the desired position.
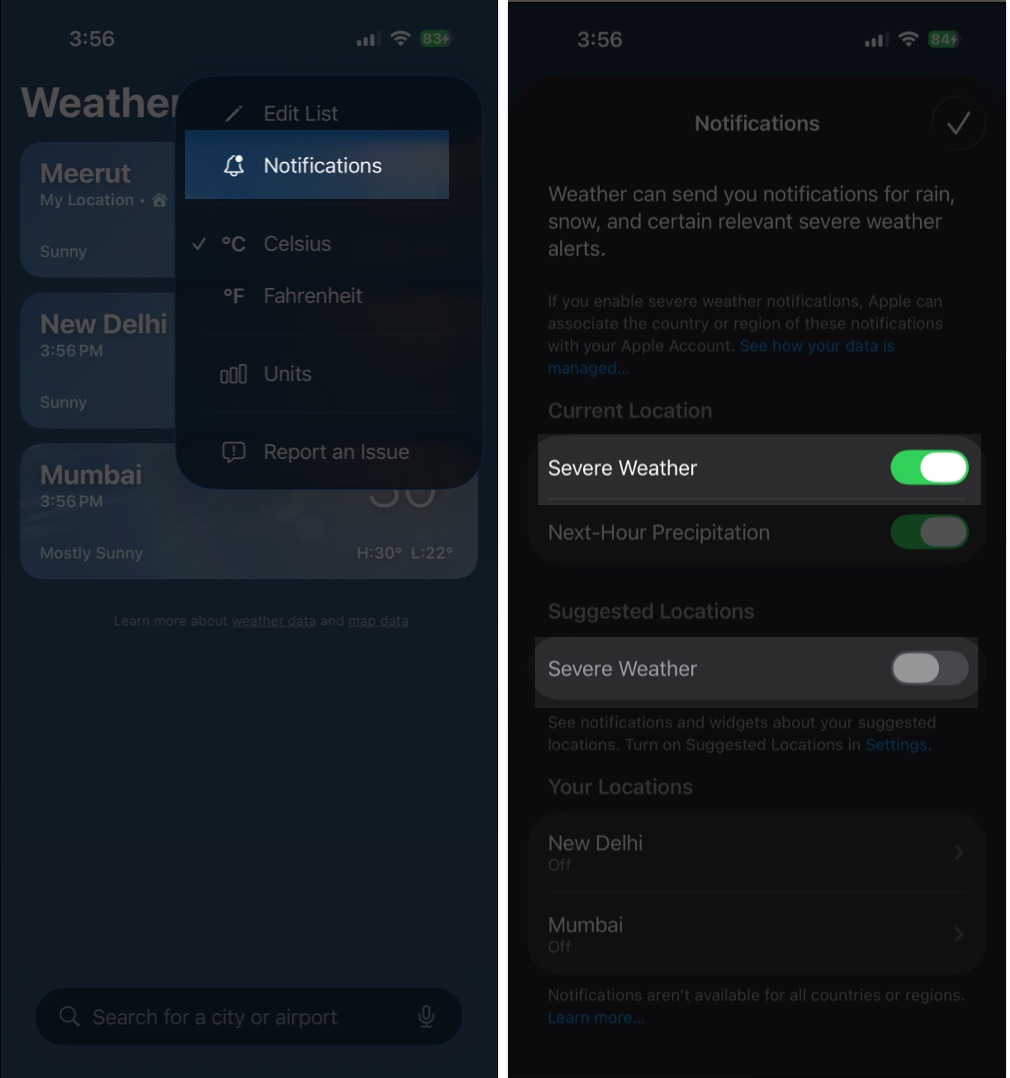
2. Get Severe Weather Alerts Instantly
In supported countries, the Weather app receives official government-issued alerts critical for safety, especially during storms, heavy rainfall, extreme heat, or cyclones. However, you won’t receive such alerts if the severe weather alerts are turned off on your iPhone. Here’s how you can check if severe weather alerts are active:
- Open the Weather app and tap the three vertical dots and lines button.
- Tap the three-dot button at the top right corner.
- Tap Notifications.
- Toggle on Severe Weather under Current Location if it isn’t already enabled.
- You can also turn Severe Weather on under Suggested Location to get alerts for other cities you have added previously.

3. Turn on Next-Hour Precipitation Alerts
Next-Hour Precipitation alerts notify you when rain or snow is about to start in your area, helping you prepare before stepping out, especially during unpredictable weather. The feature is available only in select regions, including the United States, the United Kingdom, Ireland, Japan, and Australia.
If you are in one of these supported locations, you can open the city list → tap the three-dot button → tap Notifications → toggle on Next-Hour Precipitation under Current Location.
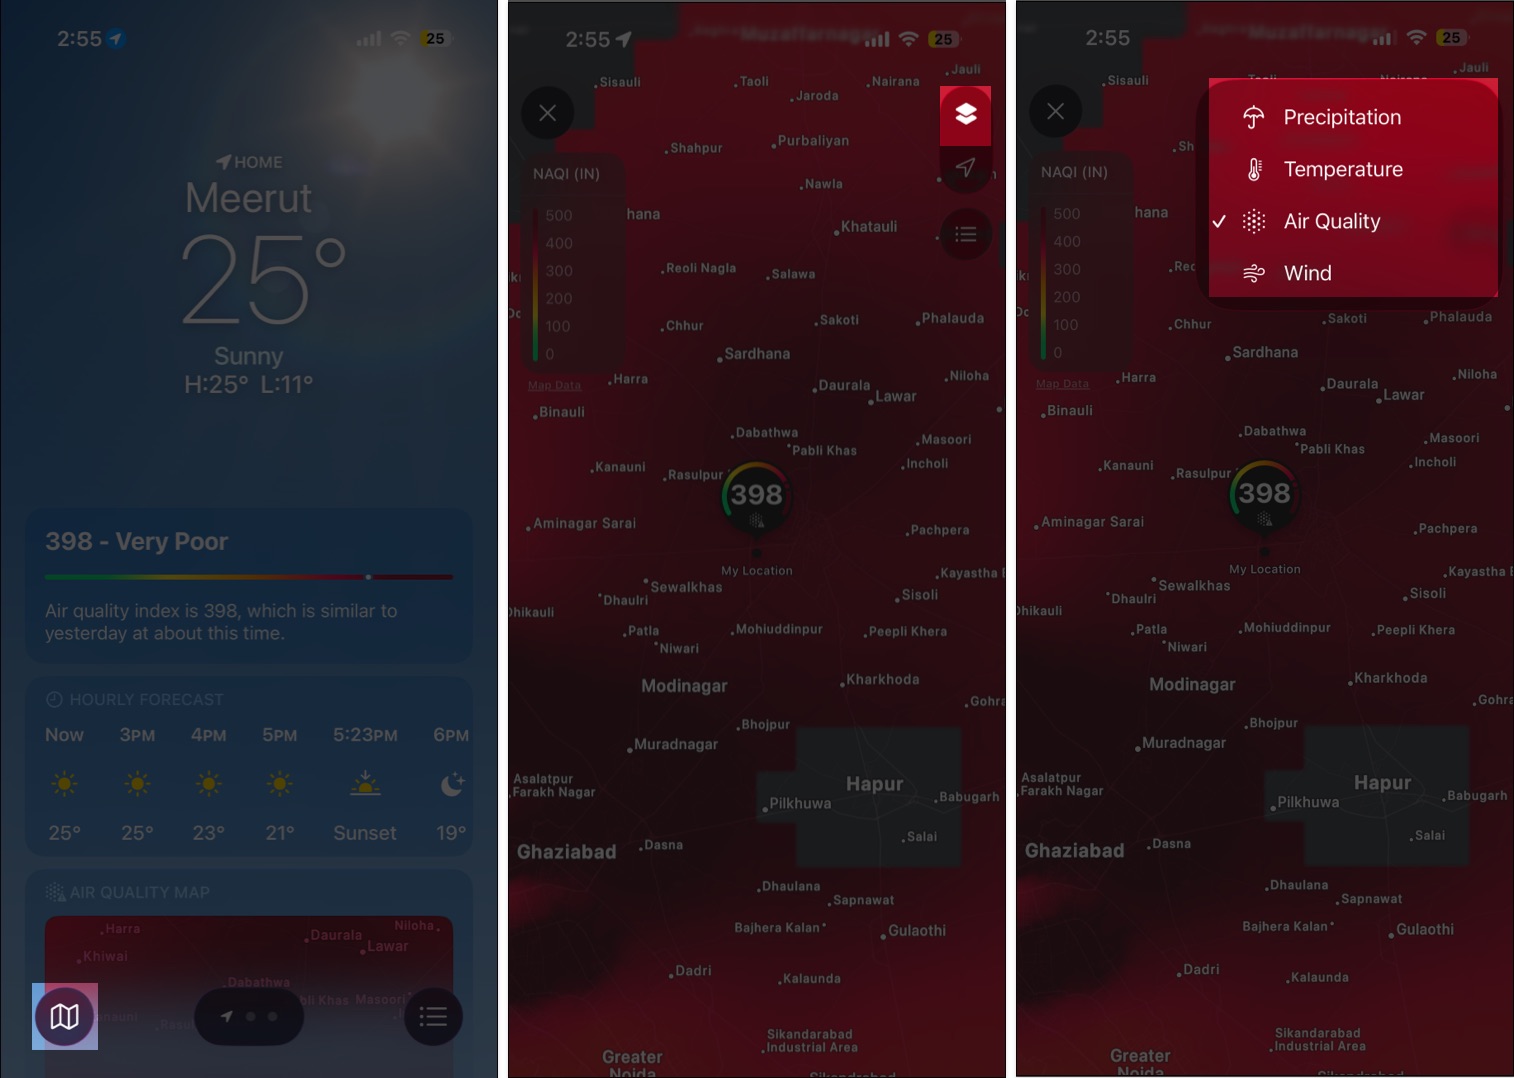
4. View Real-time Maps for Radar, Precipitation and Air Quality
The Weather app has an integrated live map that gives you a clearer picture of what’s happening around you. Radar and precipitation layers show storm movement, while temperature and air quality layers help you understand heat and pollution levels. To use it:
- Tap the Map icon at the bottom left corner.
- Here, tap the Overlay Menu (two overlapping squares) button at the top right corner to switch to a different map layer (such as precipitation, temperature, air quality, or wind).

Also Read: How to View Weather Maps on iPhone
5. Track UV Index and Sunrise or Sunset
The UV index helps you understand sun exposure risk throughout the day. You can also find sunrise and sunset timings, along with first and last light, which are useful for planning early- or late-night outdoor activities. To check these details, all you need to do is scroll down on the home screen of the Weather app and tap the UV Index or Sunset tile.

6. Use the Ten-day Forecast for Planning
The Weather app offers you a ten-day forecast of the selected location to help you prepare for upcoming trips or events. Simply scroll down and tap any day to see an expanded view for better insight into how the weather will shift across the week, including hourly temperatures, rain chances, and wind conditions.

7. Check Humidity, Visibility, and Pressure
Humidity, visibility and pressure readings give you a more complete sense of daily comfort and safety. These metrics matter for driving, for morning walks, or for understanding how warm a day might actually feel. Scroll down to access them beneath the main forecast.

8. Check Air Quality and Wind Data for Health and Travel
Knowing how clean the air is or how strong the winds are helps you make better decisions when heading out. That’s why you should always check the Air quality readings in the Weather app to determine how safe the air is. Wind information, on the other hand, helps you plan outdoor runs, cycling routes, and road trips, since strong gusts can affect comfort and safety.
Scroll down in your chosen city view to see these details.
9. Add Weather Widgets to the Home Screen and Lock Screen
You don’t need to open the Weather app every time you view the weather; you can bring real-time weather information to your Home and Lock Screens instead.

You can add widgets for temperature, UV index or rain chances to your Home or Lock Screen using the widget picker. Just make sure to pick a sized Weather app widget that fits the amount of detail you want.
10. Use Siri for Quick Weather Questions
Hands down, Siri is the fastest way to get weather updates when your hands are busy or when you need information instantly. You can ask for the chance of rain today, current humidity, tonight’s low temperature or tomorrow’s conditions. All you need to do is invoke Siri using its wake-up phrase or by long-pressing the side button and speaking your request.

Getting Smarter Forecasts with Less Effort…
And that’s it. Now you know that the Weather app on iPhone and iPad offers far more than basic temperature checks once you explore its deeper tools. These tips help you get smarter alerts, richer details, and a clearer picture of the weather ahead so that you can plan your day with ease.
Found these tips useful? Tell us which feature you rely on most in the comments below.
Read more:


