Although many smartphones feature incredible cameras today, they can never fully replace digital cameras. Undoubtedly, many still rely on the latter for photography. However, it is a hassle to transfer photos from a digital camera to an iPhone.
Unlike transferring photos from a computer to iPhone, the former demands additional accessories and can be tricky. But don’t worry! Here’re 3 different ways to get the job done.
- How to transfer photos from camera to iPhone without any accessory
- Transfer photos from camera to iPhone: The easiest way
- Import photos via the Lightning-to-SD card reader: The popular method
1. How to transfer photos from camera to iPhone without any accessory
Many recent digital cameras feature Wi-Fi or Bluetooth connectivity. If your camera has one of these technologies, you can use various Cloud services like Google Photos, Dropbox, iCloud, and so on to import pictures to your iPhone and iPad.
Additionally, many camera companies have a dedicated app for importing photos. You can also use them depending on your camera’s brand.
2. Transfer photos from camera to iPhone: The easiest way
Using the Lightning-to-USB camera adapter cable is the easiest way to import pictures from the camera to iPhone. However, you can’t use this method in reverse, i.e., you can’t transfer photos from your iPhone to your camera. So, if you think you won’t need this functionality in the future, this method is perfect.
Here’s how it works:
- Connect your camera to the USB and plug it into the Lightning-to-USB camera adapter cable.
- Next, plug the Lightning cable into your iPhone.
- Switch on your camera and unlock your iPhone, if not already.
- Open Photos on your iPhone.
- In the menu, tap the new option called Import.
All your digital camera pictures will be visible there.

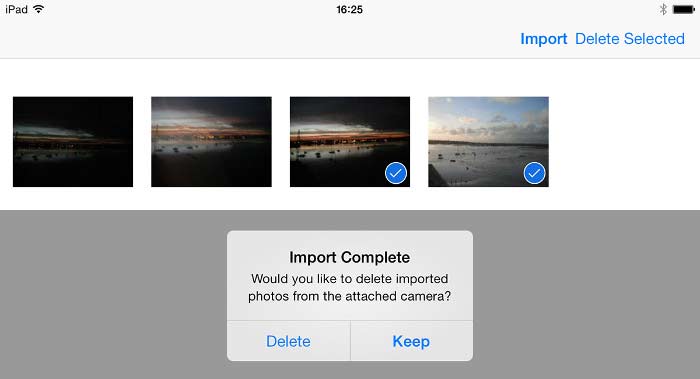
- Select the photos to import or tap Import All to select all.
- Imported photos will appear in the album, Imported Photos & Videos.
- Once transferred, you can choose to either Delete or Keep pictures in the camera.

3. Import photos via the Lightning-to-SD card reader: The popular method
Similar to the above method, this method involves connecting the SD card to your iPhone. Although a little more complex than the previous method, it removes the hassle of keeping additional cables handy.
First, eject the SD card from the camera and follow the steps below:
- Insert the SD card into the Lightning-to-SD card reader adapter.
- Next, connect the adapter to your iPhone.
Unlock your iPhone if not already. - Open Photos on your iPhone.
- Now, tap Import when prompted.
If you don’t see an import option, ensure the camera is on and the SD card is inserted correctly in the adapter (while using an SD card). If this doesn’t work, disconnect the adapter and reconnect it after 30 seconds.
If your content is edited, renamed, or copied, it won’t be imported to your iPhone. Apple adapters can import multiple types of iOS-compatible files, but they must be captured by digital cameras.
So, that’s how you can import your photos from a digital camera to an iPhone or iPad. Have more queries? Share them in the comments below.
Read more:


Leave a Reply