Have you lost or accidentally deleted photos on your Mac? Photos are memories you want to relish for a lifetime. But stored on hard drives, volumes, or other drives, digital photos are susceptible to lose.
Although Mac has photos apps and backup services for its users to manage and protect image files and folders, technical malfunctions can occur at any time.
Accidental deletion, formatting, corruption, malware, faulty macOS upgrade, virus attack, etc., can result in loss of photos from your Mac system.
Hence, we bring the 5 proven methods to recover deleted photos on Mac in any data loss situation. But make sure you don’t read/write the drive from which the photos are deleted to avoid overwriting.
- Restore photos from the ‘Recently Deleted’ folder
- Recover deleted photos from Trash
- Recover deleted photos from iCloud
- Restore photos from Time Machine backup
- Use photo recovery software for Mac
1. Restore photos from the ‘Recently Deleted’ folder
The Photos app on macOS Big Sur, Catalina, and Mojave ensures not to delete your pictures in one go. Its ‘Recently Deleted’ folder keeps the deleted pictures for 30 days. So once you delete the images and later realize to keep them, restore them from this folder in the Photos app.
Steps to restore photos from the ‘Recently Deleted’ folder:
- Open the Photos app.
- In the left pane, click Recently Deleted.
Note: You won’t see the ‘Recently Deleted’ folder if it’s empty. - Select the images you wish to restore and click Recover at the top.
2. Recover deleted photos from Trash
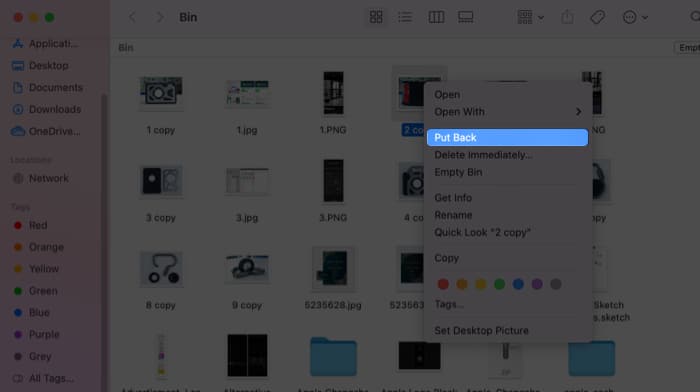
If you can’t find the deleted photos in the ‘Recently Deleted’ folder, Finder, or other apps, look for them in the Trash bin of macOS. It keeps the deleted data for 30 days or until you empty it yourself.
Steps to recover photos from Trash:
- Open Trash.
- Find and right-click the required photo.
- Select ‘Put Back.’
Now, you will see the restored photos in the original folder.
3. Recover deleted photos from iCloud
If you are using iCloud for Mac backup, recover the lost photos from here. Like the Photos app, iCloud also has a ‘Recently Deleted’ folder that keeps the images for 30 days. Post this period, iCloud will automatically delete the pictures forever.
Steps to recover photos from iCloud:
- Go to icloud.com and sign in to your account using Apple ID.
- Go to Photos.
- Navigate to the Recently Deleted album.
- Select the desired photos and click Recover.
4. Restore photos from Time Machine backup
A backup is a great help when you have lost your photos or other data. You can easily retrieve deleted or missing photos from there. Check for the lost pictures in your macOS backup drives, Time Machine, or other external storage that you may be using.
Steps to retrieve photos from Time Machine:
- Connect the external drive with Time Machine backup to Mac
- Open a Finder window and click the location from where the photos were deleted.
- Click to open the Time Machine icon in the menu.
You will see your available backups. - Click the latest or the required backup date.
- Go to your photo library backup, select, and click Restore.
It may take a while to restore your photos, based on the files’ size. All photos are recovered at their original location.
Additionally, you can also speed up the Time Machine backup on Mac going forward.
5. Use photo recovery software for Mac
Unfortunately, if you can’t find your deleted photos in the backup, Trash, or ‘Recently Deleted’ folder of the Photos app or iCloud, utilize photo recovery software.
An advanced photo recovery tool for macOS like the Stellar Photo Recovery Premium version can rescue you from different photo loss situations. Whether you have formatted the macOS drive/removable media, emptied Trash, or missing photos due to unclear reasons, the software recovers in all critical cases.
You can retrieve the lost photos of almost any file type, be it RAW, JPEG, TIFF, PNG, DNG, NEF, SR2, etc. Photos shot with Sony, Canon, Fujifilm, Nikon, Olympus, and other cameras can also be recovered.
Additionally, Stellar Photo Recovery Premium can repair corrupt photos and videos that are distorted or not opening.
Key benefits
- Recovers photos, videos, and music.
- Restores deleted photos with original date-timestamp and name.
- Retrieves camera RAW files.
- Repairs corrupt or damaged photos and videos.
Steps to recover photos using Mac photo recovery software
- Download Stellar Photo Recovery Premium on Mac.
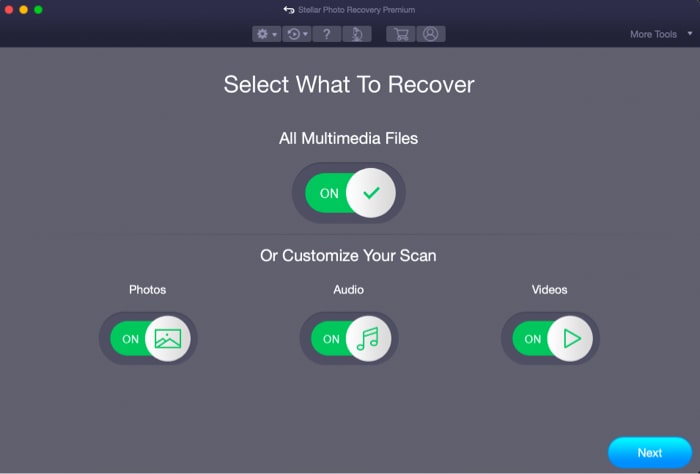
- Select Photos in the Select What to Recover screen.
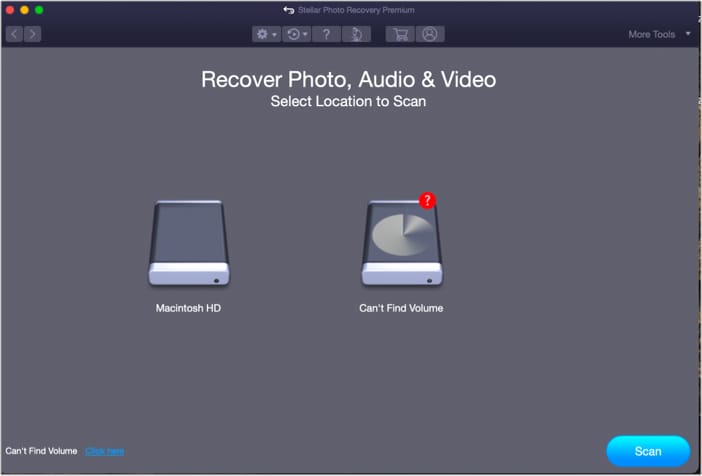
- Select the location from which the photos are deleted.
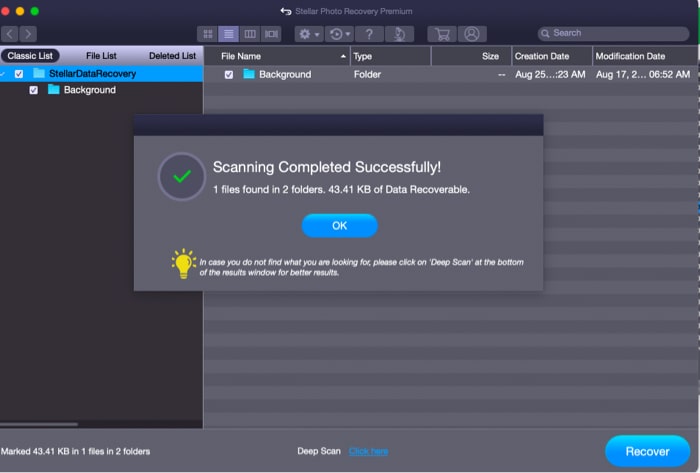
- Click Scan and preview the found photos.
- Select the ones you want to restore and click Recover.
Losing valuable photos is upsetting, and being unable to recover them is even more frustrating. However, acting quickly helps! Hope this guide helped you understand how to recover deleted photos on Mac.
Using the tool is the most efficient way to restore the data. However, it’s always best to first use the free trial version of the software, which shows a preview of recoverable photos and Once you are assured of its effectiveness, make a buying decision.
Read more:





Leave a Reply