- What is Sidecar?: Apple Sidecar lets you use your iPad as a second display for your Mac, either to extend your desktop for more space or to mirror your screen.
- Connection Requirements: For Sidecar to work, both devices must be nearby, use the same Apple ID, and be connected to the same Wi-Fi network or via USB.
- Using the Features: Once connected, you can drag windows to your iPad and use the on-screen Sidebar and Touch Bar for extra controls, enhancing your workflow.
- Limitations: Sidecar is limited to compatible Apple devices and does not work with older Macs or Windows PCs, requiring alternatives for those systems.
- Third-Party Alternatives: For unsupported systems, third-party apps like Duet Display or Spacedesk can turn your iPad into a second monitor for both Windows and Mac.
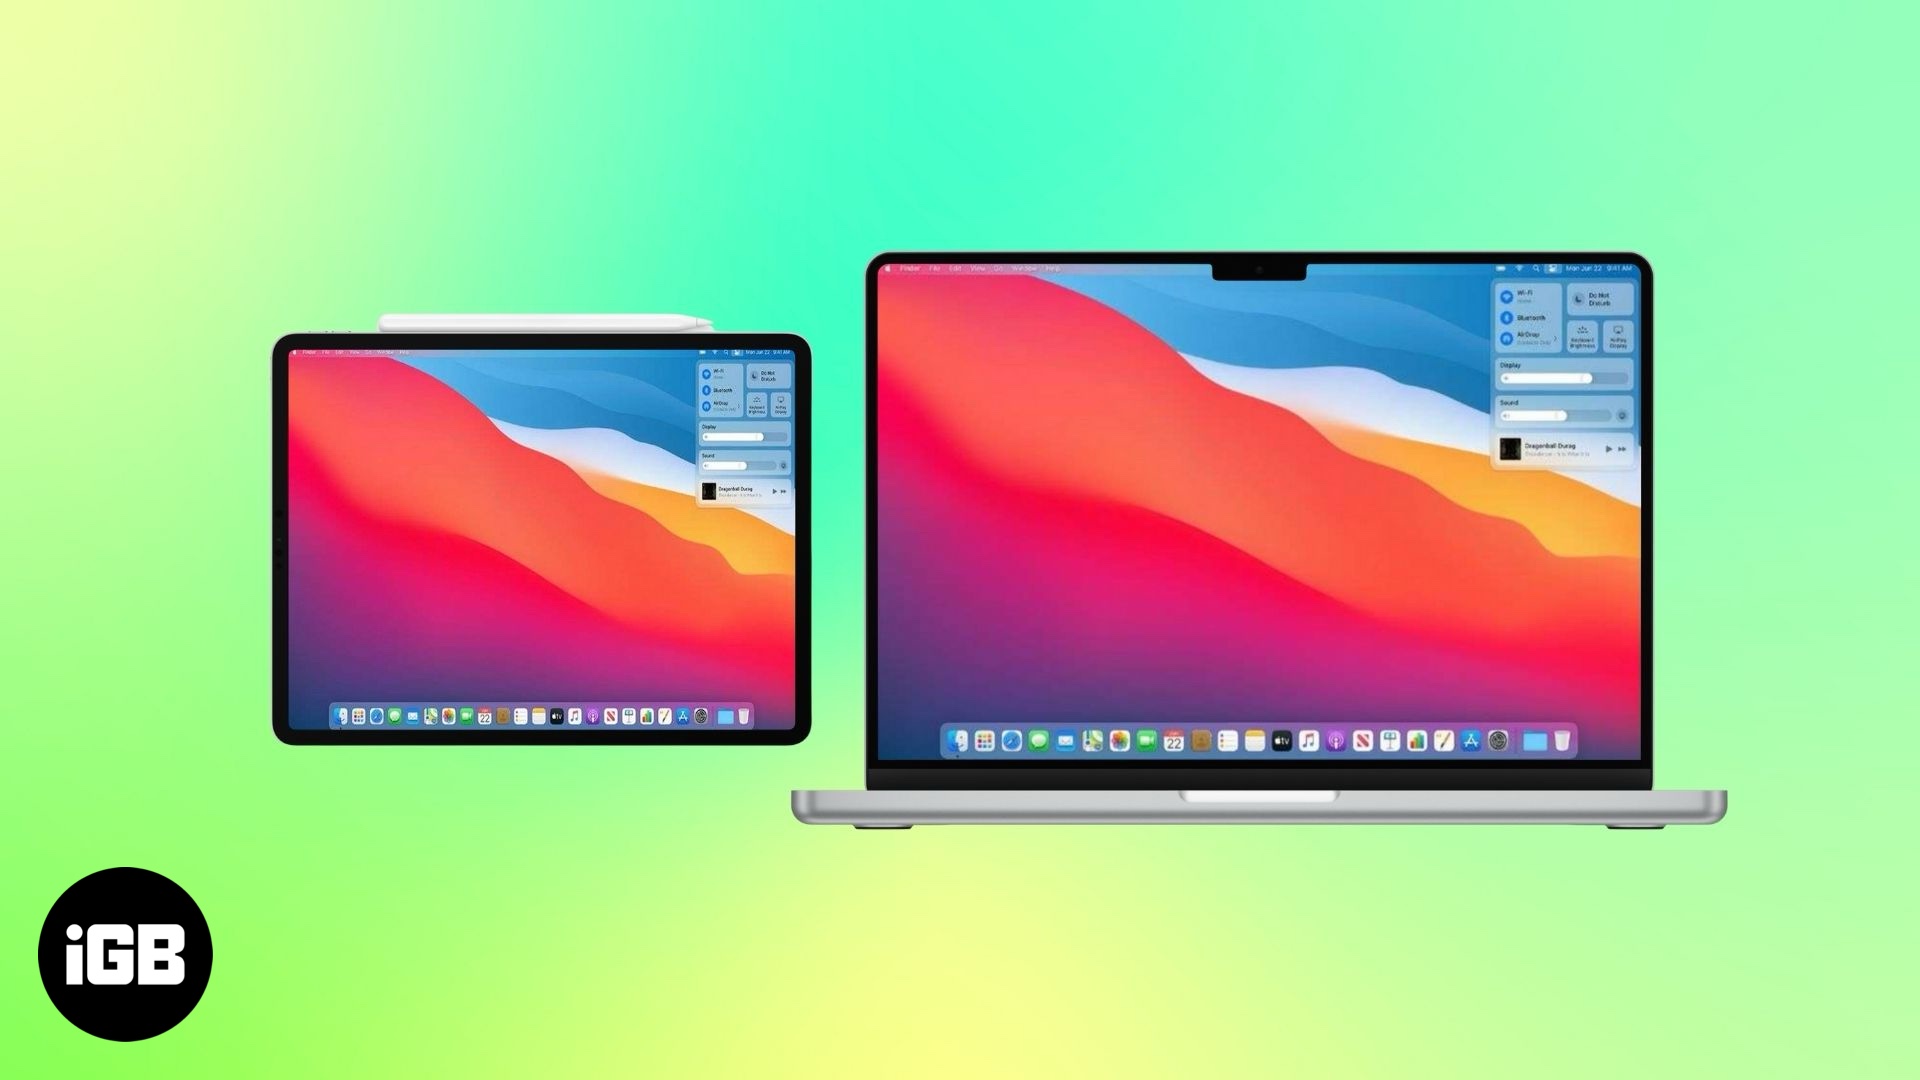
Apple offers the Sidecar feature on iPadOS and macOS to let you use your iPad as a second display for your Mac. You can use it to either extend your Mac’s screen or mirror it—which comes in handy when you want more screen space to get things done faster.
But there are also third-party apps that let you use your iPad as a second display—not just for Mac but for Windows PCs too. If you’ve been trying to figure out how to connect your iPad to your Mac or PC and use it as a second screen, this guide shows you both ways in detail.
Use iPad as second display for Mac with Sidecar
Using Sidecar to turn your iPad into a second screen for your Mac is easy. But there are a few things to sort out first:
- If you’re connecting wirelessly, make sure both your iPad and Mac are on the same Wi-Fi network and have Bluetooth turned on.
- You can also connect both devices with a USB cable instead of using wireless connection. It gives a more stable connection and charges your iPad while you use it.
- Sign in to the same Apple Account on both your Mac and iPad using two-factor authentication.
- Make sure your Mac and iPad model support Sidecar. Check out Apple’s support page to see the list of compatible devices.
- Keep both devices within 30 feet (10 meters) of each other.
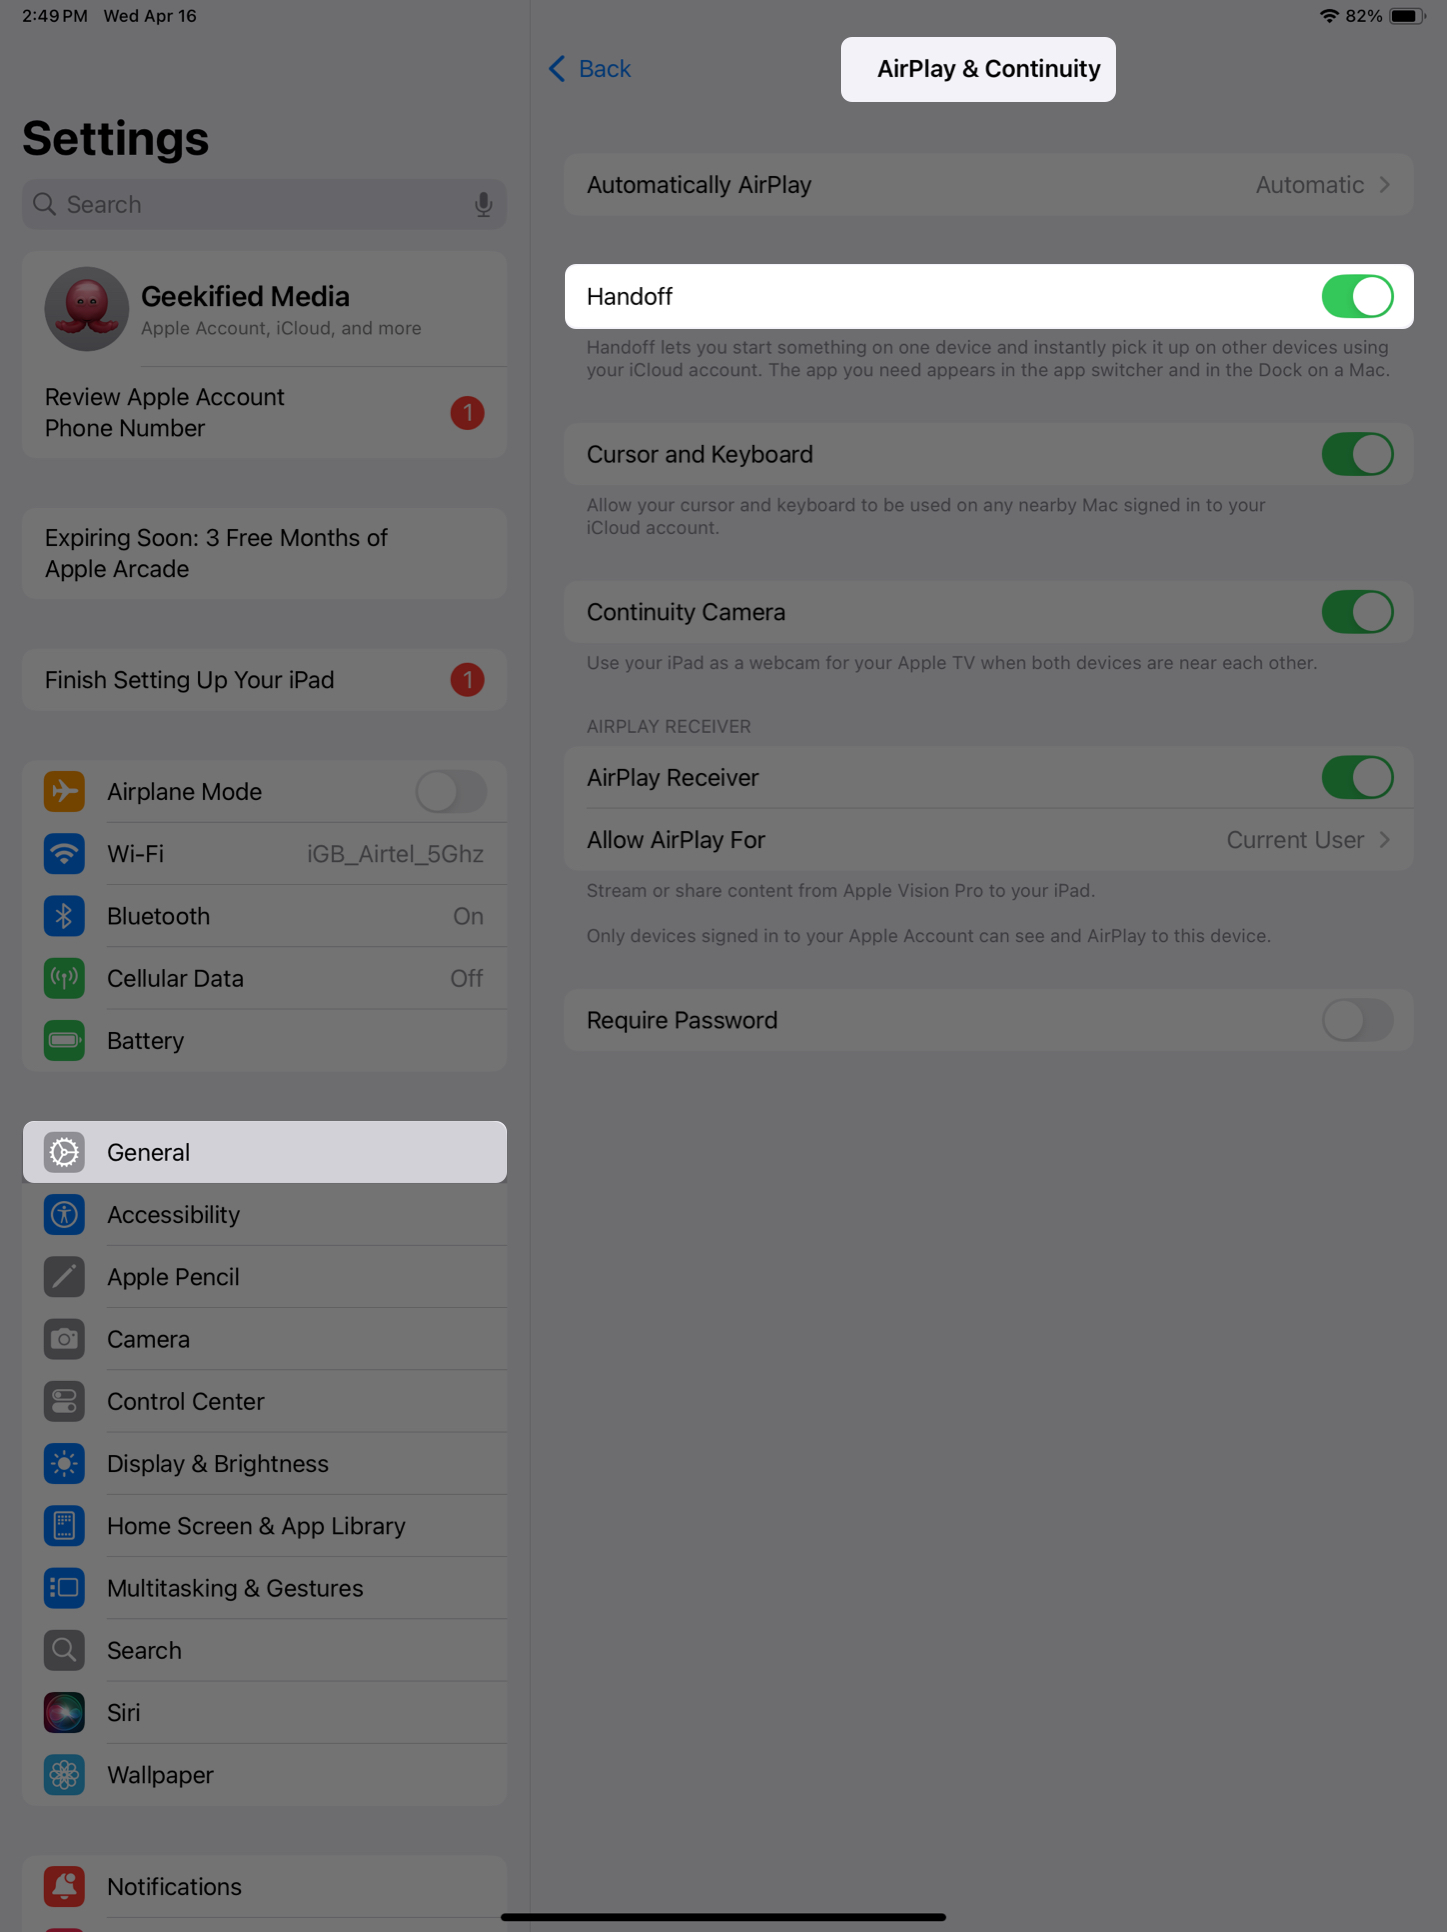
After completing the steps above, turn on Handoff on both your iPad and Mac like this:
- On your iPad: Go to Settings > General > AirPlay & Continuity, then turn on Handoff.
- On your Mac: Launch System Settings and go to General > AirDrop & Handoff, then enable the Allow Handoff between this Mac and your iCloud Devices option.

Now that you’ve done the preliminary steps correctly, here’s how to connect your iPad to your Mac with Sidecar:
- Click the Control Center icon in the top-right of your Mac’s menu bar.

- Select Screen Mirroring, then select your iPad.

You’ll get options to either mirror your Mac’s display or use the iPad as a separate screen (extend display) alongside some other customization options. Pick your preferred options and start using the iPad as a second display.
Alternatively, you can also connect through the System Settings app:
- Go to System Settings.
- Select Displays from the sidebar.
- Click the plus (+) icon, then select your iPad.
Note:
Using Sidecar with your Mac or iPad
Once your iPad and Mac are connected with Sidecar, there are a bunch of things you can do.
Adjust your Mac and iPad display arrangement: You may need to adjust your display positions. For example, if your iPad is on the right side of your Mac’s screen, make sure the display arrangement matches for a smooth experience. To adjust, open System Settings and go to Displays > Arrange, pick the right layout, and click Done.
Change Sidecar options for your iPad: On the Displays settings page, click your iPad. You’ll see options to use your iPad as the main display, extended display, or to mirror your display. You can also enable the Sidebar and Touch Bar, since the iPad’s touch functionality is limited with Sidecar. For more options, click Advanced.
Move windows between Mac and iPad: To move a window, drag its menu bar to the edge of the screen until it appears on the other device. Or hover your Mac’s pointer over the full-screen button of the window, then select Move to iPad or Move Window Back to Mac.
Enable sidebar: The Sidebar is a handy Sidecar features that lets you hide or show the onscreen keyboard, show or hide your Mac’s Dock on your iPad, and more. You can enable it from the Displays settings page in the macOS System Settings app if you need it.
Switch back to your iPad Home Screen: To minimize Sidecar and go back to your iPad Home Screen or run other apps, just swipe up from the bottom edge of your iPad, just like you do when minimizing apps. To return to Sidecar, swipe up and tap the Sidecar icon in the Dock.
How to disconnect Sidecar
You can end your Sidecar session when you’re done using your iPad as a second display as shown below:
- On your iPad: Tap the Disconnect button (last button in the sidebar) and hit Disconnect.
- On your Mac: Go to Displays under System Settings, select your iPad, and click Disconnect under Use As.
Sidecar not working? Try these fixes
If Sidecar isn’t working even after setting things up right, here are some quick fixes you should try:
- Sign out and back in to Apple Account: Log out of your Apple Account on both your Mac and iPad, then sign back in. This can help reset the connection. But ensure you both devices are signed in to the same Apple Account with 2FA.
- Make sure both devices are supported: Sidecar doesn’t work on all Macs and iPads. Check if your devices are compatible and running the latest version of macOS and iPadOS.
- Check your connection: For wireless, both devices should have Bluetooth and Wi-Fi turned on and connected to the same network. For wired, use a working USB cable.
- Keep the devices close: Sidecar only works when your Mac and iPad are within 10 meters (around 30 feet).
- Restart both devices: If it still won’t work, restart your Mac and iPad. That usually clears out any small issues.
Use iPad as a second display for Mac or PC via third party apps
Sidecar has its limitations. It doesn’t work with older Macs and iPads, doesn’t support Windows PCs, and requires the same Apple Account on both devices, which isn’t ideal if you’re using a work Mac.
In that case, you can use third-party apps to turn your iPad into a second display for both Mac and Windows. Here are two of the best ones you can use.
1. Spacedesk

Spacedesk is a free software that lets you use your iPad as a second display for your Windows PC. You can mirror or extend your screen over Wi-Fi or USB, similar to how Sidecar works—but it’s Windows-only.
It also comes with a KVM switch feature, so you can control multiple devices with one keyboard and mouse. To use it, just install the app on your Windows PC and iPad, then follow the on-screen steps to connect them.
2. Duet Display

Duet Display is a versatile display software that lets you extend or mirror your screen and also includes Remote Desktop features. It supports cross-platform connections like Mac to iPad, Mac to Mac, and Windows to iPad.
You can connect either wirelessly or with a cable. Once connected, you get access to features like adjustable frame rate and resolution, plus full touch support on iPad—something Sidecar doesn’t offer.
It’s powerful, easy to set up, but it’s a paid app.
Summing up…
Setting up your iPad as a second display is pretty straightforward, as you’ve seen in the guide above. If you’re on a Mac, you can either stick with Sidecar for a secure, built-in option or go for third-party apps if you want more features. For Windows users, third-party apps are your only option—but they’re just as easy to set up.
Hope this guide helps you get that extended display with your iPad for a smoother workflow.
Continue exploring with these related posts: