Along with creating, editing, and reading text documents in TextEdit on Mac, you can work with HTML files. From creating a new one to always opening files in code-editing mode, let’s look at how to use TextEdit for HTML on Mac.
- What is TextEdit on Mac?
- How to create an HTML file in TextEdit on Mac
- How to open an HTML file in TextEdit on Mac
- Change the settings in TextEdit on Mac
What is TextEdit on Mac?
TextEdit is a word processing and text editing app that comes preinstalled on macOS. You can use it to work with rich text documents like those created in applications like Microsoft Word. You can also use it for plain text documents, which is ideal for coding and editing HTML.
- You can find TextEdit in your Applications folder. To navigate to it, make sure Finder is active. Then select Go in the menu bar → pick Applications → double-click TextEdit to open the app.
- Alternatively, you can invoke Spotlight (cmd + space) → search and open TextEdit.
How to create an HTML file in TextEdit on Mac
- Open the TextEdit app on your Mac, as described above.
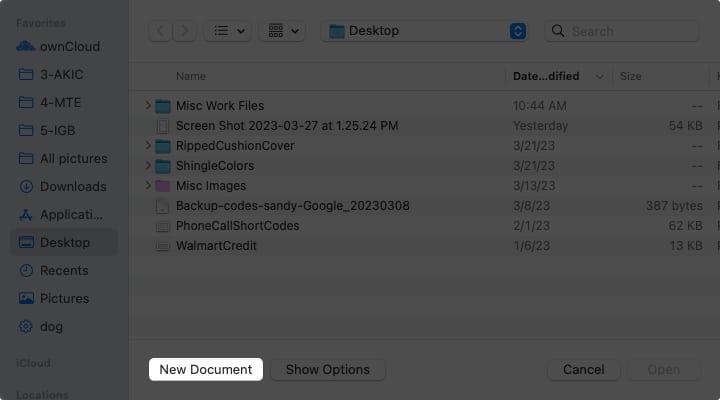
- You’ll first see the TextEdit dialog box open. Select New Document.
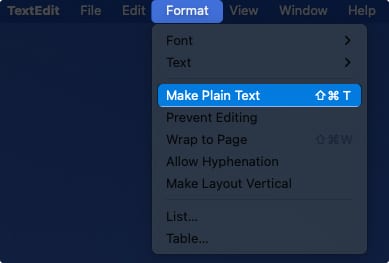
- If the new document opens in rich text mode, you’ll need to change this to plain text.
Rich text mode displays an editing toolbar at the top, whereas plain text does not. - Go to Format in the menu bar → choose Make Plain Text.
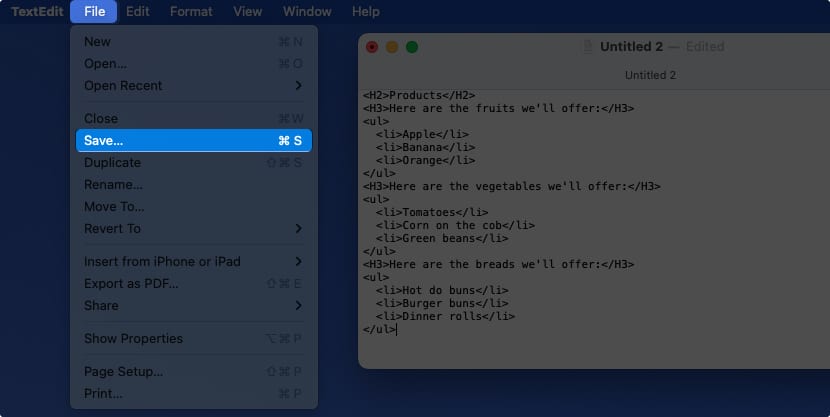
- You can then enter your HTML code or paste it from another location or your clipboard.
- To save the file, go to File in the menu bar and select Save.
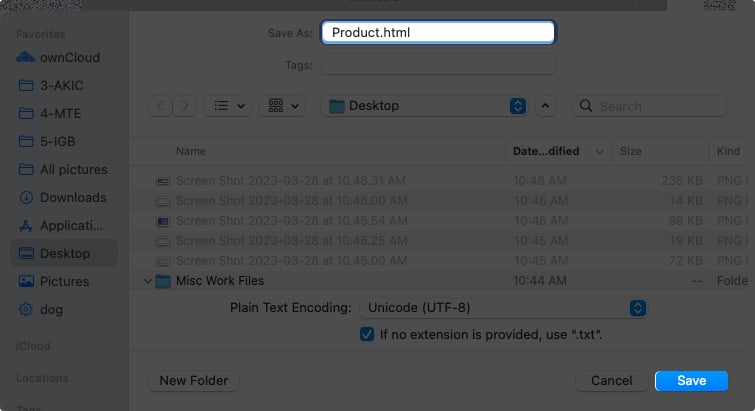
- Enter the name for the file followed by the HTML extension. For example, “name.html”. Then, pick the location for the saved file and optionally add tags.
- Select Save.
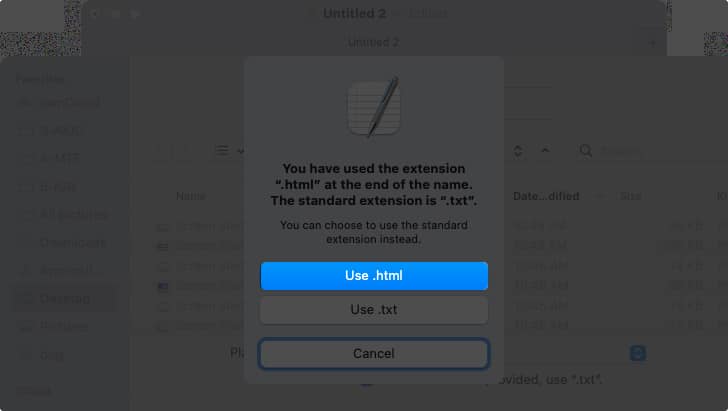
- When prompted, click Use .html to save the file as an HTML file.
Moving forward, each time you open the file and save your changes, it will automatically save with the HTML file extension.
Pro Tip: If you want to preview the HTML document in your default browser, simply double-click the file.
How to open an HTML file in TextEdit on Mac
Opening an HTML file in TextEdit isn’t as straightforward as you’d think. If you double-click the file, it opens in the browser and if you right-click and pick Open With → TextEdit, it opens in rich text format.
- To correctly open the HTML file for editing, first launch the TextEdit app.
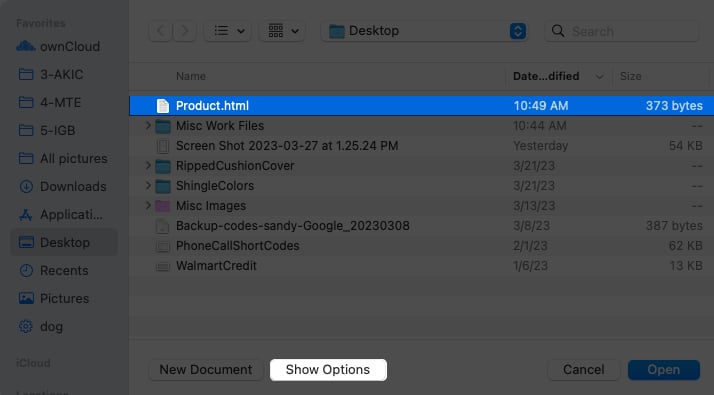
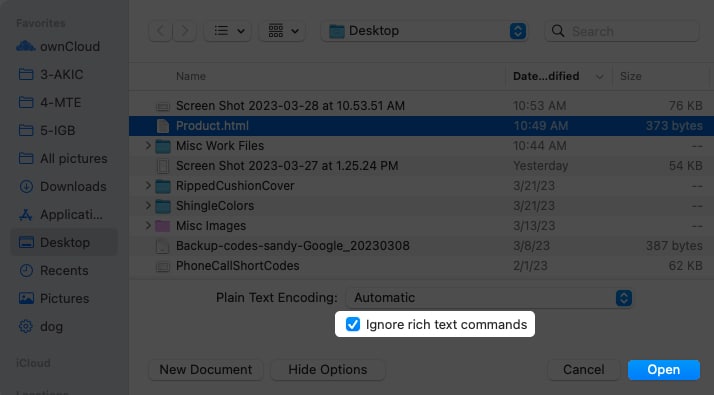
- Navigate to the location of the file, but don’t select it quite yet. First, choose Show Options at the bottom of the dialog box.
- Check the box for Ignore rich text commands.
- Next, select the file and click Open.
You should then see the HTML file open in plain text format, ready for editing.
Change the settings in TextEdit on Mac
To avoid the need to make the above adjustments each time you create or open an HTML file in TextEdit, you can change a few settings. This will save you time when working with HTML documents in the app down the road.
Always open files in HTML-editing mode
If you want to open normal text files in rich text format but open HTML files in plain text format (coding mode), this is a simple change.
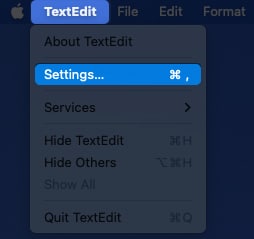
- Open TextEdit → select TextEdit in the menu bar → pick Settings.
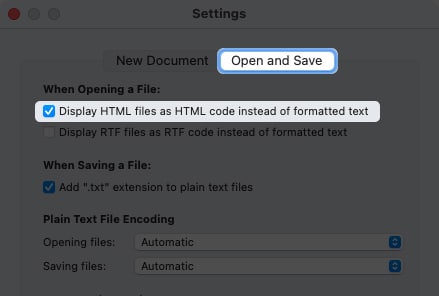
- Go to the Open and Save tab.
- Check the box at the top for Display HTML files as HTML code instead of formatted text.
- You can then close the settings or continue below with additional changes.
Moving forward, when you open an HTML file in TextEdit, it’ll be displayed in the correct format for editing.
Change how HTML files are saved
If you use a particular document type, CSS setting, or encoding style, you can change these options for TextEdit as well.
- Select TextEdit in the menu bar → pick Settings → go to the Open and Save tab.
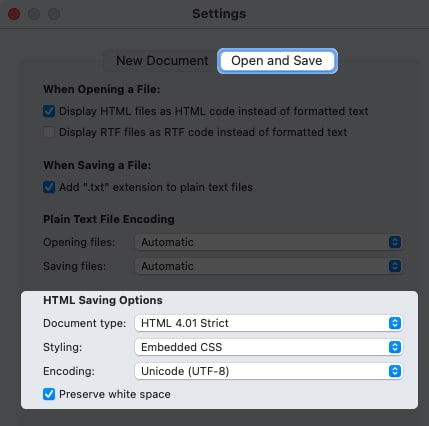
- Use the fields in the HTML Saving Options section at the bottom to choose the Document Type, Styling (for CSS), and Encoding.
- Then, check the box for Preserve white space to keep the blank space in your document.
Adjust other settings in TextEdit
There are a few other settings that can help you when using TextEdit.
Select TextEdit in the menu bar → pick Settings → go to the New Document tab and try the following:
- At the top, you can mark Plain text as the default when opening a new document.
- Below, you can set a specific Window Size and choose the Font style and size for both plain and rich text documents.
- Next, you can assign document Properties, including Author, Organization, and Copyright, for rich text documents.
- Finally, you can check the boxes for additional Options like the spelling and grammar check, using smart quotes and dashes in rich text documents only, and including data detectors.
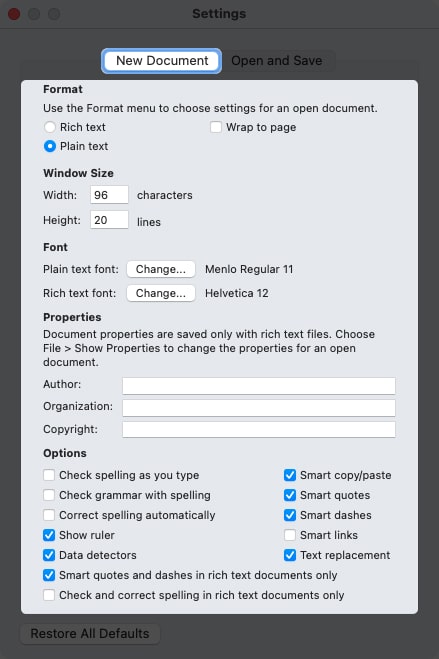
When you finish, simply close the settings and reopen TextEdit to see your changes.
Will you try TextEdit on Mac?
While you can always use a third-party editor for HTML, TextEdit on Mac is handy, free, and comes with macOS, so it’s definitely worth a try.
What do you think about using TextEdit on Mac for HTML? Are you going to give it a try, or have you already and want to share your thoughts?
Read more:



Leave a Reply