Emojis have become a regular part of our communication, adding personality to our messages and posts. While their use feels almost second nature on smartphones, it might not be as intuitive on a Mac. Regardless, Macs come with an emoji keyboard. Don’t know how to access and use emojis on Mac? Dig in to learn more.
How to access Emojis on your Mac
Symbols, accented letters, characters, and emojis can all be found in the Character Viewer. There are different ways to access this.
1. Using a keyboard shortcut
The easiest way to do this is to hit the keyboard shortcut Cmd + Ctrl + Space.
Just place your cursor on a text field and hit the keyboard shortcut to access the Character Viewer.
2. Access it within the app
You can also access the Character Viewer within the app.
- From an open app, click Edit from the menu bar.
- Select Emoji & Symbols to open Character Viewer.
3. Use the Globe or Function Key
There’s another Mac keyboard shortcut you can use. Newer Macs come with a Globe key. Just click it, and the emoji keyboard should pop right up.
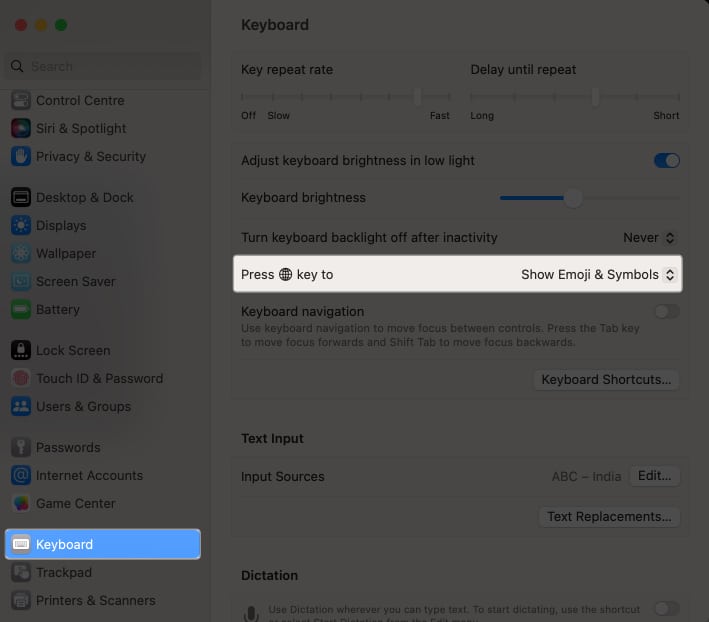
If pressing the Globe key only lets you Change Input Source, you can change this to Show Emoji & Symbols instead.
To do this:
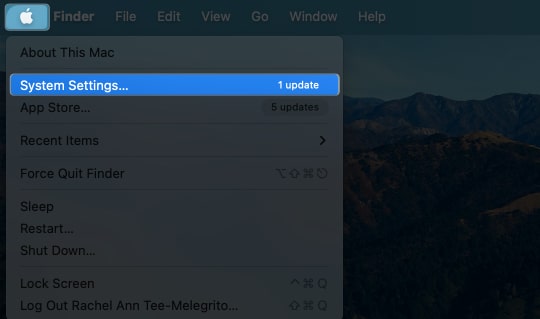
- Open the Apple menu → System Settings.
- Select Keyboard from the sidebar.
- Click the dropdown menu beside Press key to → Choose Show Emoji & Symbols.
Alternatively, you can also click the Globe key + E to show Character Viewer.
On your Mac, you can also use the Input menu on the right side of the menu bar. This provides access to all the enabled sources, including the Character Viewer and Keyboard Sources.
If you can’t see it, you can let it show by:
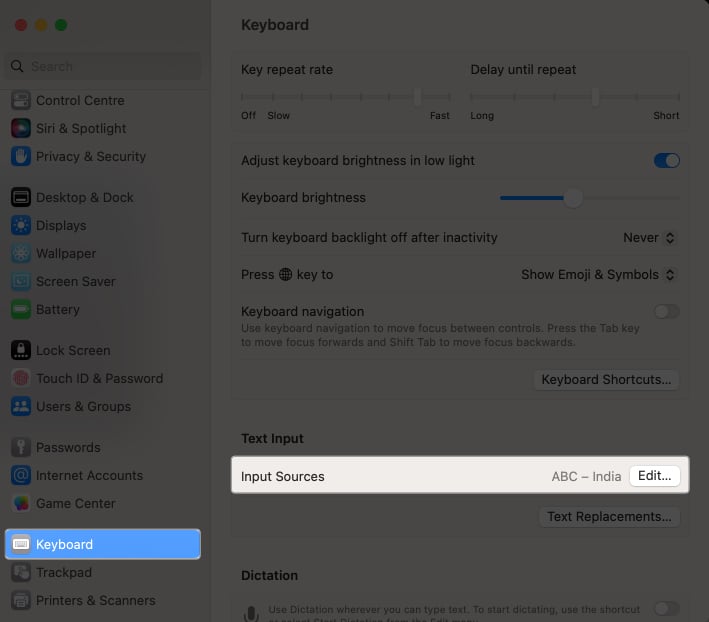
- Going to System Settings → Keyboard → Input Sources → Click Edit.
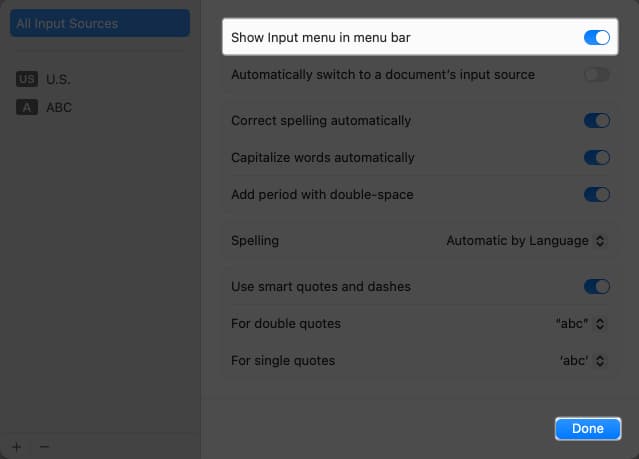
- Toggle on Show Input menu in menu bar → Click Done.
- Now that the Change Input icon is in the menu bar, click on it → Choose Show Emoji & Symbols.
How to use the Emoji keyboard on your Mac
- Once you’ve accessed the Character Viewer, you can find a particular emoji by typing a description in the search field.
- Alternatively, you can use tabs at the bottom of the Character Viewer to choose categories like people, animals, or others, simplifying your emoji search.
- Once you’ve found the emoji you want, double-click it for it to appear wherever your cursor currently is, or drag it to the document.
You can also expand the Character Viewer by clicking the top-right corner to see not just the emoji but also letter symbols and characters.
How to add emojis to emails on your Mac
On the other hand, the Mac’s native Mail app features its own emoji button. Simply position the cursor where you’d like to insert the emoji and click the emoji button to choose your desired emoji.
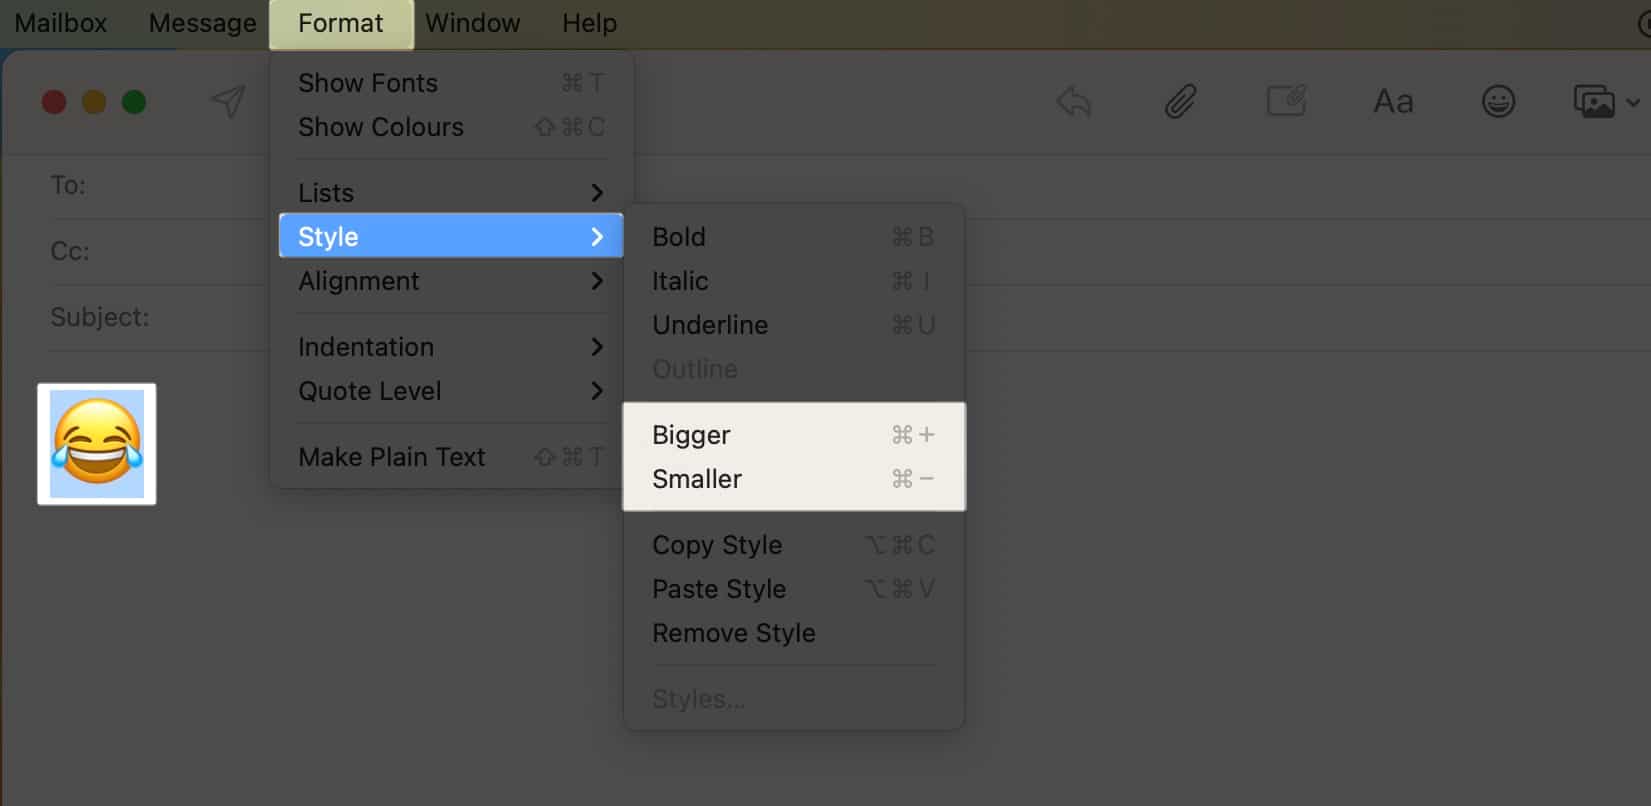
A distinctive feature of using emojis in the Mail app is the ability to adjust their size. To do this:
- Highlight the emoji → Then press Cmd + Plus (+) to enlarge and Cmd + Minus (-) to reduce its size.
- Alternatively, select the emoji → Then go to Format → Style → Bigger or Smaller to make the icon bigger or smaller, respectively.
Wrapping up…
If you often use emojis to convey your feelings, remember that you aren’t confined to your smartphone. We trust this article has guided you to access and use emojis on Mac. Which method do you prefer? Let us know in the comments!
Read more:

