- To set up your Apple Vision Pro, connect the battery > Wear the headset > Link your Apple ID > Scan hands and eye motions > Create a FaceTime Persona > and Set up Optic ID.
- You need to connect your Apple Vision Pro to your Wi-Fi network to begin the setup process.
- If you have an iPhone or iPad running iOS 17 or iPadOS 17 and later, you can use Quick Start to automate the Vision Pro setup.
Have you finally got your hands on your magical Apple Vision Pro? Now, it’s time to unbox and activate the spatial computer. However, as visionOS is a new operating system, you may wonder how to set up your Apple Vision Pro.
Don’t worry! In this guide, I will provide you with a step-by-step process to get started with your Vision Pro. But before you begin, there are a few things to take care of. Let’s take a look.
Things to do before setting up your Apple Vision Pro
- Adjust fit: Apple Vision Pro provides a personalized visual experience, so it needs to fit your face properly. So, ensure you are wearing the right Light Seal and headband for your head and face.
- Correct your vision: If you wear powered eyeglasses, you must use ZEISS Optical Inserts for the best visual results.
- Charge up battery: After you take the battery out of the box, connect the USB-C charger and plug in the power adapter. When the charge is complete, tapping the battery will flash a green light.
- Get the right environment: You must go to a room with adequate lighting and fewer obstacles to avoid tripping.
- Check your network connection: Apple Vision Pro needs a stable Wi-Fi internet connection to begin the setup process.
Once you have taken care of the above prerequisites, you can set up your Vision Pro and start using it. Let me guide you through the steps!
How to set up Apple Vision Pro
Apple Vision Pro is not just an ordinary headset; it comes with a whole new operating system called visionOS. So, you must set it up properly to enjoy a seamless mixed reality experience.
Step 1. Turn Apple Vision Pro on
To start up your Apple Vision Pro, you need to connect the external battery to it.
- On the left side of your headset, you will find a circular connector beside the Audio Strap.
- Attach the power connector of your battery pack to the headset. Note that the dot marked on the battery power connector should align with the headset’s empty dot.

- Next, press the power connector and move it clockwise until the dots line up. Also, you will hear a click when the connector is locked.

- Now, a light will flash on the connector, indicating your Apple Vision Pro has turned on.
You will hear a startup tone like other Apple Products, prompting you to wear your Vision Pro. If there is no sound, you need to press and hold the Top button. This will turn on your headset.
Step 2: Put on your Vision Pro
Now that you have turned on your Apple Vision Pro, it’s time to put it on and start using the device.

- Remove the front cover from your headset.
- Hold the frame of your Vision Pro and position it over your face.
- Next, pull the headband and put it over your head’s back.
- If the headband feels loose, use the adjustment dial located on its right side.
- Once your fit is proper, look straight. As Vision Pro recognizes your eyes, its display switches.
- Next, press and hold the Digital Crown to align your eyes for clear viewing.
- Now, you will see an Apple logo with the signature “hello” and your surroundings on the display.
Now you are comfortable to view through your Apple Vision Pro, let’s set it up further.
Step 3: Scan iPhone and link Apple ID
You may already know your Apple ID is the key to accessing Apple services. It’s also true for your Vision Pro. You need to link your Apple ID to your headset. Let’s see how to do that:
- Press the Digital Crown on your Vision Pro to proceed with the setup.
- If you have your iPhone running iOS 17 or later nearby, use Quick Start to automate the process.
- Bring your iPhone in front of you and unlock it. You will see a prompt on your iPhone showing Set up Apple Vision Pro.
- Next, scan the QR code which appeared on your phone with your Vision Pro.
- Your iPhone will function as a two-factor authentication (2FA) device to link the headset to your Apple ID and let the Vision Pro connect to your Wi-Fi network.
- The prescription lens users need to scan the pairing code hereafter.
- If you don’t have an iPhone or iPad, select Set Up Manually. Now you will get a virtual keyboard to input your Apple ID credentials. Next, approve your access by entering the six-digit 2FA number received on your phone.
Step 4: Scan hands and eye movements
Now your Apple ID details are synced, you need to set up your hand motions and eye movements to control your Apple Vision Pro using gestures.
- Again, press the Digital Crown to scan to start scanning your hands.
- Now, raise and extend your hands in front of you. The back of the hands should be visible.
- Keep looking at your hands until that view has been recorded.
- Then it will instruct you to turn your hands over.
- Finally, a prompt will indicate that your hand scan is completed.
After that, your Vision Pro will detect and record your eye movements. You will see a circular dot at the center of your display. Look at that and tap your fingers to perform a pinch gesture, selecting the dot.

Now, it will show multiple dots in a circle. You need to perform the same for each dot. This process will be repeated thrice with a brighter display at every level until the setup is done. After that, your Apple Vision Pro can track your eyes in any surrounding.
Step 5: Create FaceTime Persona
Now comes an interesting part. Your Vision Pro will prompt you to create your Persona, a 3D avatar. When you receive any video call on your headset, the caller will see your Persona mimicking your gestures in real time.

To capture your Persona, you need to take off your headset and hold it in front of you to scan your face and expressions. You will see the instructions on the front display of your Vision Pro and hear the prompts. Once the scan is done, wear the headset again.
Now, you may edit your Persona and customize the look with eyewear. If the steps seem tricky, you may refer to our detailed guide on how to create your Persona on Apple Vision Pro, where I’ve shared a few tips to make a better Apple Vision Pro Persona.
Step 6: Set up Optic ID
Now we have completed most of the Apple Vision Pro setup, let’s secure your device. Like Face ID on your iPhone, Vision Pro uses Optic ID.

Whether you are unlocking your headset, making any purchases, or signing into apps, you can use Optic ID on your Vision Pro to authorize your access.
To set it up, Vision Pro will instruct you to focus on a symbol in front of you. It will scan your eyes and create your Optic ID in a few seconds. Also, you need to set up a six-digit password or passcode, which you can enter when Optic ID is not working.
Step 7: Final setup of your Vision Pro
Finally, you will see a security popup with usage guidelines. Select Continue using a pinch gesture. Next, select Don’t Transfer Apps & Data if you’re setting up Vision Pro for the first time. Now, your Apple Vision Pro will activate your Apple ID and align all the settings.
If you want to customize your visionOS like your iPhone, select Apps & Data or Settings in the Shared Settings window. Next, you will see the Keep Apple Vision Pro Up to Date window; select Continue to proceed.
Now, your display will show your saved cards on your Apple ID. Choose the ones you want to use on your headset. After that, the Improve Siri & Dictation will ask you to share your audio recordings. To skip this, select Not Now.
In the setup process, you may also change the font size from the Appearance window. Now, your Vision Pro will help you to navigate the interface with some quick tips. Finally, you will see a Welcome greeting indicating you are ready to use your headset.
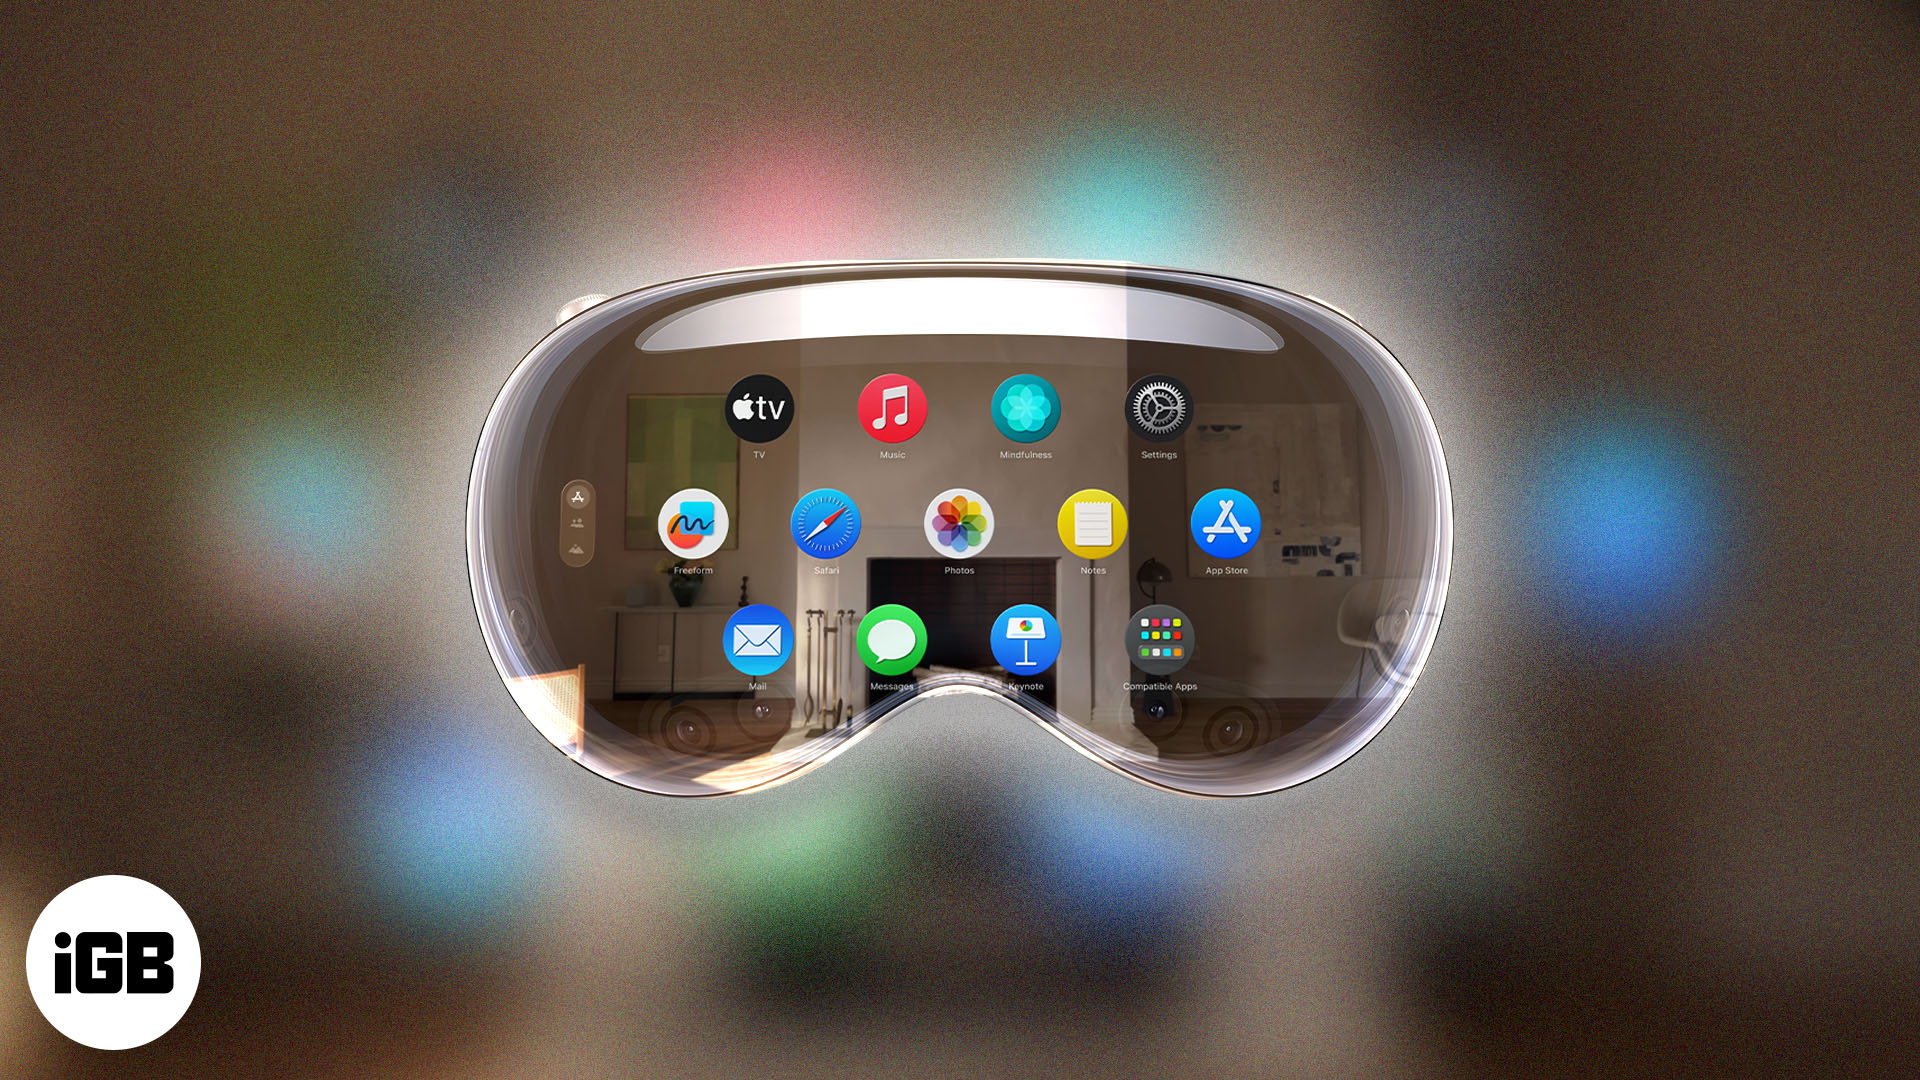
Simply press the Digital Crown to open the Home view. Now, you can explore the new visionOS, install Vision Pro apps, and enjoy Environments. There’s much more to do with your Apple Vision Pro.
Start using your Vision Pro like a Pro!
Apple Vision Pro offers a completely new way of computing. You may immerse yourself in the entertainment and gaming world like never before or boost your work productivity by connecting your Mac to Vision Pro.
I hope you were able to onboard your Vision Pro journey smoothly. If you face any issues, let me know in the comments below. I will be happy to help.
Read more: