
- What is AssistiveTouch: AssistiveTouch is an iOS accessibility feature that adds a floating on-screen button for quick actions like screenshots, volume control, and launching Siri.
- How to Enable AssistiveTouch: You can turn on AssistiveTouch using Siri, through Settings → Accessibility → Touch, or by setting it as an Accessibility Shortcut for faster access.
- Using AssistiveTouch on iPhone or iPad: Tap the floating button to open a customizable menu with shortcuts to Notifications, Control Center, Home, and Device options.
- Customizing the AssistiveTouch Menu: From Settings, you can add, remove, or rearrange icons in the AssistiveTouch menu to prioritize your most frequent actions.
- Creating Custom Gestures and Actions: You can record gestures and assign Tap, Double-Tap, or Long Press actions to automate common tasks and improve accessibility control.
When you enable AssistiveTouch on your iPhone or iPad, you unlock a world of smart shortcuts and time-saving hacks. With just a tap, you can take screenshots, adjust volume, restart your device, and perform several powerful actions effortlessly.
If you want to master this accessibility gem, you’re in the right place. Let’s dive into how to turn on, customize, and make the most of AssistiveTouch on iPhone and iPad.
Table of Contents
- What is AssistiveTouch?
- How to Turn On AssistiveTouch on iPhone or iPad
- How to Use AssistiveTouch on iPhone and iPad
- How to Customize the AssistiveTouch Menu
- How to Add Custom AssistiveTouch Actions
- How to Create New AssistiveTouch Gestures
- How to Connect a Pointer Device Using AssistiveTouch
- How to Turn Off AssistiveTouch on iPhone or iPad
- Wrapping Up
What is AssistiveTouch?
AssistiveTouch is one of Apple’s most useful accessibility features, designed to make iOS navigation easier and faster. While it’s primarily created to help people with physical or motor challenges, it’s equally handy for everyday users who want quicker access to essential functions.
When enabled, a small floating button appears on your screen. Tap it once, and a menu full of actions pops up. From taking screenshots and locking your screen to invoking Siri or launching the App Switcher, AssistiveTouch acts like a powerful control hub sitting right on your Home Screen.
And the best part? You can fully customize this button to match your preferences.
How to Turn On AssistiveTouch on iPhone or iPad
There are three easy ways to enable AssistiveTouch:
1. Using Siri
Just say, “Hey Siri, turn on AssistiveTouch.” Siri will instantly activate it for you.
2. Through Settings
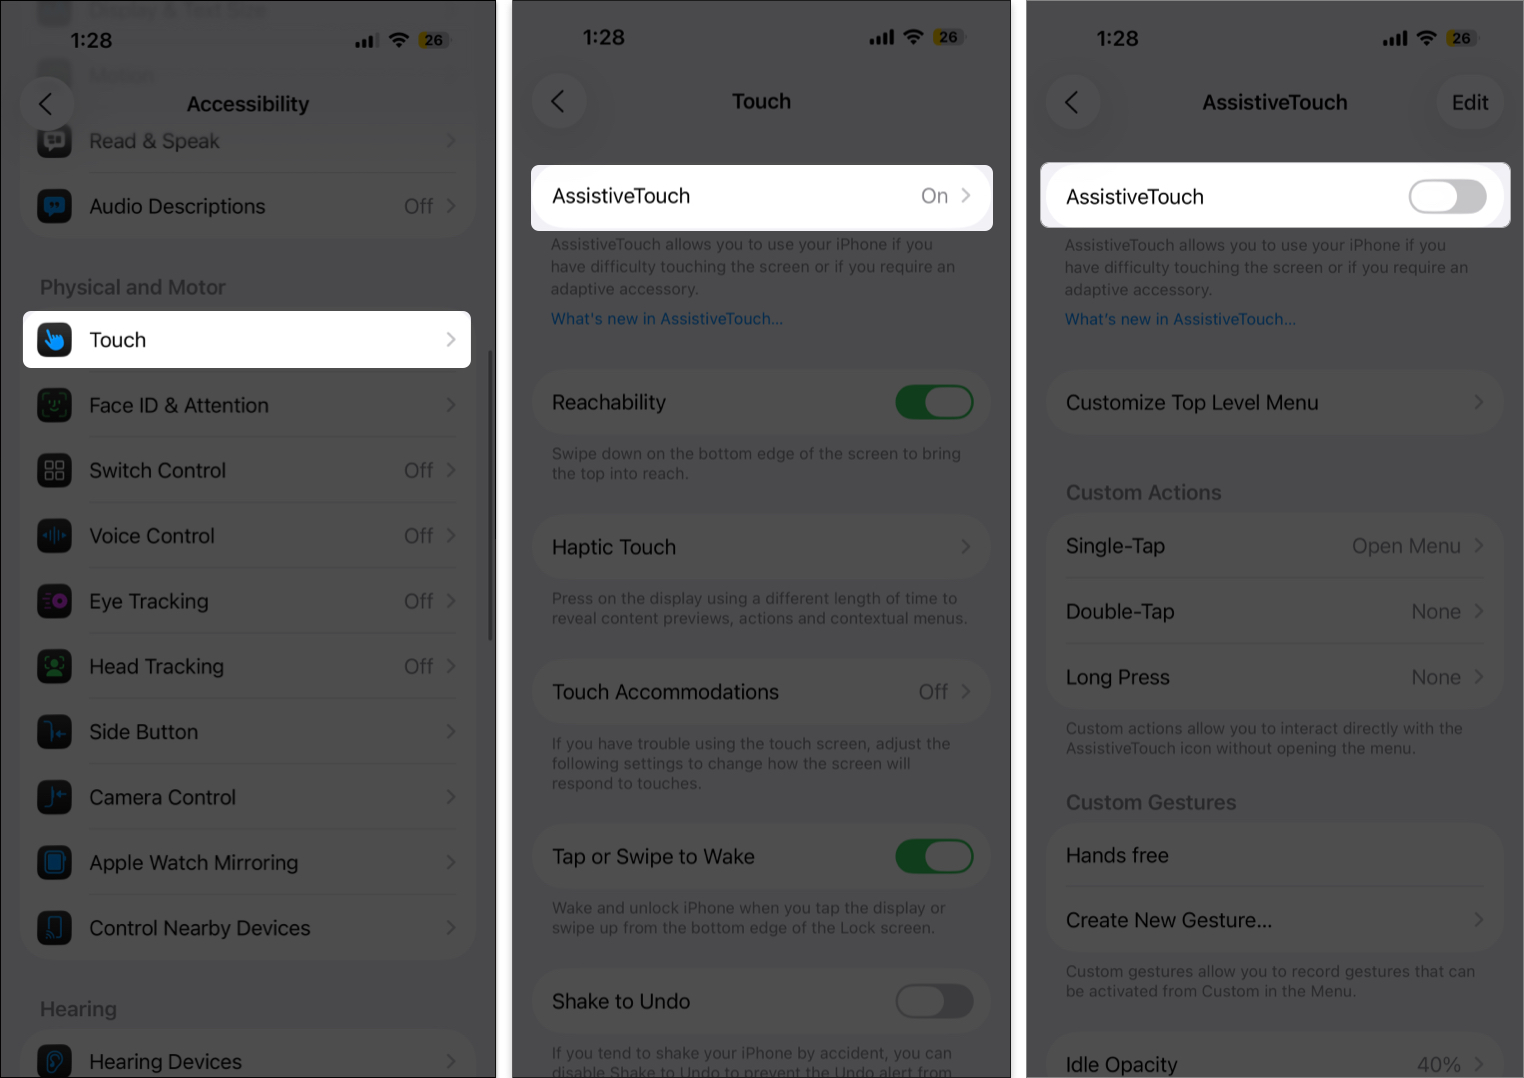
- Open Settings → Accessibility.
- Tap Touch → AssistiveTouch.
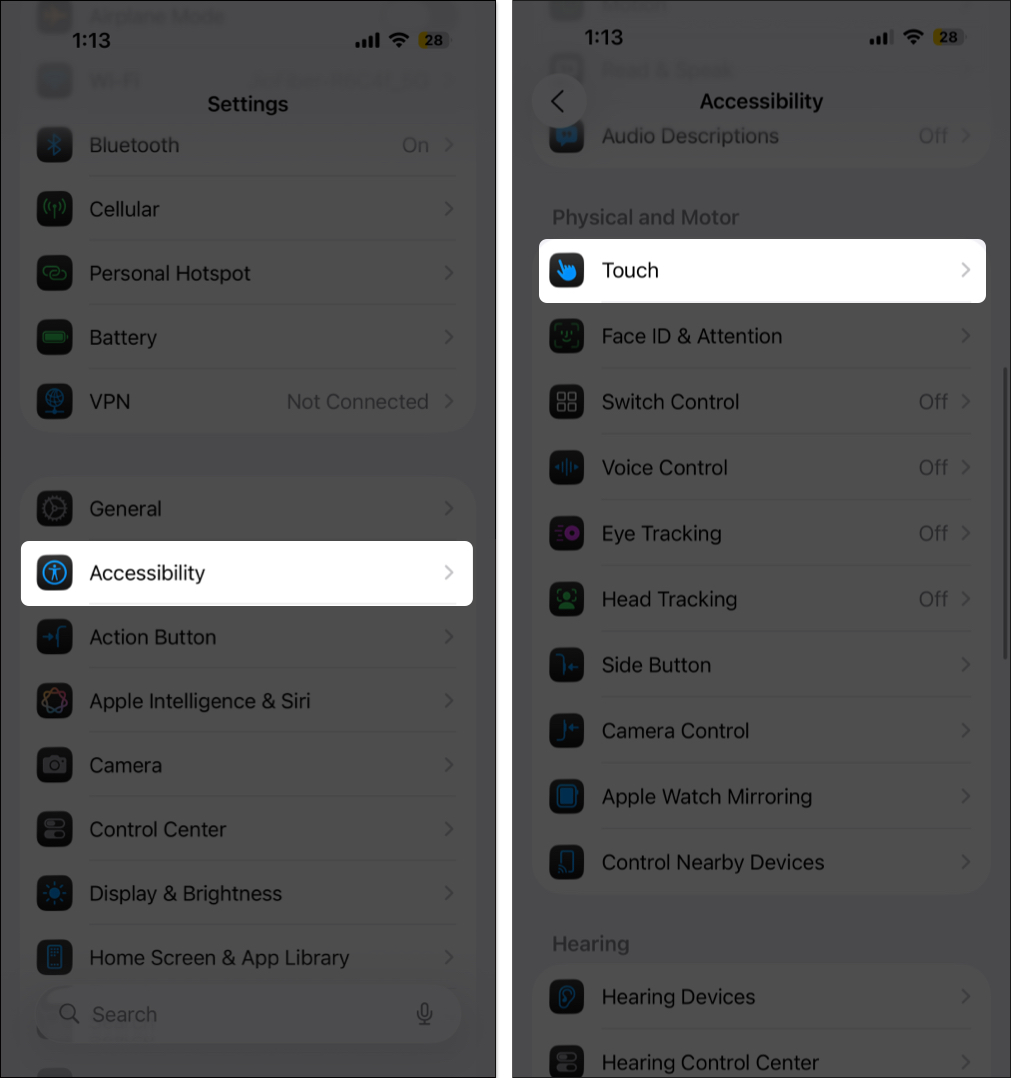
- Turn on the AssistiveTouch toggle.
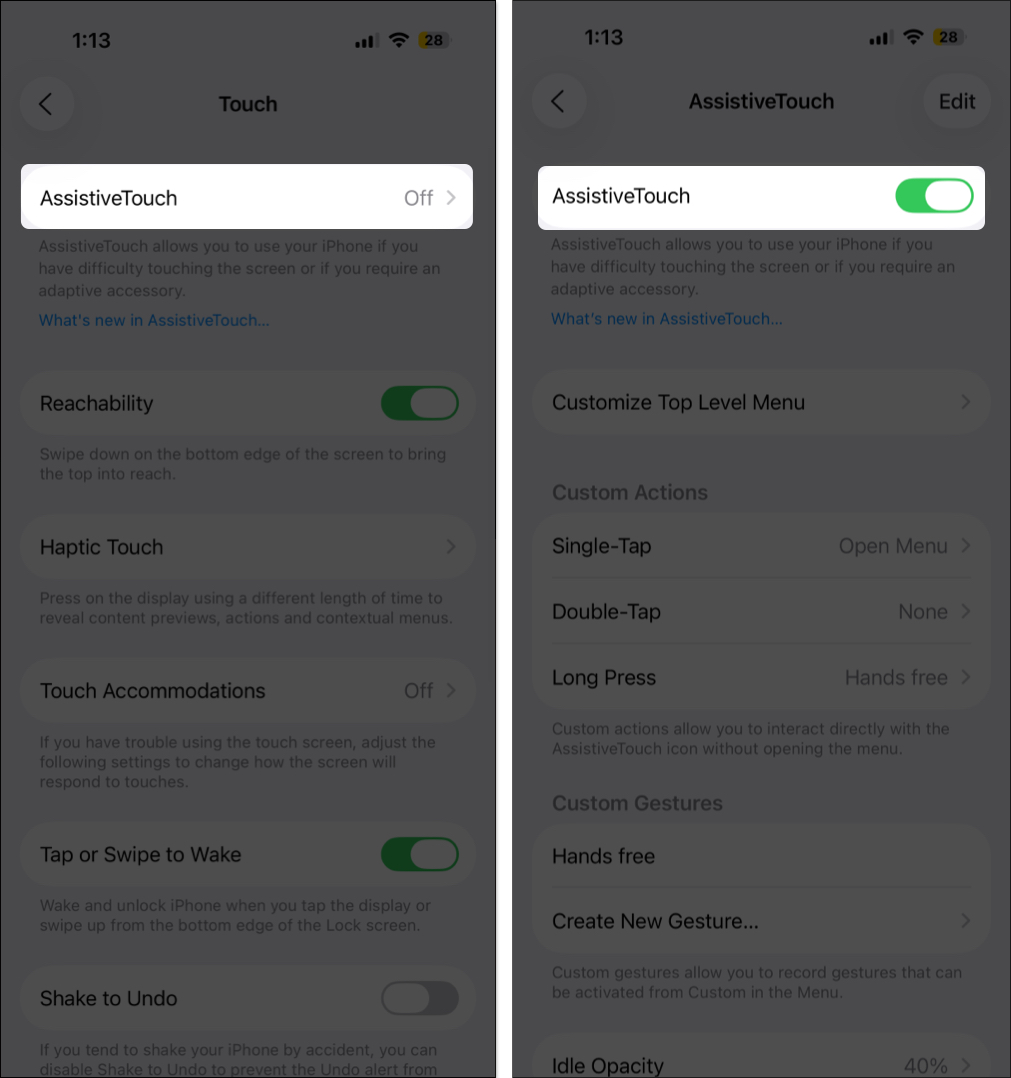
A circular button will appear on your screen. You can drag it anywhere along the edge, and it will stay there until you move it again.
3. With Accessibility Shortcut
Go to Settings → Accessibility → Accessibility Shortcut, and select AssistiveTouch.
Now, you can quickly enable or disable AssistiveTouch by pressing the side or Home button three times.
How to Use AssistiveTouch on iPhone and iPad
Using AssistiveTouch is simple. Tap the floating button to open the menu, and tap anywhere outside the menu to close it.
Here’s what you’ll find in the default AssistiveTouch menu:
- Notifications: Instantly opens the Notification Center
- Control Center: This brings up the Control Center without using any onscreen gesture
- Device: It opens up a device menu, wherein you can access Rotate Screen, Lock Screen, Volume up, down, or mute
- The More option further shows several other options such as App Switcher, Screenshot, and Restart
- Home: No matter which app you are using, this will quickly take you to the iOS Home Screen
- Siri: This activates Siri
- Custom: Here, you can perform and add custom gestures such as Hold & drag and Pinch & Rotate
You can tweak this menu to include the tools you use most.
How to Customize the AssistiveTouch Menu
Also known as the Top Level Menu, this is where you can personalize the AssistiveTouch layout.
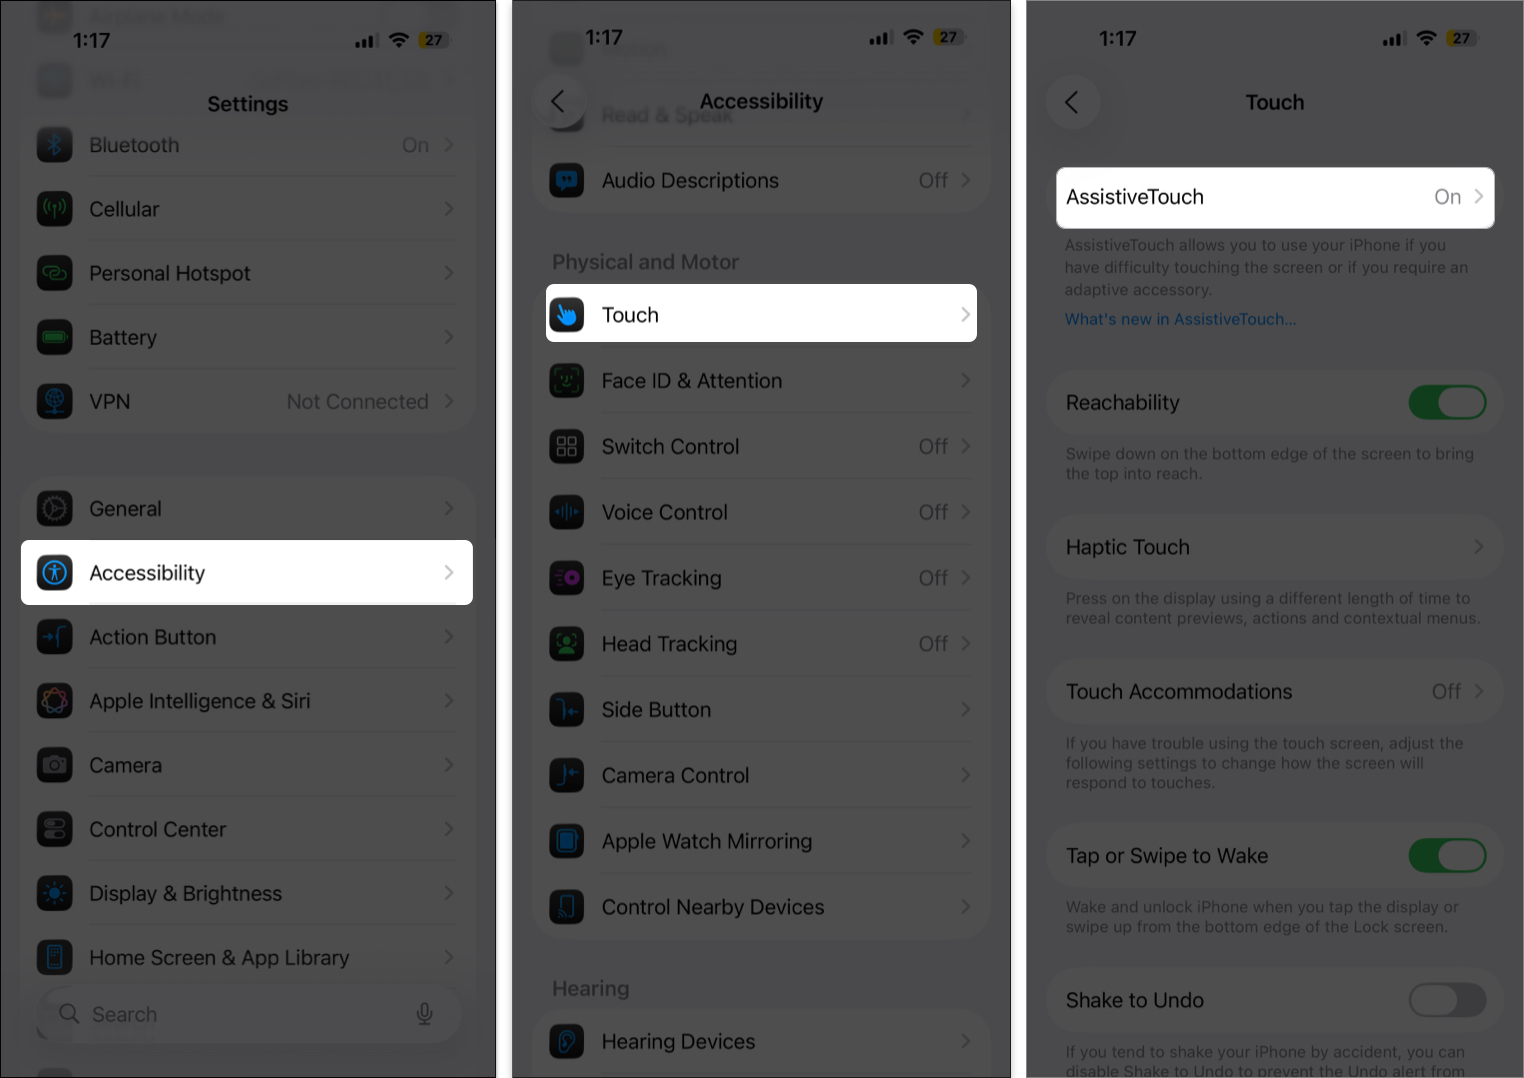
- Launch Settings → Accessibility → Touch.
- Tap AssistiveTouch.
- Customize Top Level Menu → To Reset or Rearrange the existing icon, tap on it
- Now, select the desired function or action and tap Done.
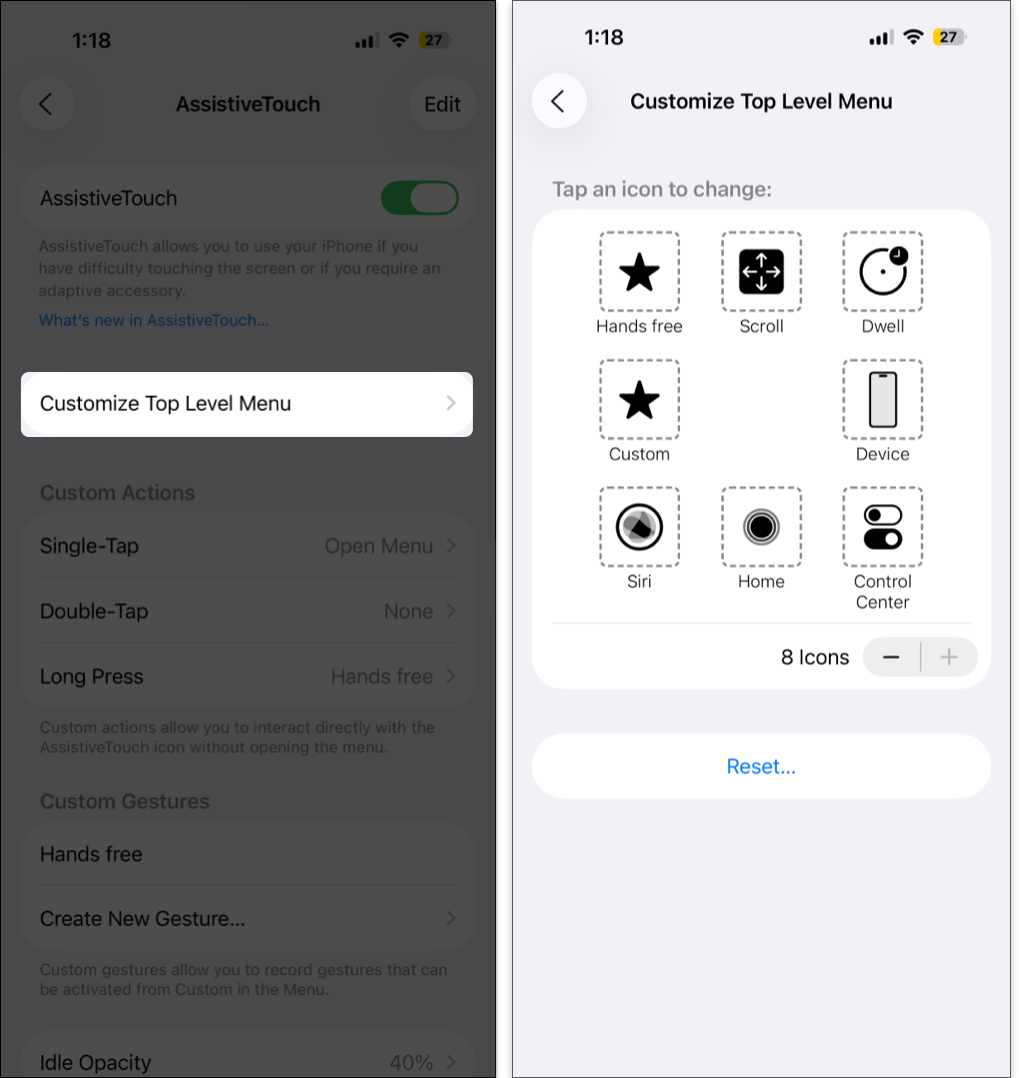
Note: Repeat steps 3 & 4 until you are satisfied with your AssitiveTouch menu - To add or remove options in the Top Level menu, tap “+” and “-” buttons.


You can add up to 8 shortcuts or keep it minimal with just one. If you ever want to revert to the original layout, simply tap Reset.
How to Add Custom AssistiveTouch Actions
AssistiveTouch also supports Custom Actions, allowing you to perform quick commands without even opening the menu.
- Go to Settings → Accessibility → Touch → AssistiveTouch.
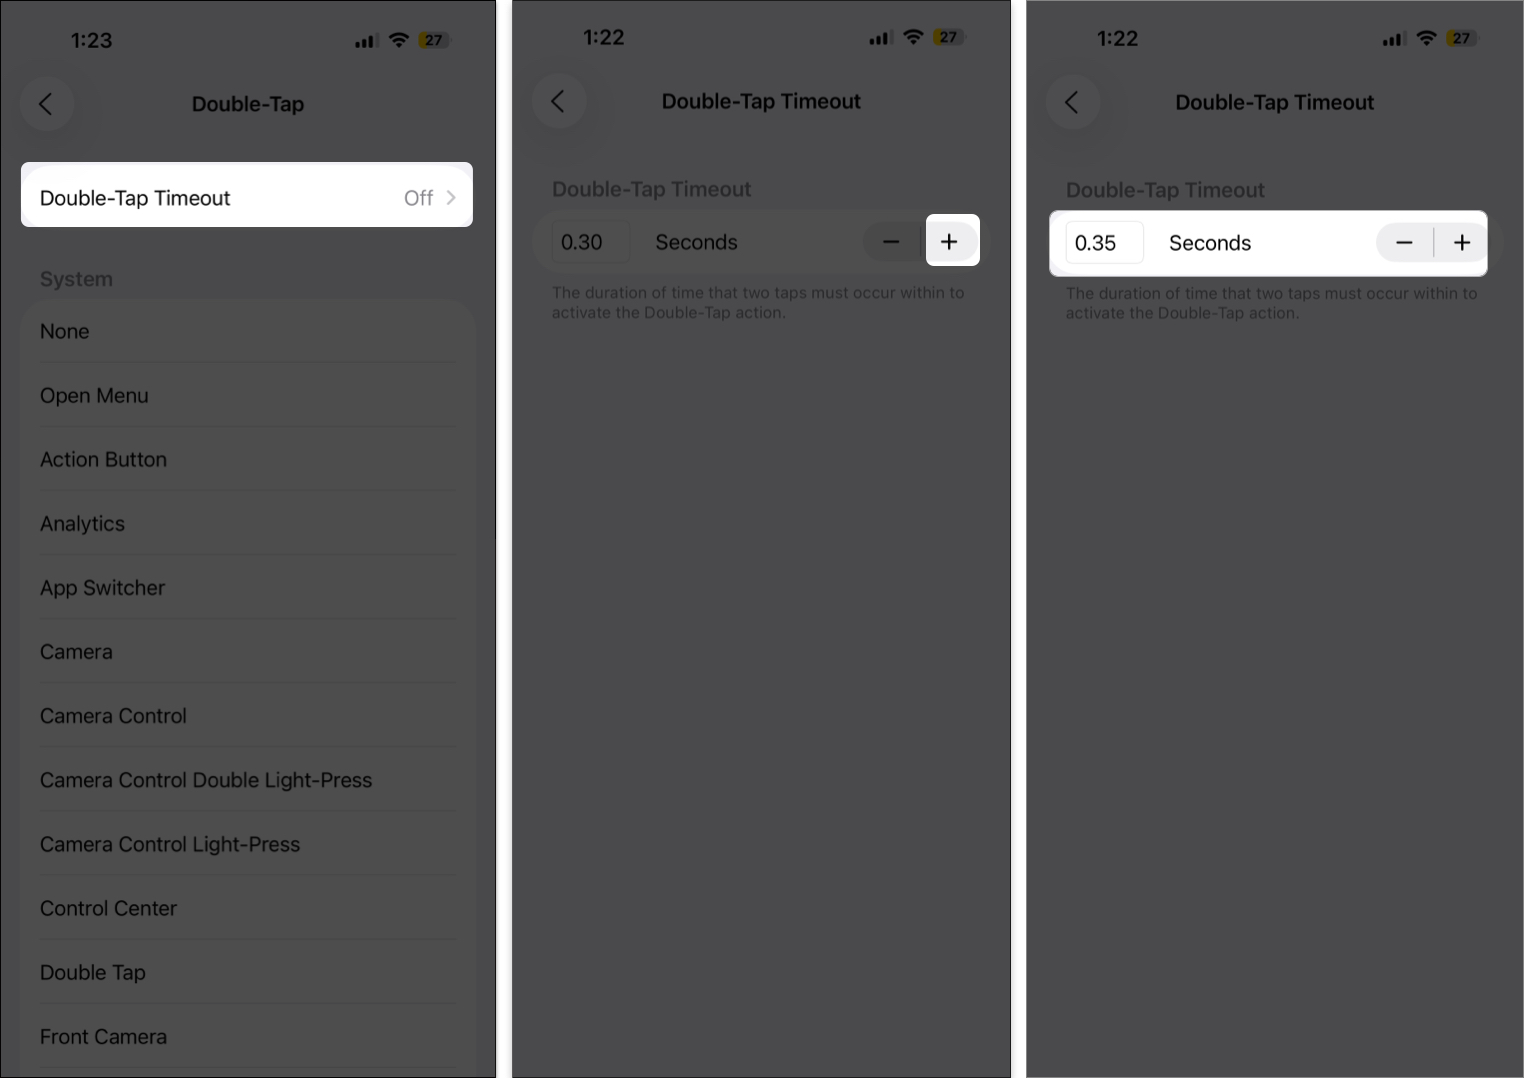
- Under the Custom Actions heading tap on the Single-Tap, Double-Tap, or Long Press.
- Select the action you would like to assign the gesture
- Tap on Back from the top-left of the page.

- And not just that, you can also edit the Double-Tap Timeout and Long Press Duration.


How to Create New AssistiveTouch Gestures
Want to make your own gestures? You can record taps and swipes that execute specific movements on-screen.
- Open Settings → Accessibility → Touch → AssistiveTouch.
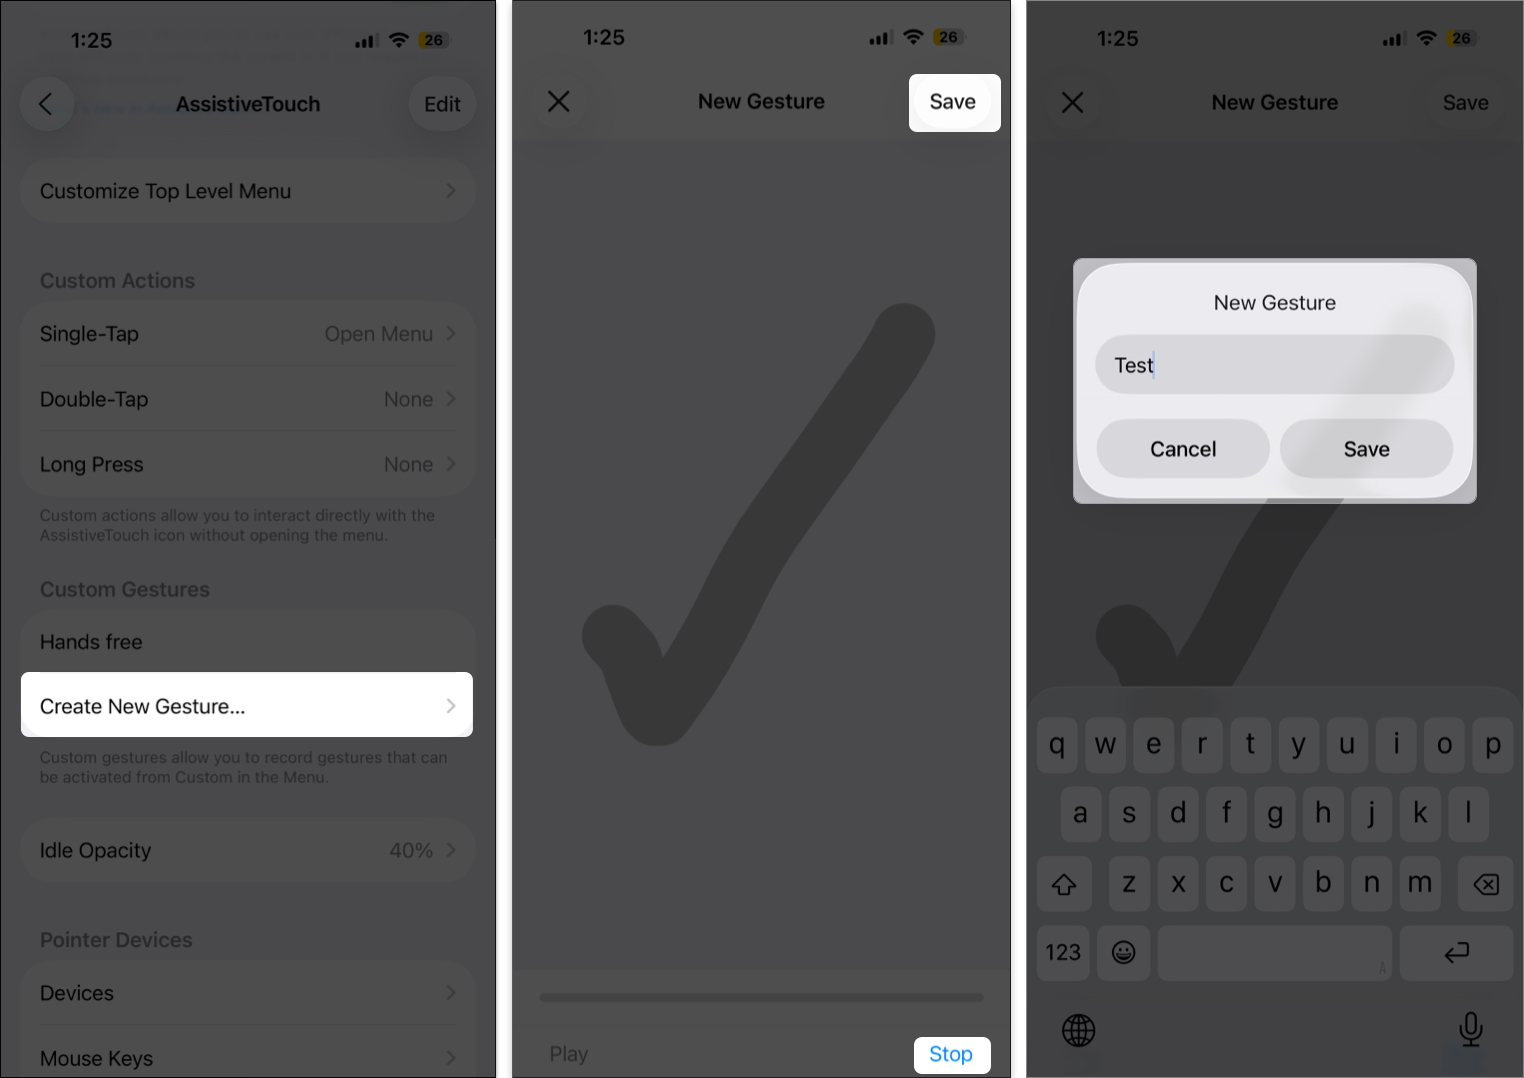
- Here, select Create New Gesture under the Custom Gesture section
- In the recording screen, feed the gesture you want to add
- Tap on Stop and Play to test. If unsatisfied tap Record and do it again.
- Once satisfied, tap Save and enter the Gesture Name.

To use it, tap the AssistiveTouch button → Custom → your gesture name. A translucent dot will appear—tap it to perform the action.
To delete a gesture, tap Edit at the top right, select the minus icon, and confirm.
AssistiveTouch only recognizes gestures, not tasks like making calls. For instance, you can create a “scroll down” gesture for reading apps to move the screen automatically.
How to Connect a Pointer Device Using AssistiveTouch
With iOS 13 and iPadOS 13 or later, Apple added support for external pointing devices like Bluetooth mice and trackpads.
AssistiveTouch helps you connect and control these devices easily, especially on iPad, where mouse compatibility feels smoother and more natural.
How to Turn Off AssistiveTouch on iPhone or iPad
To disable AssistiveTouch, either:
- Open the Settings → Accessibility → Touch.
- AssistiveTouch → Toggle off the switch next to AssitiveTouch.

If you’ve added it to the Accessibility Shortcut, triple-press the side or Home button to turn it off instantly.
Wrapping Up
Once you get the hang of AssistiveTouch, it can truly transform the way you use your iPhone or iPad. Whether you need it for accessibility or convenience, it’s one of those underrated iOS features you’ll wonder how you lived without.
iOS is packed with other amazing accessibility tools too, explore them and see how they can make your experience even smoother.
Don’t miss these related reads:


