If you multitask and have hands full of work, you can make Siri read whatever text is on your screen aloud. It’s like turning your iPhone, iPad, or Mac into your personal storyteller. In this guide, I have shared how to get Siri to read text, web pages, articles, emails, etc., in iOS 17 and macOS Sonoma.
How to make Siri read webpage on iPhone
With iOS 17, you don’t have to go through those lengthy articles straining your eyes or squinting at the screen. Just make Siri read the mobile webpage. However, note that you must open the website using Safari. It will not work in other browsers like Chrome.
Also, check if the website supports Reader View mode. When you open the website, you must momentarily see a Reader Available label in the address bar. If you miss that, don’t worry! Tap the aA icon beside the address bar and try accessing the Show Reader option.
If the website satisfies the conditions above, here’s how you can make Siri read text on web pages.
Method 1: Listen to web pages using Siri command
- Launch the Safari app on your iPhone → Open the article you want to listen to.
- Invoke Siri and say, “Read this article to me.”
- Siri will start reading the text aloud. You will see a media player on top of your screen and your Lock Screen.
- To stop listening: Tap the play/pause button on the media control.

- You may also stop the session by going to the speaker icon beside the address bar → Select Listening Controls → End Listening.
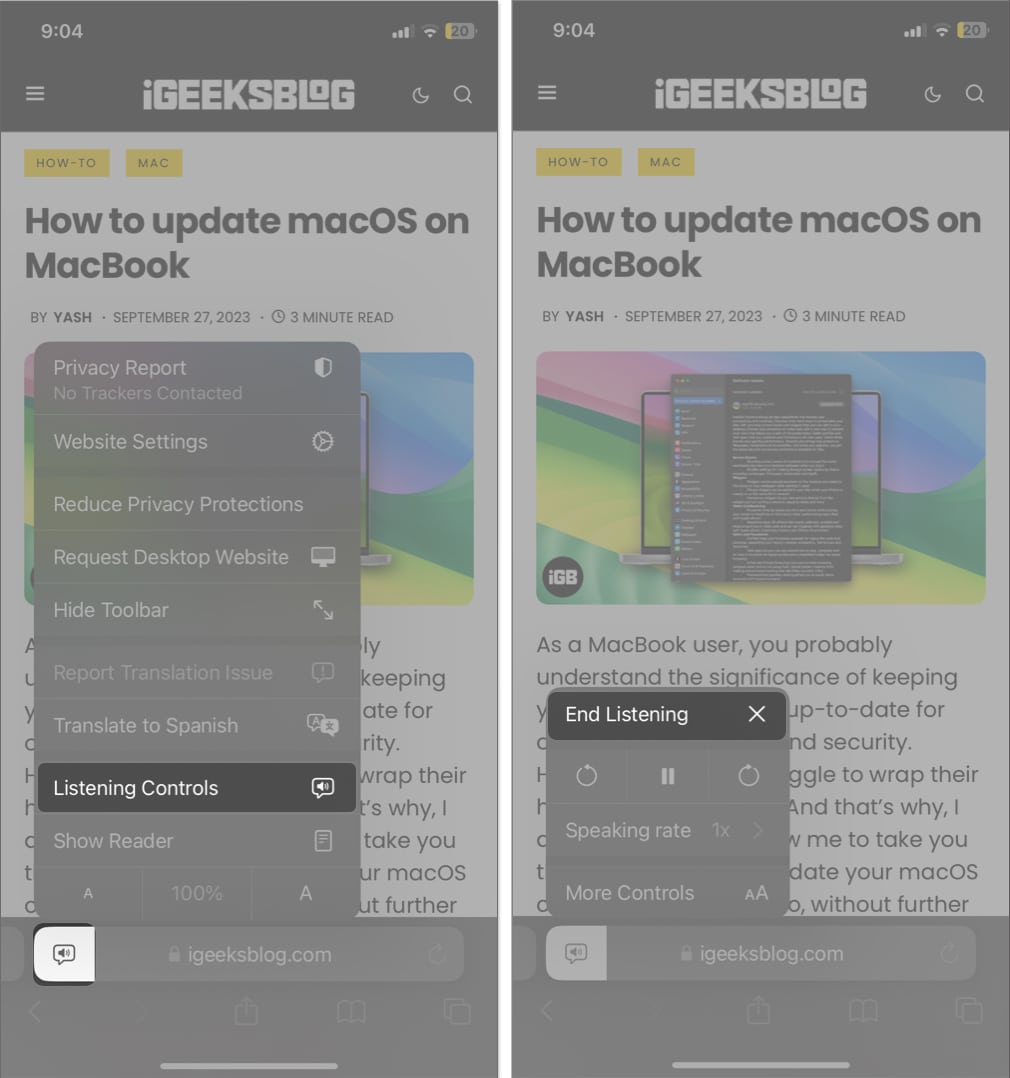
- To re-listen to the article: Tap the aA icon → Select Resume Listening.
- To skip sentences: Select the plus button to jump to the following sentence or the minus sign to return to the previous line.

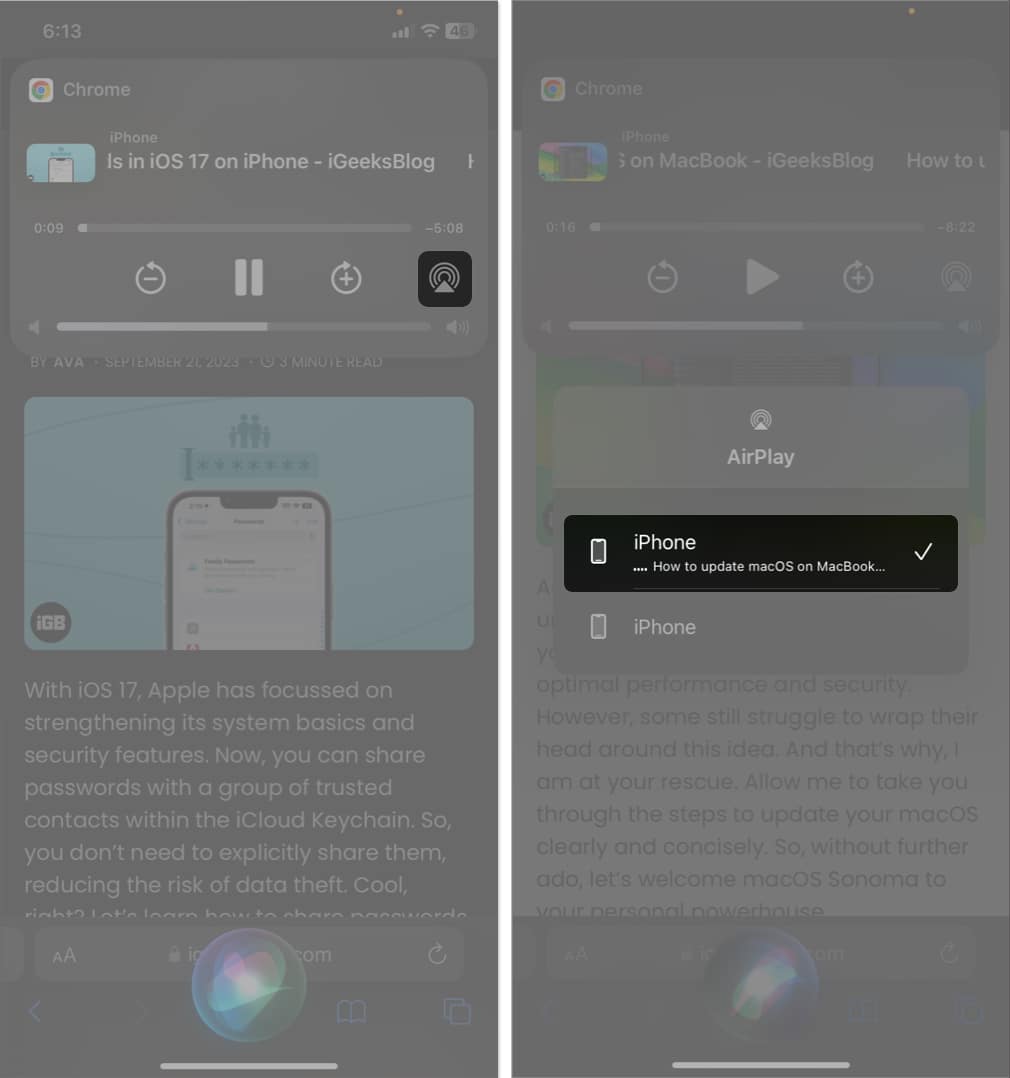
- Listen on other devices: Tap the AirPlay icon → Choose the device where you want to listen to the article.
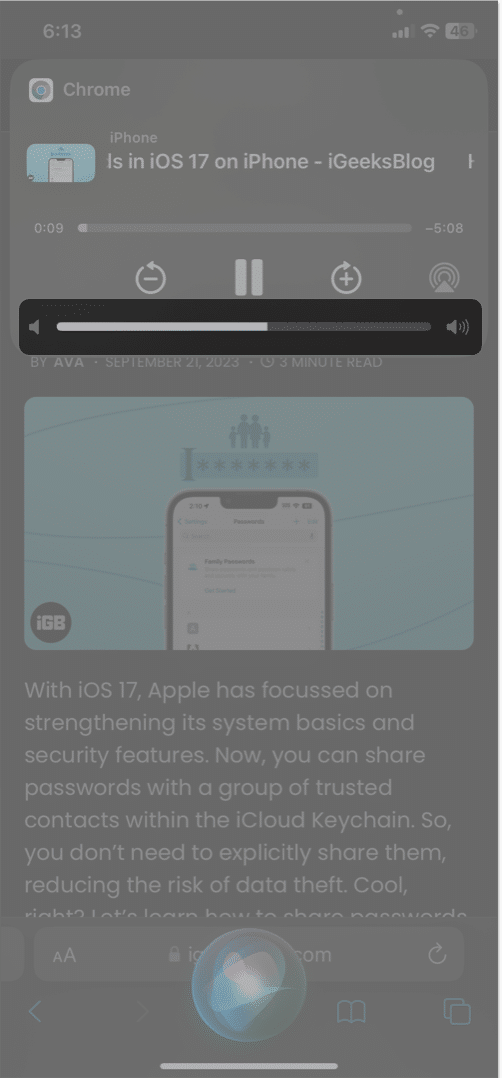
- Control volume: Drag the volume slider on the media control to increase or decrease the audio sound.
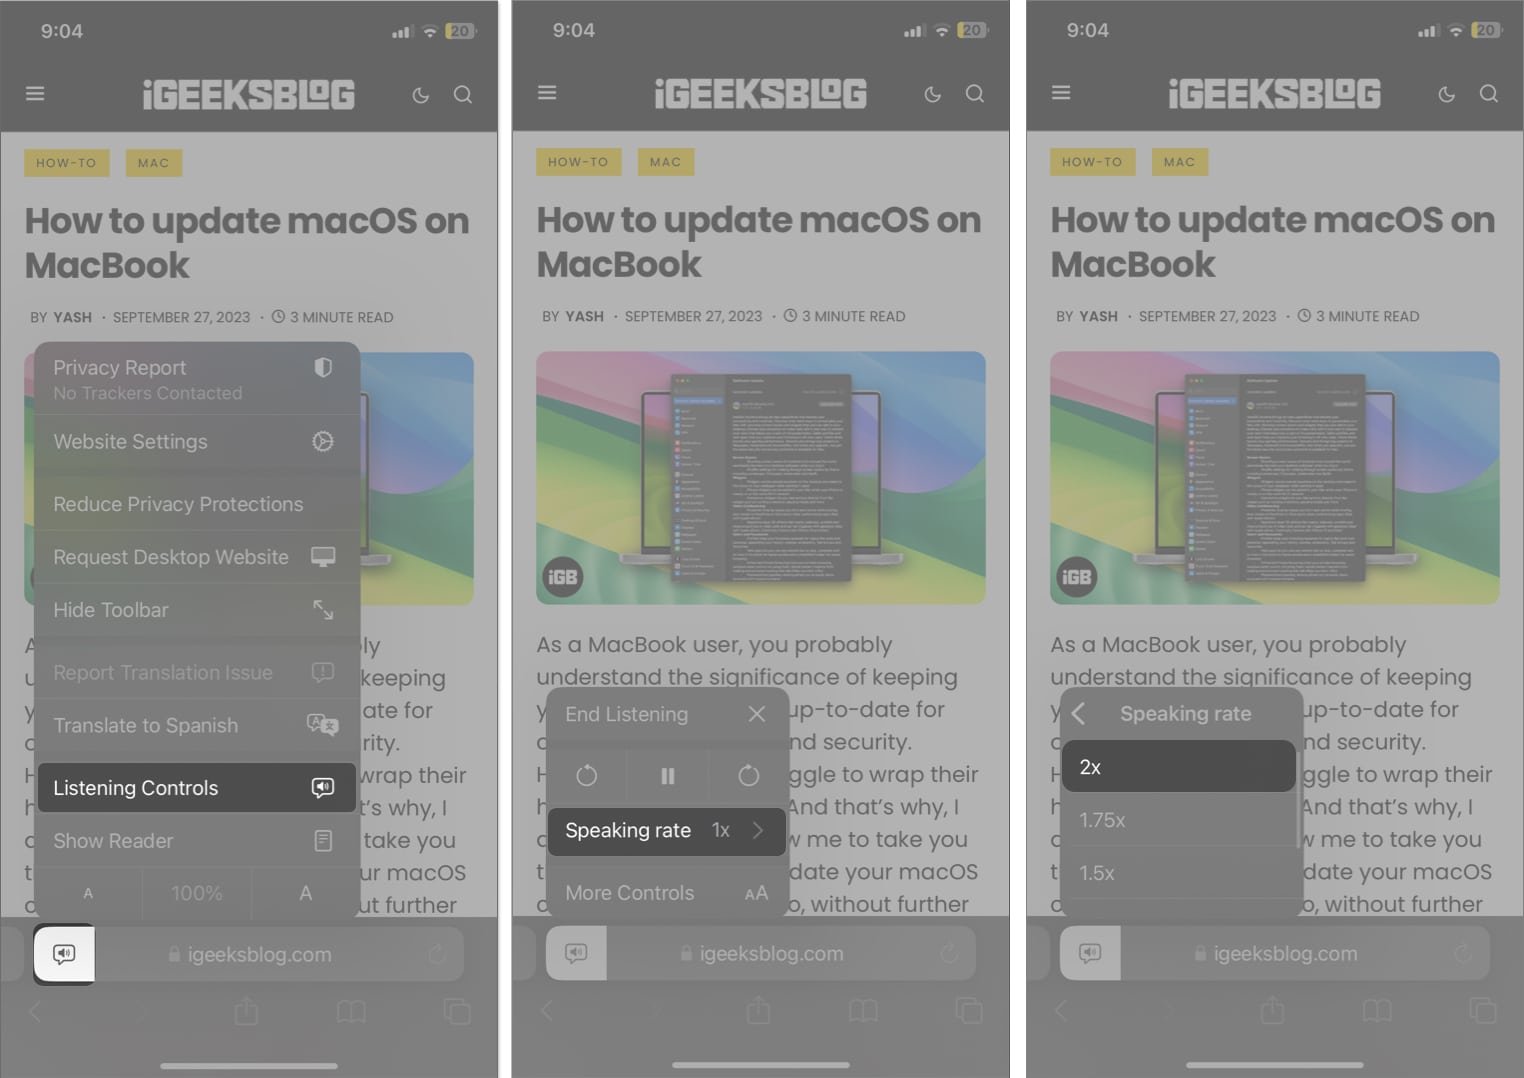
- To change reading speed: Tap the speaker icon beside the address bar → Select Listening Controls → Speaking rate → Choose the pace.
- To stop listening: Tap the play/pause button on the media control.
That’s how you can make Siri read mobile web pages hands-free. However, there’s an alternative method.
- Open the article → Tap the aA icon beside the address bar.
- Select Listen to Page.
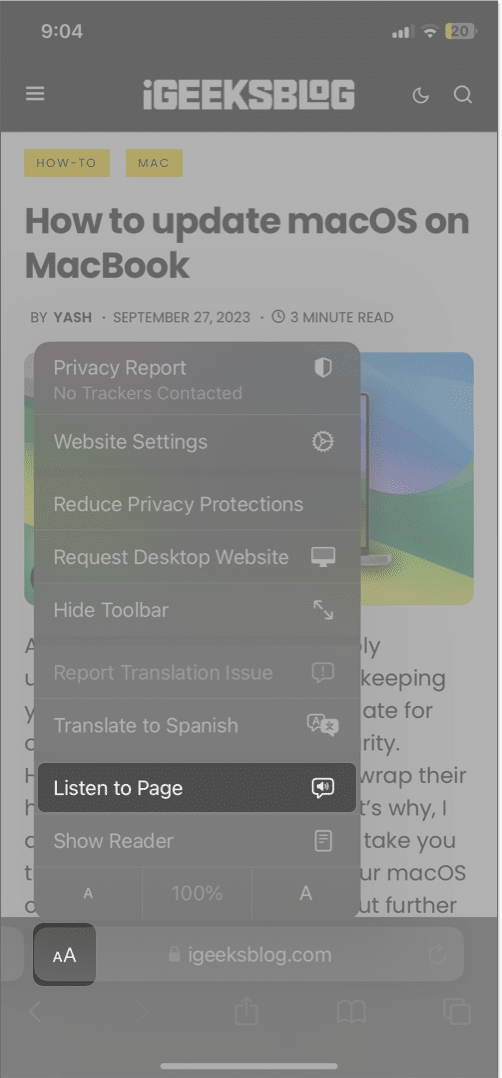
- Now, Siri will start reading the article.
- To get the media controls, tap the loudspeaker icon beside the address bar → Select Listening Controls.
Not only web pages or articles, but you can also make Siri read the text in Notes, email content, text messages, etc. Keep reading to learn how.
How to get Siri to read any text on iPhone or iPad
- Go to Settings.
- Tap Accessibility → Spoken Content.
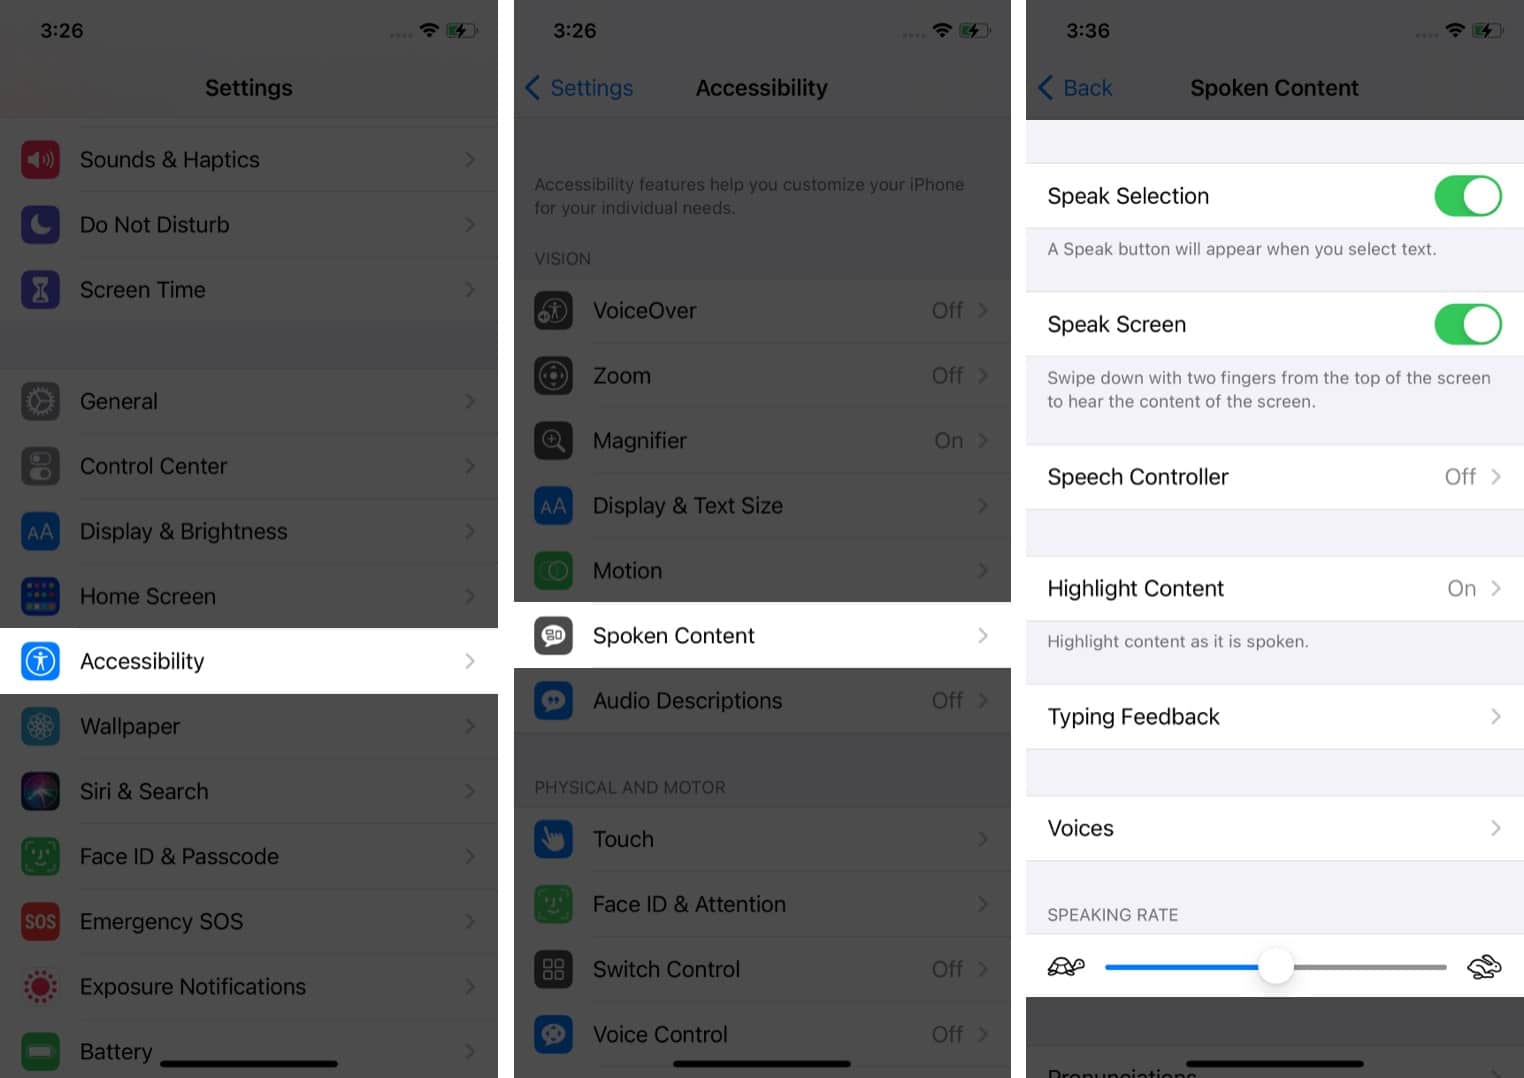
- Here, you will get several options:
- Speak Selection: Enabling it will show you a Speak option after selecting a text section.
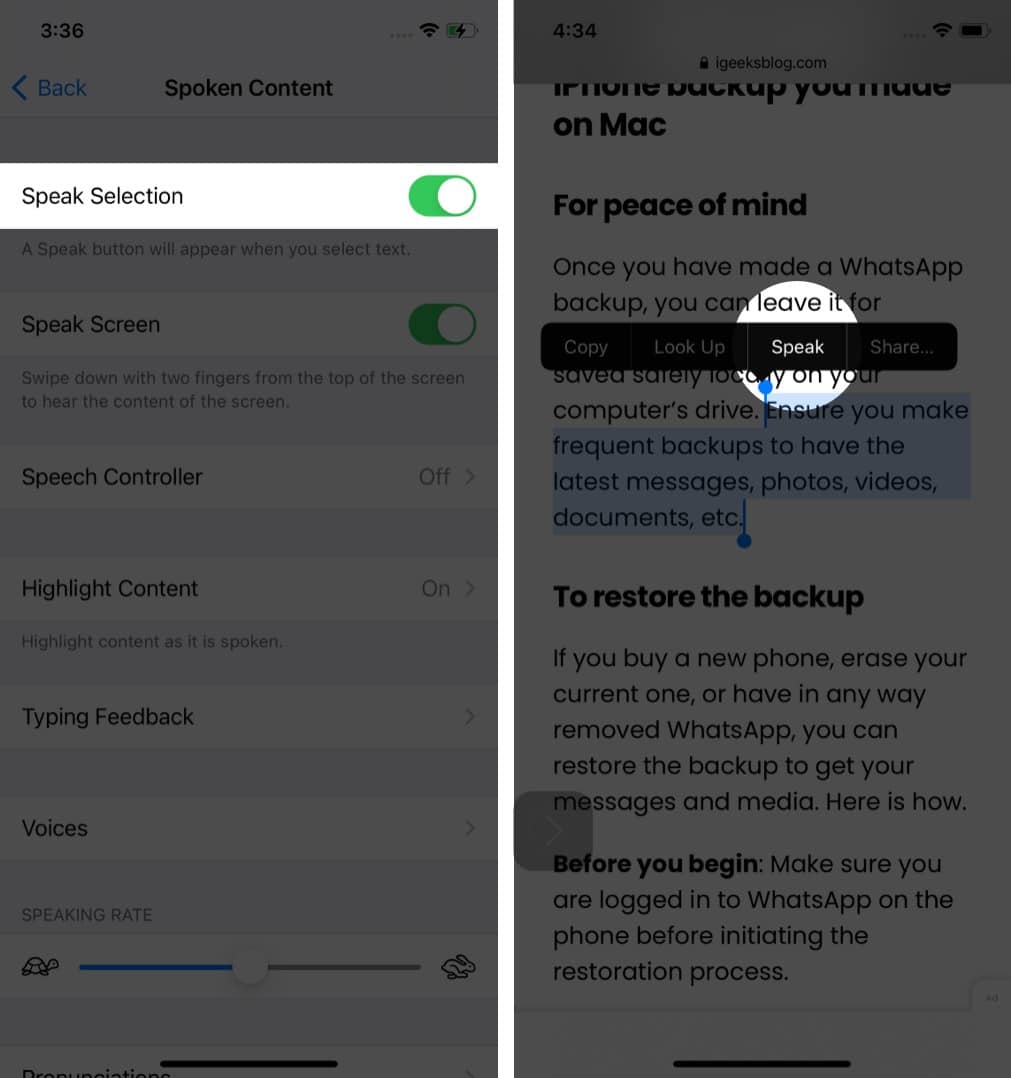
- Speak Screen: This option makes Siri read everything on your screen. You just need to swipe with two fingers from top to bottom.
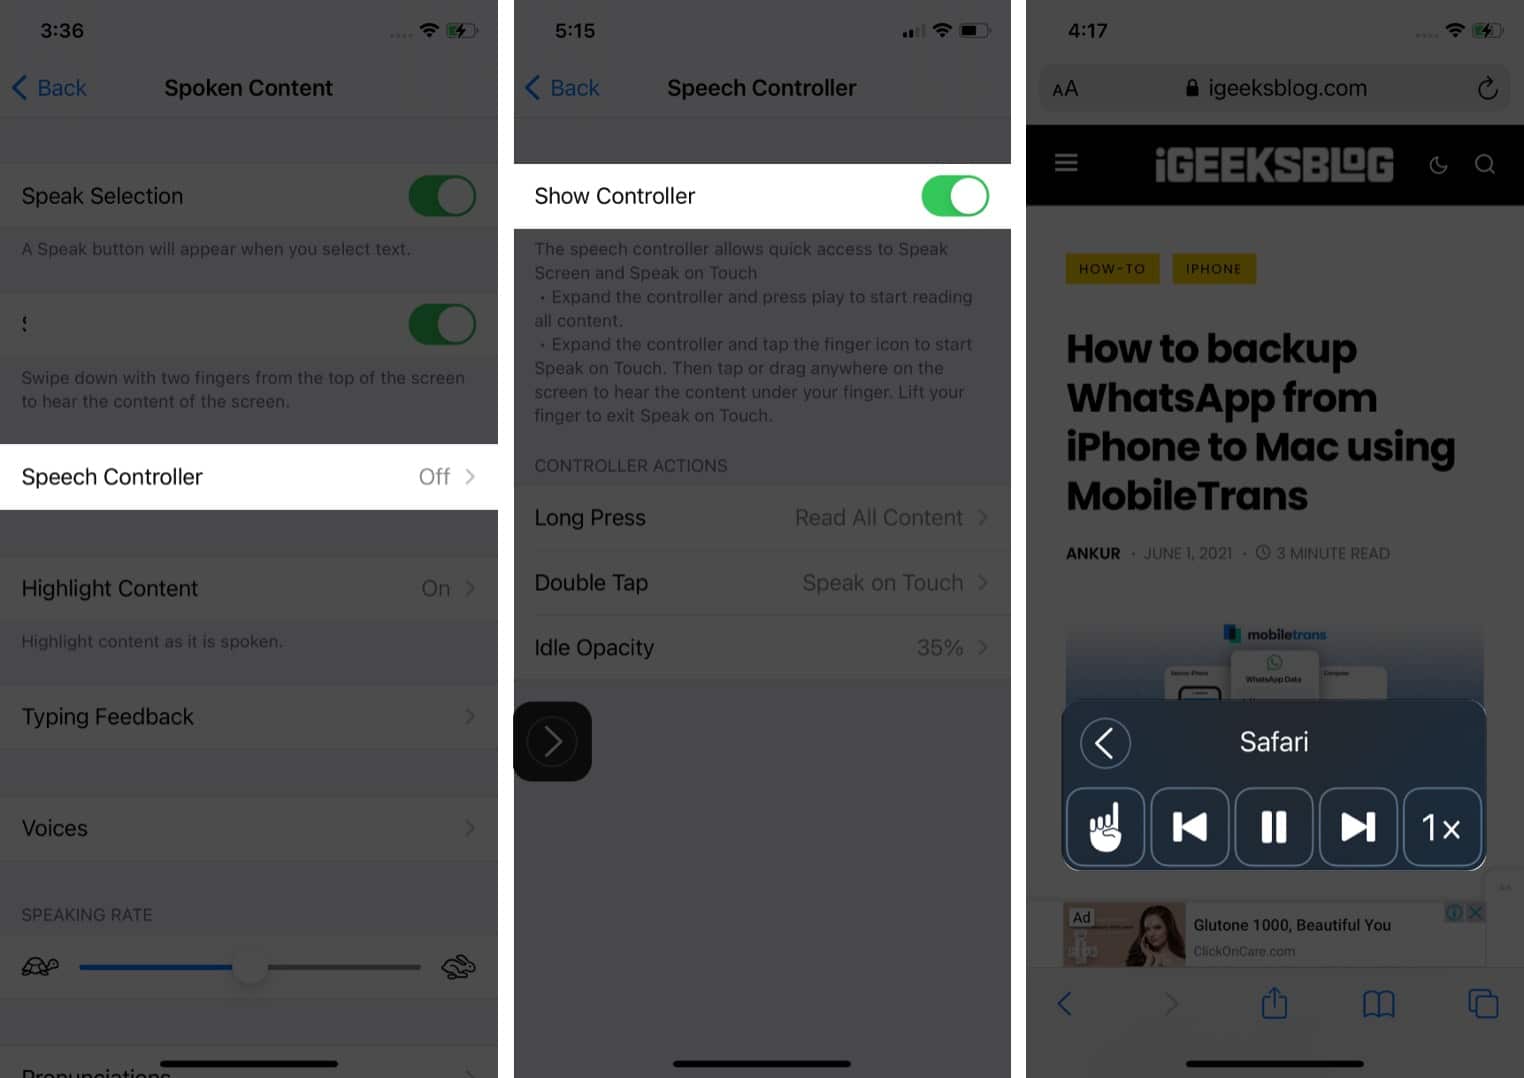
- Speech Controller: Toggling on the Speak Screen will give you the option of Speech Controller. On enabling it, a square black icon will pop up. It provides quick access to Speak Screen and Speak on Touch features. You can further customize actions for long-press and double-tap.
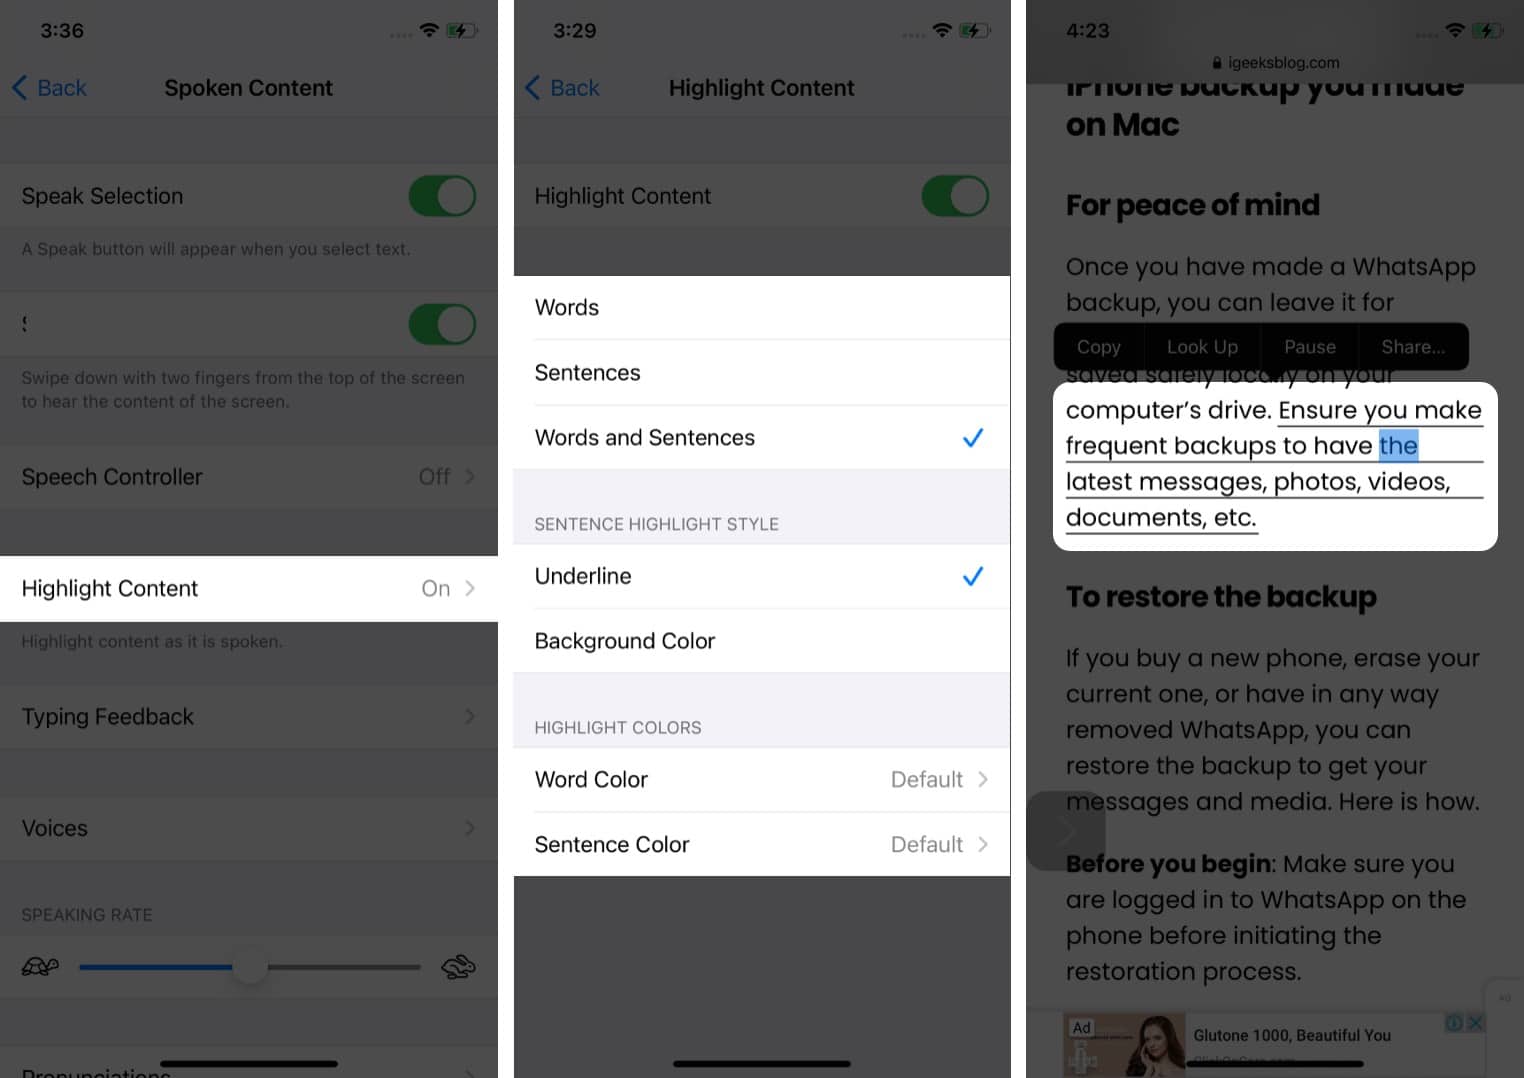
- Highlight Content: Enabling this allows you to observe the words as Siri reads them. You may choose your preferred highlight type, style, and colors. This feature comes in handy while reviewing some documents on your iPhone.
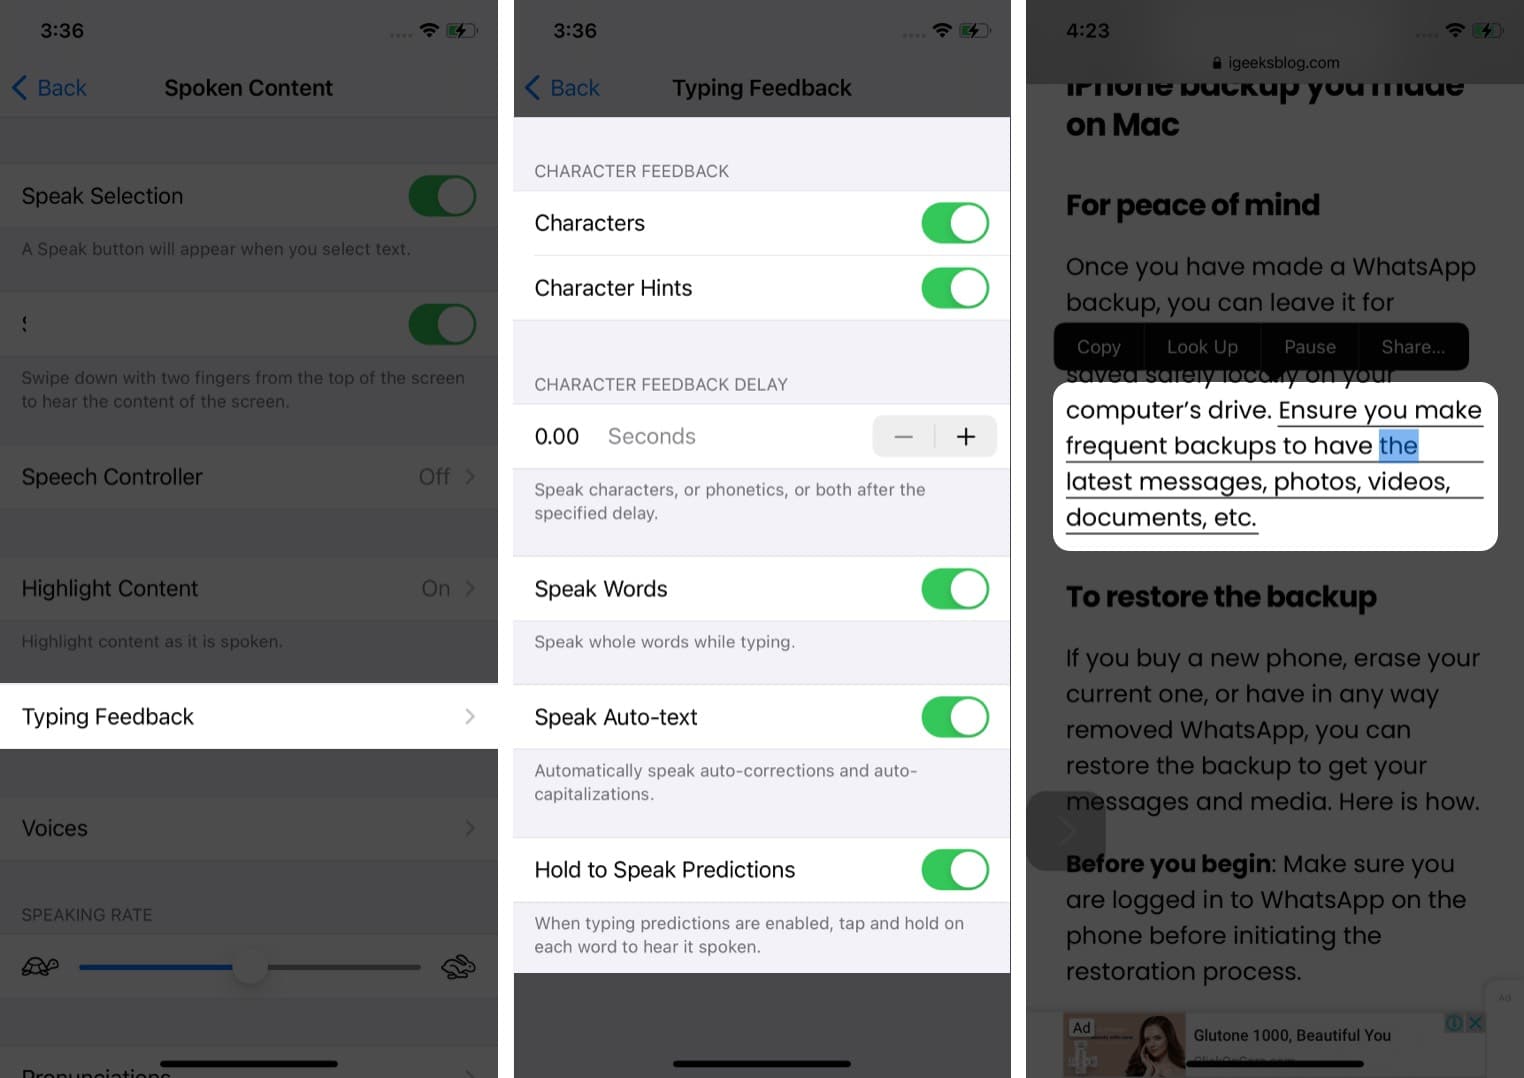
- Typing Feedback: Enabling this provides voice feedback as you type. You can enable Siri to read out the characters, words, auto-corrections, or predictions while typing something.
- Voices: Select a different voice and language for narration.
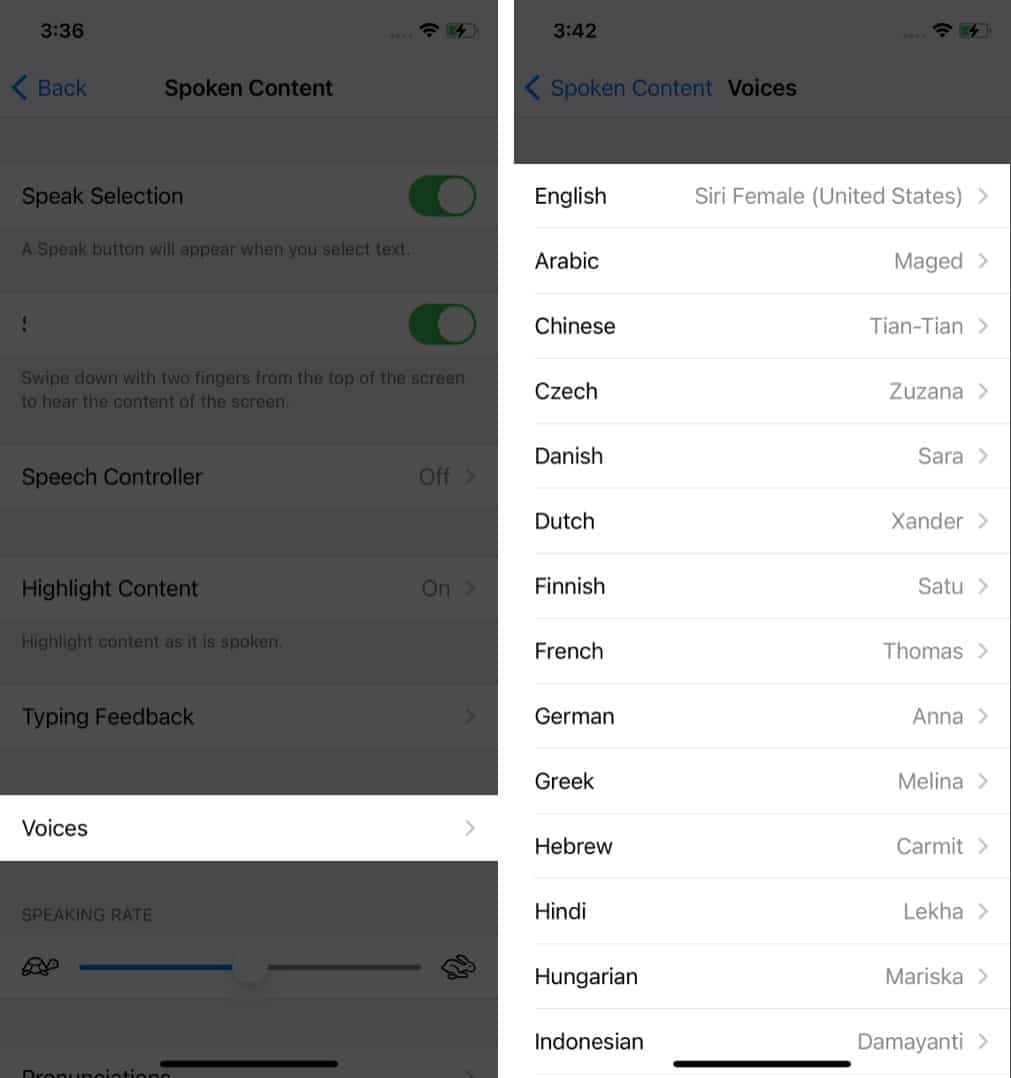
- Speaking Rate: You can also adjust the narration speed using the Speaking Rate slider.
- Pronunciation: If Siri mispronounces, you can add its correct pronunciation here.
- Speak Selection: Enabling it will show you a Speak option after selecting a text section.
- Now, summon Siri → Say, “Speak Screen“ to let Siri read everything on your screen.
This is how you can make Siri read every text on your iPhone and iPad. If you’re interested in setting Siri to read incoming messages in a different language, follow these steps to customize your experience.
How to make Siri read aloud on Mac
- Go to Apple logo → System Settings.
- Select Accessibility → Spoken Content.
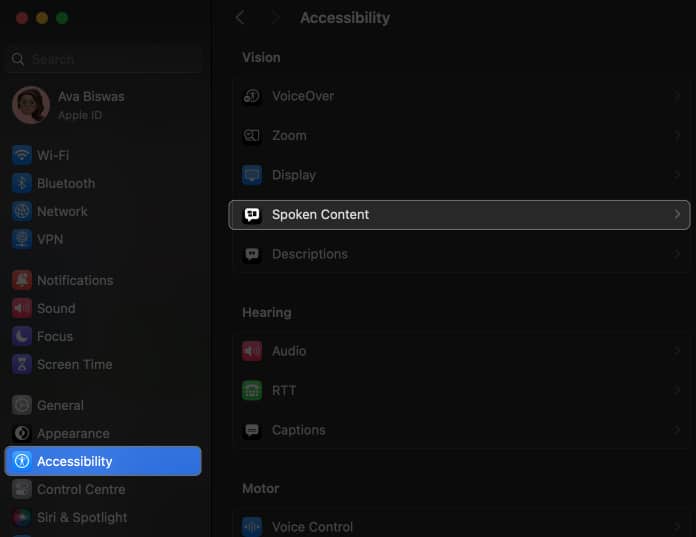
- Toggle on Speak selection.

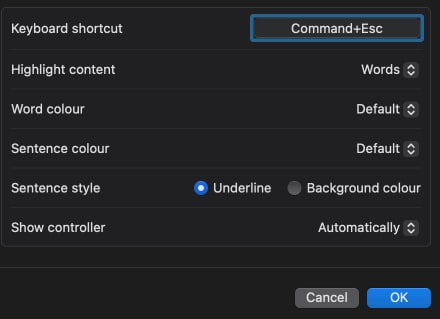
- Click the info button → Customize the options as per your preference.
- Keyboard Shortcut: The default shortcut to make Siri read the selected text is Option (⌥ ) + Esc. However, you can change the shortcut by pressing the keys you want. For example, press the Option (⌥ ) and R to set the keyboard shortcut as Option (⌥ )+R.
- Highlight Content: Like the iPhone, you can choose the highlight style, colors, and content. Alternatively, you may also select None to disable Highlight content.
- Show Controller: You can choose the controller to be shown always or never.
- Click OK to save your choices.
- Open the article on Safari → Select the text → Press the keyboard shortcut.
- It will get MacBook to read text aloud. Also, you will see a media controller on your screen.
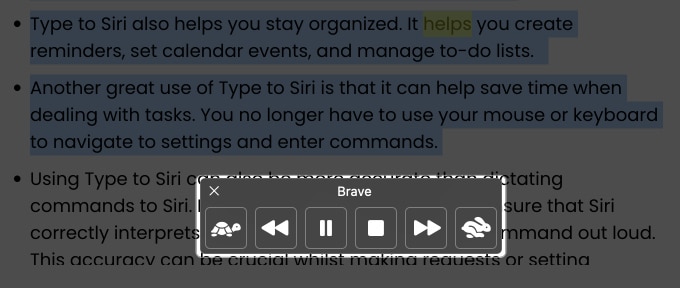
- To control speech rate: Click the rabbit icon to increase reading speed or click the tortoise icon to slow down the reading pace.
- To stop listening: Click the play button to pause the reading. Otherwise, select the square stop button to end the session.
- To skip content: Click the forward button to jump to the next sentence or select the backward button to listen to the previous sentence again.
- Click the X icon to remove the media controller.
Alternatively, you may summon Siri and say Speak Screen to get Siri to read text offline or online on Mac.
Enjoy free audiobooks!
I love reading stories and blogs online, but extended screen time creates eye fatigue. Therefore, this accessibility feature is my daily companion. You can get Siri to read text, webpage, emails, etc., on your iPhone, iPad, and Mac and turn any text story into an audiobook. So, what do you think about this hack? Let me know in the comments below!
FAQ’s
You can make Siri talk by enabling the Spoken Content accessibility feature.
Text-rich websites or blogs like iGeeksBlog mostly support Siri’s Apple voice recognition. To determine this, check if you can enable Reader View mode on the website.
Yes, you can make Siri read the text in any PDF using the accessibility feature.
Explore more…

