Key Takeaways
- To fix red eye in photos on iPhone, launch the Photos app > Open a picture with red eyes > Tap Edit > Red-eye icon > Touch each red eye on the image one after the other.
- Additionally, you can use third-party apps to remove red eye from iPhone photos.
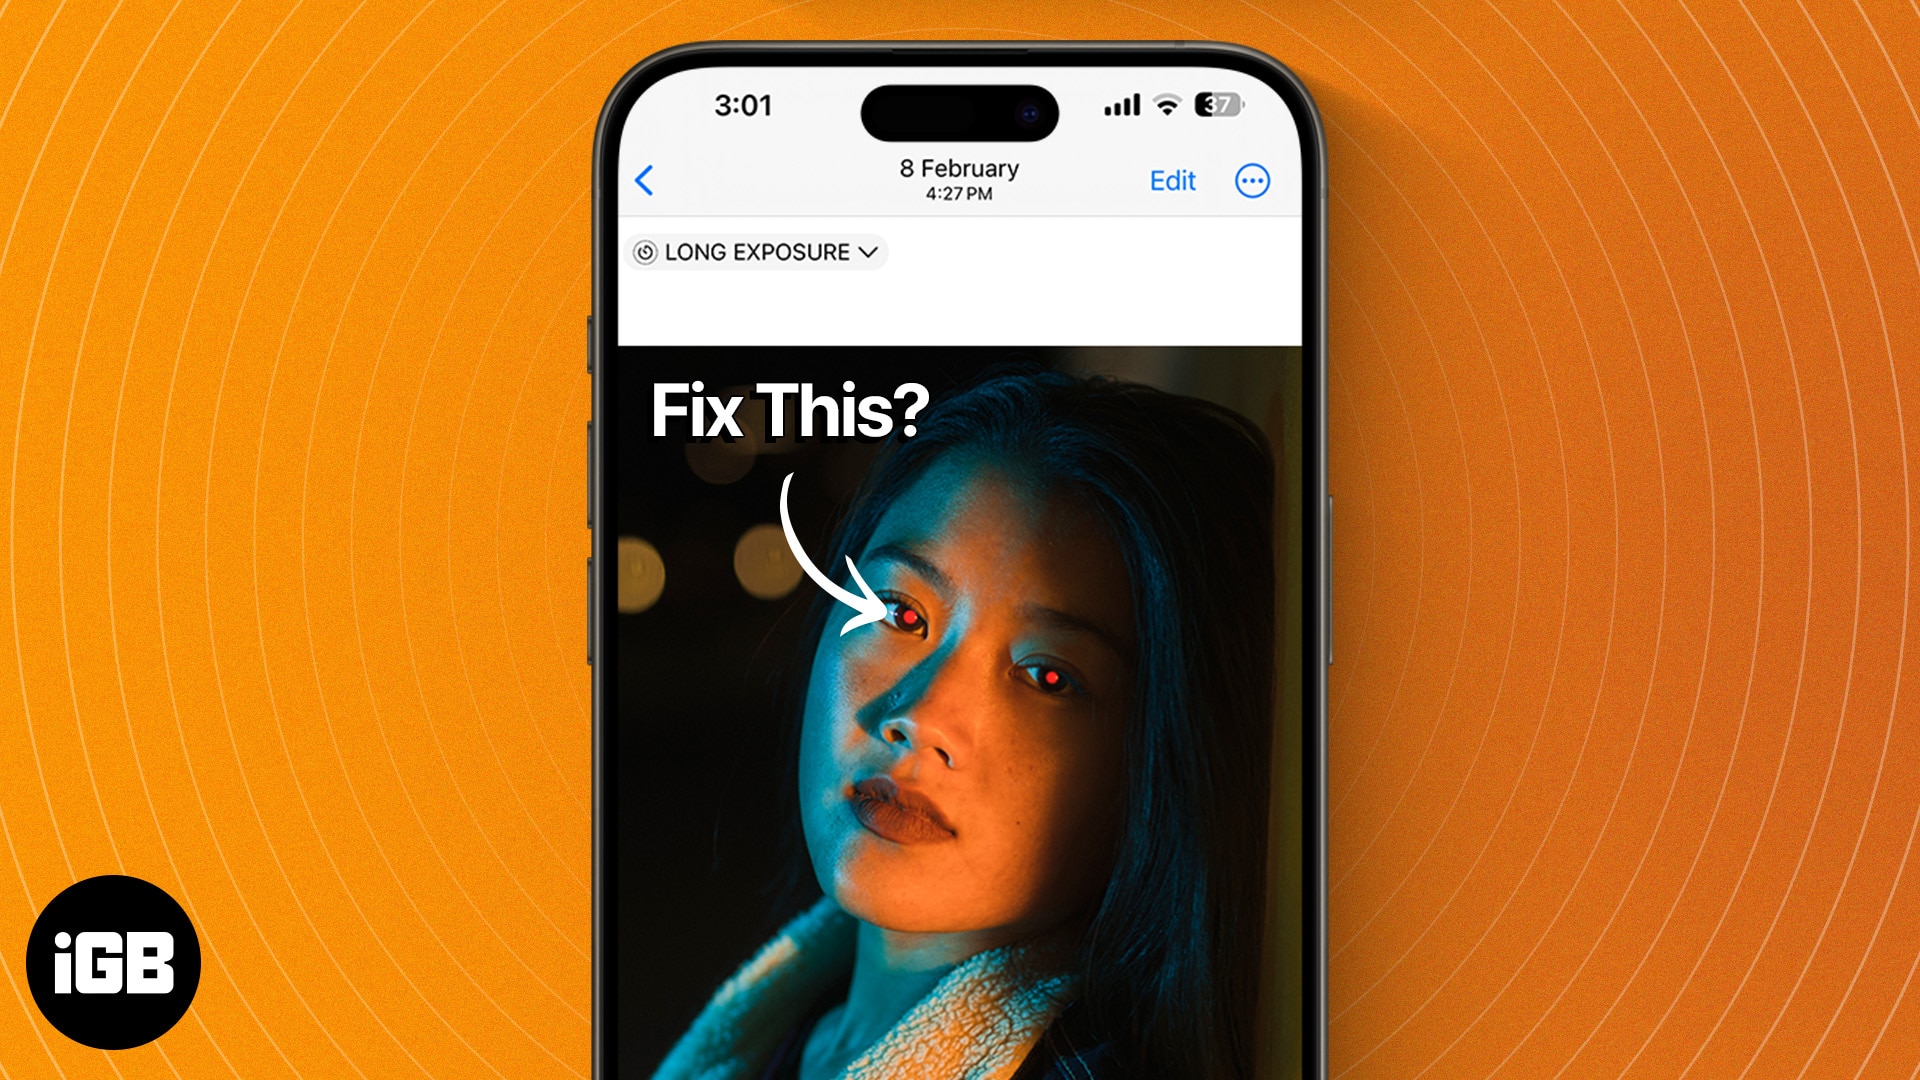
Picture this. You are at a party. You click some great photos with friends and family but later find out that the photos have red eyes in them! We all have been there, and this can be frustrating. If you are looking for a way to fix the red-eye issue on your iPhone, this guide is all you need.
Whether the photos were clicked on your iPhone or not, and whether the photos were clicked with a flash or not, you can use a built-in option in the Photos app to remove the red eye. Let me show you how.
How to remove red eye from iPhone photos
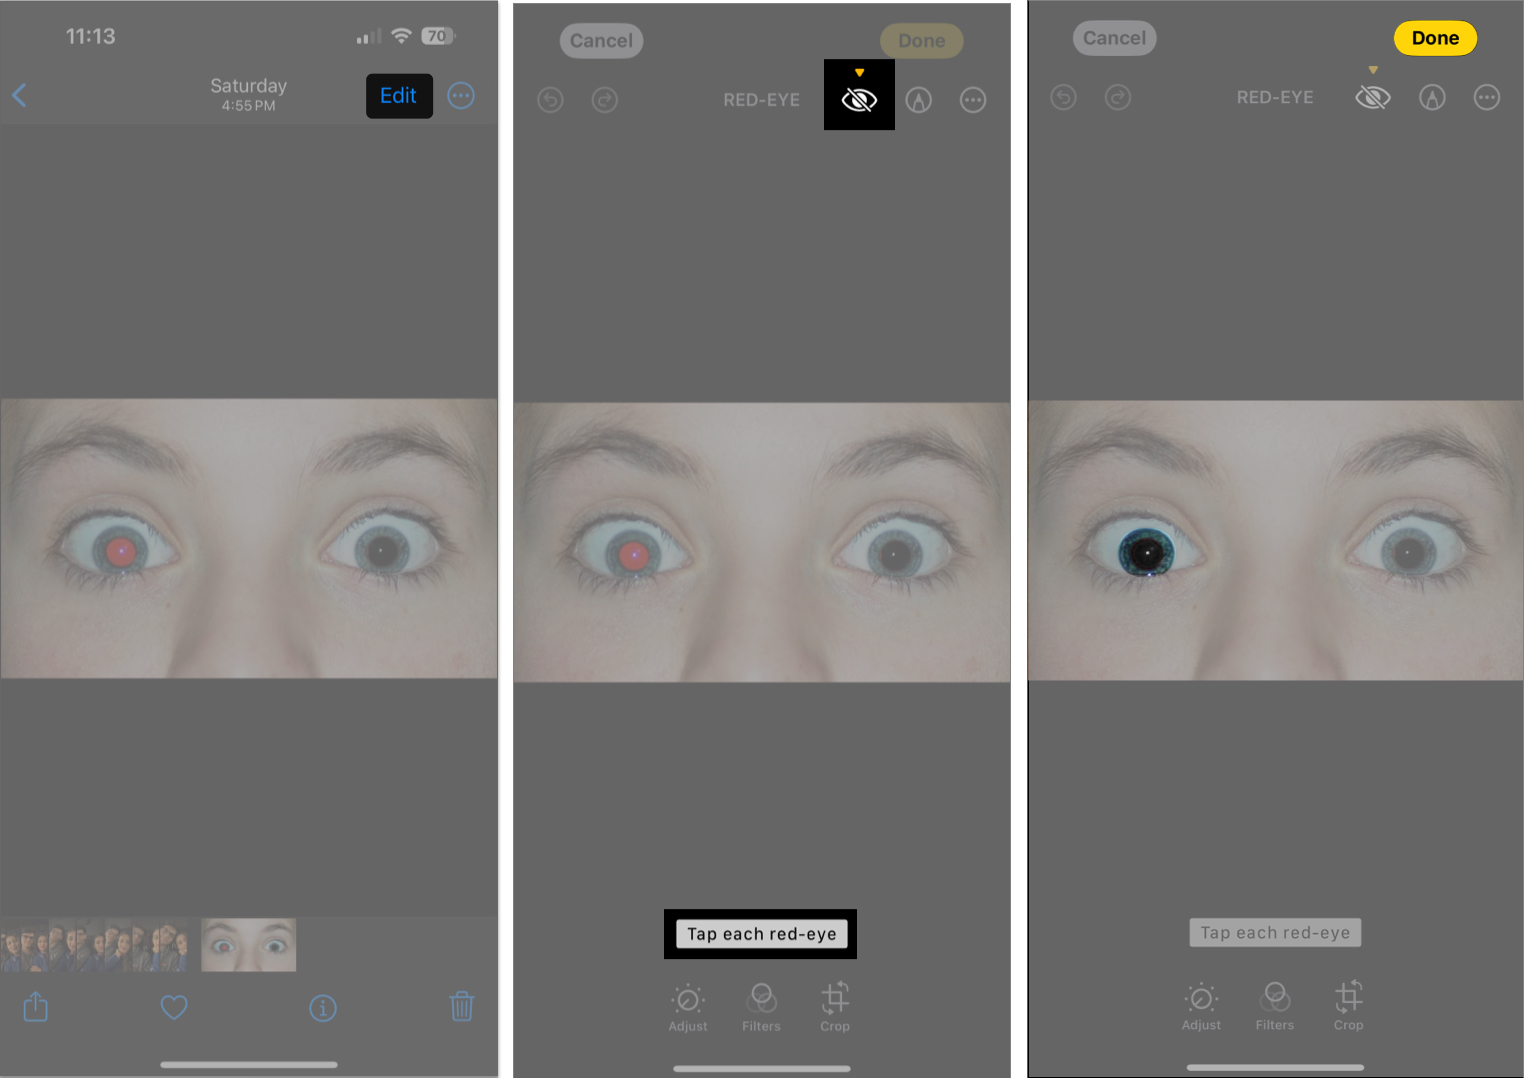
- Launch the Photos app on your iPhone.
- Open a picture with a red eye.
- Tap the Edit option from the top right corner.
- Choose the Red-Eye icon at the top (third icon from the right).
- Now, in the image, carefully tap each red eye one after the other. For more accuracy while tapping, you can zoom the picture.
- As the red-eye disappears from the image, tap Done.
That’s it. You’ve yourself a normal photo!
What to do if you can’t see the Red-Eye icon on iPhone
Sometimes, you might not find the Red-Eye icon during your edit in the Photos app.
This issue arises when the photo was taken without flash, the photo was not taken on your iPhone, or when the photo was received from another device.
In such scenarios, you can take the help of this workaround:
- Open the photo with a red eye in any compatible app on your iPhone. Make sure the image is in full-screen mode.
- Take a screenshot of the same.
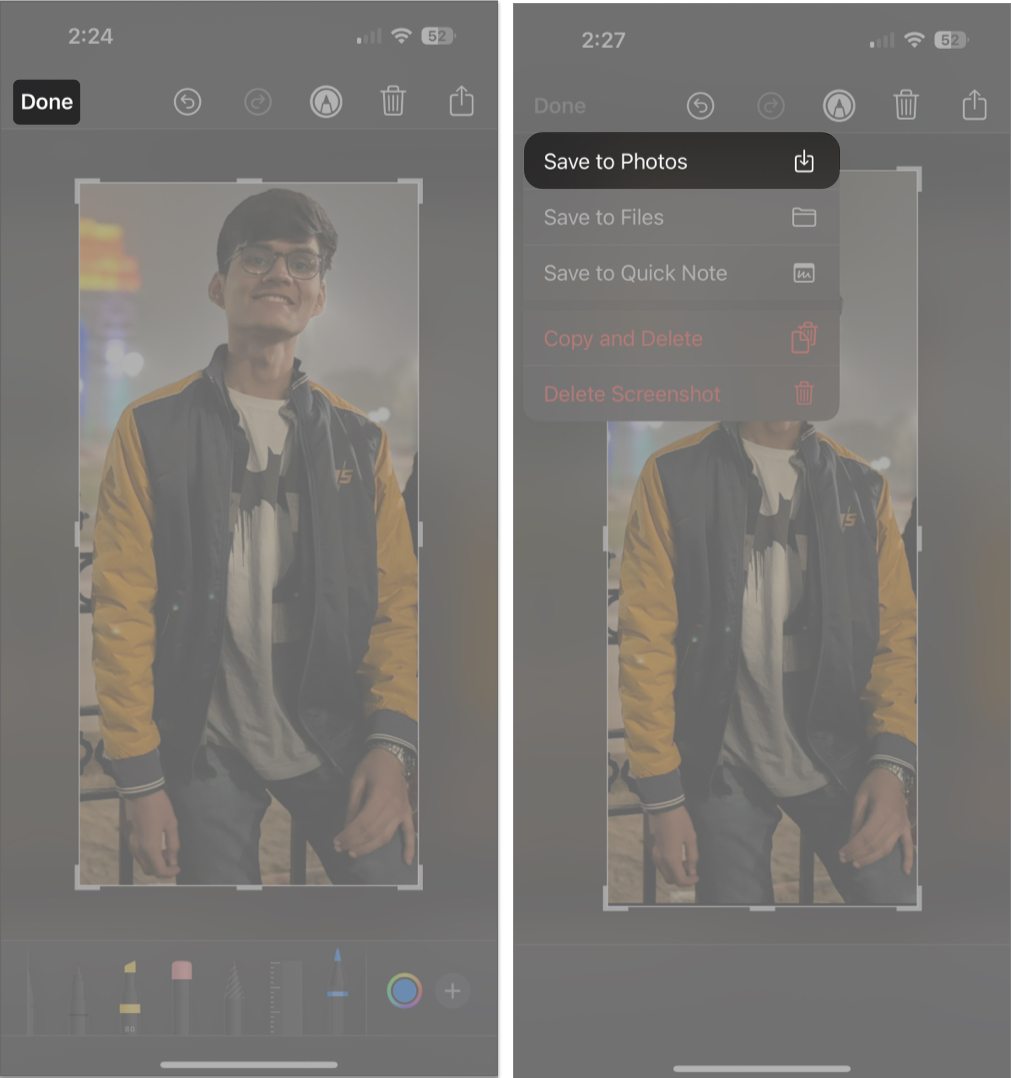
- Tap the screenshot thumbnail at the bottom-left corner.
- Adjust the corners around the focus. If needed, zoom in and make sure the subject and their red eyes are clearly visible.
- Tap Done → Save to Photos.
- Now, open the same screenshot in the Photos app → Tap Edit.
- The red-eye icon should appear now. Tap the same and remove the red eyes from the image, as discussed above.
If this workaround didn’t work for you, don’t be disheartened. I have one more trick up my sleeve. Keep reading!
Use third-party apps to fix red eye on iPhone
In case the Photos app fails to deliver the desired results, there are several third-party red-eye removal apps that can do the job for you.
This is particularly necessary when you seek advanced red-eye correction capabilities for group photos. Apps like Facetune2 and BeautyPlus can easily help you with that. These apps can also adjust parameters like pupil size and color intensity.
These apps will help you achieve professional-quality results that are not easily attainable with the native editing tool on iPhone.
Tips on how to avoid red eyes in photos on iPhone
Red-eye occurs when the camera’s flash reflects off your retina. While the above-discussed methods will help you get rid of red eye from photos on your iPhone, there are a few practices to which you can adhere to avoid this occurrence completely.
- Make sure to capture photos in a well-lit environment.
- Avoid directly looking at the camera lens while taking photos in low-light conditions. It can reduce the likelihood of red-eye appearing in photos.
- Try to capture images from different angles, such as from below, above, and side. If possible, maintain distance while taking photos.
- If applicable, enable the red-eye reduction mode in the camera settings. It emits a pre-flash to constrict pupils before the main flash, minimizing red reflection.
- Assess your pictures after capturing them so you can experiment and capture one with red eyes.
- Despite all this, if the red eye keeps on popping on random clicks, use the default Photos app to manually remove it.
The best of all is to wear sunglasses while taking pictures. Don’t worry, I am kidding, and I know this is not always possible. But still, it is a trick that works!
If a camera uses a flash on a color photograph at night or in dim lighting, the light reflects off blood in the back of the eye, causing red pupils to appear.
Unfortunately, not all devices feature a built-in red-eye filter in the camera. If you’re using a third-party camera app, you may find it in flash settings.
Remove the red!
In conclusion, fixing the red eye on your iPhone is a quick and easy process. By following the simple steps outlined above, you can easily remove the red-eye effect from your photos using either the built-in Photos app or a third-party red-eye removal app.
I hope you found this iPhone trick helpful. If you have any further questions, do let me know in the comments. I’d be happy to help!
Read more:


Leave a Reply