Chrome Autofill can come very handy if you frequently shop online. With your credit card information along with other important details already saved to the web browser, you will be able to place orders or buy things fast. Perfect time saver for the folks who are fond of a smooth sailing approach, isn’t it? Adding your info to the app is pretty simple as the web browser itself asks you to save it. Besides, you can choose to edit or remove your credit card information from Chrome autofill on your iPhone, Android, and computer at your own will.
To ensure you have the complete freedom to safeguard your privacy, Chrome lets you wipe out entire autofill data in one go. Moreover, you can also turn it off if you ever decide to stop using it on your mobile device or desktop. Let’s learn more!
- Edit Your Credit Card Information from Chrome Autofill on iPhone, iPad, and Android
- Delete Your Entire Autofill Information in Google Chrome on iPhone, iPad, and Android
- Stop saving Credit Card info to Chrome Autofill on iPhone, iPad, and Android
- Edit or Remove your credit card info in Chrome Autofill on Computer
- Delete a Credit Card from Chrome Autofill from Computer
- Delete Entire Chrome Autofill Information from Computer
- Turn off Autofill Forms in Google Chrome on Computer
Edit Your Credit Card Information from Chrome Autofill on iPhone, iPad, and Android
Step #1. Open Chrome app on your device and then tap on more button at the top right corner.
Step #2. Now, tap on Settings and select Autofill forms/Autofill and payments.
Now, you can edit or delete a credit card in Chrome:
To edit the info:
Simply tap the credit card and then tap on Edit. Once you have edited the info, tap on Done to confirm.
To delete a card:
Tap on Edit. Select the credit card you wish to remove and tap on Delete. Tap Done to confirm the change.
For privacy, you can remove your entire Autofill info. Keep reading…
Delete Your Entire Autofill Information in Google Chrome on iPhone, iPad, and Android
Step #1. Open Google Chrome on your device.
Step #2. Now, tap on More button → Settings → Privacy.
Step #3. Next, tap on Clear browsing data.
Now, ensure that Autofill data is selected, then tap on Clear Browsing Data and confirm.
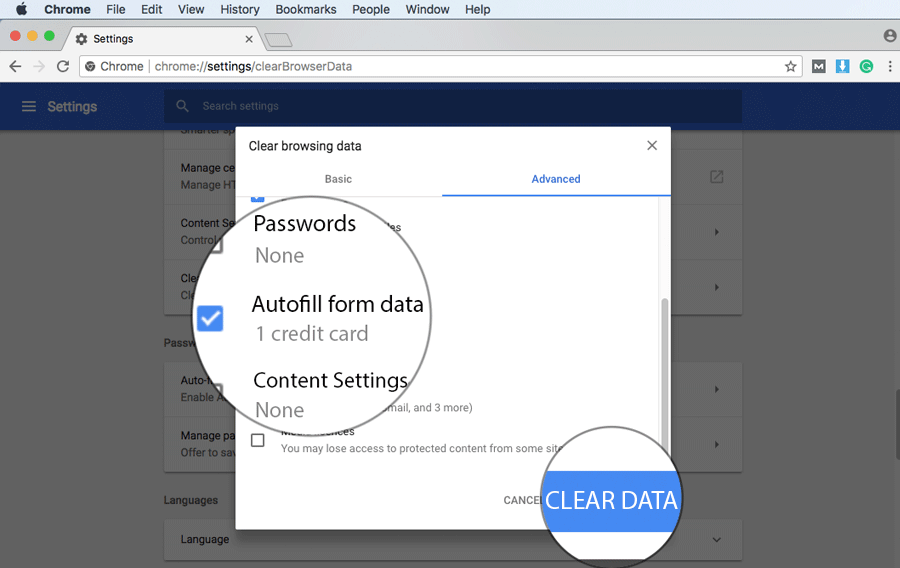
Note: On your Android device, you need to first select the Advanced tab and then check the box for Autofill form data → Clear Data.
If you ever don’t want to save your credit card info, you can prevent the app from doing so.
Stop saving Credit Card info to Chrome Autofill on iPhone, iPad, and Android
Step #1. Launch the Chrome app on your device → tap on More button at the top right → Settings.
Step #2. Now, tap on Autofill forms and turn off the toggle.
Editing credit card information on the desktop is as simple as it’s on the mobile device.
Edit or Remove your credit card info in Chrome Autofill on Computer
Step #1. On your computer, launch the Chrome → More button.
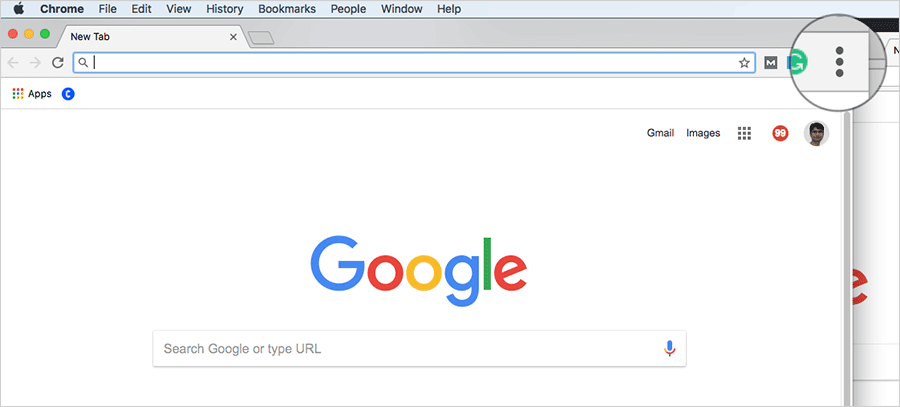
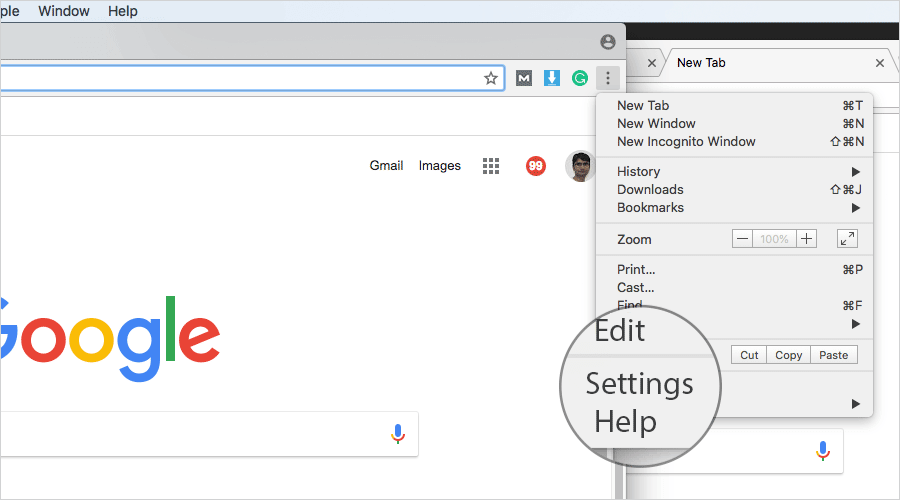
Step #2. Click on Settings.
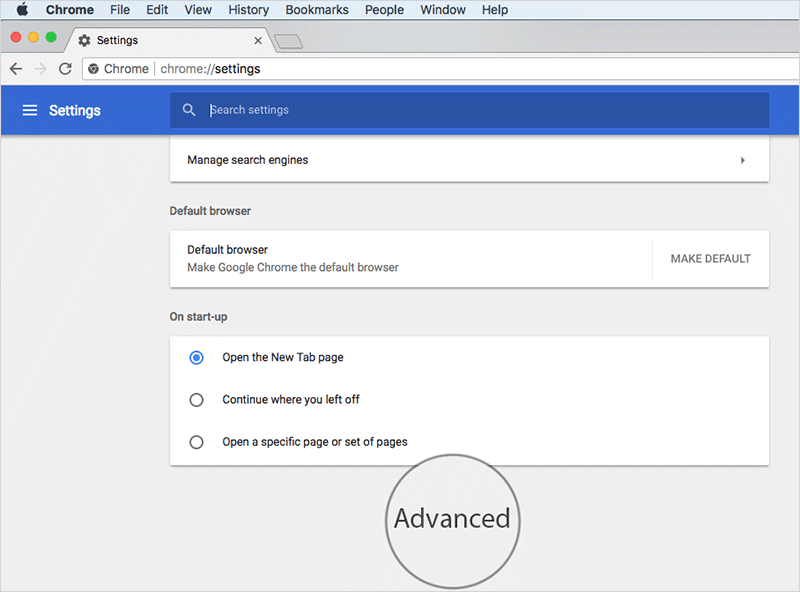
Step #3. Click on Advanced.
Step #4. Under Passwords and forms, select Autofill settings.
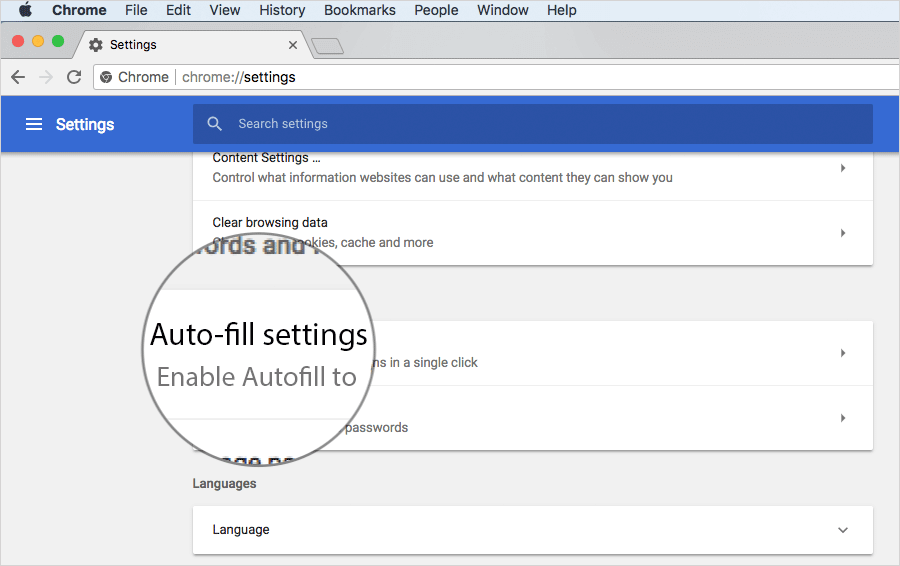
Note: Check out the option to add a card. Simply click on Add and then follow the instructions to add the card info.
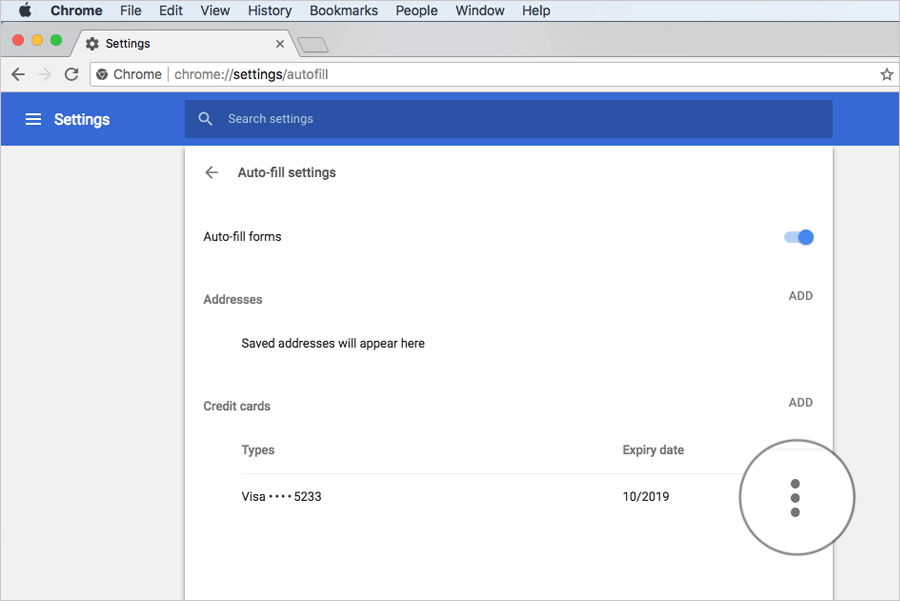
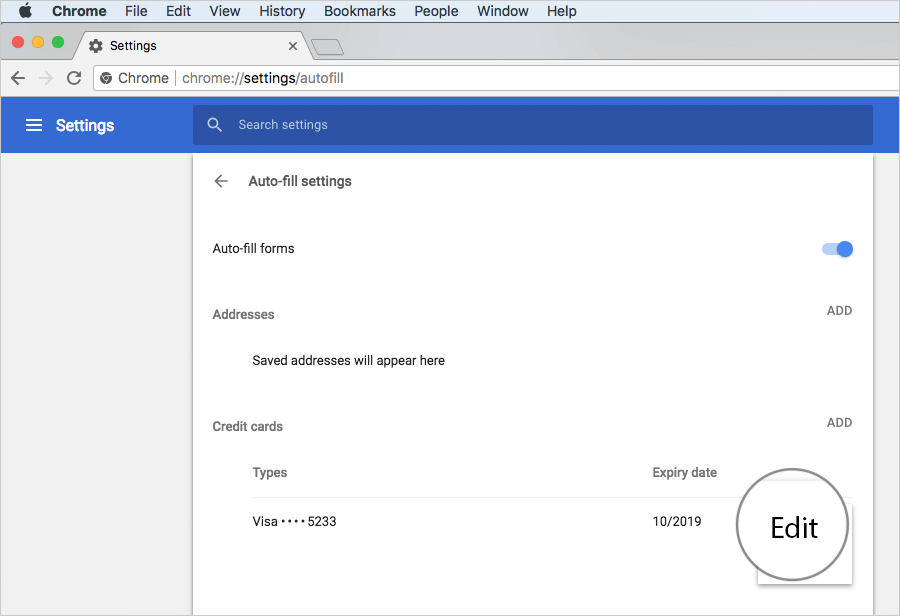
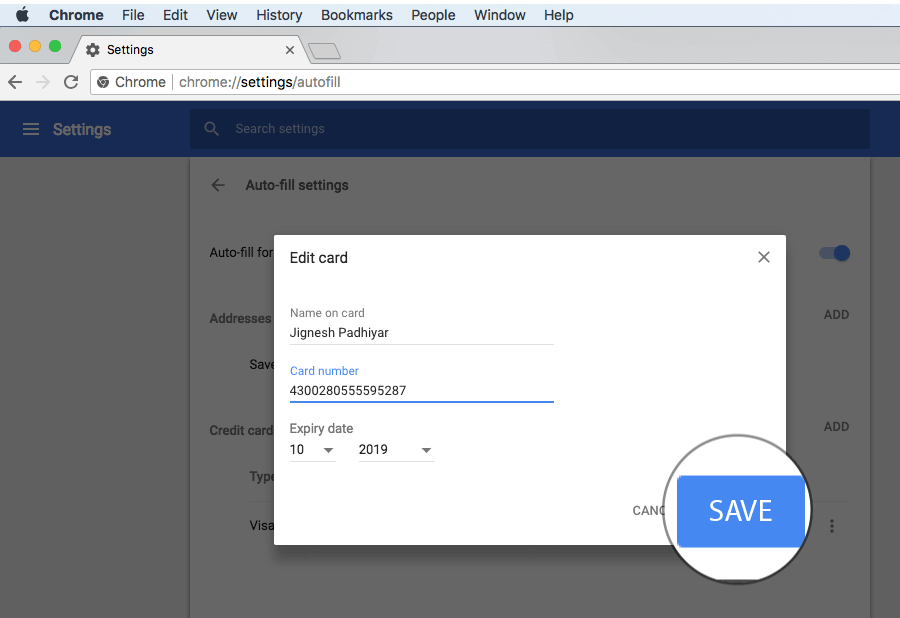
To edit any card:
Click on the More button to the right of the card and select Edit. Then, make the desired changes.
To Delete any card:
To the right of the card, you need to click on More and select Remove.
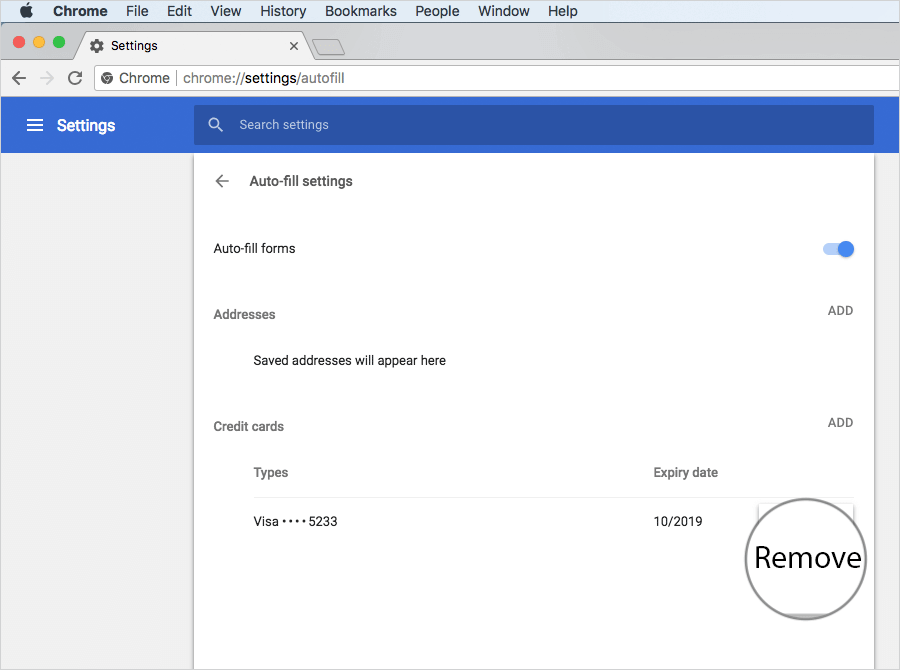
No longer want to keep credit card info in Chrome Autofill? No problem. You can easily remove it from the web browser.
Delete a Credit Card from Chrome Autofill from Computer
Step #1. Launch Chrome on your computer.
Step #2. Now, go to an online form and click on a text field.
Then, you need to use the keyboard’s arrow keys to highlight the info you wish to delete.
And then delete the info:
- Windows: Press Shift+Delete
- Mac: Press Shift+fn+Delete
- Chromebook: Press Shift+Alt+Backspace
You can choose to remove your entire Chrome Autofill info if you ever decide to stop using it.
Delete Entire Chrome Autofill Information from Computer
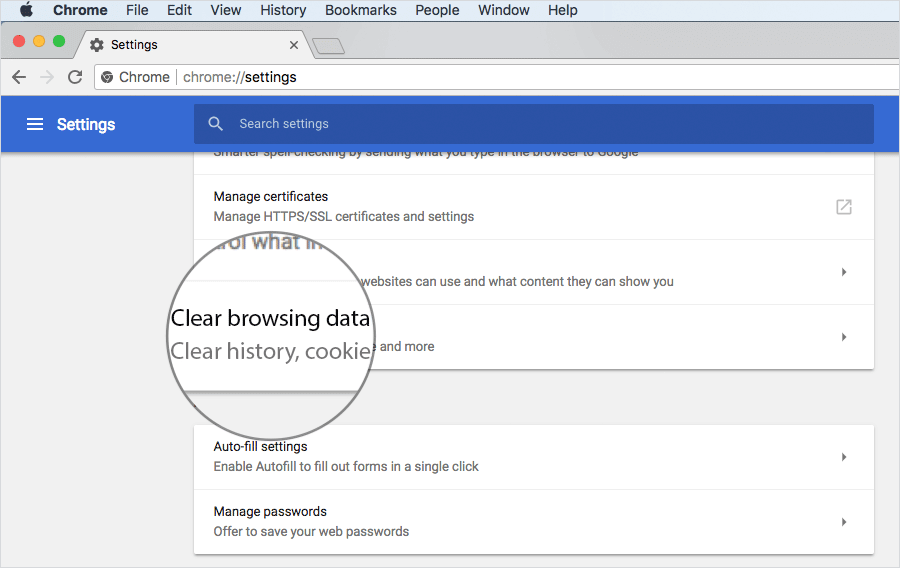
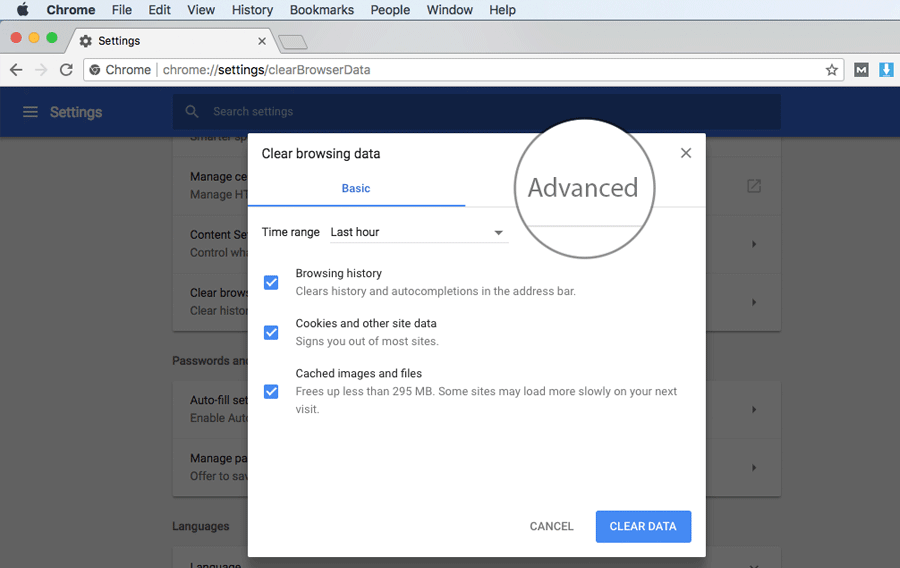
Step #1. Open Chrome on your computer → click on the menu button and select Settings → Click on Advanced.


Step #2. Now, click on Clear browsing data.
Step #3. Under the Advanced tab, select Autofill form data and then hit Clear Data.
You can turn off Autofill if you decide to stop using it. Read on…
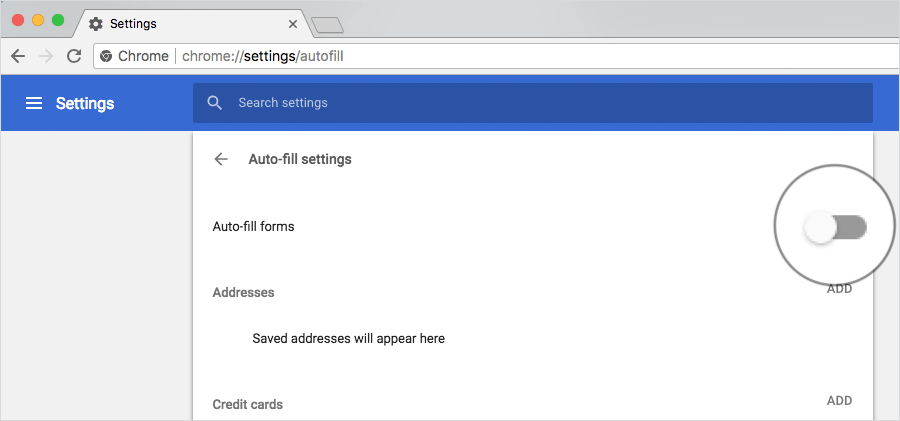
Turn off Autofill Forms in Google Chrome on Computer
Step #1. Open Chrome on your computer → click on more button at the top and select Settings.

Step #2. Click on Advanced at the bottom.

Step #3. Next, under “Passwords and forms,” click on Autofill settings and then turn off the switch next to Auto-fill forms.

That’s it!
Wrapping up
Hopefully, managing autofill data will no longer be a big ask. Share your feedback down below in the comments.
You might want to take a peek at these posts as well:
- How to Mute Website in Chrome on Mac and Windows PC
- Change Font, Page Size and Zoom-In Zoom-Out in Chrome on Mac or Windows PC
- How to Stop Autoplay Video or audio in Chrome on Mac or Windows PC
- AutoFill Passwords not working on iPhone and iPad
🗣️ Our site is supported by our readers like you. When you purchase through our links, we earn a small commission. Read Disclaimer.

