How to Password Protect Pages, Numbers, and Keynote on iPhone, iPad, and Mac
Add an extra layer of security to your iWork files. Learn how to lock Pages, Numbers, and Keynote documents with a password across Apple devices.
Your iPhone’s passcode protects documents stored on the device, but that protection stops there. Once a Pages contract is emailed, a Numbers spreadsheet is shared, or a Keynote presentation is uploaded to cloud storage, the file can be copied, forwarded, or accessed freely. At that point, device security no longer protects the document itself.
For professionals handling contracts, financial data, research, medical records, or internal reports, this creates a serious risk. Sensitive information can be circulated beyond its intended audience without proper controls. This is where file-level encryption becomes necessary. Adding a password directly to the document ensures protection stays with the file, wherever it goes.
Keep reading to learn how to add a password to Pages, Numbers, and Keynote documents on iPhone, iPad, and Mac.
Why You Should Password Protect Pages, Numbers, and Keynote Files
If you use Apple’s iWork apps for professional or academic work, your documents often contain sensitive information that should not be freely accessible.
Apps like Pages, Numbers, and Keynote often store client contracts, financial statements, research data, medical or compliance records, and internal strategy presentations.
Once shared via email, AirDrop, or cloud storage, these files can be copied or forwarded without restriction. Device-level security no longer applies.
Password protection encrypts the document itself. This ensures:
- Only authorized individuals can open it
- The file remains secure even if downloaded
- Sensitive data stays protected across devices
- You maintain control over access after sharing
In short, password protection shifts security from the device to the document, which is critical when files move beyond your direct control.
How to Add a Password to Pages, Numbers, and Keynote on iPhone and iPad
The process of adding a password to your sensitive documents is nearly identical across all three iWork apps on iPhone and iPad, including Pages, Numbers, and Keynote, and can be done in just a few taps. Here’s how:
- Open a document in the Pages, Numbers, or Keynote app on your iPhone.
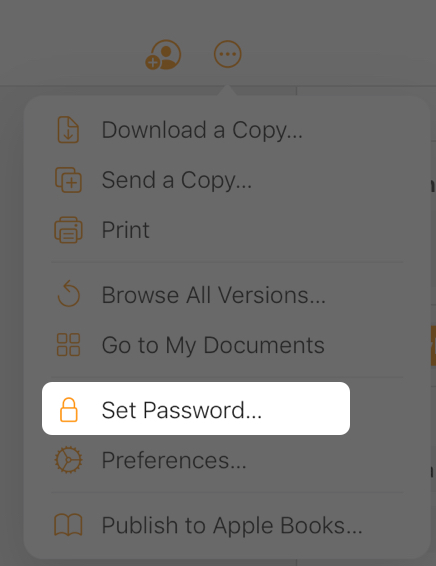
- Here, tap the three-dot button at the top right corner.
- In Pages or Keynote, tap Document Options, then select Set Password.
- In Numbers, tap Set Password directly from the menu.
Now, select Set Password from the drop-down menu.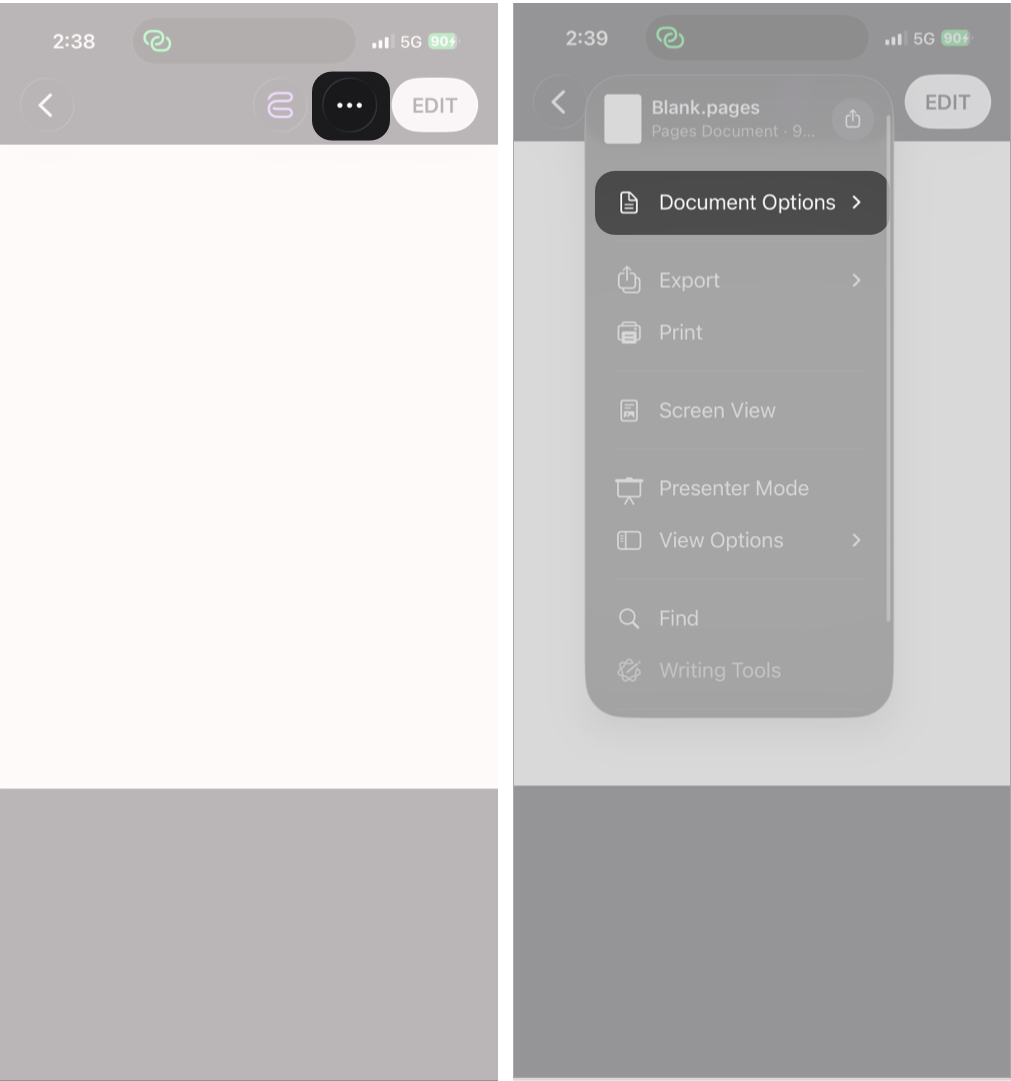
- Toggle on “Open with Face ID” if you need faster access.
- Finally, tap the right tick (Done) at the top right corner.
Click the Set Password button to complete.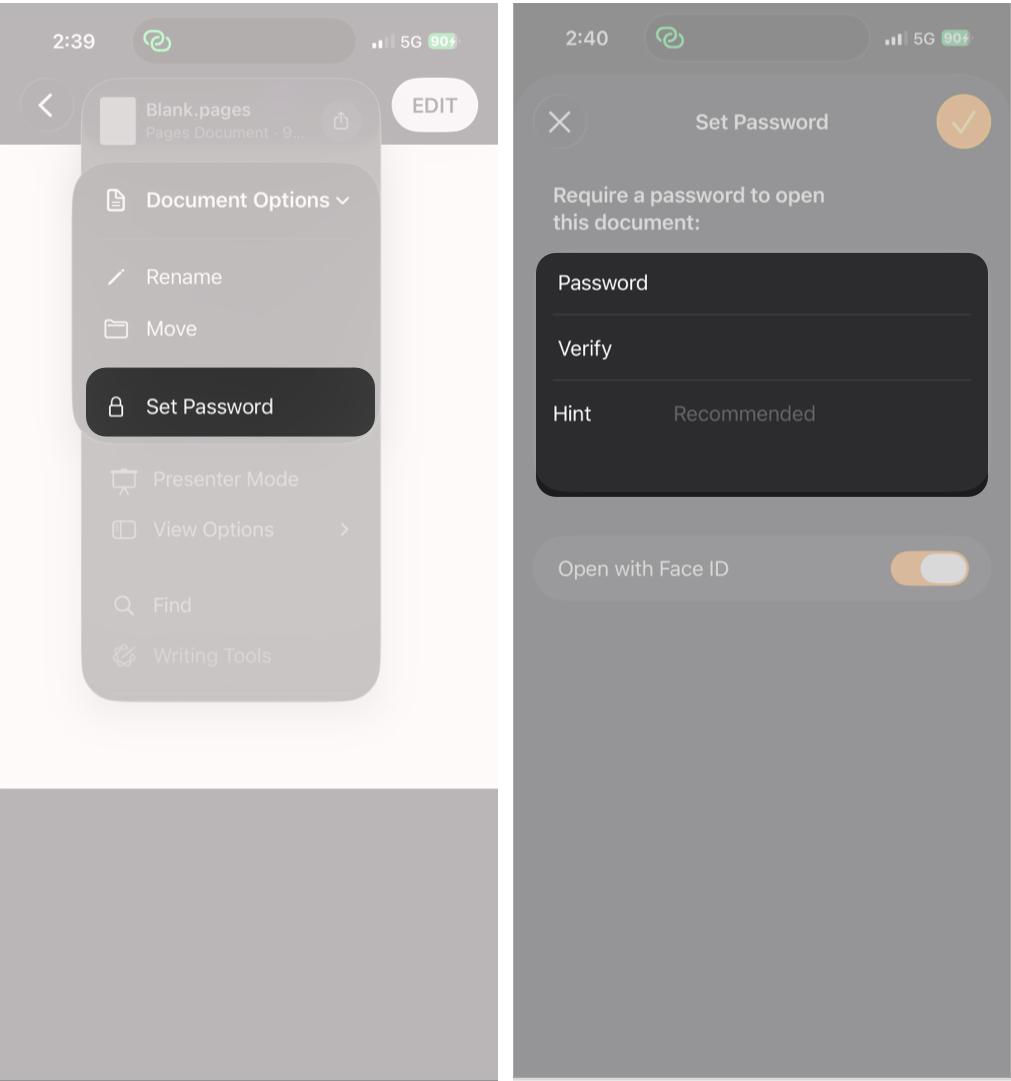
Once enabled, the document is encrypted and requires authentication to open, even if it is shared or transferred to another device.
How to Password Protect Pages, Numbers, and Keynote on Mac
Like the iPhone, the process is identical across all three iWork apps on Mac. Here’s how:
- Open a document in the Pages, Numbers, or Keynote app on your Mac.
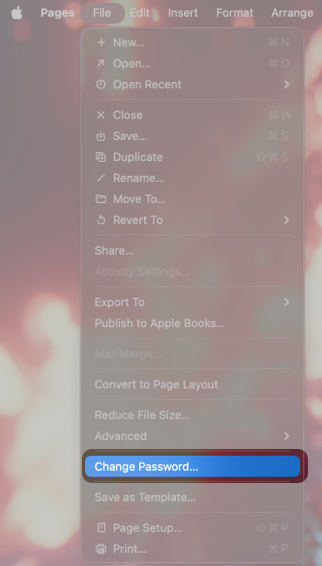
- Click File in the top menubar.
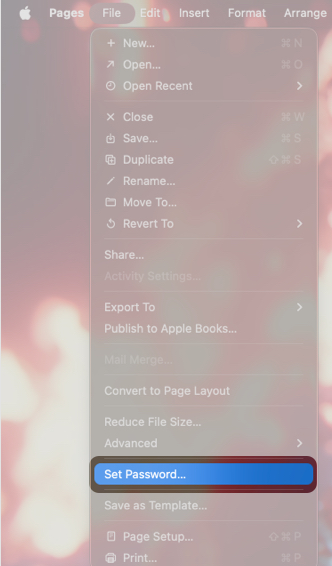
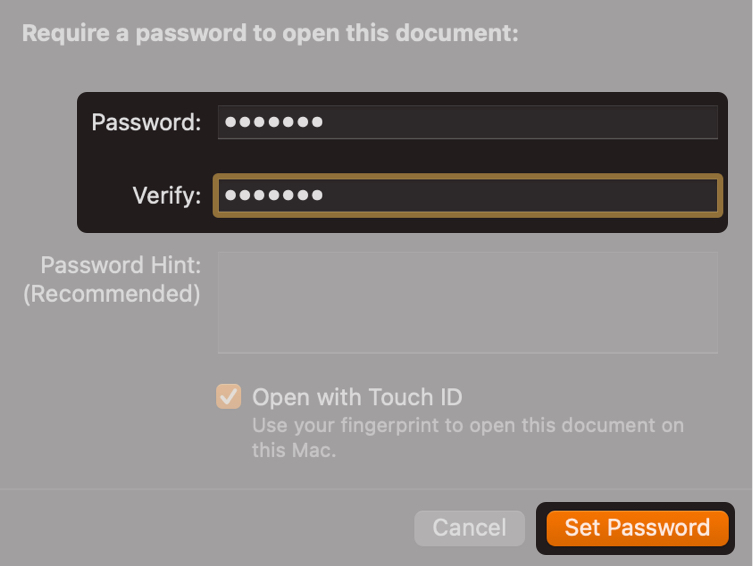
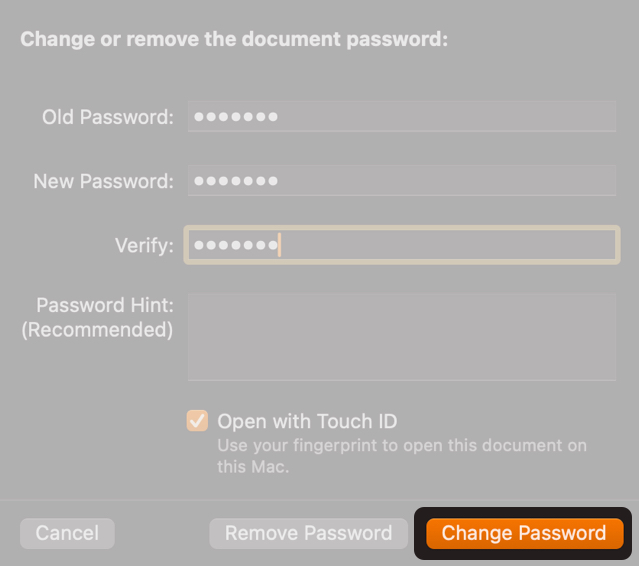
- Next, enter and verify your desired password. You can also add a password hint if required.
- Enable “Open with Touch ID” if you need faster access.
How to Add a Password to iWork Documents Using iCloud.com
When using iCloud.com, Apple maintains a consistent password setup interface across the entire iWork suite.
- Go to iCloud.com and sign in to your Apple Account (formerly Apple ID).
- Scroll down and select Pages, Numbers, or Keynote from the app tray.
- Open the document you want to password-protect.
- Click the three-dot button in the top right, then select Set Password in the drop-down menu.
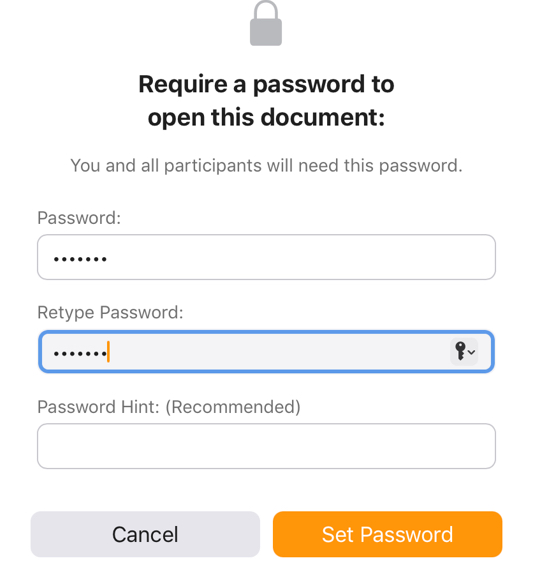
- Enter and verify your desired password. Add a password hint if required.
- Click the Set Password button to complete the process.
How to Change or Remove a Password from Pages, Numbers, or Keynote
There may come a time when you need to change the password if access requirements change or the current one is compromised, or when you can remove it if the document no longer contains sensitive information or requires broader access.
On iPhone or iPad:
- Open the protected document.
- Tap the three-dot button.
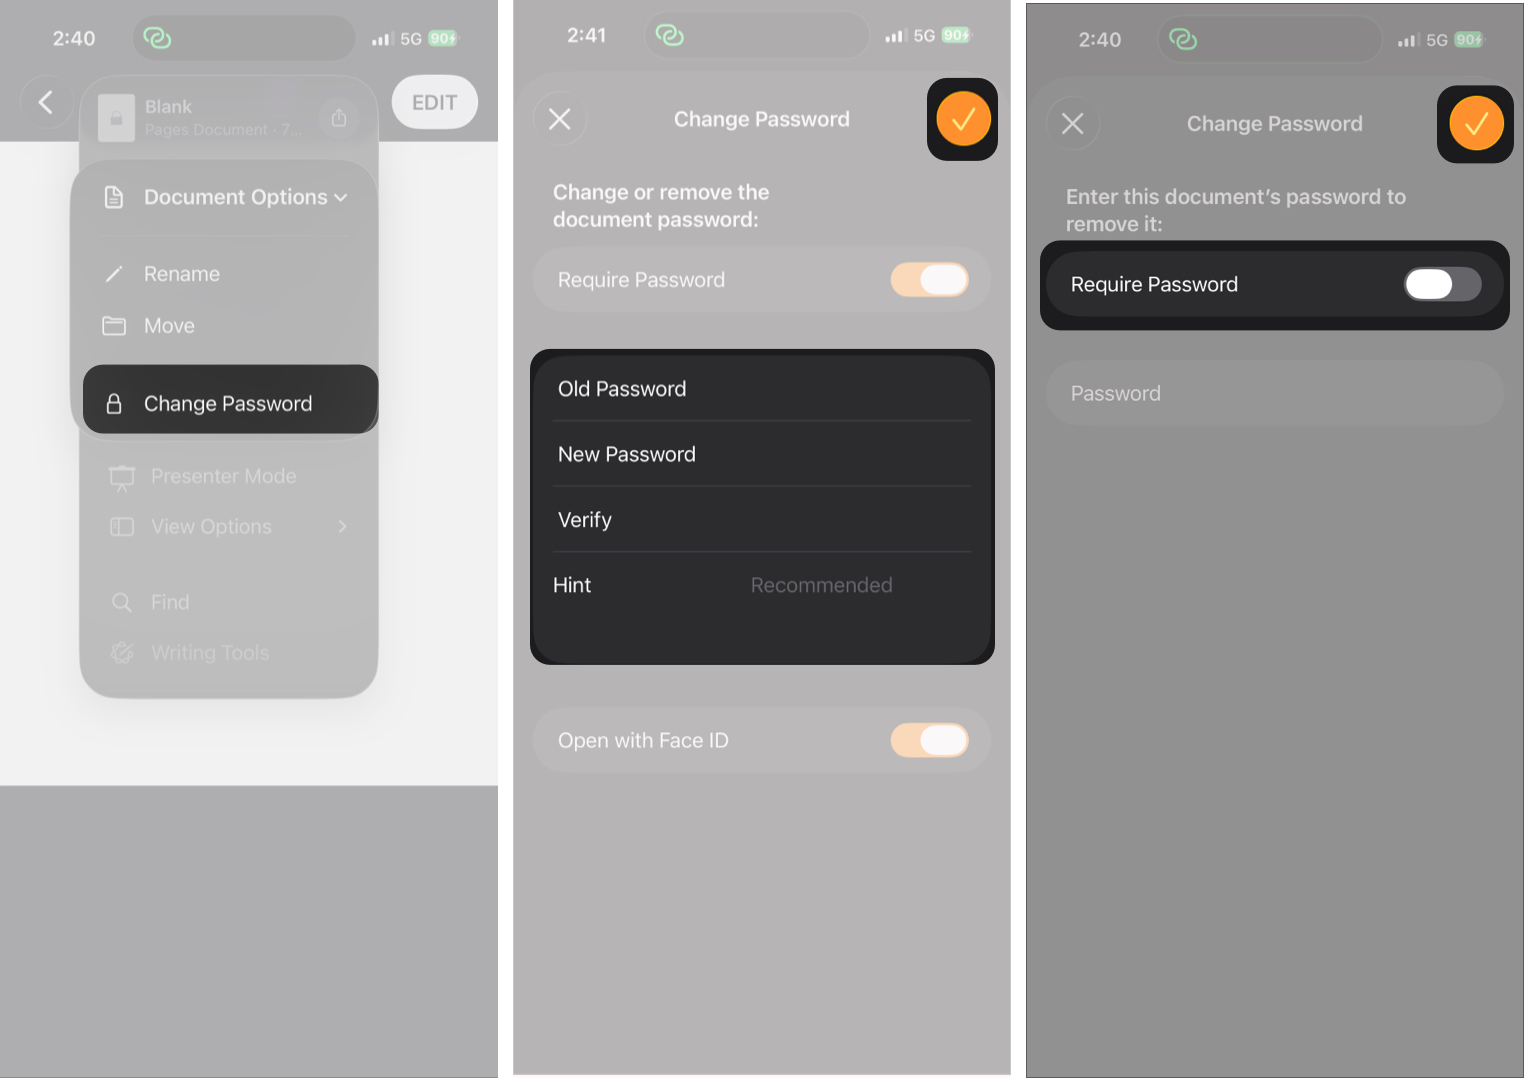
- In Pages or Keynote, tap Document Options, then select Change Password.
- In Numbers, tap Change Password directly from the menu.

- To remove password protection, turn off Require Password, enter the current password, and tap Done.
- To set a new password, enter the current password, then enter and verify the new password, and tap Done.
On Mac:
- Open the document.
- Click File → Change Password.
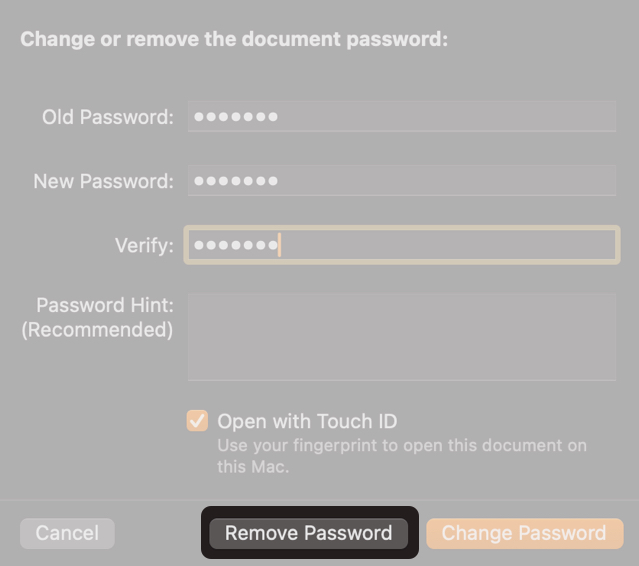
- Enter the existing password.
- To remove password protection, click Remove Password.
- To set a new password, enter the new password, verify it, and click Change Password.
- To remove password protection, click Remove Password.
Limitations of Password Protection in iWork Documents
Before you add password protection to your documents, it is important to understand these constraints:
- If you lose the password, the file becomes permanently inaccessible.
- Face ID and Touch ID only work on the device where they are enabled.
- Sharing an unlocked version removes protection.
- Exported PDFs must be separately password-protected if needed.
Expert tip: Always store critical passwords in the Password app.
Protect What Matters…
Password-protecting your iWork documents adds a critical layer of security at the file level. Once enabled, your data remains encrypted and inaccessible without authorization, even after sharing. If you deal with contracts, financial spreadsheets, client reports, or sensitive presentations, enabling password protection is strongly recommended.
Ready to password-protect your Pages, Numbers, or Keynote document? Try it now and let us know in the comments if you faced any issues.
Frequently Asked Questions

Written by
VikhyatVikhyat has a bachelor's degree in Electronic and Communication Engineering and over five years of writing experience. His passion for technology and Apple products led him to the tech writing space, where he specializes in writing App features, How-to guides, and troubleshooting guides for fellow Apple users. When not typing away on his MacBook Pro, he loves exploring the real world.
View all posts →More from How-to

Snapchat Parental Controls: How to Set Up Family Center and Keep Your Teen Safe
Snapchat’s Family Center lets parents monitor their teen’s friend activity and screen time without reading private messages. Here’s how to set it up and what to expect.

How to Block and Unblock Someone on Instagram
Instagram lets you block or unblock someone in seconds. Follow these simple steps to take full control of your privacy and online peace.

Apple Watch Not Responding? 8 Fixes That Actually Work
Is your Apple Watch unresponsive or stuck on a black screen? Here are 8 proven fixes to help you unfreeze it and get it working again quickly.