If you’ve subscribed to Apple Music, you must authorize your Mac to get the purchased songs, favorite playlists, and synced libraries on your device. Once you authorize your Mac for Apple Music, it connects your device to your Apple Account, allowing you to stream your favorite tracks and access purchased content. Here’s everything you need to know about authorization, including its importance and how to do it.
Why do you need to authorize your Mac for Apple Music?
Aside from getting the most out of your Apple Music subscription, here are two reasons why you’ll want to authorize your Mac for Apple Music:
- Access purchased songs: Authorization lets you play songs purchased through your Apple Account. Without this, you’ll face restrictions when trying to access your Apple Music library.
- Sync your library across devices: If you use Apple’s iCloud Music Library, authorization is important for syncing playlists, tracks, and settings across all your devices.
How to authorize a Mac to use Apple Music
Now that you know why you should authorize your Mac for Apple Music, let’s see how to do it.
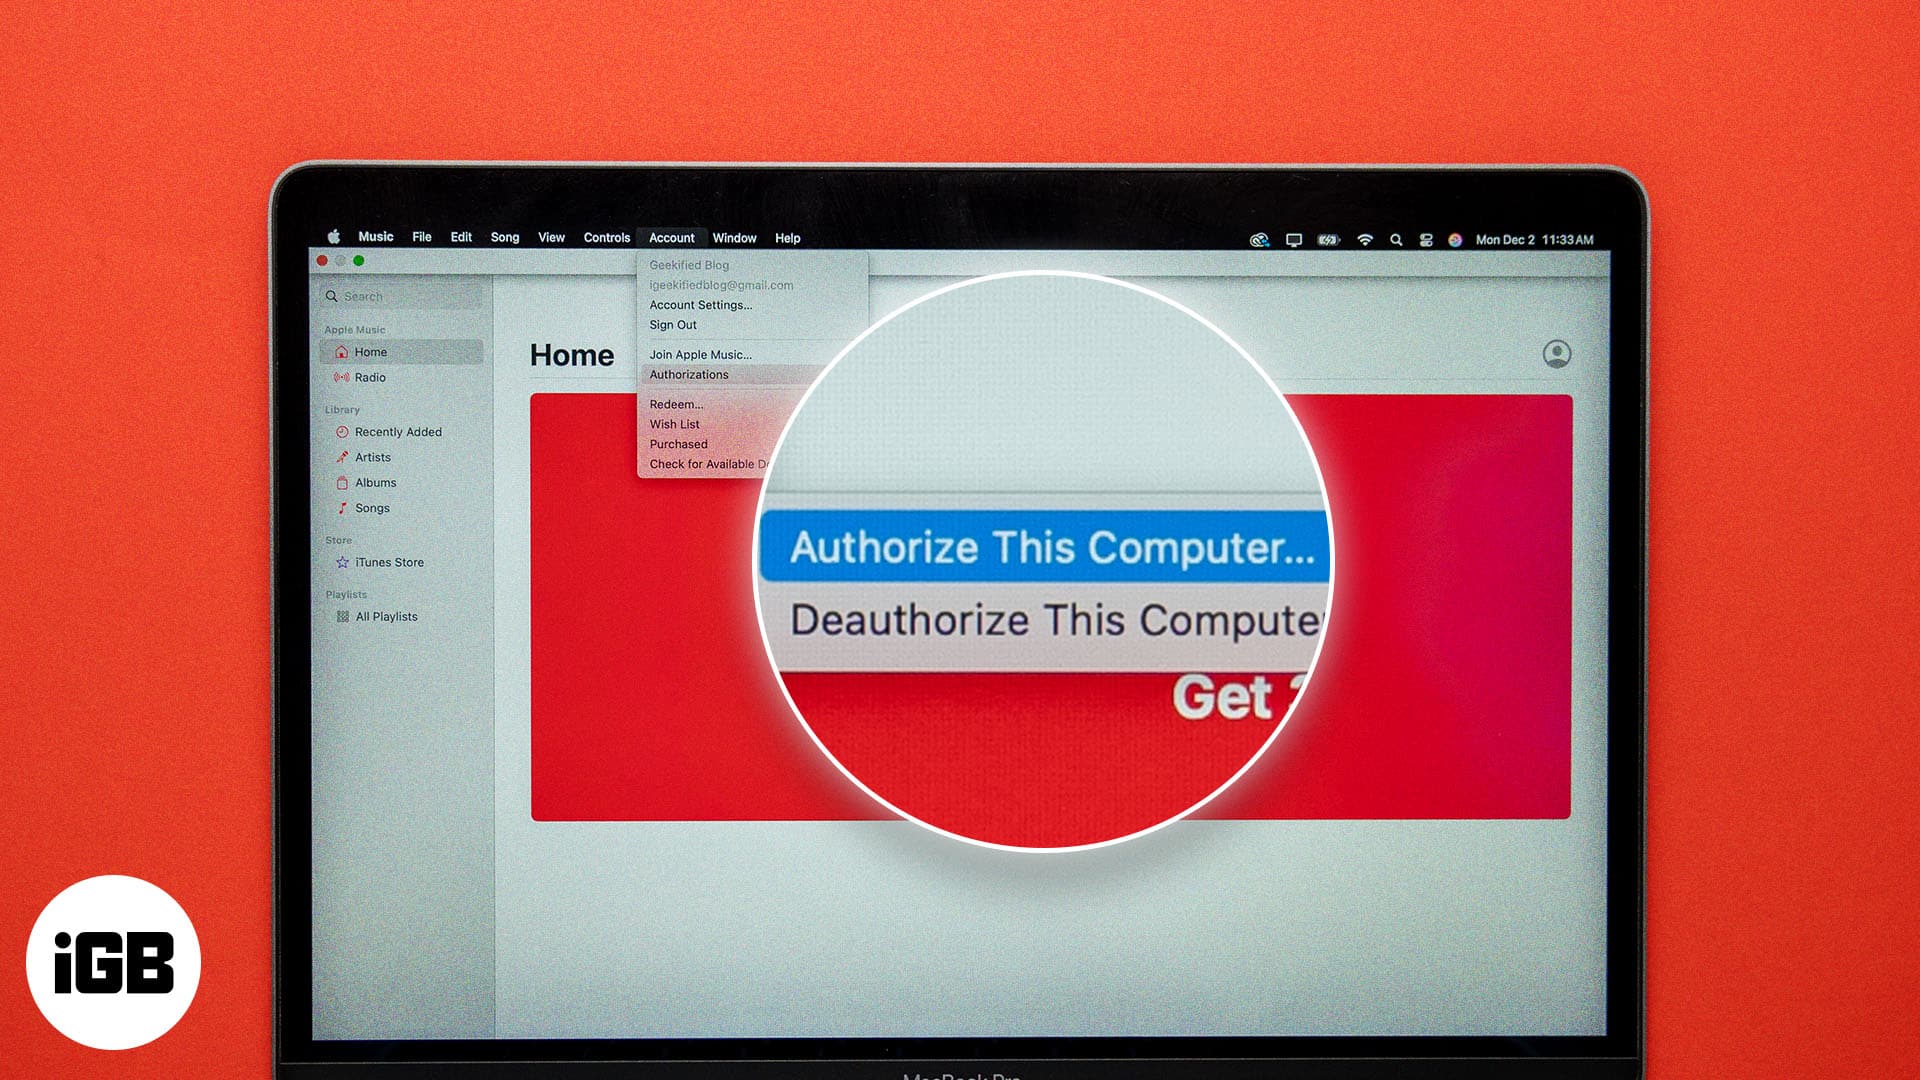
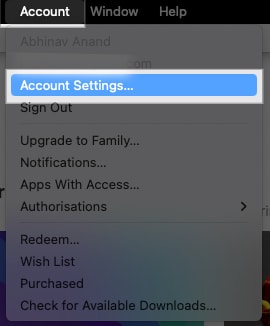
- Open the Apple Music app on your Mac.
- Click Account in the menu bar at the top.
- Select Authorizations > Authorize This Computer.
- Enter your Apple Account login credentials and click on Authorize.

Note:
How to manage your authorized devices
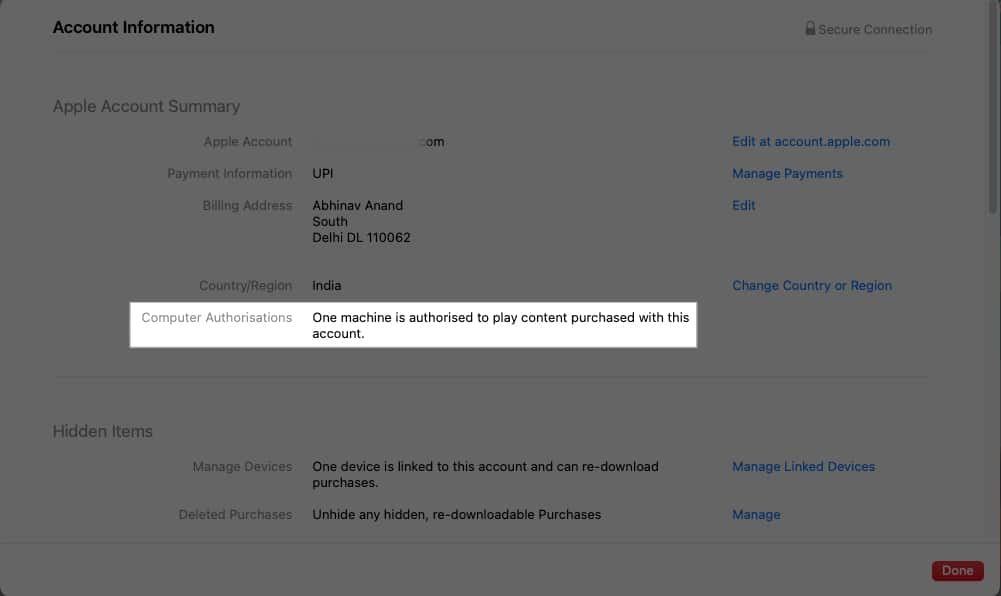
Did you authorize more than five Macs, but don’t remember or can’t figure out exactly what devices are authorized? Well, there’s a small trick to help you with that. You can view and manage all devices under your Apple Account. Here’s how:
- Open Apple Music on your Mac.
- Click Account in the menu bar and select Account Settings. Then, sign in to your Apple Account if prompted.
- Under the Computer Authorizations section, you’ll see how many computers are authorized. To deauthorize all of them at once, click the Deauthorize All button.
How to deauthorize a Mac for Apple Music
Because of limited authorization slots, managing multiple Macs can be challenging. That’s why you’ll have to occasionally need to free up authorization slots. You can deauthorize a Mac by following these steps:
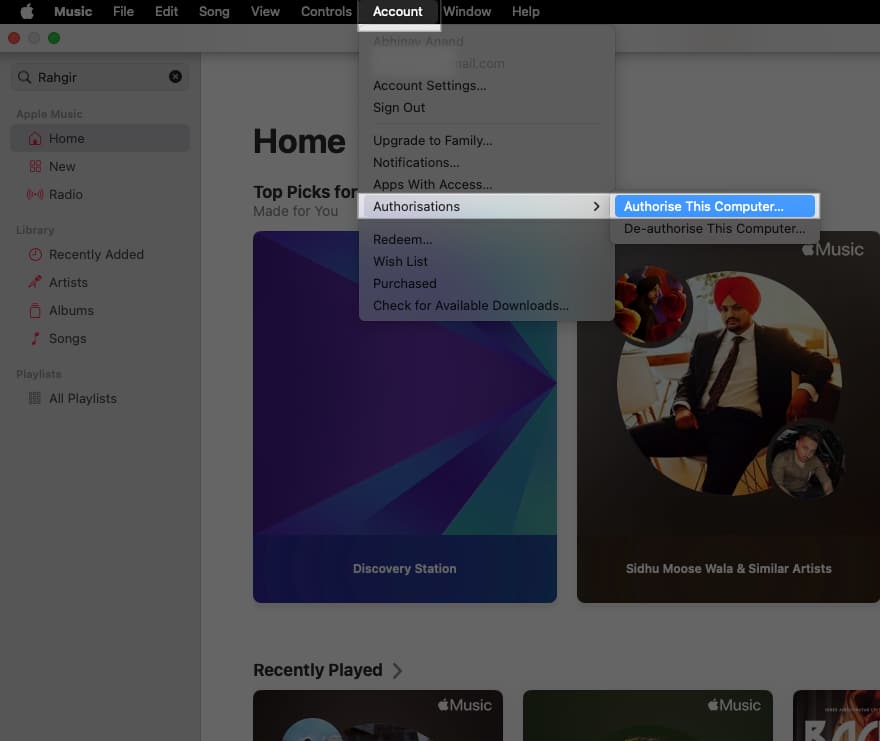
- Open Apple Music on your Mac.
- From the menu bar, click Account > Authorizations > De-authorize This Computer.
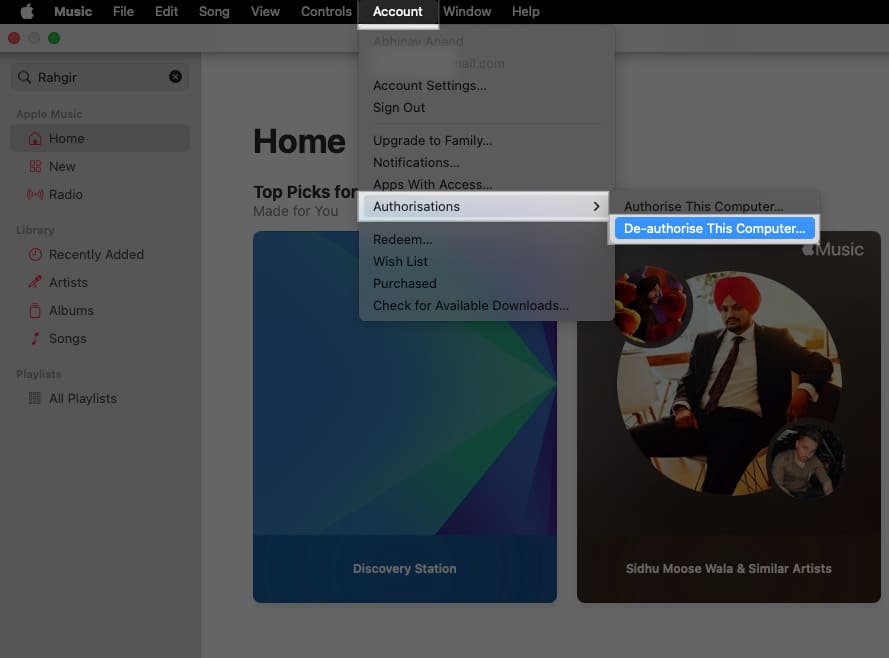
- You may be prompted to enter your Apple Account login credentials. Enter it.
- Click Deauthorize to deauthorize your Mac and free up the authorization slot.

Tip:
Signing off…
Using the steps above, you can easily authorize your Mac for Apple Music as needed and should be able to access your purchased songs and libraries across devices. After all, music is better when it’s seamless. Don’t forget to deauthorize devices you don’t use to free up authorization slots.
If you encounter any issues during the process, let us know. We’d be happy to assist you.