Apple-designed iMessage to be seamless across all your devices. This is why you can send and receive iMessages from your iPhone, iPad, iPod touch, and Mac. But what if you want to stop iMessage from going to your iPad or your Mac? What if you want to restrict iMessages to iPhone-only? This is not a very popular user-case (because the seamlessness and cross-device compatibility of iMessage is an important feature) but when you want to prevent iMessages delivery from going to your iPad (or other devices), here are some tips.
How to Stop iMessages From Going to iPad and Other Devices
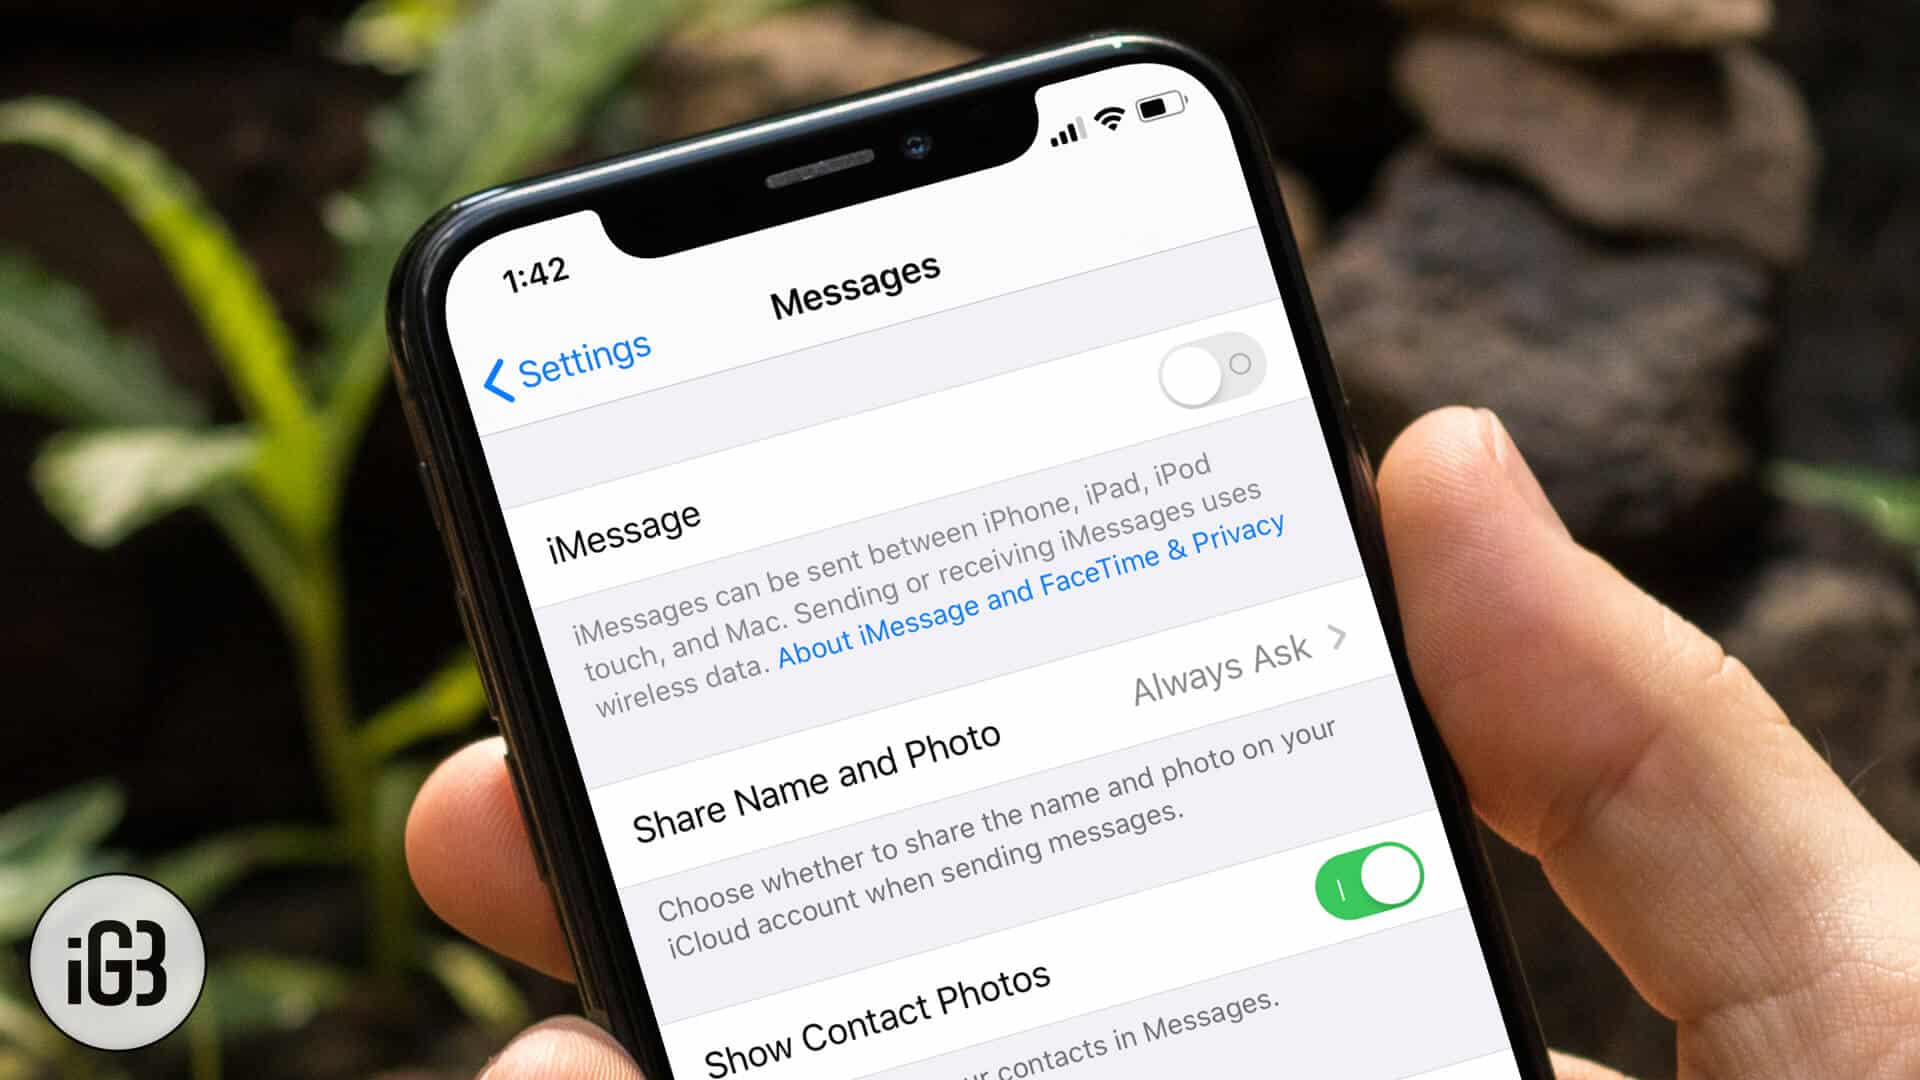
Turning off iMessage
One of the easiest ways to prevent iMessages from being sent to your iPad or Mac is to turn off the iMessage switch. Turning off iMessage on a device turns off iMessage on that device only.
Step #1. Go to Settings → Tap on Messages.

Step #2. Turn off the switch for iMessage.

This is a blanket solution though. When you turn off iMessage, you won’t be able to send any iMessage too.
Tweaking Send & Receive
There’s another option that prevents your Apple ID to be associated with your iMessage account. Doing this will make sure iMessages don’t get sent to devices where the Apple ID acts as the iMessage receiver.
To Tweak Send and Receive on your iPhone
Step #1. Go to Settings → Open Messages.
Step #2. Tap on Send & Receive.

Step #3. Now tap on the email id under the “You Can Be Reached By iMessage At” label to de-select it.

Make sure your iPad doesn’t have the number associated with iMessage. (Can be checked through Settings → Messages → Send & Receive). Once done, your iPad should stop receiving iMessages.
That’s about it. Note that this will turn off all message alerts. Assuming that your iPad only gets iMessages (and that’s what you’ve been trying to stop or disable), this should be just fine.
That’s all, mate!
Recommended Tutorials on Mac You Might Like!
- Fix Split Screen Not Working On Mac
- How to Fix Wi-Fi Not Working on MacBook Pro or MacBook Air
- How to sign out of iMessage on Mac


Leave a Reply