Do you plan to upgrade to the all-new iPhone 16 series and are anxious about the switch? Don’t worry, as Apple makes it pretty easy to transfer all your old data from your old iPhone to the new one. Whether you have everything on your old iPhone, iCloud, or local backup, you can easily transfer all your data with the appropriate method.
Keep reading as we explore all the methods you can use to transfer data from your old iPhone to a new iPhone during and after the initial setup.
Things to know before transferring your old iPhone data to a new iPhone
There are multiple ways to transfer data from iPhone to iPhone. Irrespective of which method you opt for and begin transferring your data, you should know a few things.
- Ensure both your old and new iPhones have enough battery left. We recommend keeping both your iPhones connected to power while transferring the data.
- You can use an iCloud backup to transfer data. If you select this option, you will have to sign in with your Apple ID on your new iPhone. Further, if you have enabled two-factor authentication, you will receive a code on your old iPhone for verification.
- You can also transfer data from a local backup on your Mac or Windows PC. If you’re using a Windows PC, ensure you’ve installed the new Apple Devices app from the Microsoft App Store.
How to transfer data from old iPhone to new iPhone during setup
When you power on your new iPhone, you can choose between multiple ways to transfer data from your old iPhone. You can transfer data wirelessly or connect your new iPhone and your old one with the cable.
1. Transfer data from iPhone to iPhone using Quick Start
Apple thrives on making things ridiculously simple, and using Quick Start to bring your old iPhone close to your new one to transfer data is one such example. Here’s what you need to do:
- After you power on your iPhone, select the language and connect to a Wi-Fi network.
- Connect your old iPhone to Wi-Fi and enable Bluetooth.
- Bring your old iPhone close to your new iPhone.
- You will see the Quick Start screen on your new iPhone. On your old iPhone, select Set Up New iPhone and scan the animation using the camera.
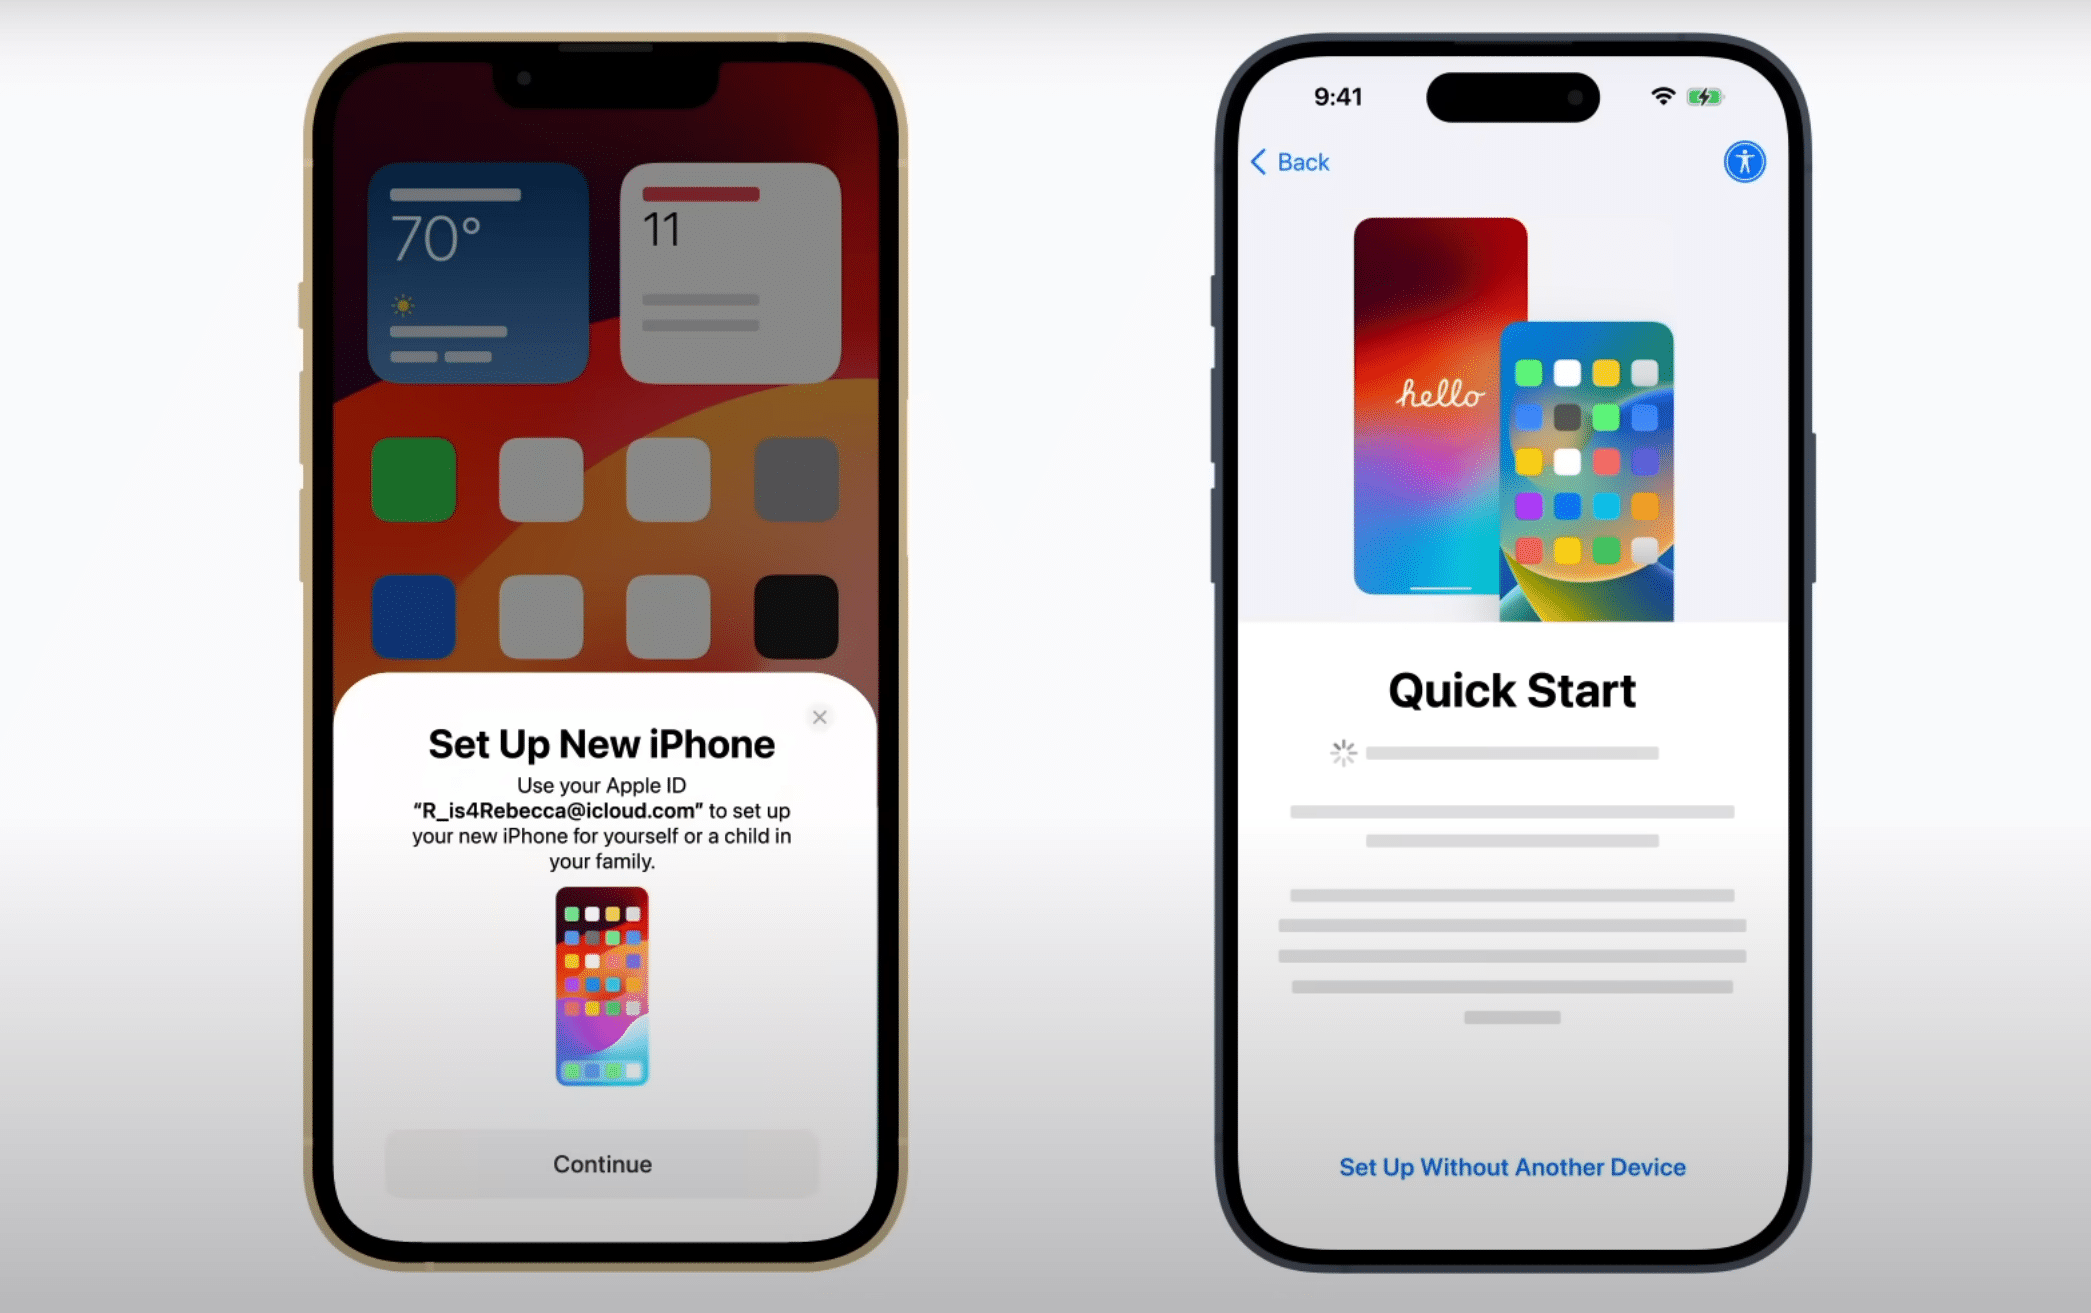
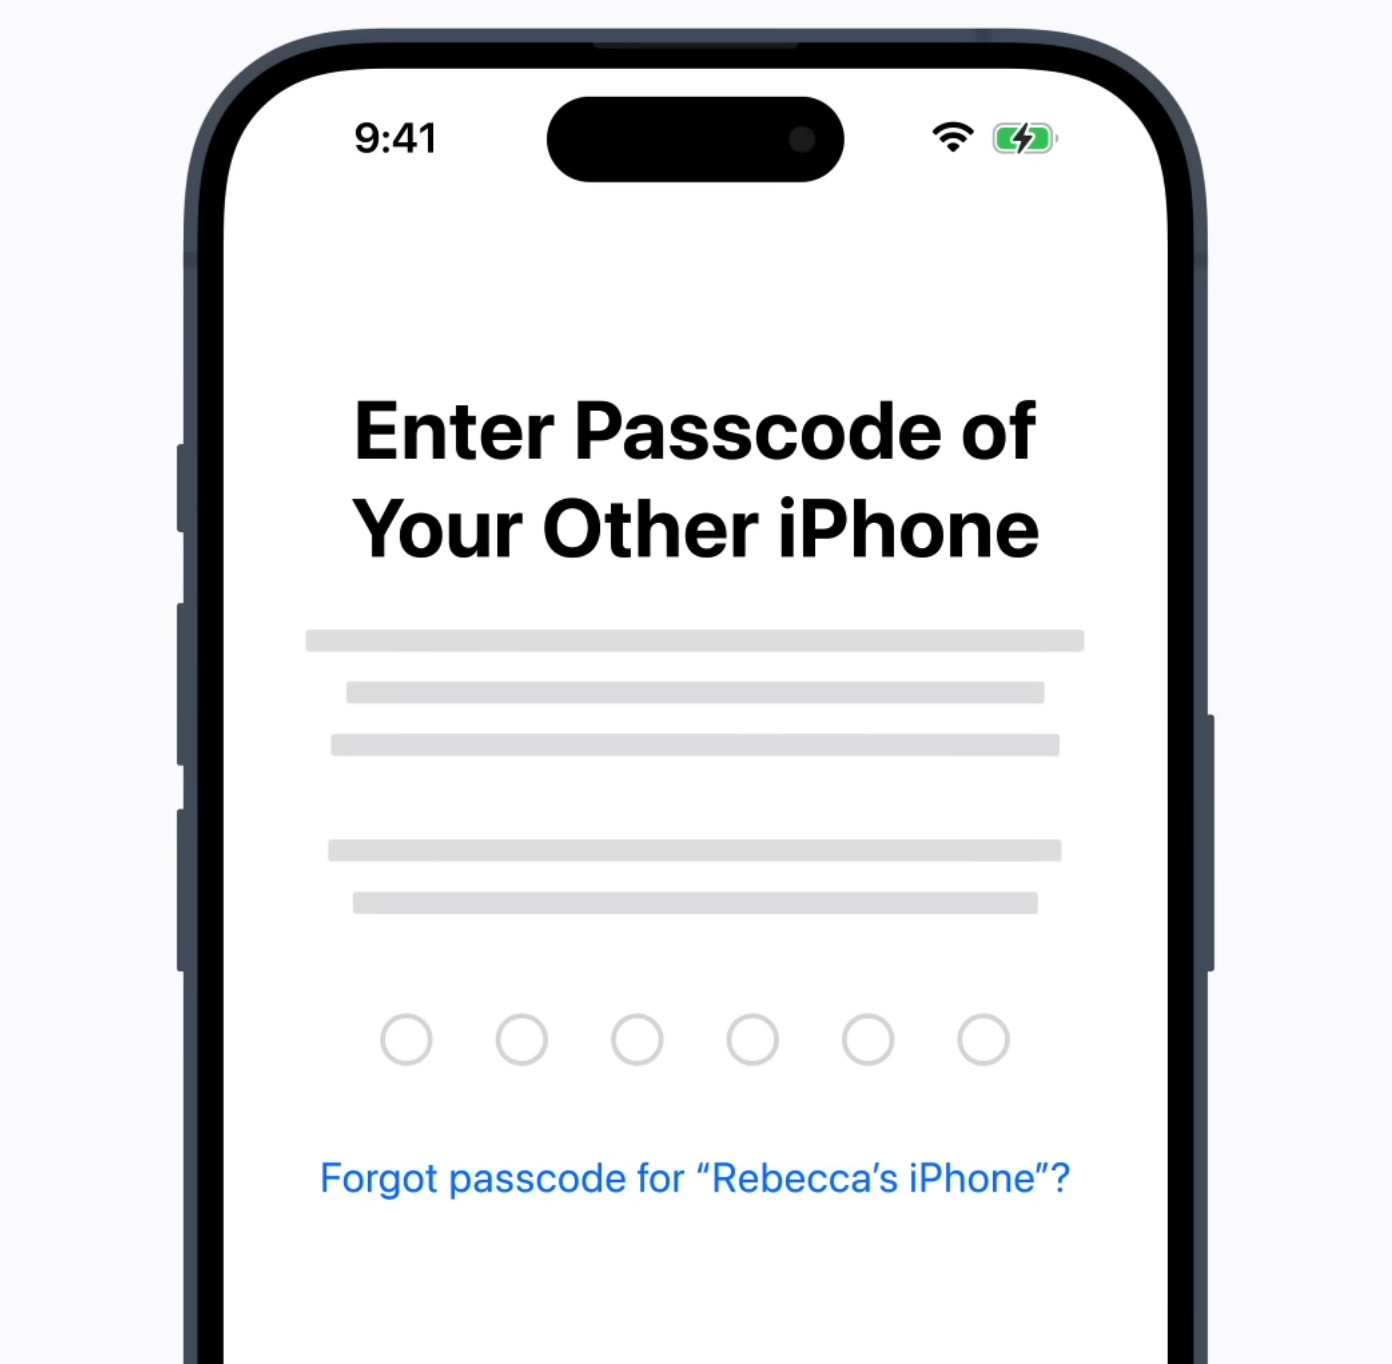
- Enter the passcode of your old iPhone on the new one.
- Follow the on-screen instructions to complete the process. You will be asked to set up FaceID or Touch ID, and you can either transfer apps and app data via iCloud or directly transfer it from your old iPhone.
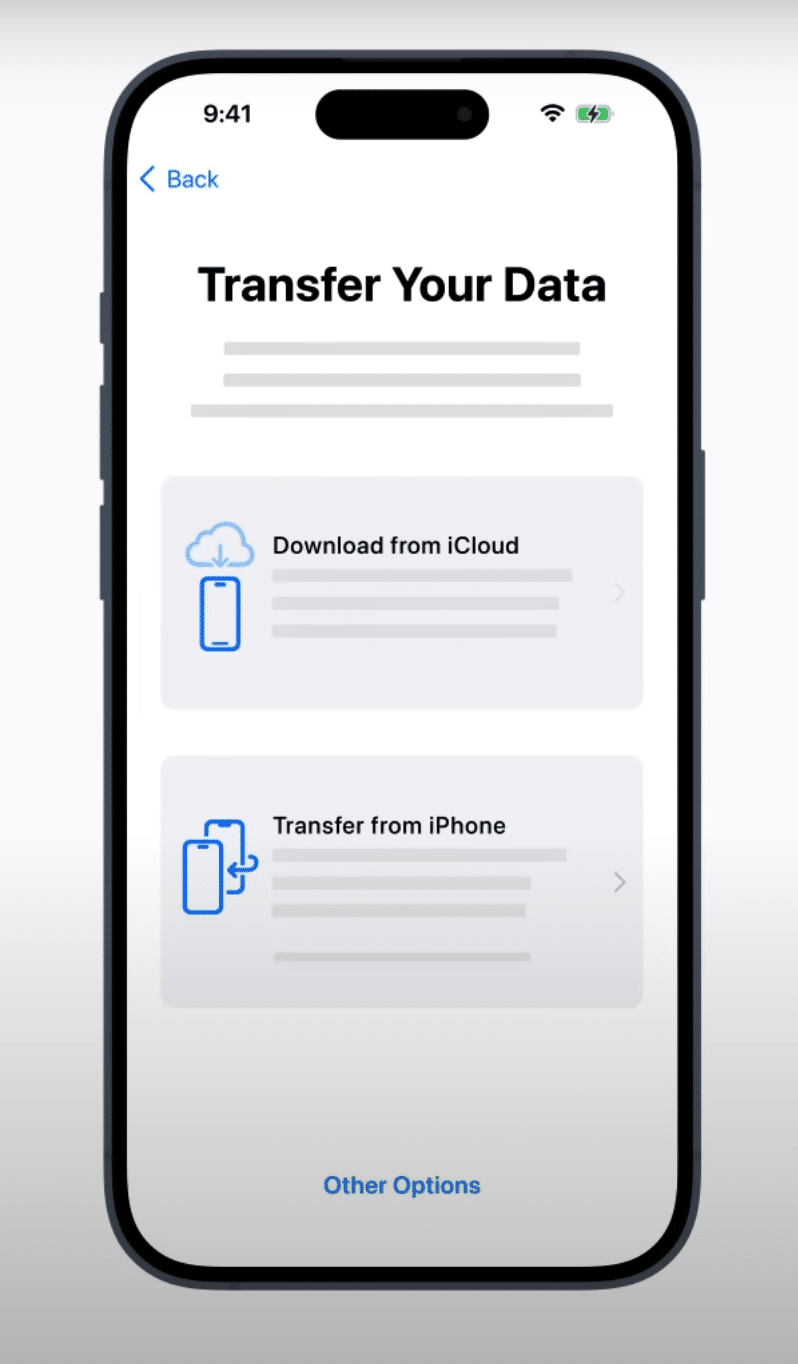
Image source: Apple
Depending on the amount of data that needs to be transferred, the process can take quite some time. However, you shouldn’t worry, as even if it goes on for a significant period, your data is safe on your old iPhone.
2. Transfer data from old iPhone to new iPhone using a cable
Alternatively, you can connect your old iPhone and the new one with a data transfer cable to transfer your data.
- If your new iPhone has a Type-C port, use a Lightning to Type-C or a Type-C to Type-C cable, depending on your old iPhone.
- If your new iPhone has a Lightning port, you will have to use the Lightning to USB 3 Camera Adapter.
To transfer the data, you will need to connect both iPhones to a Wi-Fi network. Once you connect both iPhones with the cable, turn your new iPhone on and follow the on-screen instructions to complete the process.
3. Transfer data on new iPhone from an iCloud backup
If you cannot access your old iPhone, don’t worry; you can transfer data from your old iPhone using an iCloud backup. However, this requires data to be backed up from the old iPhone to iCloud.
- As you are setting up your iPhone, finish the initial steps of selecting the language and connecting to a Wi-Fi network.
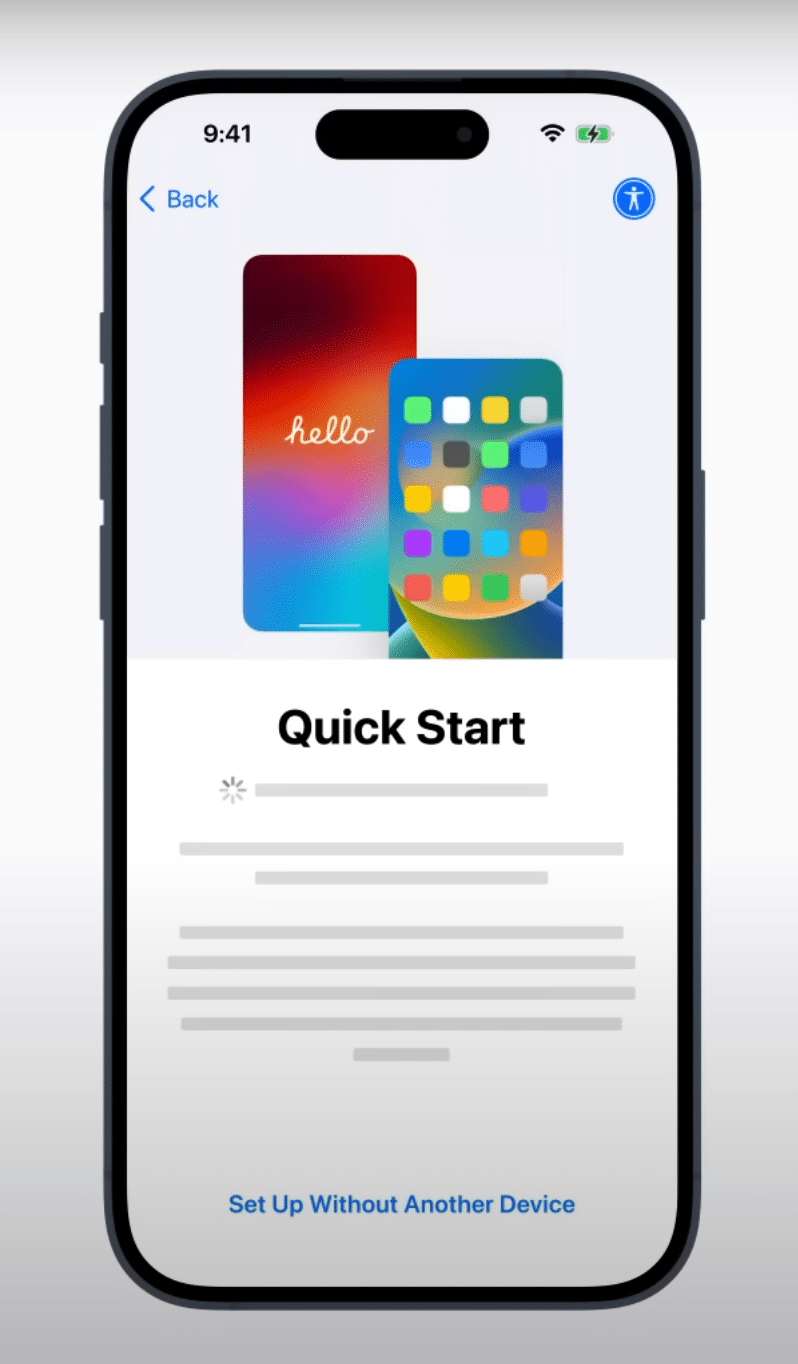
- Once you arrive on the Quick Start screen, select Set up Without Another Device.
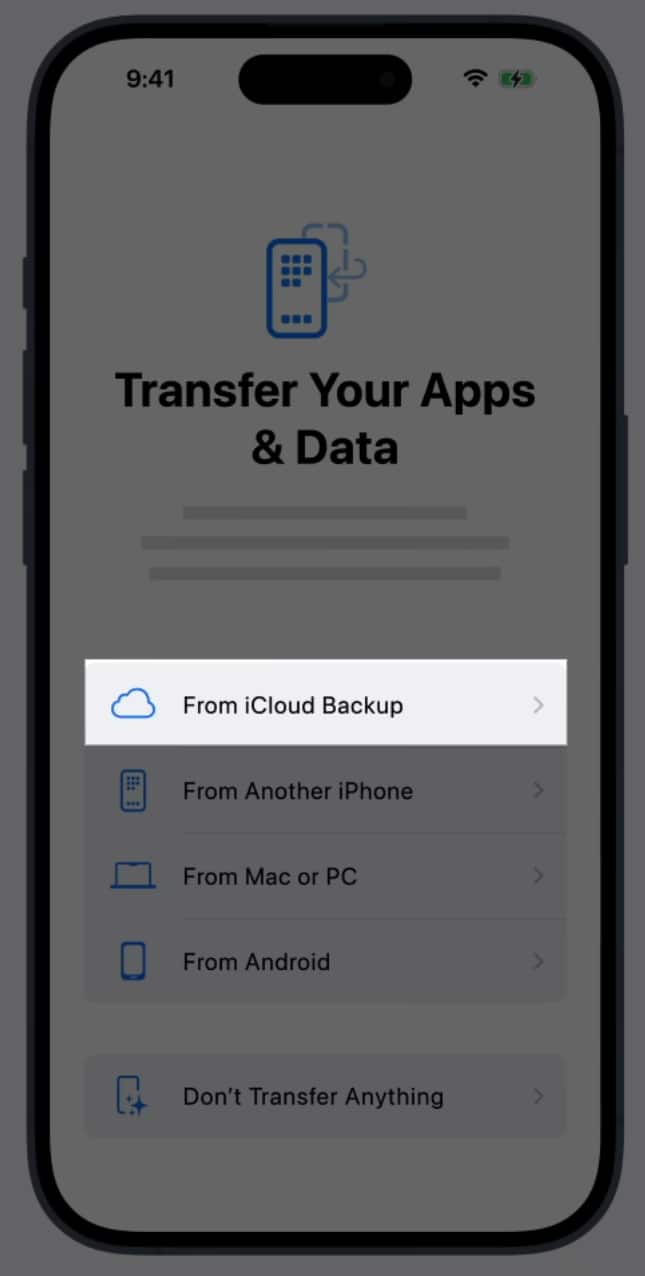
- On the Transfer Your Apps & Data page, select From iCloud Backup.
- Then, sign in with your Apple ID, select the iCloud Backup option and wait for the data to be transferred.
4. Transfer data from a local backup on a Mac or Windows PC
If you’ve backed up your iPhone’s data locally to a Mac or Windows PC, you can transfer data to your new iPhone using the local backup. Here’s how:
- Finish the initial steps of selecting the language and connecting to a Wi-Fi network during the setup.
- Once you’re on the Quick Start screen, select Set up Without Another Device.
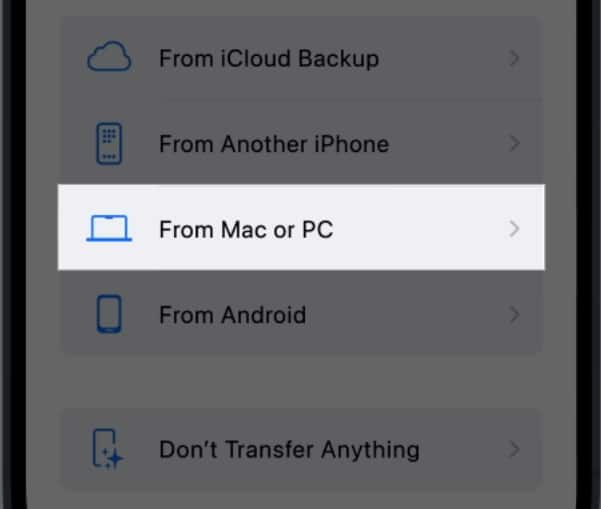
- Select From Mac or PC.
- Connect your iPhone to a PC or a Mac.
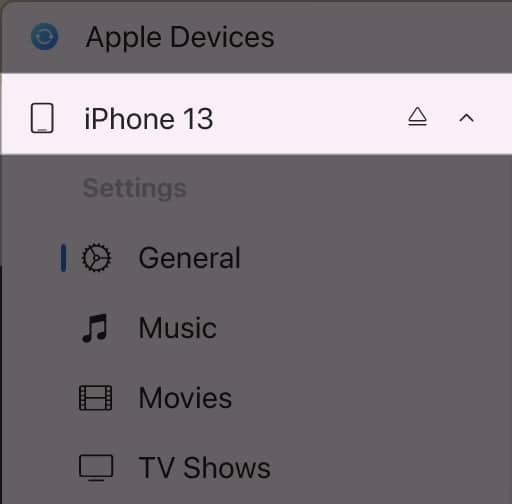
i. On a Mac: Open Finder and select your iPhone.
ii. On a Windows PC: Download the Apple Devices app and select your iPhone.
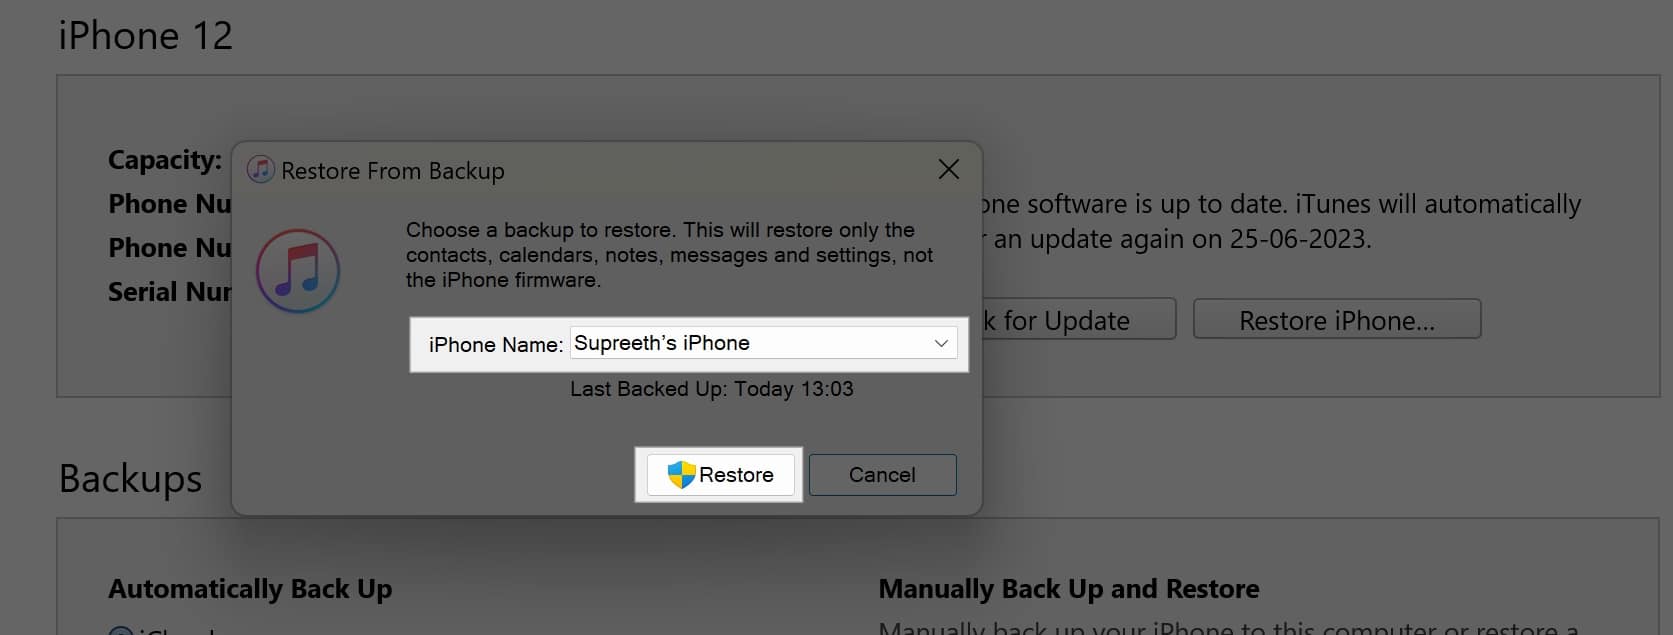
- Now, select the Restore Backup option.
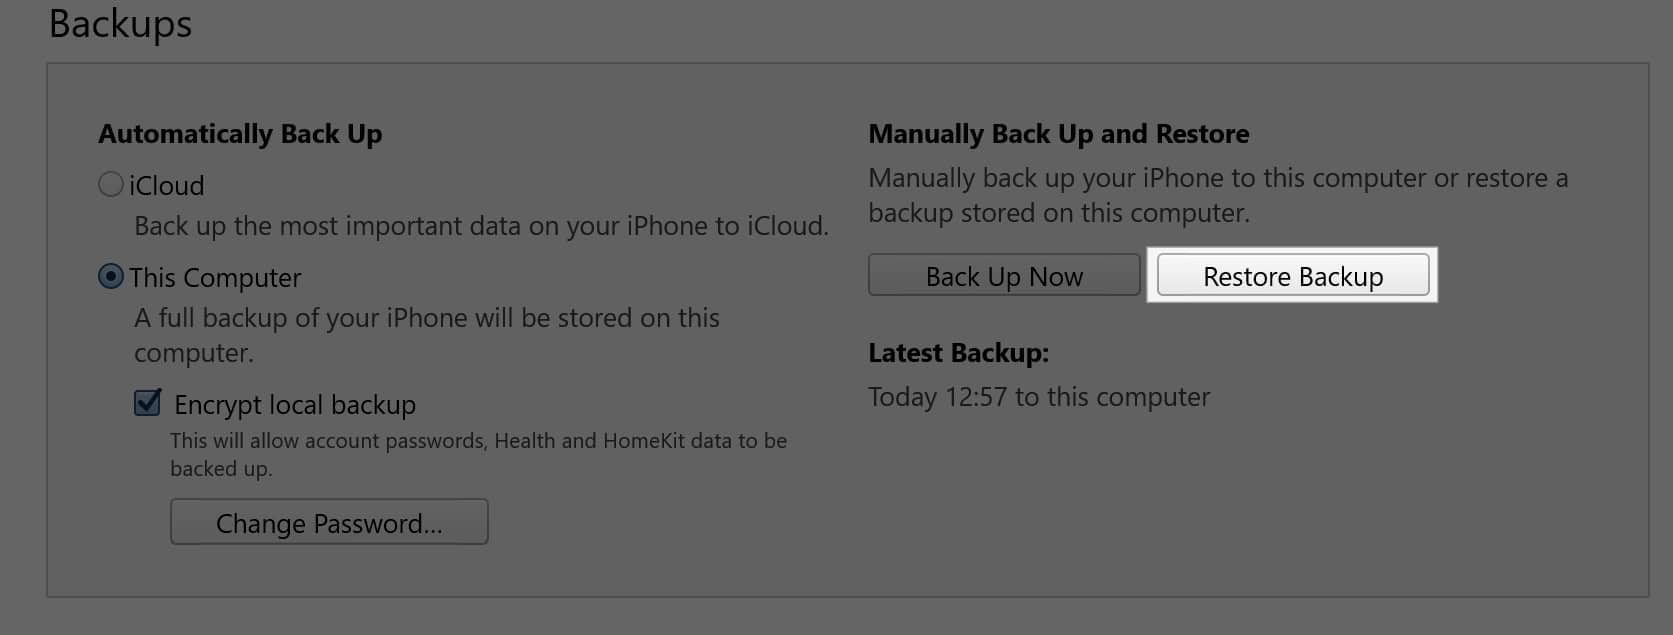
- Select the local backup to transfer and click on Restore.
How to transfer data from old iPhone to new iPhone after setup
If you were too excited to use your new iPhone as soon as you unboxed it and didn’t transfer data during the initial setup, you can still transfer data from your old iPhone to your new iPhone. Let’s look at all the ways to do so.
1. Transfer data to a new iPhone using iCloud
If you want to transfer data to your iPhone from an iCloud backup after setting it up, you will have to erase your iPhone to access transfer options on the Quick Start. This is what that looks like:
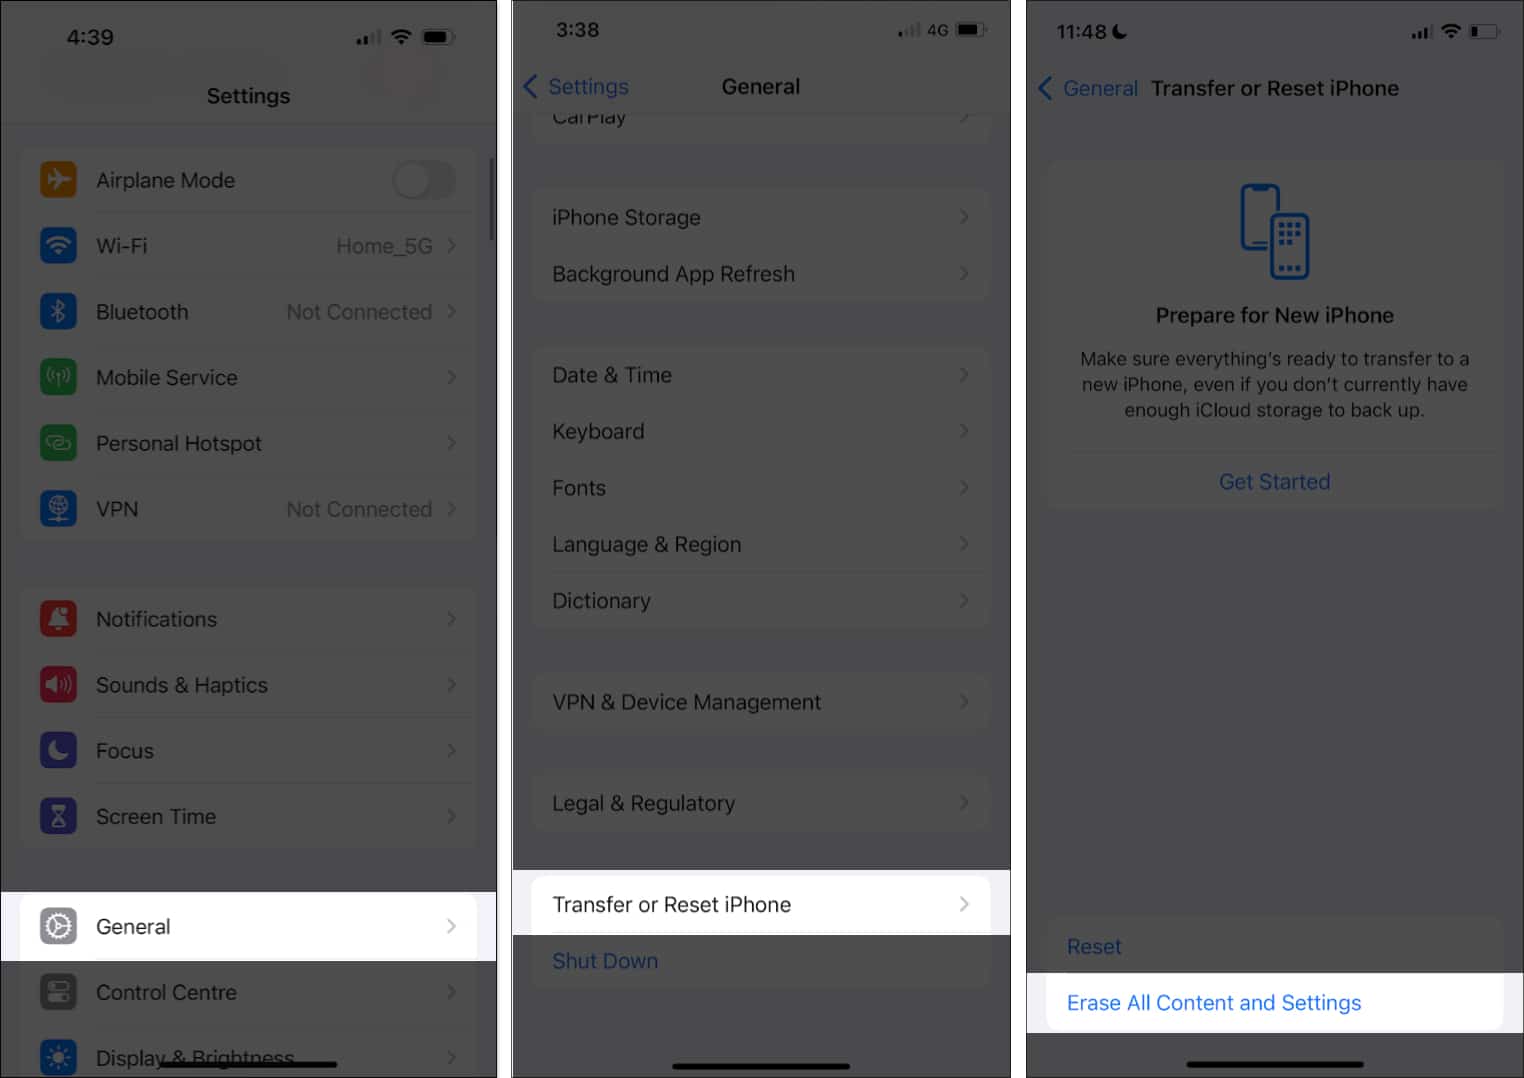
- Open Settings, go to General and select Transfer or Reset iPhone. Now, tap on Erase All Content and Settings. (Doing this will erase all of your data, and reset all settings on your iPhone.)
- Once the device turns on, finish the initial setup.
- Select Set up Without Another Device and select From iCloud Backup.
- Sign in to your Apple ID, select the iCloud backup, and wait for the process to complete.
2. Transfer data to a new iPhone from a PC or Mac
Here’s how you can transfer data from a local backup on your new iPhone:
- Connect your iPhone to a PC or a Mac.
i. On a Mac: Open Finder and select your iPhone.
ii. On a Windows PC: Download the Apple Devices app and select your iPhone.
- Now, select the Restore Backup option, then select the local backup to transfer and click on Restore.
Note:
All the contents of your iPhone will be erased as you are restoring the backup.
Keep your iPhone connected until the process is complete.
3. Transfer data from one iPhone to another using AirDrop
The above methods to transfer data after setup require you to erase the iPhone. However, if you still have your old iPhone with you, why not use AirDrop to transfer data?
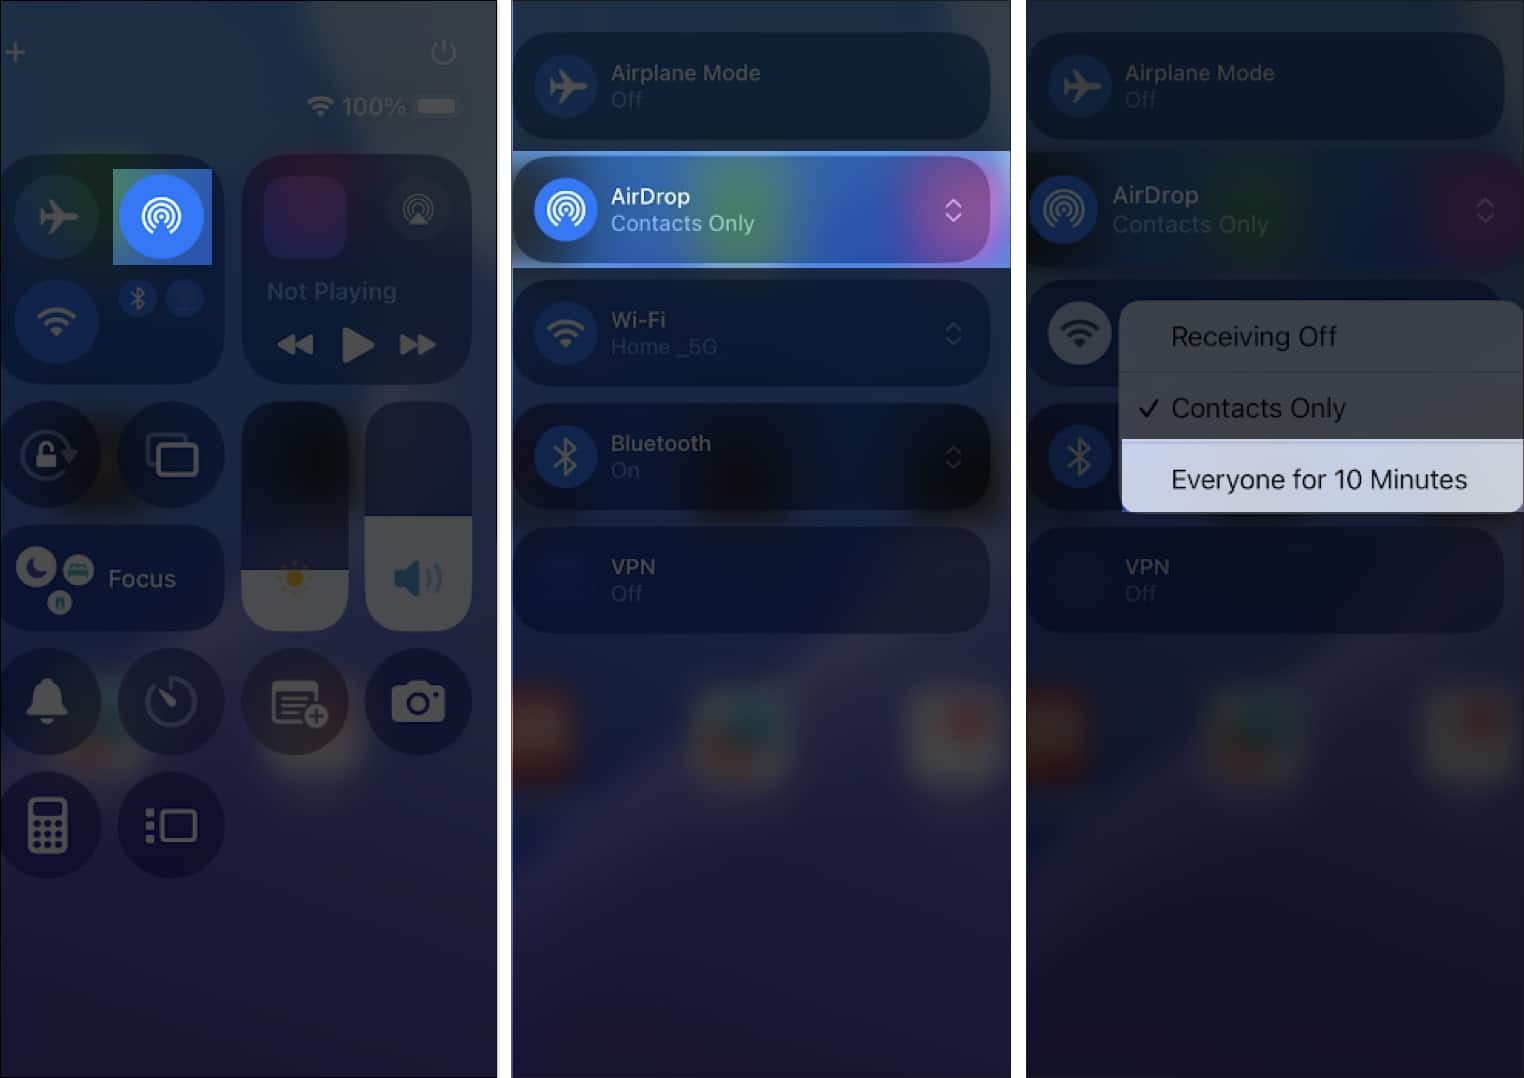
- Enable AirDrop on both your new and old iPhones. Open the Control Center, select the network panel, tap on AirDrop, and select Everyone for 10 Minutes.
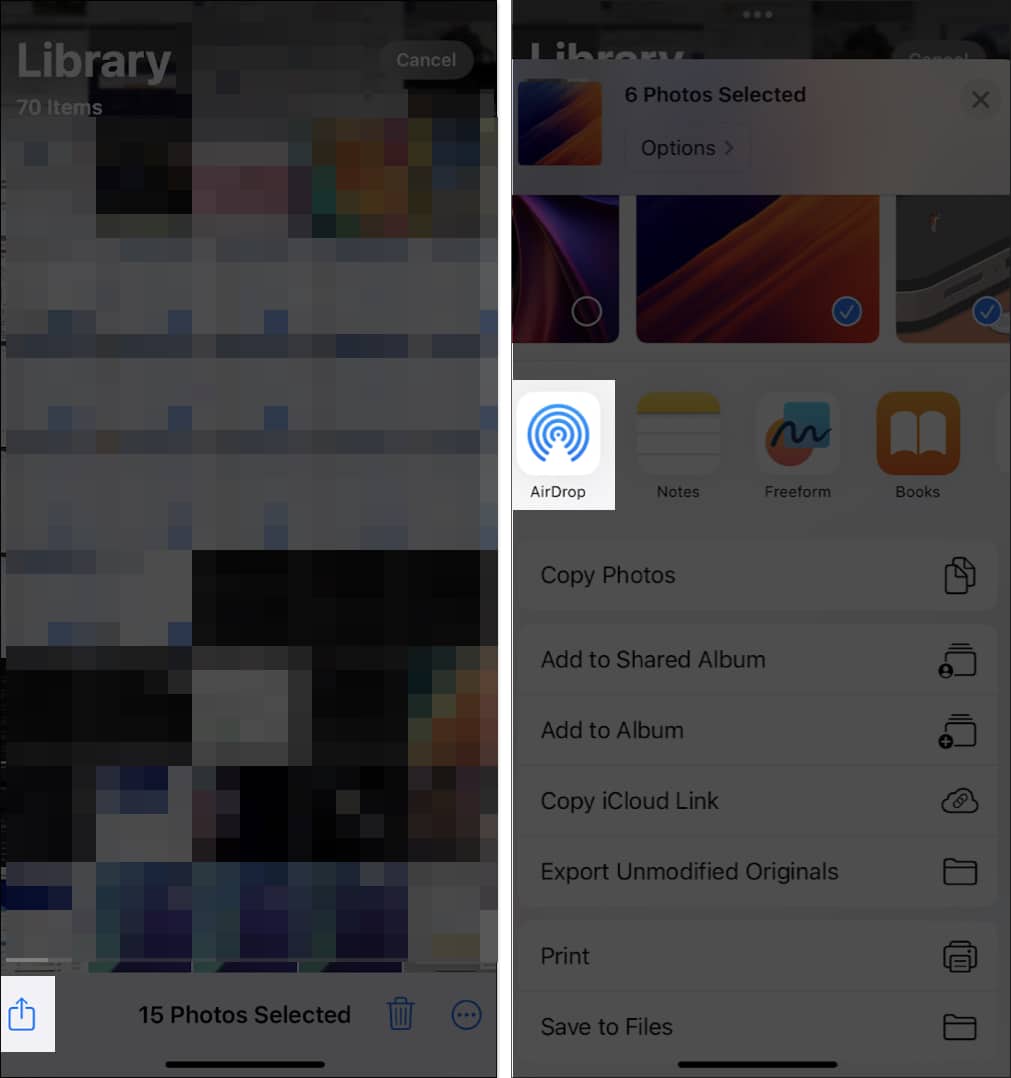
- Select the photos or files you want to transfer on your old iPhone.
- Tap on the Share icon and select AirDrop.
- Accept the AirDrop request on your new iPhone and wait for all the data to be shared.
Wrapping up…
There you go; those are all the ways you can transfer data from iPhone to iPhone.
When I completed the process, I was amazed at how my new iPhone had all my apps, data, and photos ready in just a few minutes. This makes it a breeze to transition to a newer iPhone without having to worry about missing out on any data from the older one!


