Faxing might seem outdated, but it still has its uses. Many fax apps make sending and receiving documents easy without a conventional fax machine. Of these, iFax is one of the best options.
In this article, I’ll use it to explain how to send a fax from your iPhone and clarify why you would even need to use this method in the age of email and other modern communication technologies.
How to fax from your iPhone
The iFax app offers a convenient way to transmit documents from your iPhone. You will need to subscribe to use it, but it offers a convenient 7-day free trial.
The basic iFax subscription starts at $24.99 a month. The app lets you attach a document or image, write a text, or scan a document to fax. Here’s how:
- Download the iFax app from the App Store.
- Open the app and tap Send a Free Fax.
- Fill in the details like the recipient’s fax number, name, and any comments you have.
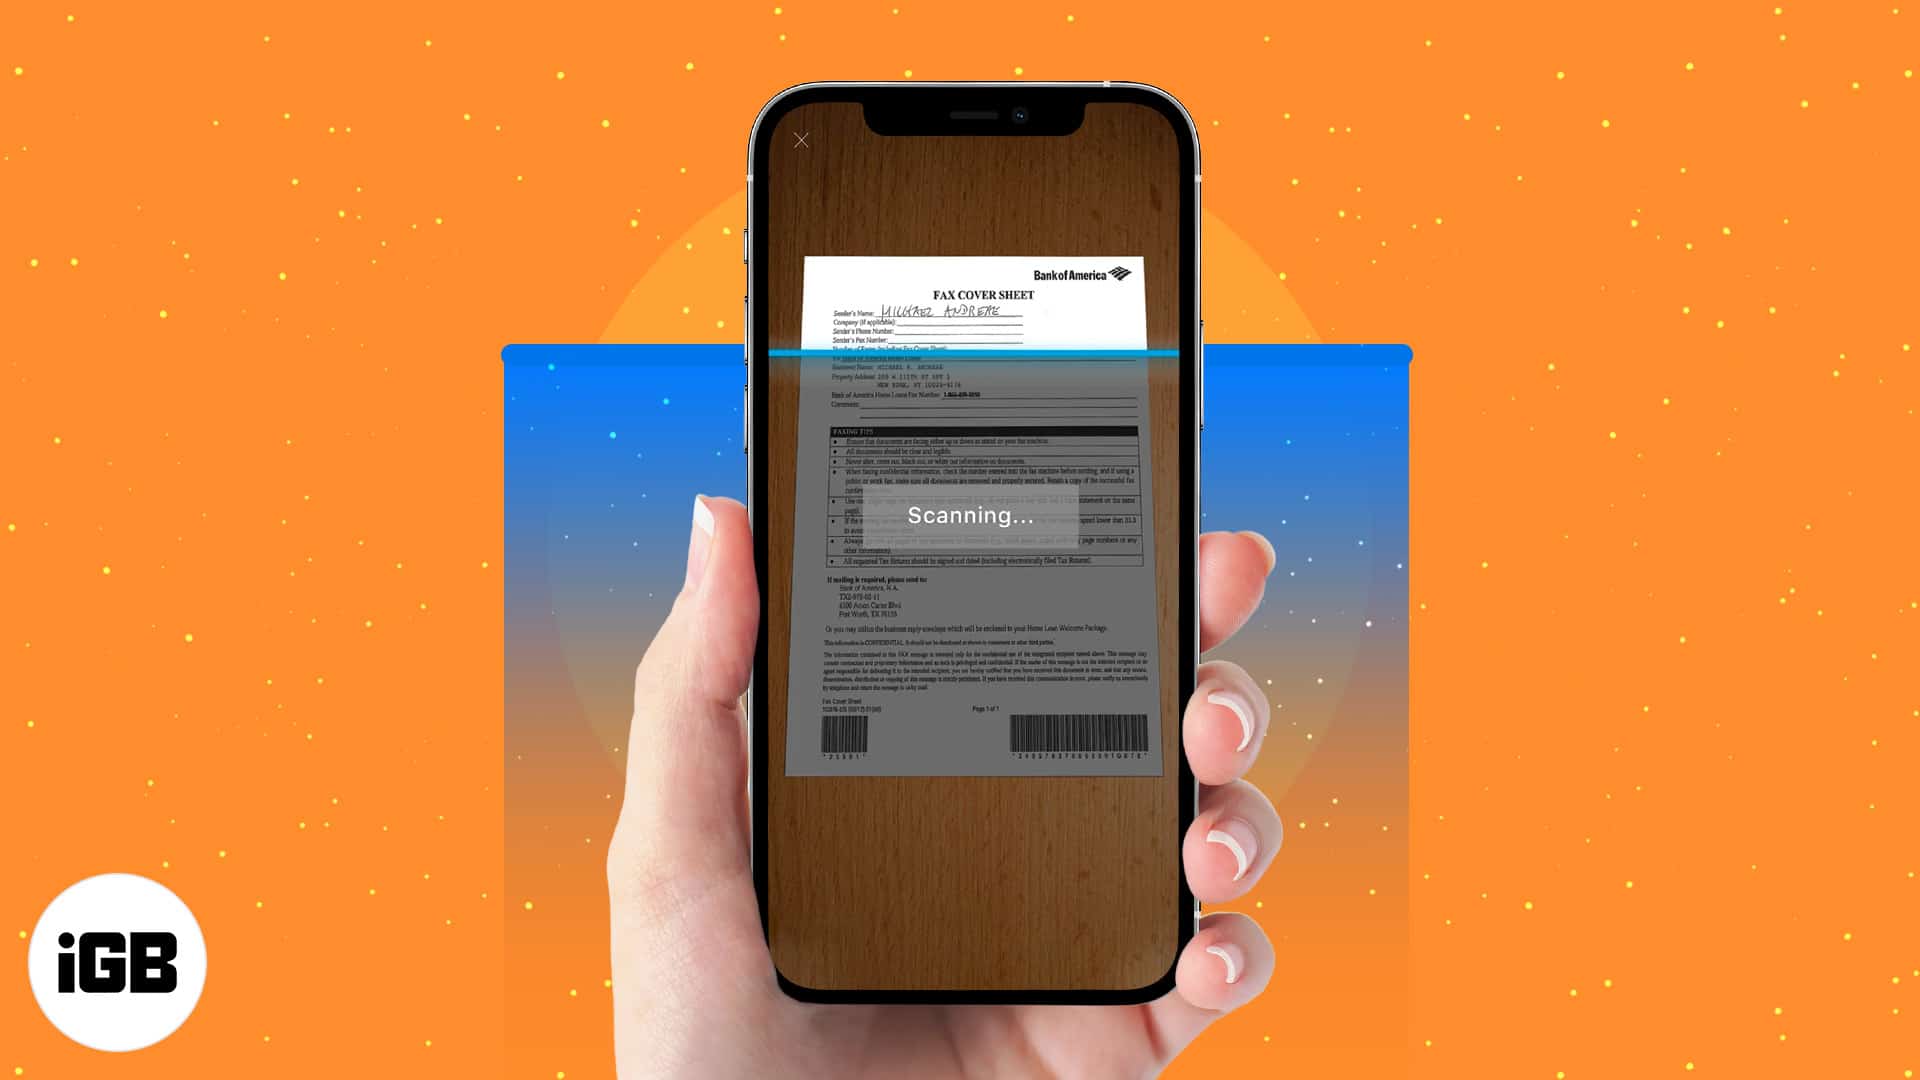
- Tap Scan/Add Document to attach the document you want to send.

- Select where the document/image is located.
- You can also create the document by tapping Scan a Document or Write Text.
- Edit your attachment as needed.

- Once attached, you will see its preview.
- Tap Send to transmit the fax to the recipient.

You can also use the iFax app to get a fax number to receive documents. For this, tap Get a Fax Number on the app’s Home Screen and select your location and number.

Why do people still use fax?
Despite the advancement of messaging apps and email, fax is alive and well! It’s used by businesses worldwide, especially in the United States, Japan, and Germany. Fax is often preferred over email because it’s a more secure way to transmit documents, mainly when signatures are involved.
Faxed signatures became legally accepted in the late 1980s and early 1990s and are widely accepted. Although the Electronic Signatures Act in 2000 gave digital signatures similar legal power, they are not as widely accepted yet.
Moreover, faxing gives you the confirmation of receipt, which is often missing in emails and other forms of communication.
So, believe it or not, fax is still considered a quick and convenient way to send and receive documents. The one thing that’s changed, though, is that traditional fax machines are not needed. Thanks to an abundance of apps, you can send and receive faxes over the internet on your iPhone or computer.
My favorite is the iFax app for iPhone, which is super easy to use and gets the job done quickly, as explained above.
Happy faxing!
That wraps up our guide on how to send a fax from your iPhone. Let me know in the comments below if you have any questions. I’ll be happy to help.