While Apple incorporates a fair few ringtones on your iOS devices, you might want to step outside the box. Set tunes that match your or the caller’s personality or play your current favorite song every time someone calls. While there are several ways to get new ringtones, the simplest one is via the iTunes Store. So, without any delay, let’s see how you can buy ringtones on iPhone and iPad.
How to Purchase an iPhone Ringtone from the iTunes Store
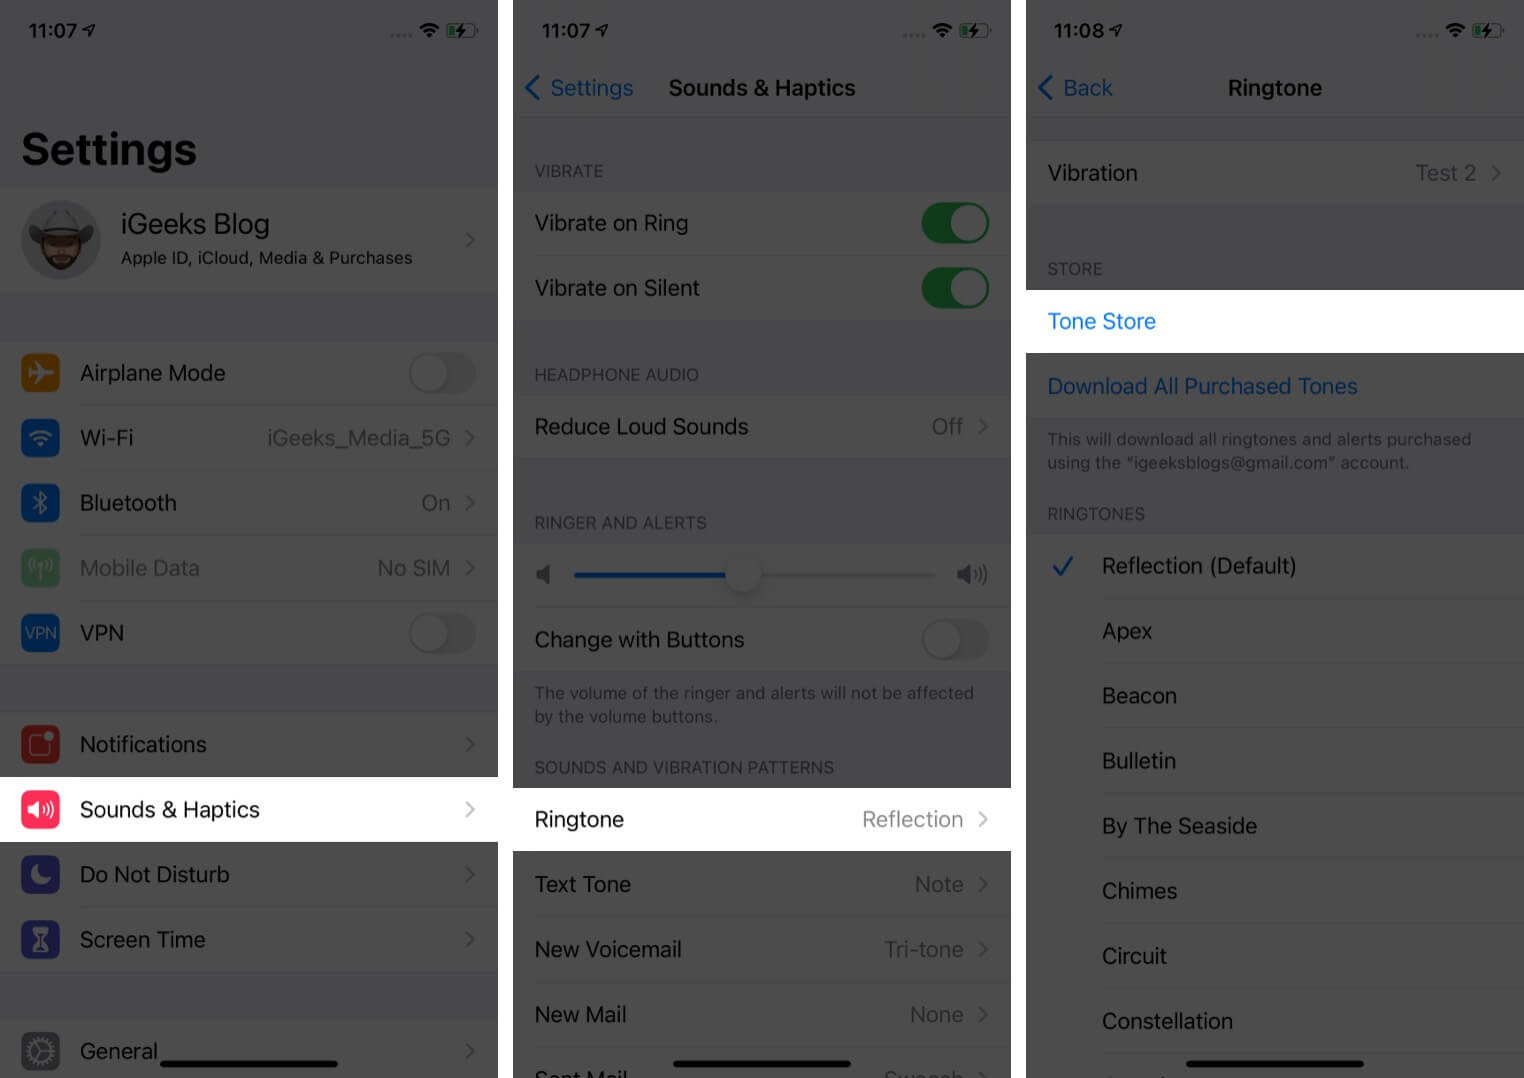
- Launch the Settings app on your iPhone.
- Go to the Sounds & Haptics and tap on Ringtone.
- Tap on Tone Store or you can also directly Open the iTunes Store app.
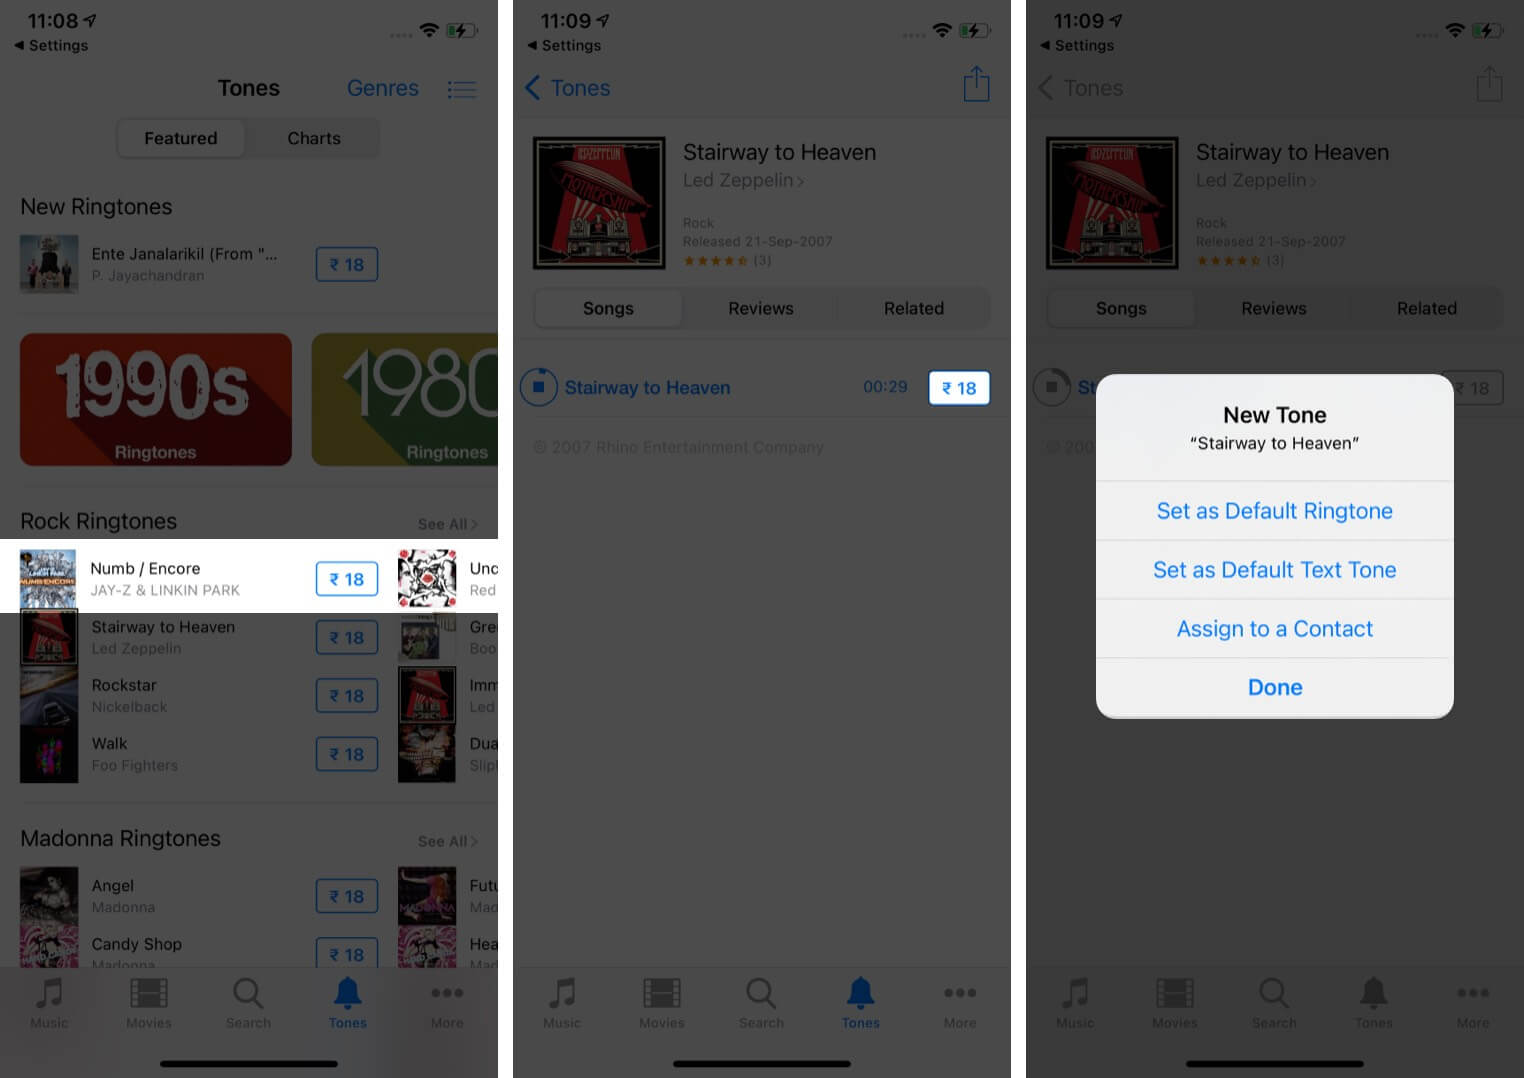
- Now, surf & find a ringtone of your choice.
- You can tap on any option to preview it. When selected, tap on the Price of the ringtone.
- In the pop up select either select Set as Default Ringtone, Text Tone, or Assign to a Contact or tap on Done if you have not made up your mind how to set it.
- Now, you might need to enter your Apple ID password to complete your purchase.
Once the download is completed, it will appear on your Ringtones List. Now, go to Settings → Sounds & Haptics → Ringtone → find a downloaded tone, and set purchased ringtone on iPhone.
And while you are there, you can also set a custom vibration alert! In the Ringtone section, tap on Vibration and select from the options. Or better yet, make a new one by tapping on Create New Vibration.
Note: In case you didn’t like the offerings in the iTunes Store, check out these amazing third-party ringtones apps to buy on iPhone with more options.
Signing off
While the default ringtone of the iPhone is quite impressive, it has become too familiar. And with iPhone’s omnipresence, it is hard to figure out if your phone is ringing or someone else’s.
So, switching the tune with a custom one is a logical solution. Mention in the comments below if this tutorial was helpful to you and if you want us to do any more tutorials.
Meanwhile, here are some other articles that you might enjoy:


Leave a Reply