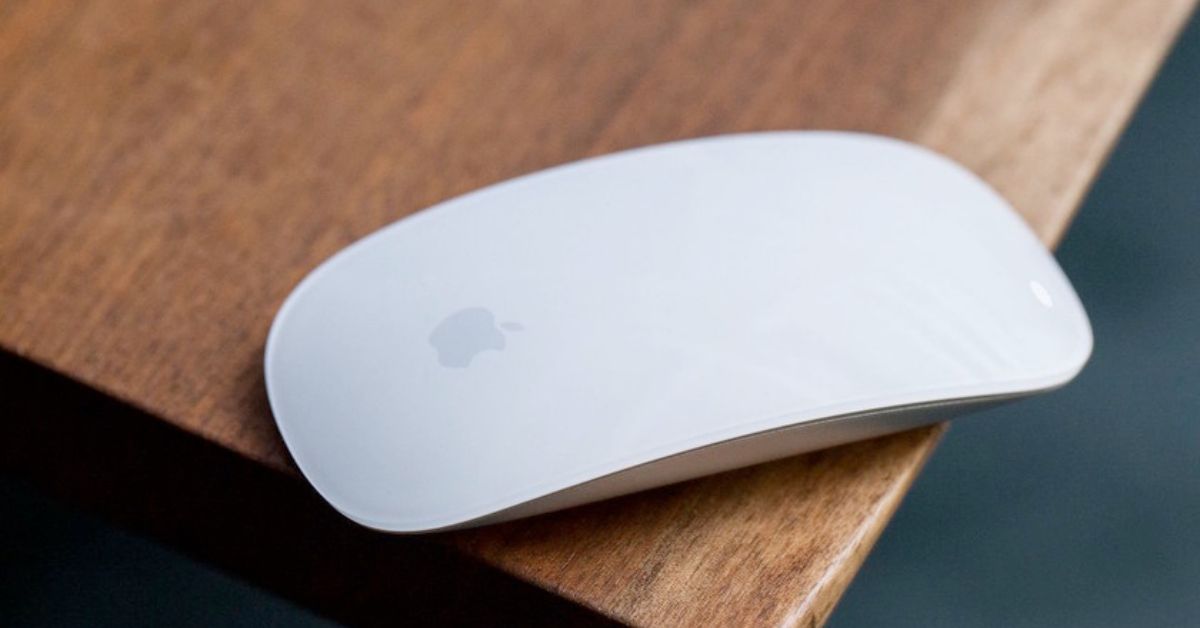
Most users treat the Magic Mouse like a regular mouse and only use click, scroll, and right-click. In reality, the entire top surface is touch-sensitive and supports built-in macOS gestures that control navigation, multitasking, and zooming.
With simple taps and swipes, you can switch apps, move between pages, zoom into content, and manage desktop spaces without relying on toolbar buttons or keyboard shortcuts. This guide explains every Magic Mouse gesture, how each one works, and how to adjust them for better efficiency.
Magic Mouse Gestures Overview
| Gesture | How to Perform | What It Does |
|---|---|---|
| Left-Click | Press the upper-right area | Select items, open files and apps, interact with interface elements |
| Right-Click | Press the upper-right area | Open contextual menus and advanced options |
| One-Finger Scroll | Slide one finger up/down or side to side | Scroll vertically or horizontally through content |
| Smart Zoom | Double-tap with one finger | Zoom in on the area under the pointer; double-tap again to zoom out |
| Swipe Between Pages | Swipe left/right with one finger | Navigate back or forward in browsers and supported apps |
| Mission Control | Double-tap with two fingers | Show all open windows, desktops, and full-screen apps |
| Swipe Between Spaces | Swipe left/right with two fingers | Switch between desktop spaces and full-screen apps |
1. Left-Click on Magic Mouse
The Magic Mouse uses a single touch-sensitive surface instead of separate physical buttons. The top shell detects finger position and pressure to determine which click to register.
To left-click, press on the upper-left area of the surface. macOS reads the position of your finger and registers it as a primary click. Because the surface is unified, avoid resting a second finger on the right side while clicking, as that can trigger a secondary click instead.
Primary click is used for selecting files, opening apps, placing the cursor in text fields, dragging items, and interacting with interface elements across macOS.
2. Right-Click (Secondary Click)
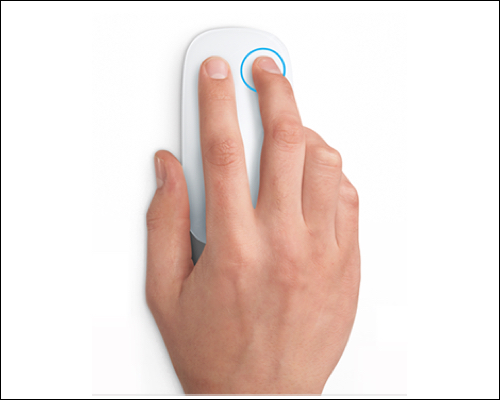
Right-click works using the same surface logic as left-click, but on the opposite side.
To right-click, press on the upper-right area of the surface. The system detects pressure on the right zone and registers it as a secondary click.
If secondary click does not work, enable it in System Settings → Mouse → Point & Click by turning on Secondary Click. You can also choose whether the left or right side activates it, which is useful for left-handed users.
Secondary click opens contextual menus. It is required for renaming files, accessing file options, copying and pasting, saving images, inspecting elements in browsers, and revealing advanced app settings.
3. Scroll with One Finger
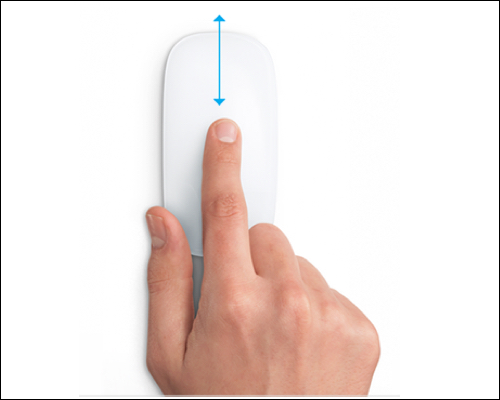
Instead of using a mechanical scroll wheel, the Magic Mouse supports full-surface touch scrolling.
To scroll, slide one finger up or down across the surface. The movement is smooth and momentum-based. A slow glide allows precise movement through content, while a quick flick scrolls rapidly through long pages. You can move the finger side by side to scroll horizontally.
macOS uses Natural Scrolling, meaning content moves in the same direction as your finger. You can disable this in System Settings → Mouse if you prefer traditional scrolling behavior.
Scrolling works system-wide across web pages, long documents, PDFs, Finder windows, spreadsheets, and system menus.
4. Smart Zoom

Smart Zoom provides quick magnification without using zoom controls or keyboard shortcuts.
To activate Smart Zoom, double-tap with one finger. The Mac zooms into the exact area under your pointer. Double-tap again to return to normal view.
Smart Zoom works in Safari, most web browsers, PDFs, and image previews. It is useful for reading small text or inspecting details without changing the overall zoom level of the page.
5. Swipe Between Pages

The Magic Mouse supports horizontal navigation within compatible apps.
Swipe left with one finger to go back. Swipe right with one finger to go forward.
This works in Safari, Chrome, and other browsers, as well as apps that support page-based navigation. It reduces pointer movement and speeds up browsing.
6. Open Mission Control

Mission Control provides an overview of all open windows and desktop spaces.
To open Mission Control, double-tap with two fingers. The screen zooms out and displays every open window, along with desktop spaces and full-screen apps at the top.
From this view, you can switch apps, move windows between desktops, create new desktop spaces, or close windows.
7. Swipe Between Full-Screen Apps and Desktops

When an app enters full-screen mode, macOS places it in a separate desktop space.
To switch between spaces, swipe left or right with two fingers. This moves you horizontally between your main desktop, additional desktops, and full-screen applications.
This gesture allows fast workspace switching without minimizing windows or using keyboard shortcuts.
Customizing Magic Mouse Gestures on Mac
All gestures work by default, but you can adjust behavior to match your workflow.
Open System Settings and click Mouse in the sidebar. From there, you can:
- Turn individual gestures on or off.
- Disable page swiping if triggered accidentally.
- Enable or disable Smart Zoom.
- Change scroll direction between Natural and traditional.
- Adjust tracking speed.
- Adjust double-click speed.
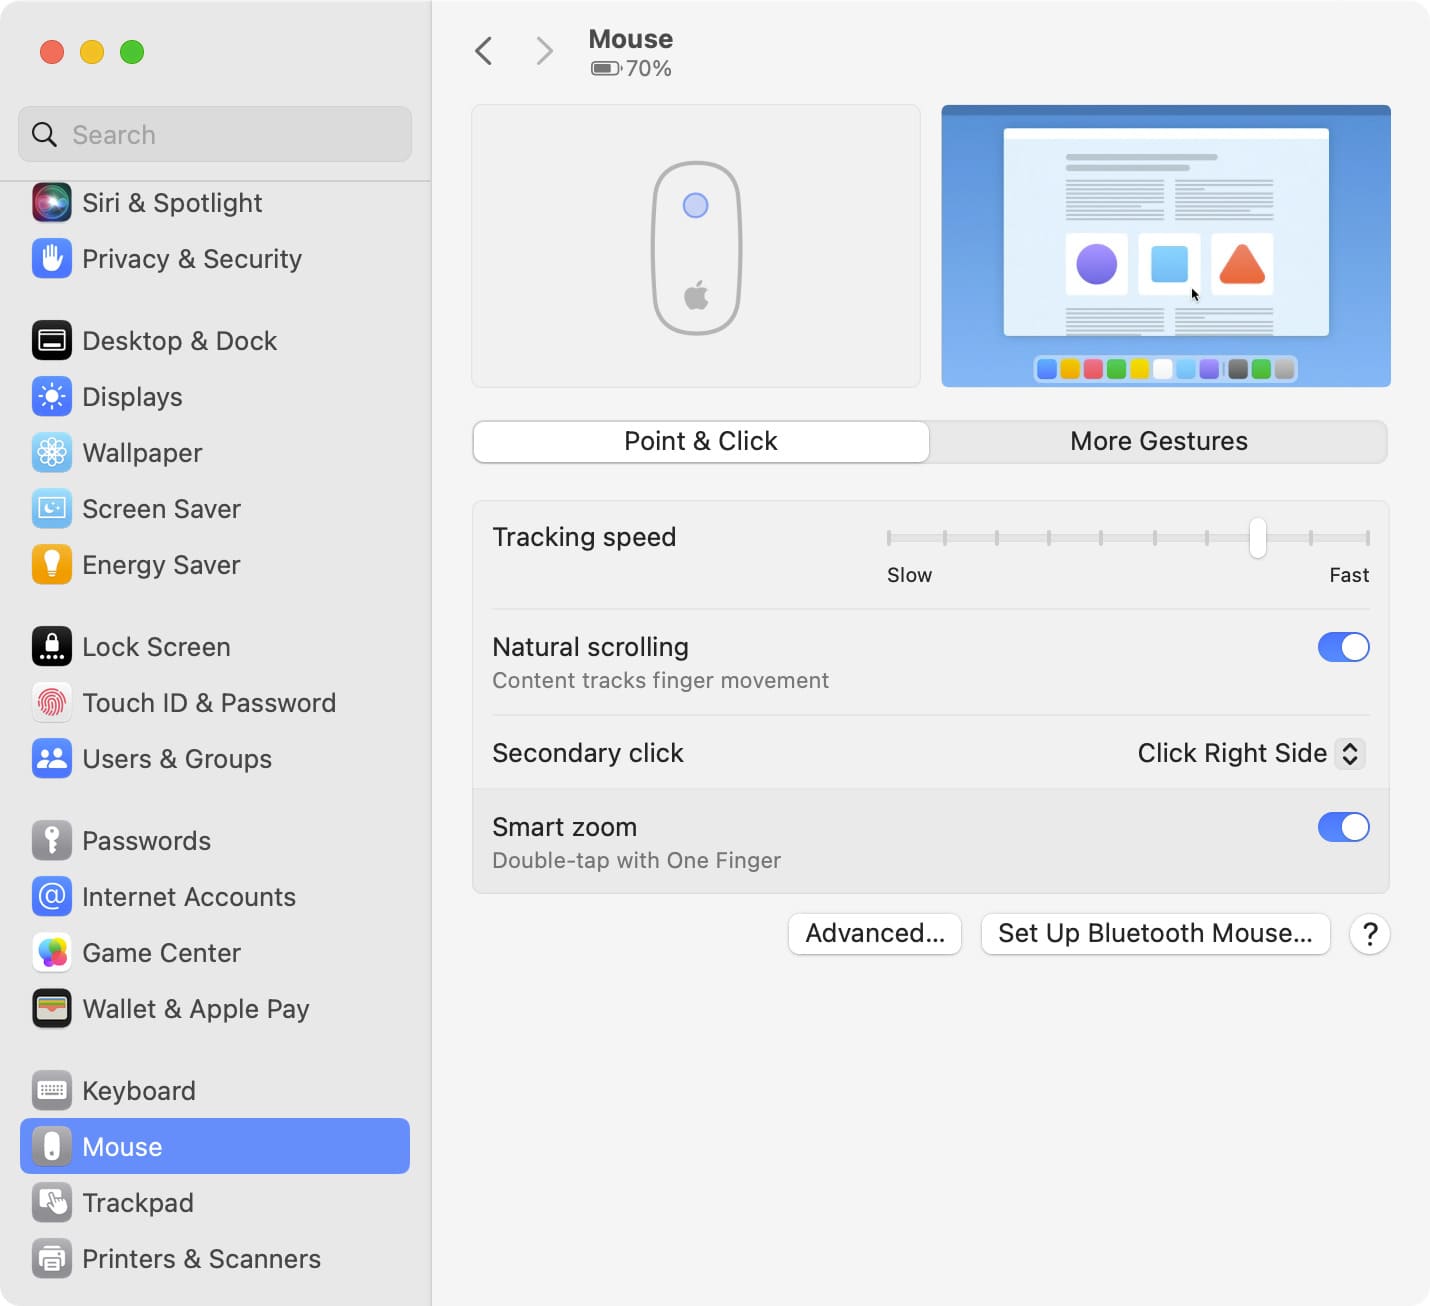

If a specific gesture causes issues, disable only that setting instead of turning everything off. For example, if page swipes are accidentally triggered in Mail or Safari (which can happen often when you want to scroll horizontally), turn off page swipes while keeping Mission Control and Smart Zoom enabled.
Tracking speed affects how far your hand moves across the desk. Faster speeds reduce movement, while slower speeds improve precision for editing or design work. Small adjustments can significantly improve comfort and efficiency.
Magic Mouse vs Magic Trackpad
The Magic Mouse supports essential gestures such as scrolling, Smart Zoom, page swipes, Mission Control, and switching between desktop spaces, while maintaining precise cursor control.
The Magic Trackpad supports all of those gestures plus additional multi-finger controls like pinch to zoom, three- and four-finger app switching, App Exposé, Launchpad access, and Force Click.
Also Check: Magic Trackpad vs Magic Mouse
Use the Magic Mouse if you prioritize cursor accuracy. Use the Magic Trackpad if you rely on advanced multi-finger gestures and faster workspace navigation.
Conclusion: Getting the Most Out of Magic Mouse Gestures
The Magic Mouse combines traditional pointer control with essential macOS gestures in a single touch surface. When you use only click and scroll, you miss the built-in navigation and multitasking shortcuts.
Using page swipes, Smart Zoom, Mission Control, and desktop switching reduces repetitive pointer movement and reliance on the keyboard. With consistent use, these gestures make macOS navigation faster and more efficient. After all, this is unique aspect where Magic Mouse excels above any third-party mouses.