With so many apps installed on your iPhone, it is not uncommon to feel overwhelmed by the notifications you receive daily.
Luckily, iOS comes with a range of settings and options that you can use to control and customize notifications on your iPhone or iPad. These options ensure you always stay on top of the arriving information without feeling overwhelmed by their sheer number.
We’ve prepared this guide explaining how to use these options to manage notifications on an iPhone or iPad effectively.
How to see notifications on an iPhone or iPad
Unless you have Do Not Disturb or a customized Focus active on your iPhone or iPad, all your incoming notifications will arrive in real-time, and you can view them in the Notification Center.
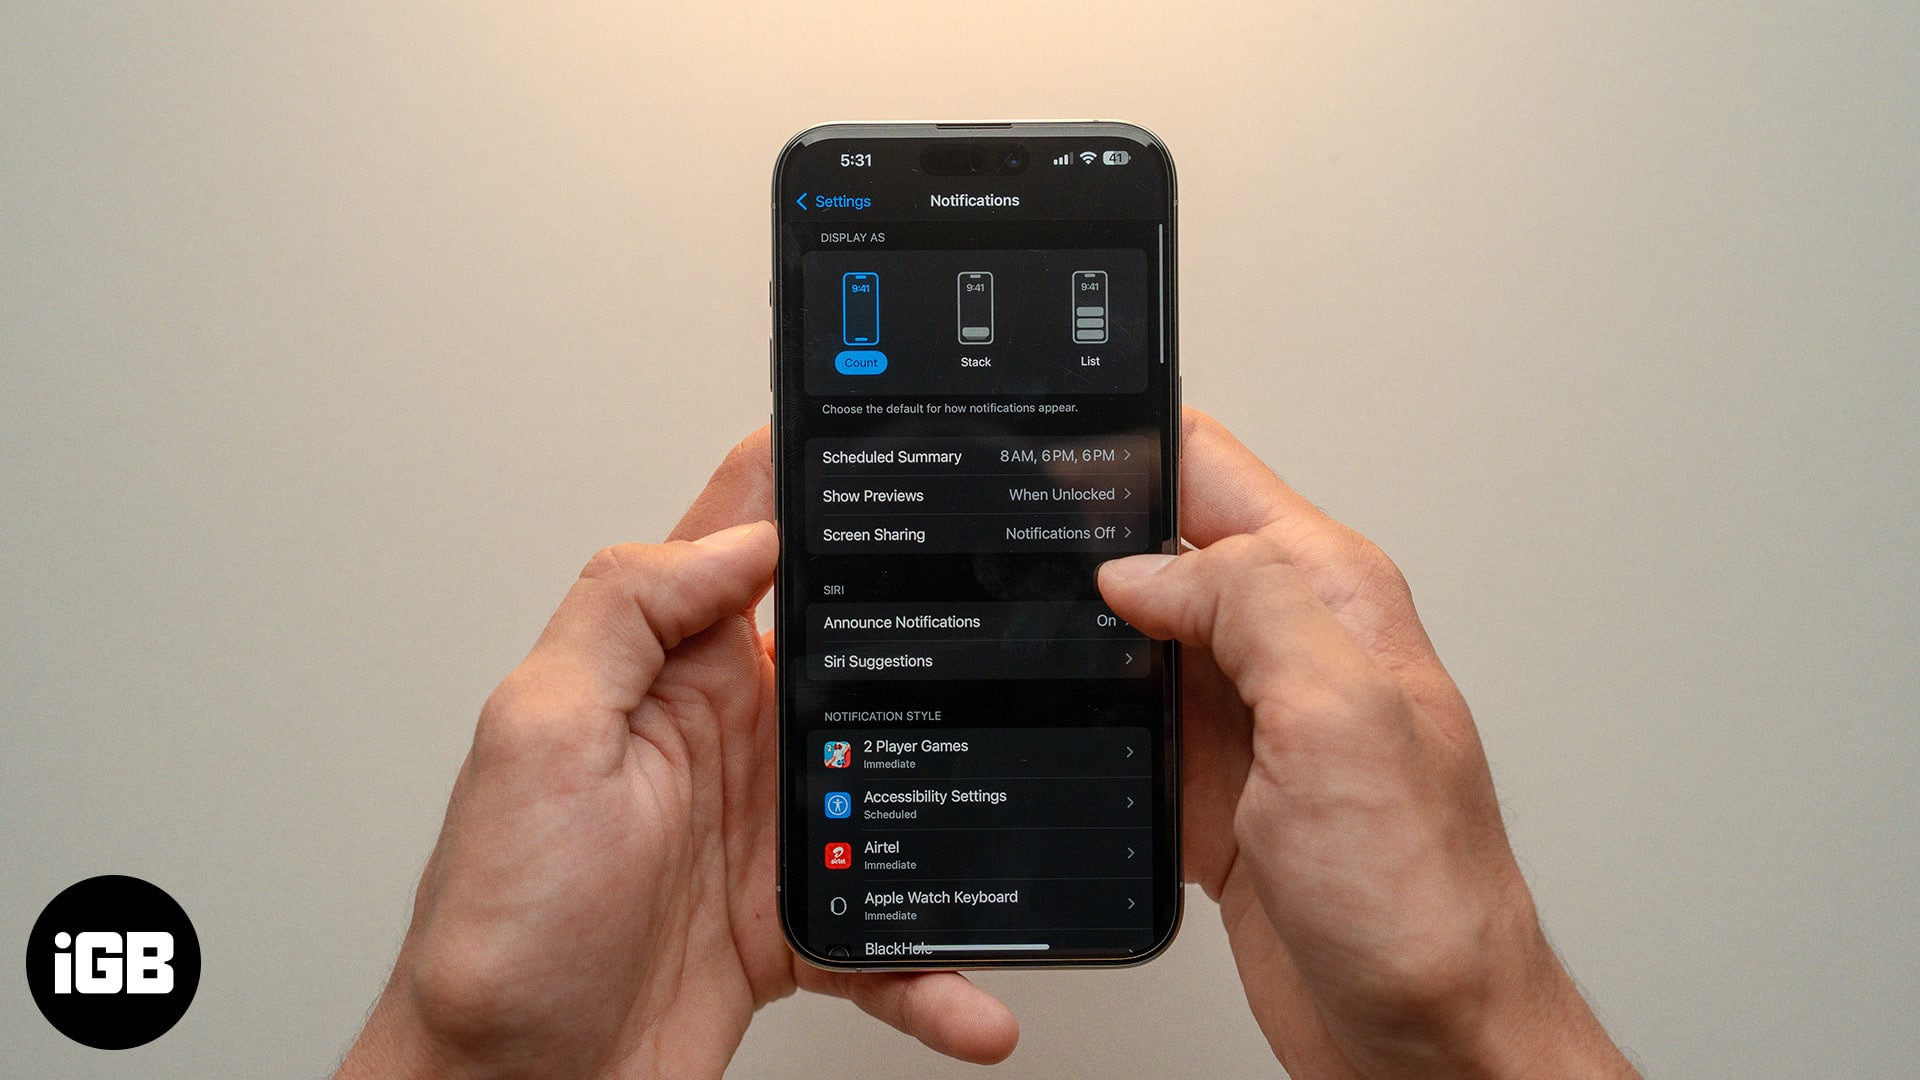
To help you stay clear of distractions, Apple has made the Notifications roll in from the bottom of the screen. The notifications can be viewed in a list, stack, or count view, which you can choose from the Notifications settings.
Here are two ways to view notifications on an iPhone or iPad:
- On the Lock Screen: Swipe up from any empty area on the screen, and the notifications will roll up.
- On other screens: Swipe down from the top-left of the screen to access the Notification Center and see all the recent notifications.
How to clear notifications on an iPhone or iPad
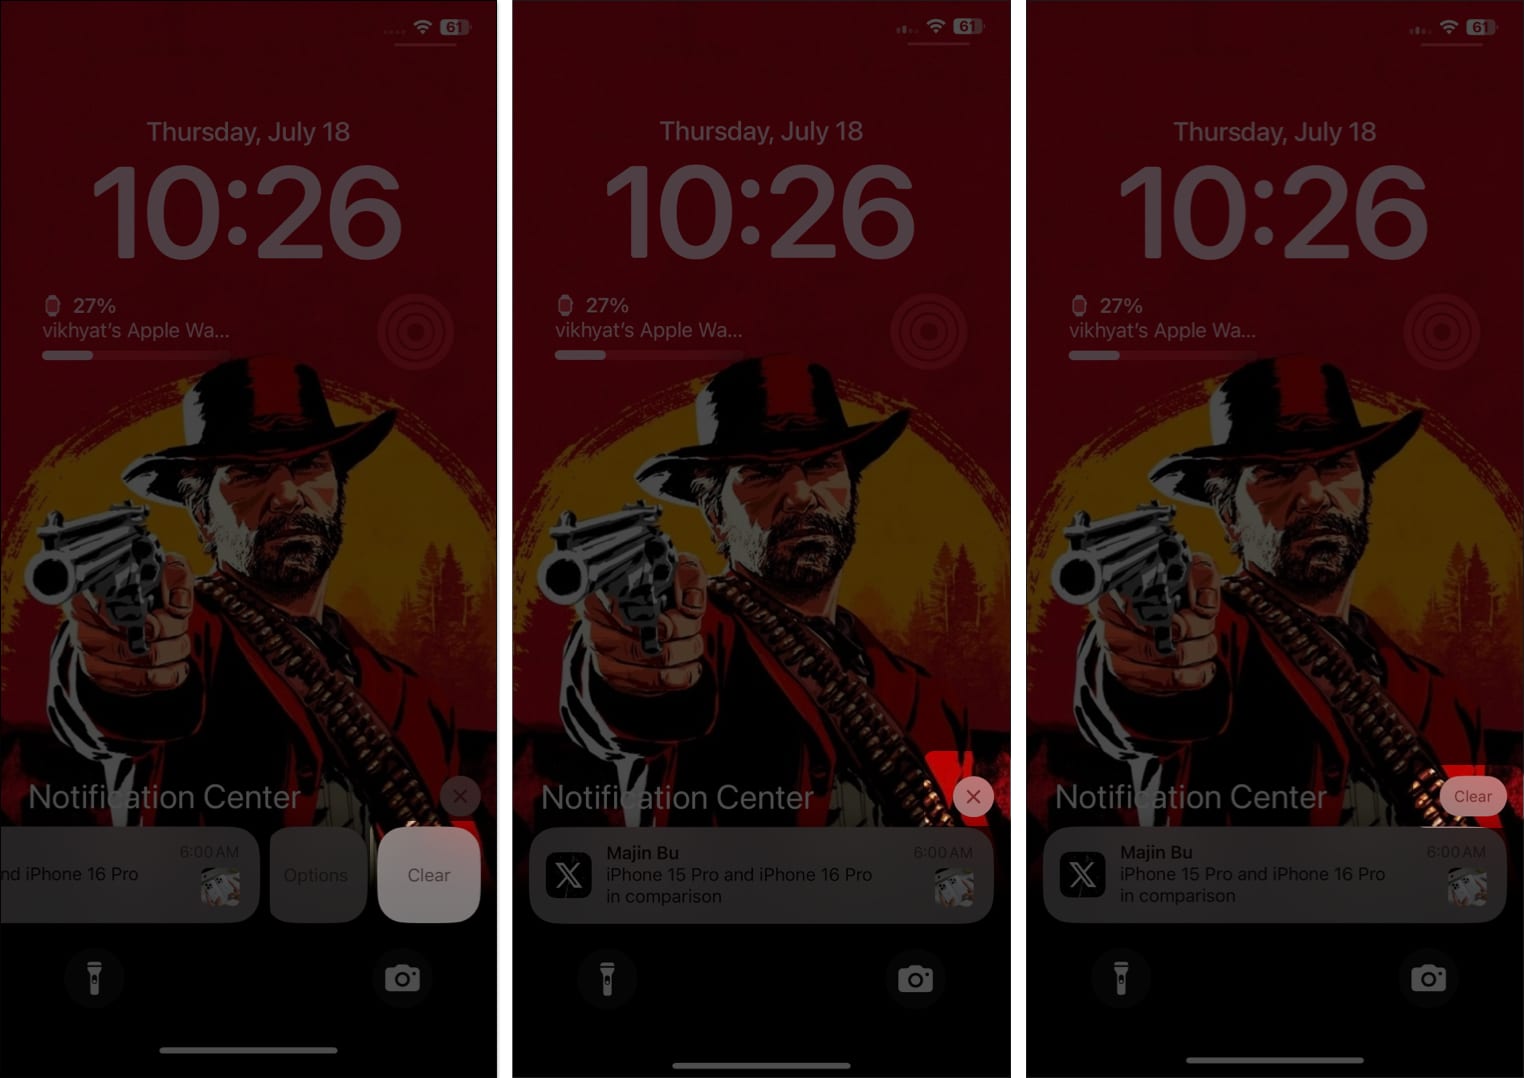
While you can simply swipe up on the notification that appears on the screen when you are using an app on your iPhone to clear the notification, you must head to the Notifications Center to clear all previously received notifications.
- Swipe down from the top left to pull down the Notification Center.
- Here, swipe left on a single notification or a notifications to clear it.
- Alternatively, you can clear all Notifications at once by tap the X button and selecting Clear.

How to change the default notification style on an iPhone or iPad
Depending on your preference, you can choose how the notifications are displayed on your iPhone screen.
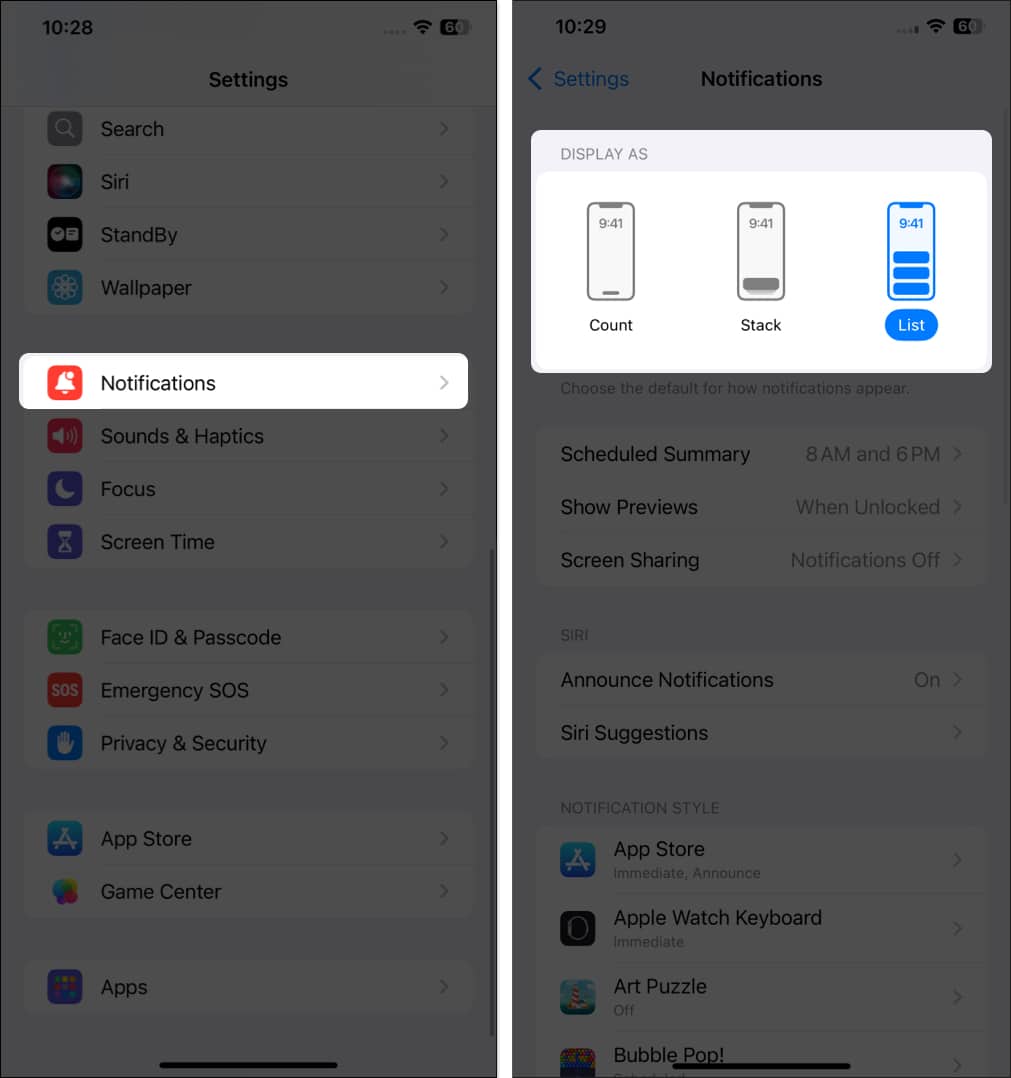
- Open the Settings app.
- Head to Notifications settings.
- Here, choose an appropriate option under the Display As section.
- List: All the notifications will appear in a scrollable list view.
- Stack: Notifications will appear as a stack with the latest notification on top of the old one; you can swipe on the first to reveal the second, and so on.
- Count: Instead of a notification preview, the total number of notification counts will be visible in the Notifications Center.

How to change the notification sound on an iPhone or iPad
If you don’t like the default notification sound, you can choose a different sound like this:
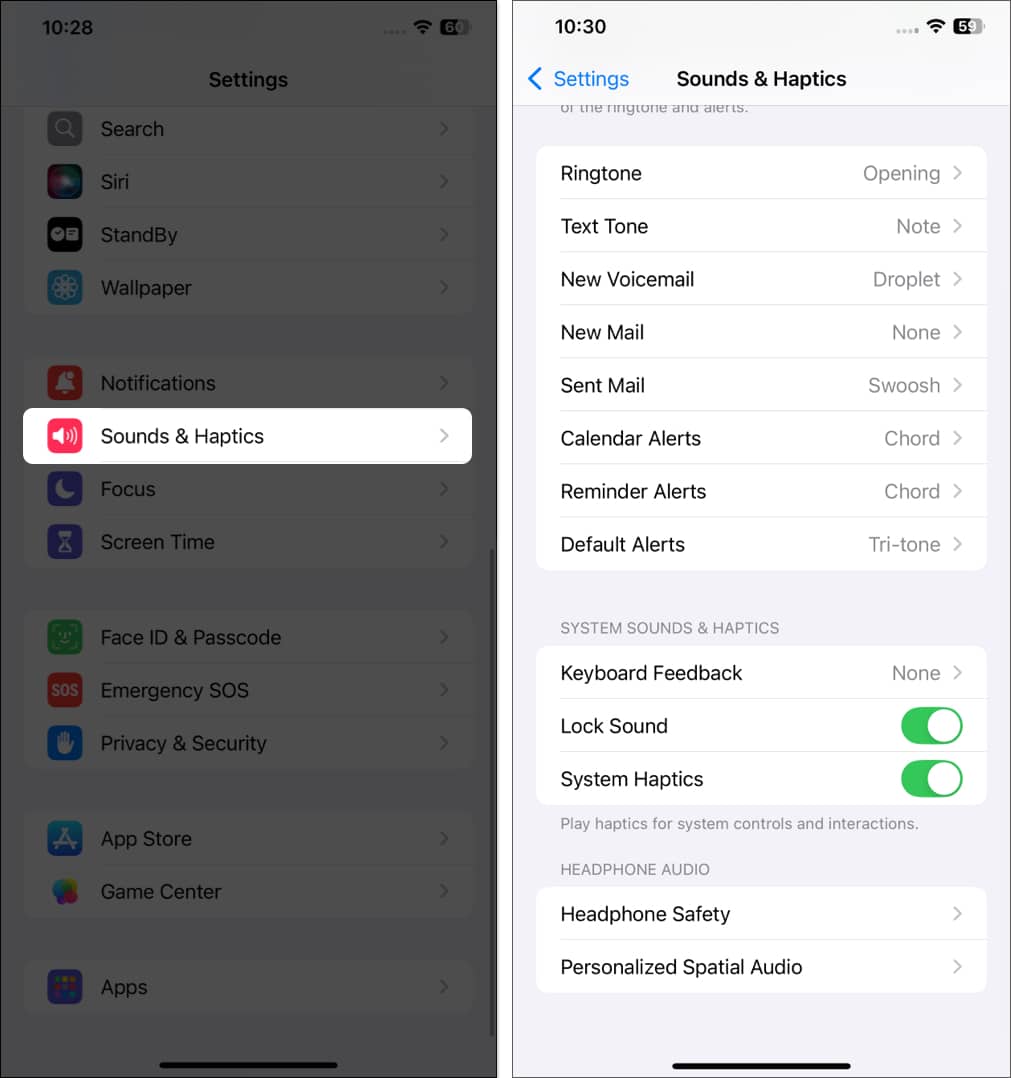
- In the Settings app, select Sounds & Haptics.
- Here, you will see all the system-wide iOS notification sounds you can customize to your preference.
- Next, select Text Tone, New Voicemail, or New Mail, then choose your preferred notification sound.
How to turn on or off notifications on an iPhone or iPad
While you can’t turn off all notifications at once, you can manually turn off notifications for any to all apps installed on your iPhone separately. This is what you need to do:
- Head to the Notifications settings and select an app under the Notification Style section.
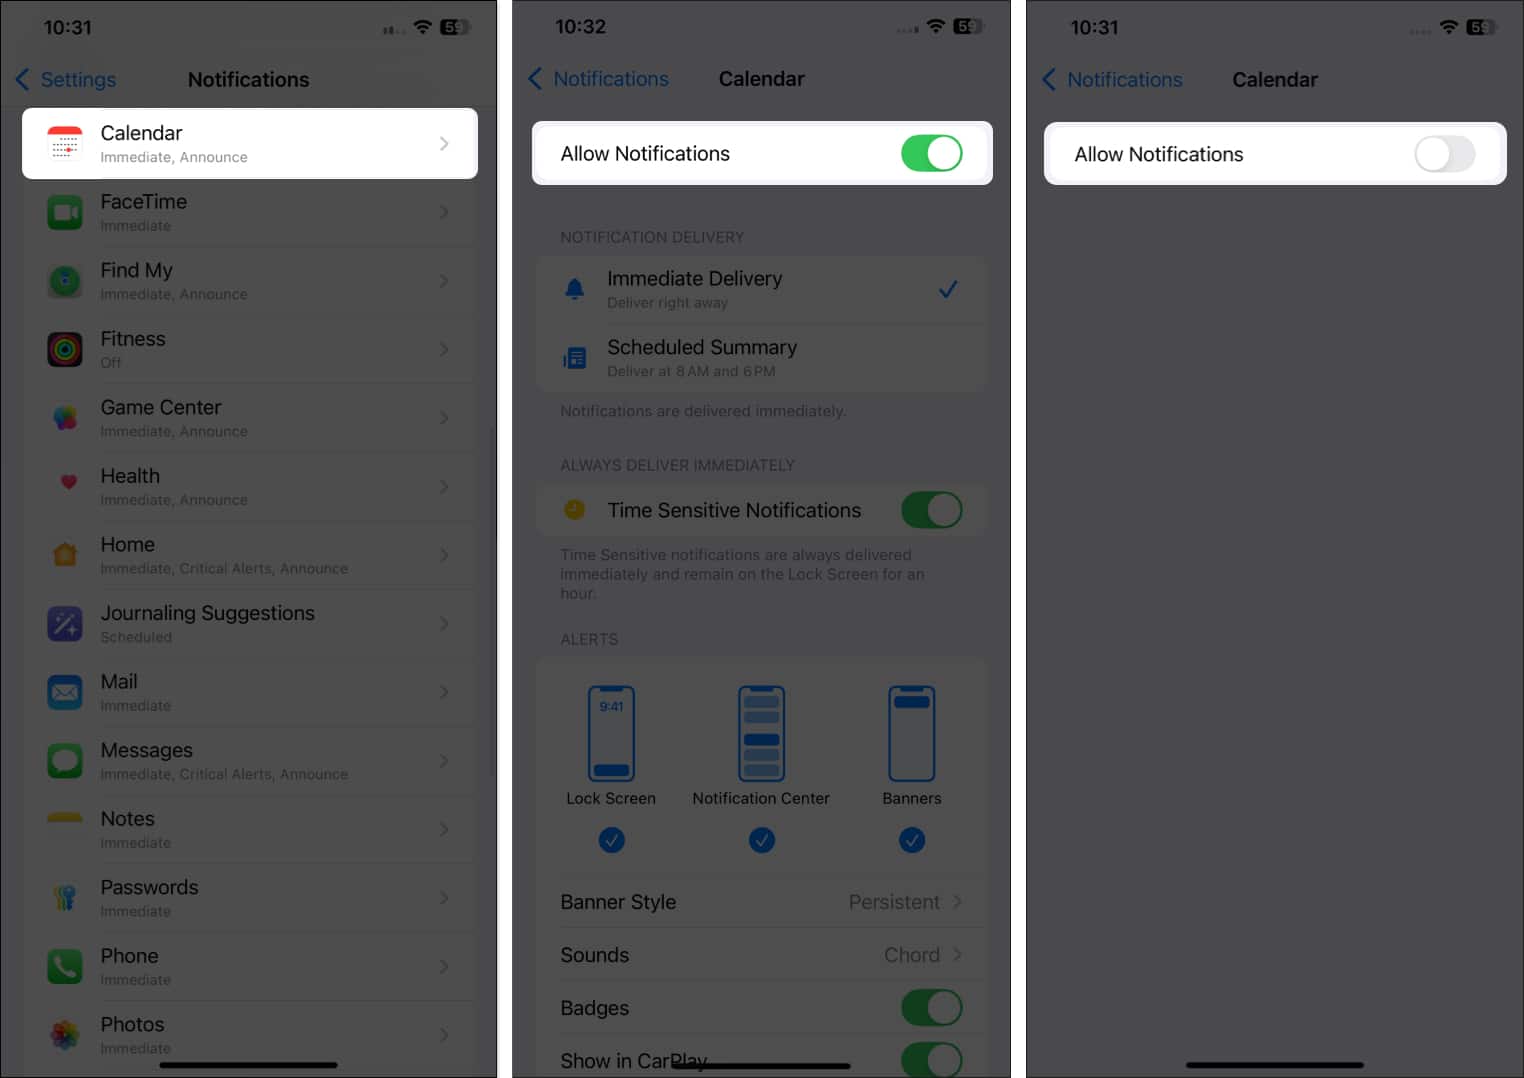
- Here, toggle on Allow Notifications if it isn’t already.
- If you do no want to receive any notification from the particular app, toggle off Allow Notifications if it is on.
How to customize a specific app’s notifications on an iPhone or iPad
If you do not want to turn off notifications for an app altogether, you can customize the notifications for that app per your preference. This is what you need to do:
- In the Notifications settings, select the app whose notifications you want to customize.
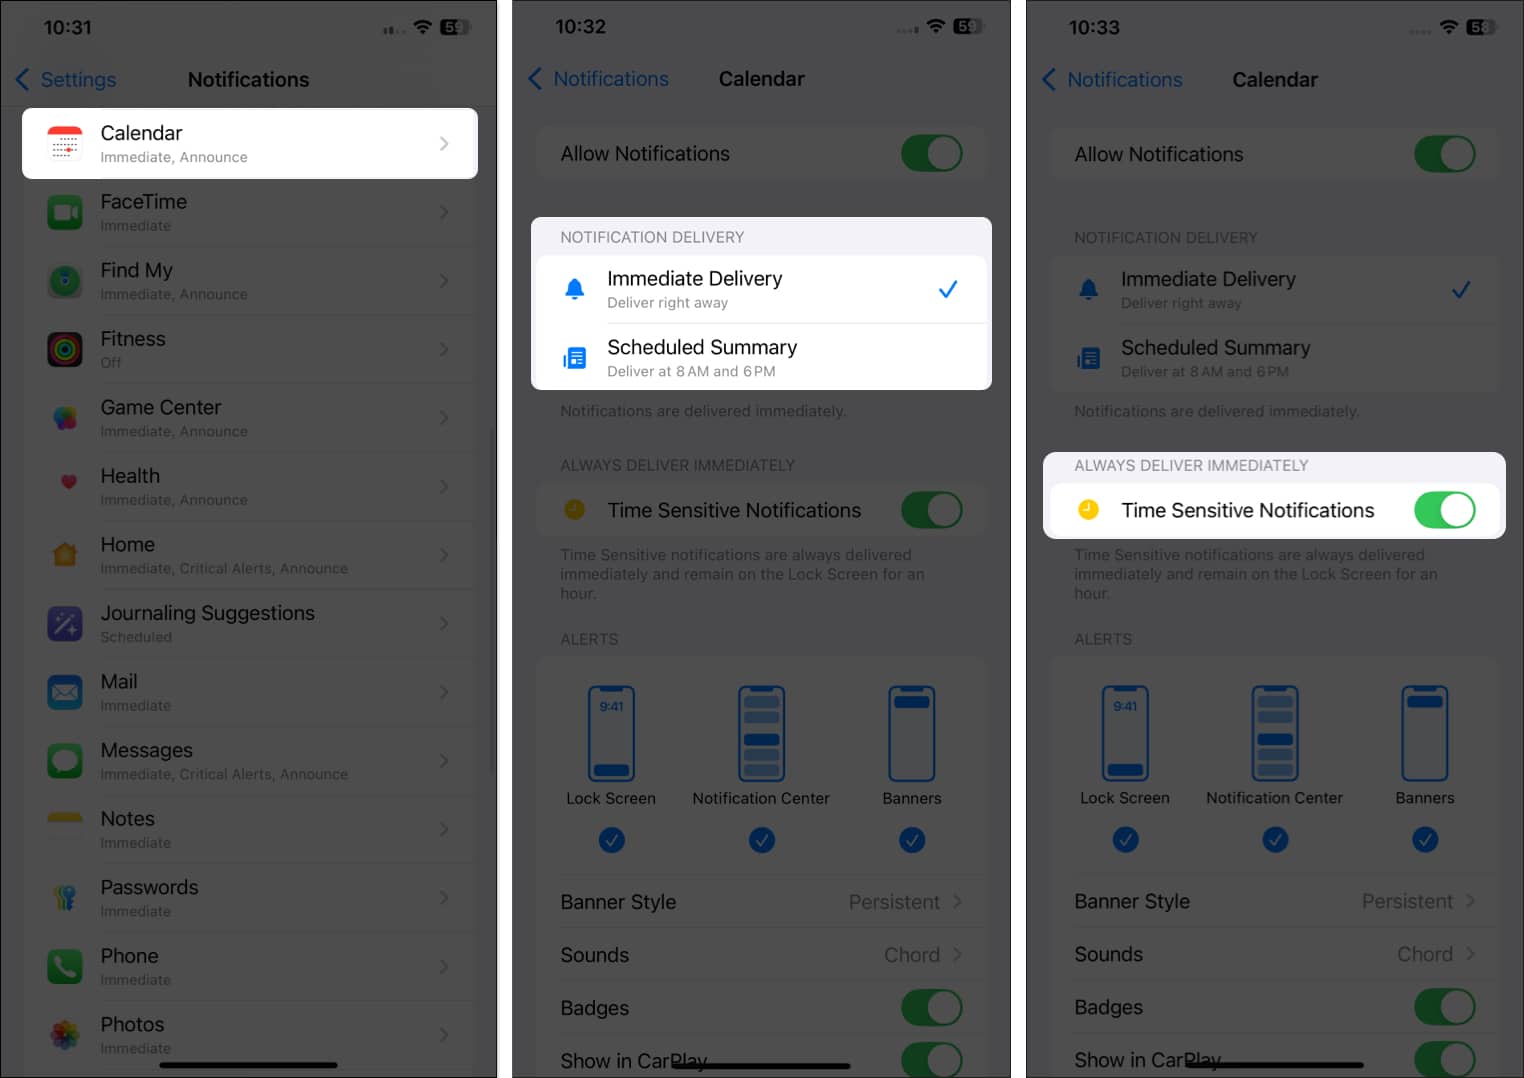
- Now, first, select whether you want the notifications to be delivered Immediately or later in the Scheduled Summary.
- Next, toggle Time Sensitive Notifications if you want the notifications to be immediately delivered and stay on your Lock Screen for an hour. As per Apple, these are the ones that are most important to you.
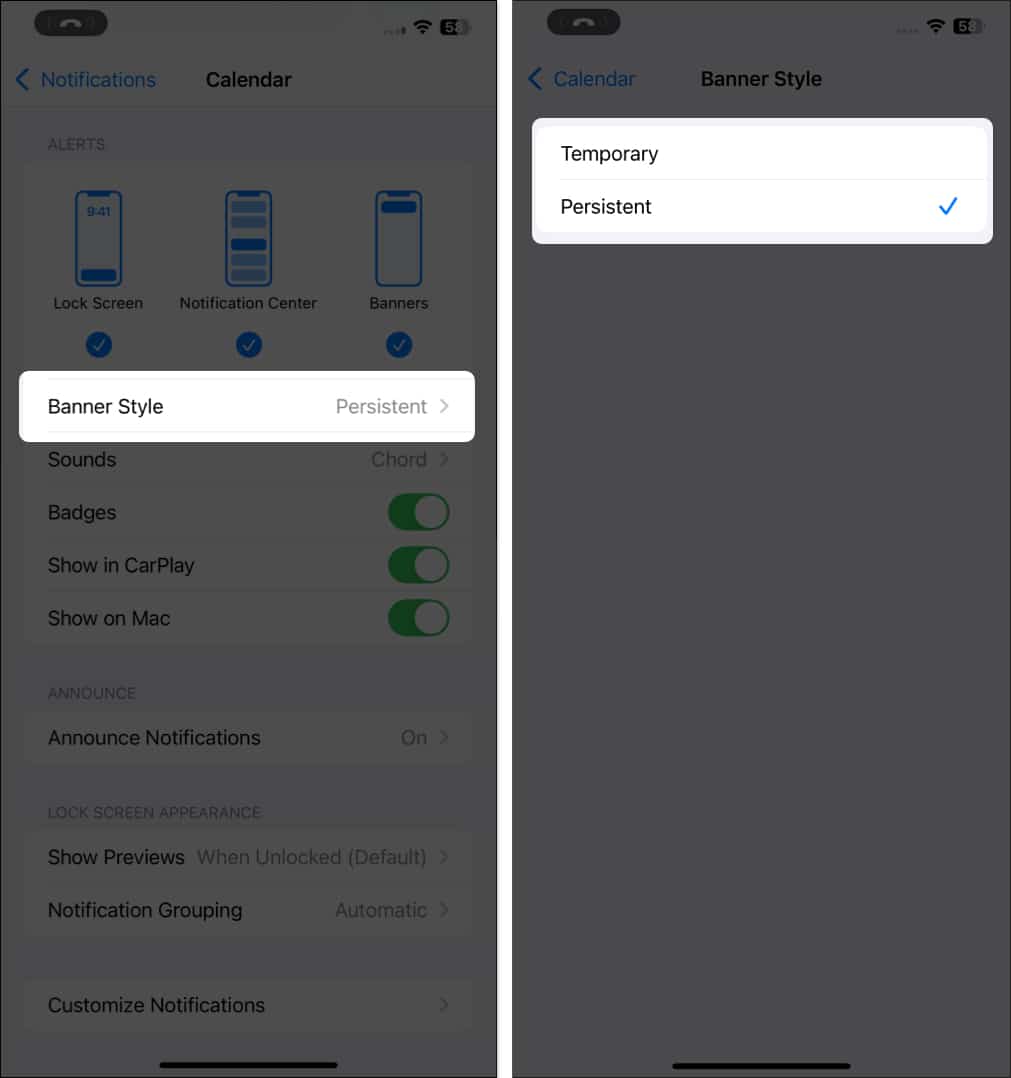
- In the Alerts section, tap on the Banner Style and choose between Temporary and Persistent banner styles on the following screen.
- Then, tap on Sounds to choose a custom notification sound specific to the app.
- After that, toggle on Badges if you want a badge to appear on the app icon when there is a new notification.
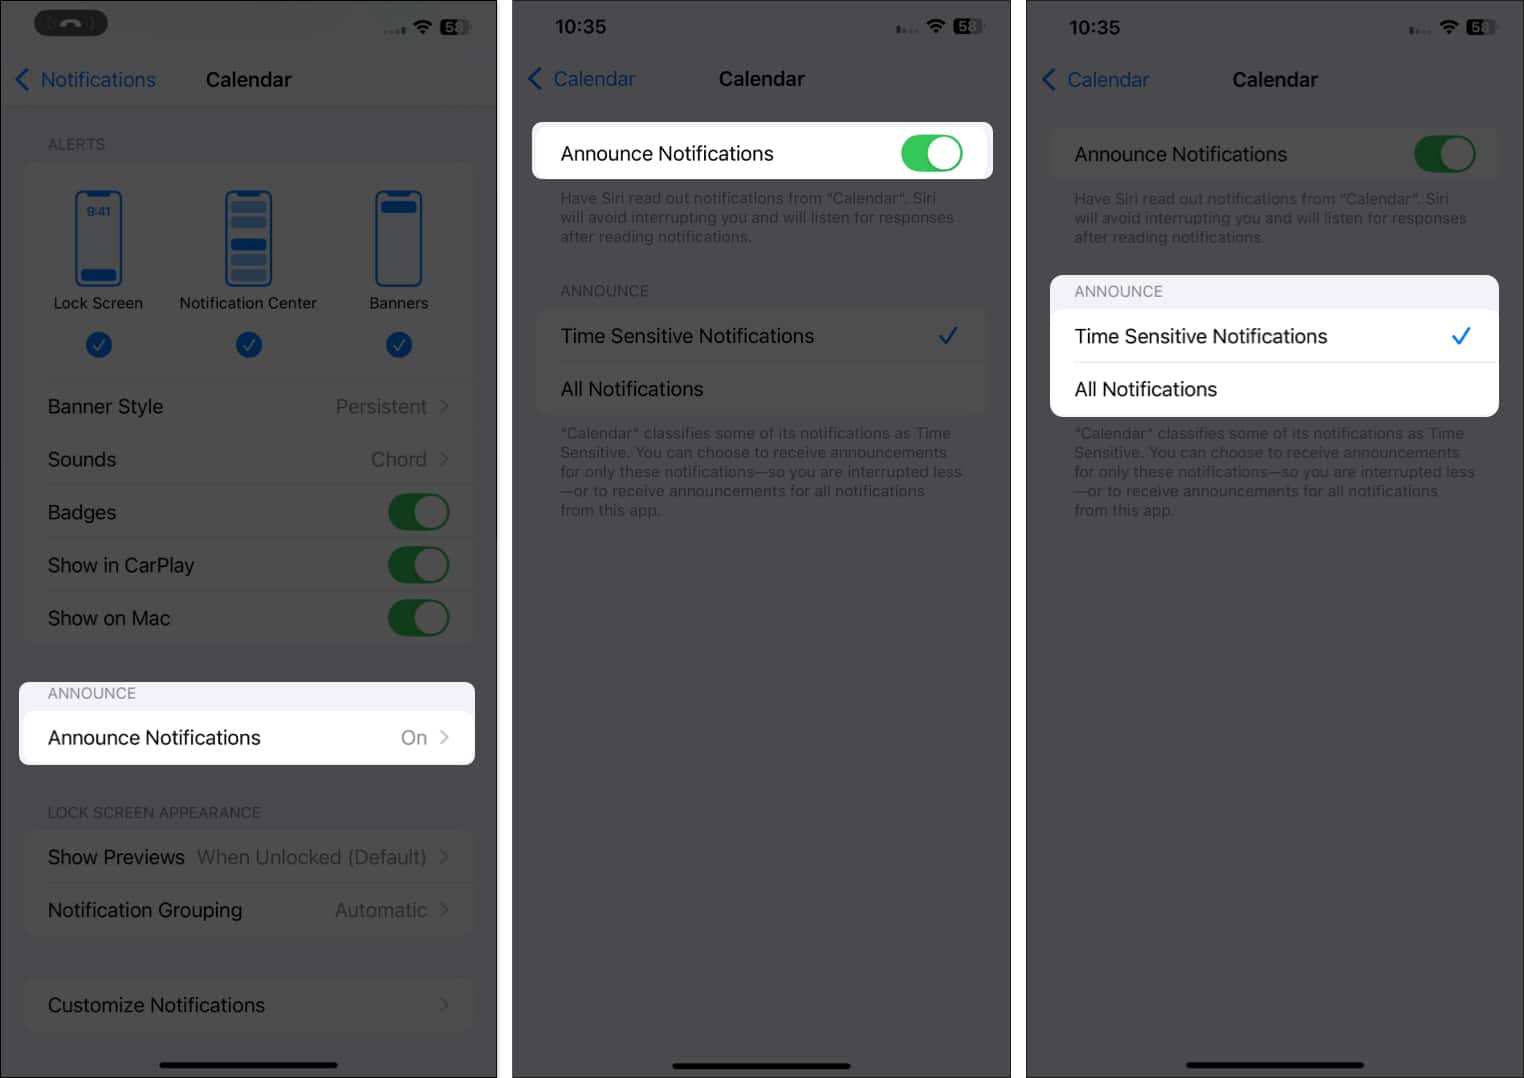
- Next, tap on Announce Notifications, then toggle it on to allow Siri to read out the notification when you are wearing headphones to minimize distraction.
- Select Time Sensitive Notifications if you want Siri to announce only time-sensitive notifications on your iPhone.
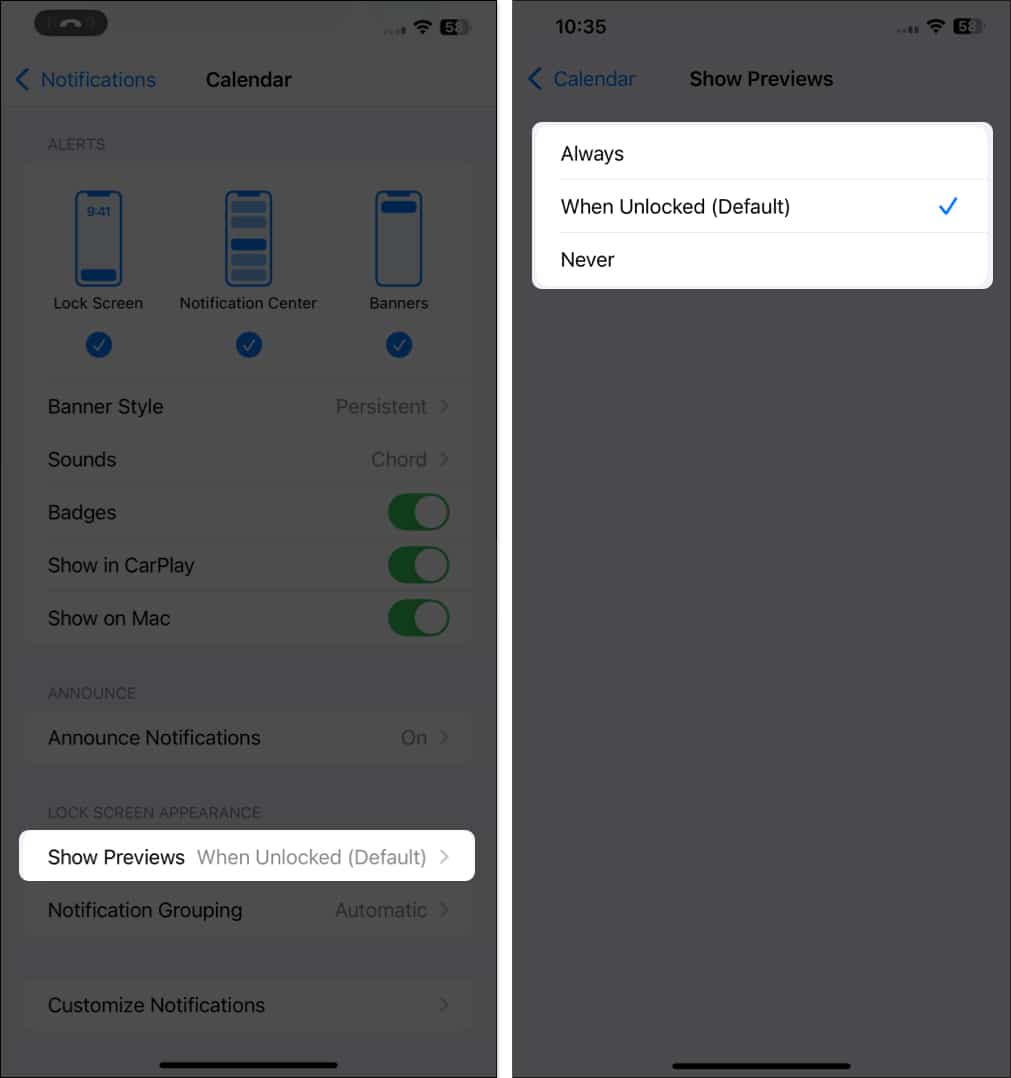
- Now, move to the Lock Screen Appearance section and tap on Show Previews. Select your preferred preview style from the available options.
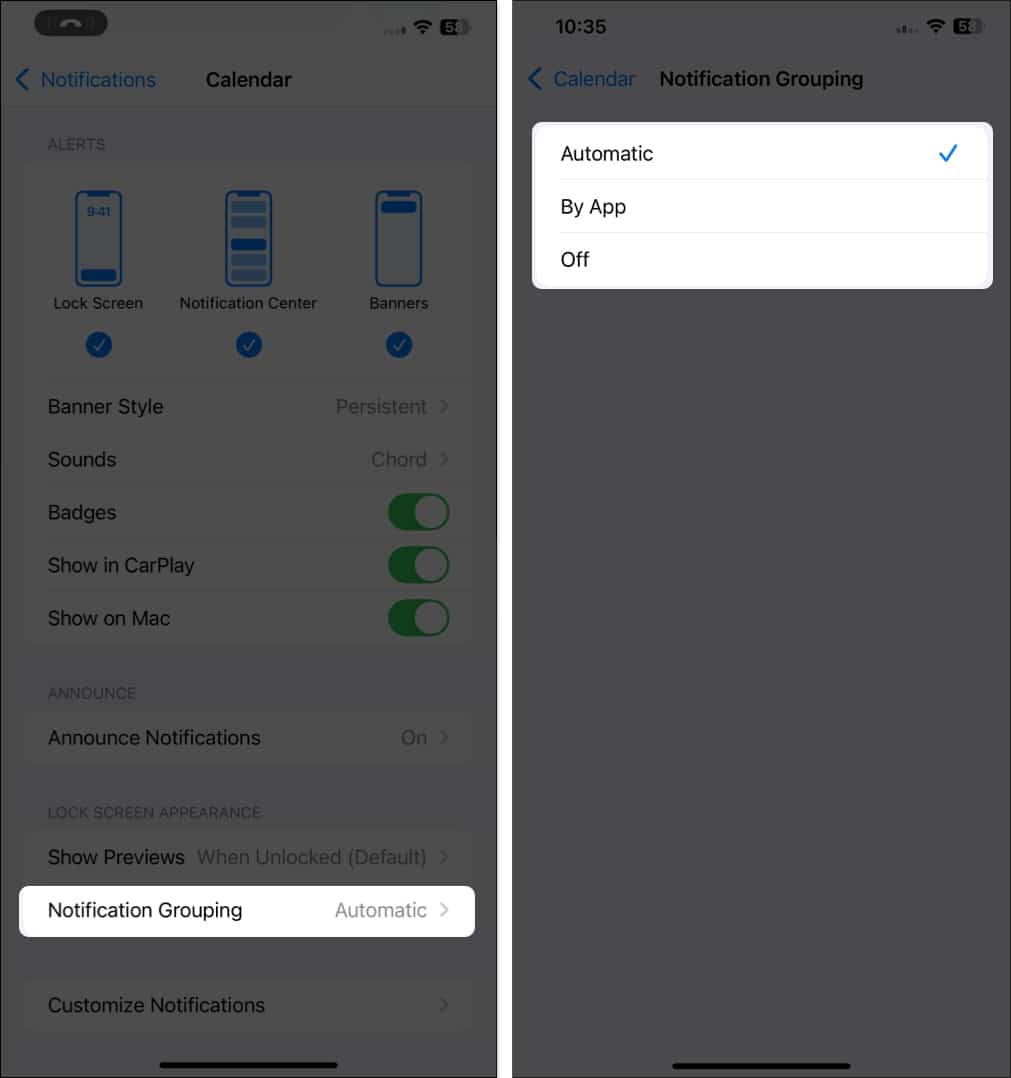
- Finally, tap on Notification Grouping and select one of the available options. This organizes multiple notifications from the same app into a single notification stack.

How to change notification previews on an iPhone or iPad
Notification previews display a small snippet of the notification content. While the previews for most notifications are harmless, a few can contain private information you don’t want to see. Thus, Apple allows you to change the notification previews preferences to suit your requirements.
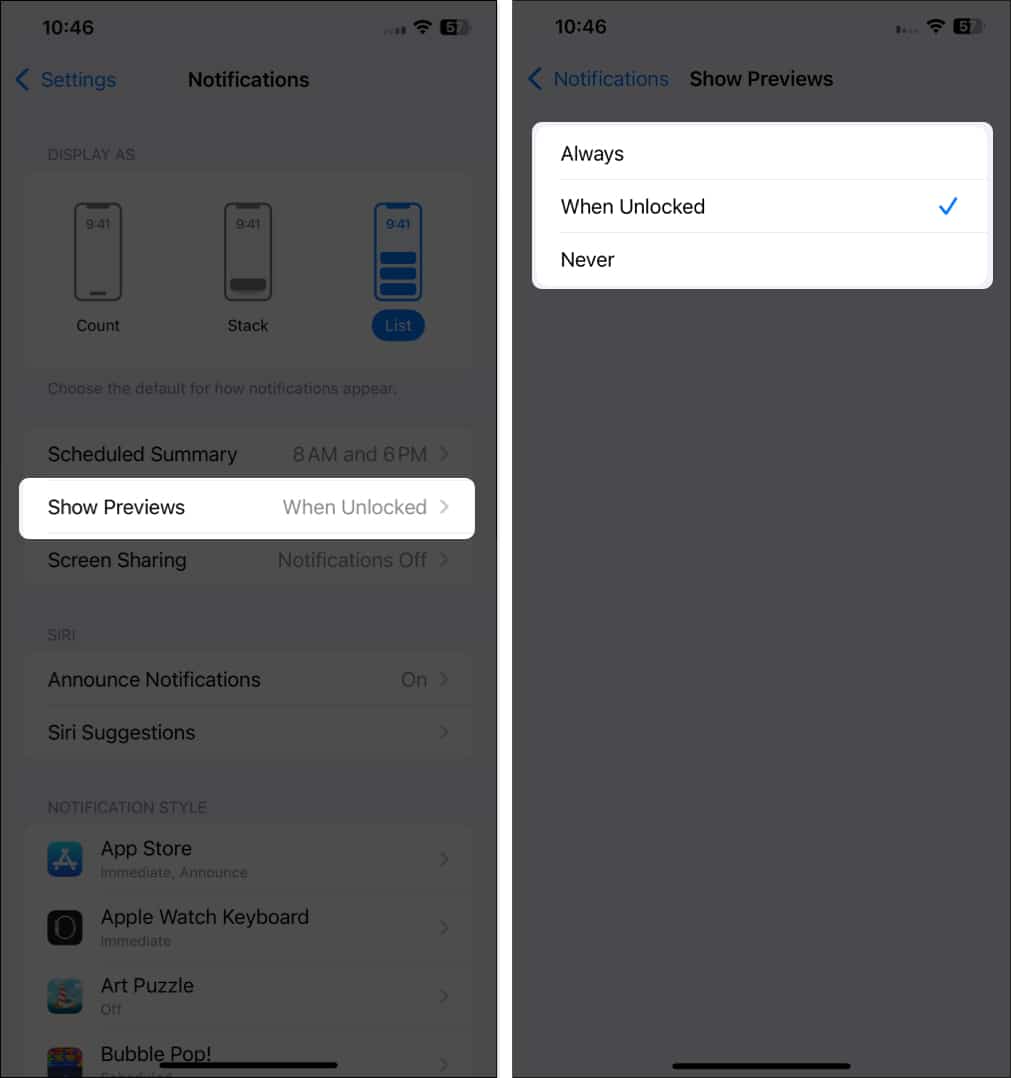
- In the Notifications settings on your iPhone or iPad, tap on Show Previews.
- Here, select one of the three options –
- Always: Notifications preview will appear all the time, no matter if the iPhone is locked or unlocked.
- When Unlocked: Notifications preview will only appear when the iPhone is unlocked.
- Never: Notifications preview will never appear.
How to enable or disable notifications while screen sharing on an iPhone
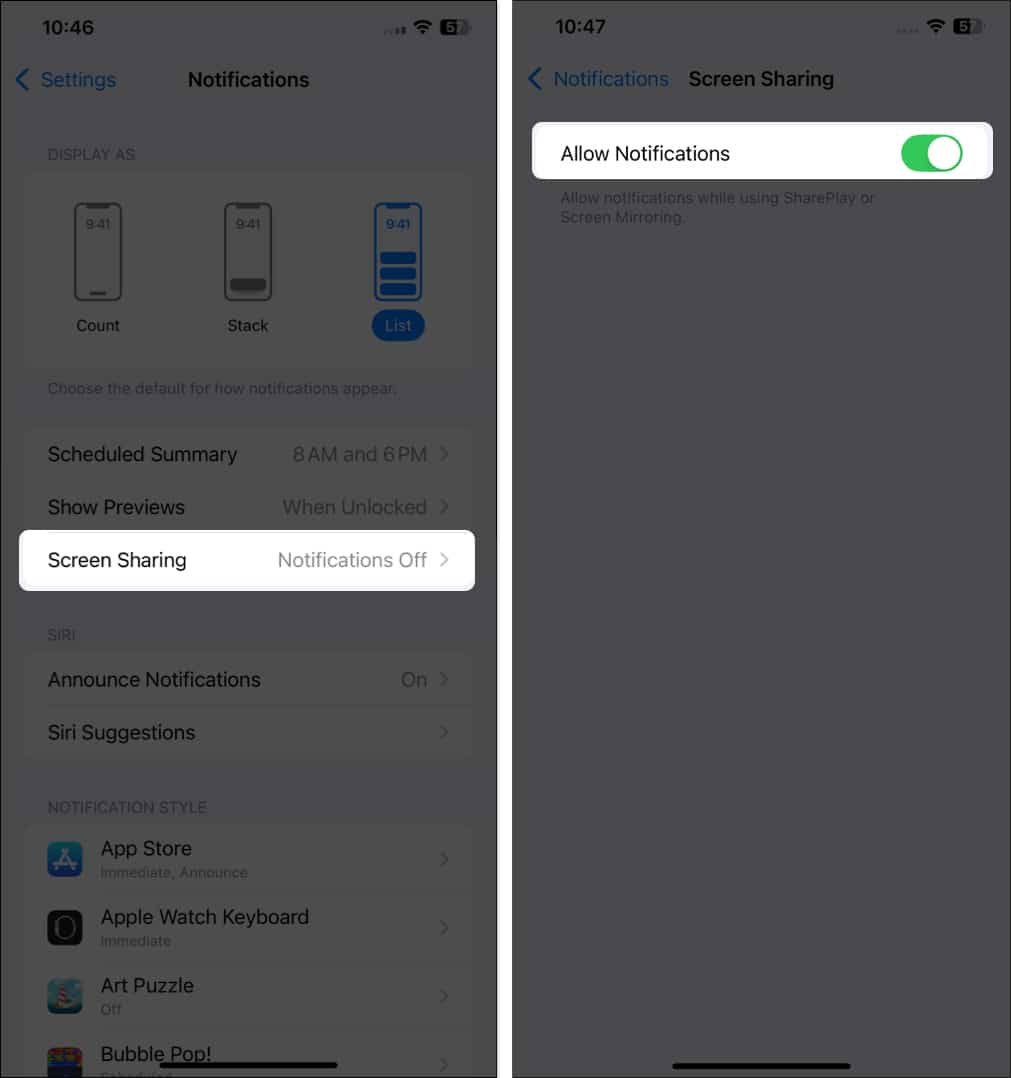
Starting with iOS 15.1, Apple allows you to share your screen during active FaceTime calls. To help you keep your privacy in check, it also gives you the option of whether you want to show your notifications during screen sharing.
- In the Notifications settings, tap on Screen Sharing.
- Here, toggle on Allow Sharing if you want others to be able to see your notifications when you share your screen with them.
How to set a Scheduled Summary of notifications on an iPhone or iPad
The Scheduled Summary feature allows you to set your iPhone to deliver a notification summary (non-urgent notifications) from the selected apps at a pre-decided time. Once you add an app to the Scheduled Summary notification, you won’t receive any notifications from that app the whole day, but you will receive them in the notification summary.
While Apple has set 8 AM as the schedule for the first summary by default, you can create any number of schedules you want. Also, your iPhone asks you if you wish to add the app’s notifications to the scheduled summary during the installation process; you can also add the app later.
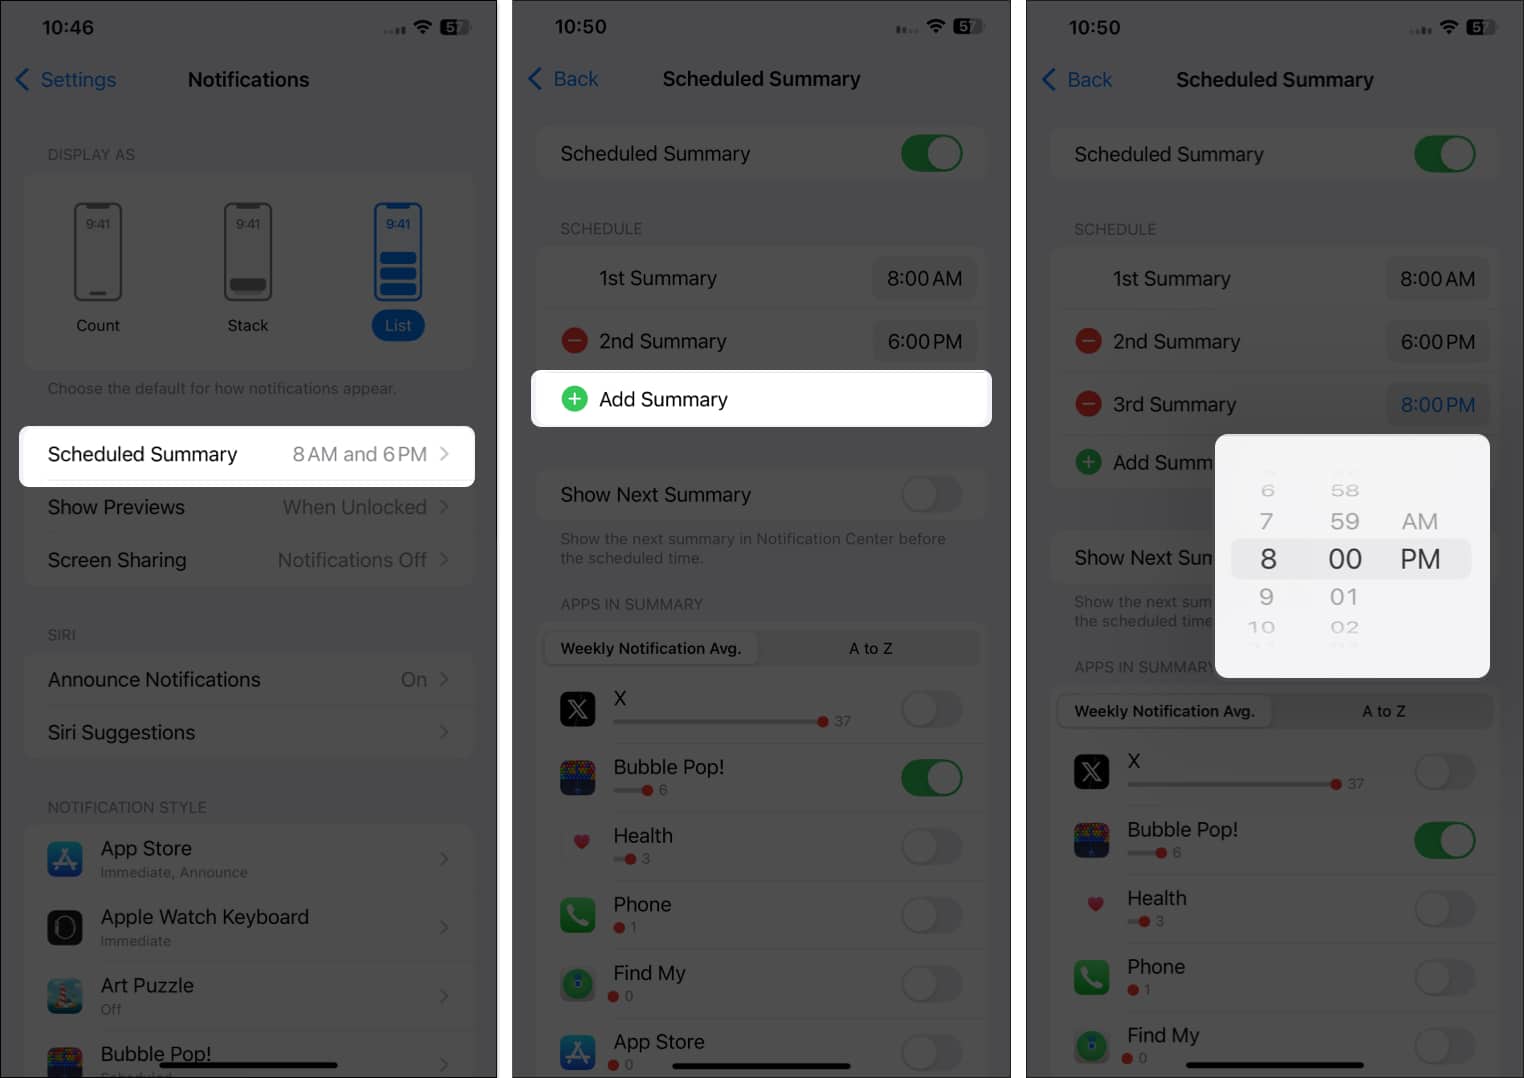
- Open Settings on your iPhone or iPad.
- Go to Notifications and tap on Scheduled Summary.
- Now, tap the Add Summary button to create a new schedule. This sets the times you want the summary to be delivered.
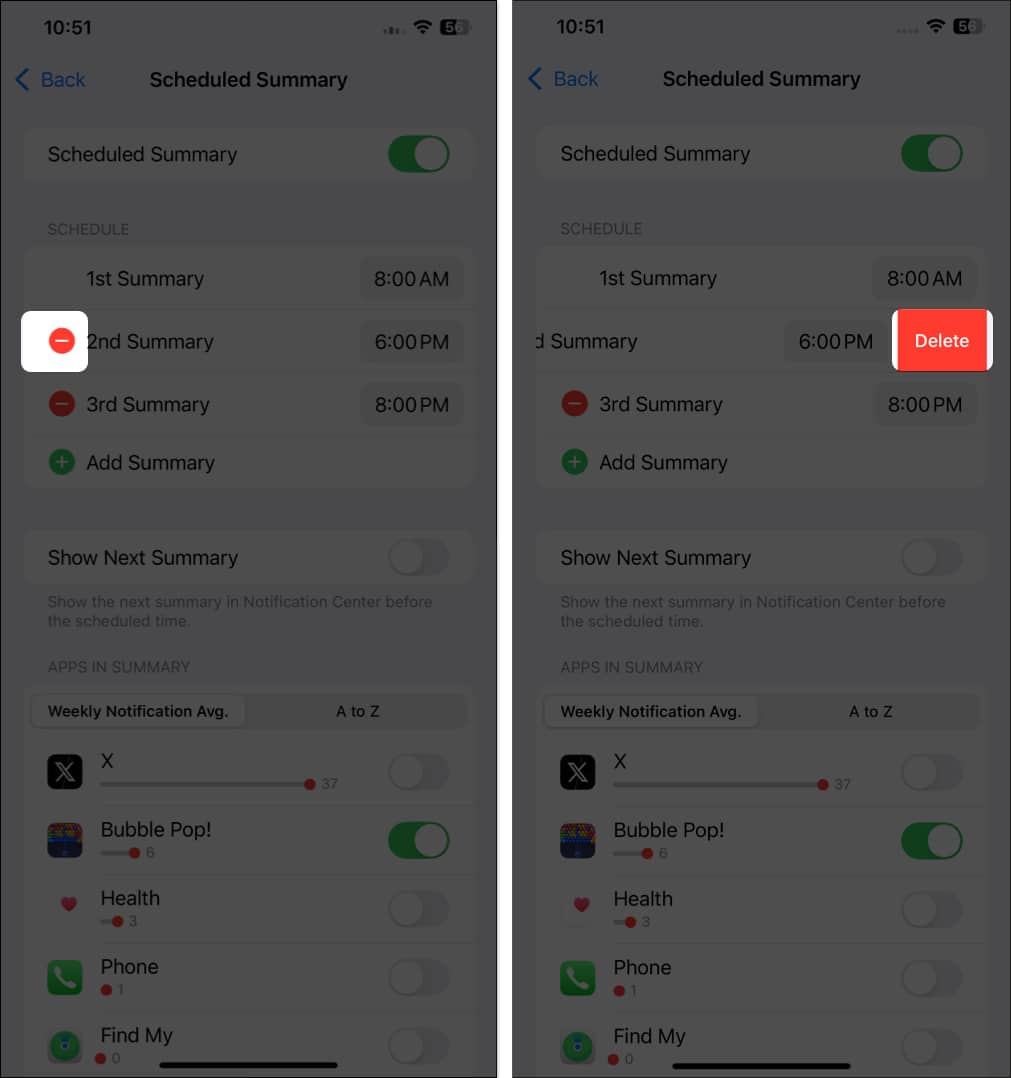
- Tap the – button before the schedule, then tap the Delete button that appears to delete a schedule.
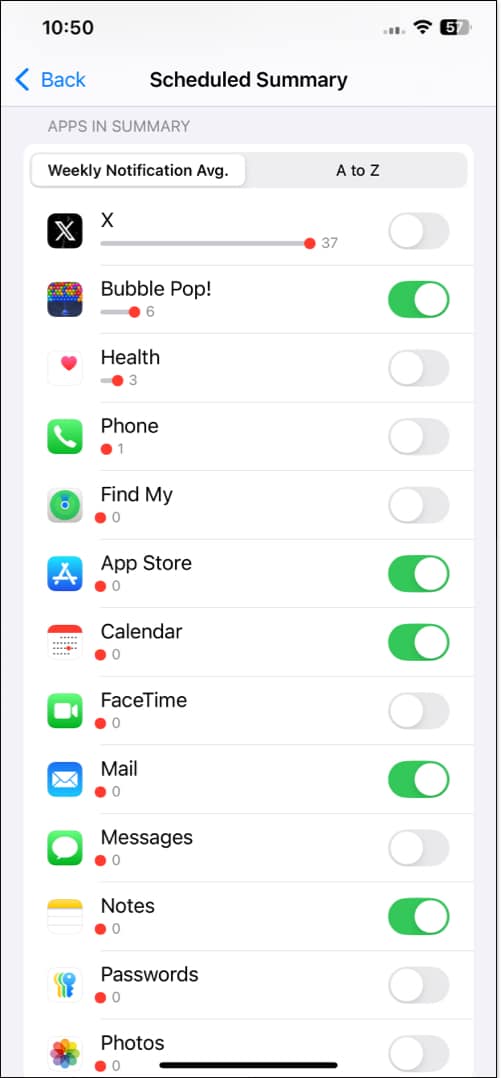
- Now, scroll down to the list of apps and toggle on the ones you want to add to the Scheduled Summary.

How to silence notifications on an iPhone or iPad
You may think that simply putting your iPhone on Silent mode silences the notifications. Well, in a way, it does so. However, the notification badge or preview will still appear and can distract you. So, instead of Silent mode, activating the Do Not Disturb mode within the Focus settings is much better. This mode silences all the notifications until you turn the Focus off.
Follow these steps to activate Do Not Mode on your iPhone or iPad:
- Swipe down from the top right to pull down the Control Center.
- Here, long press on the Focus tile.
- Next, tap the Do Not Disturb button.

You can either set a schedule for the Do Not Disturb mode to turn off automatically or turn the mode off manually.
How to turn government alerts on or off on an iPhone or iPad
Your government often sends emergency, public safety, or amber alerts on your iPhone to alert you in case of any adversity. While these alerts are for your own safety, the feature isn’t enabled by default. However, you can turn on or off these anytime if you want like this:
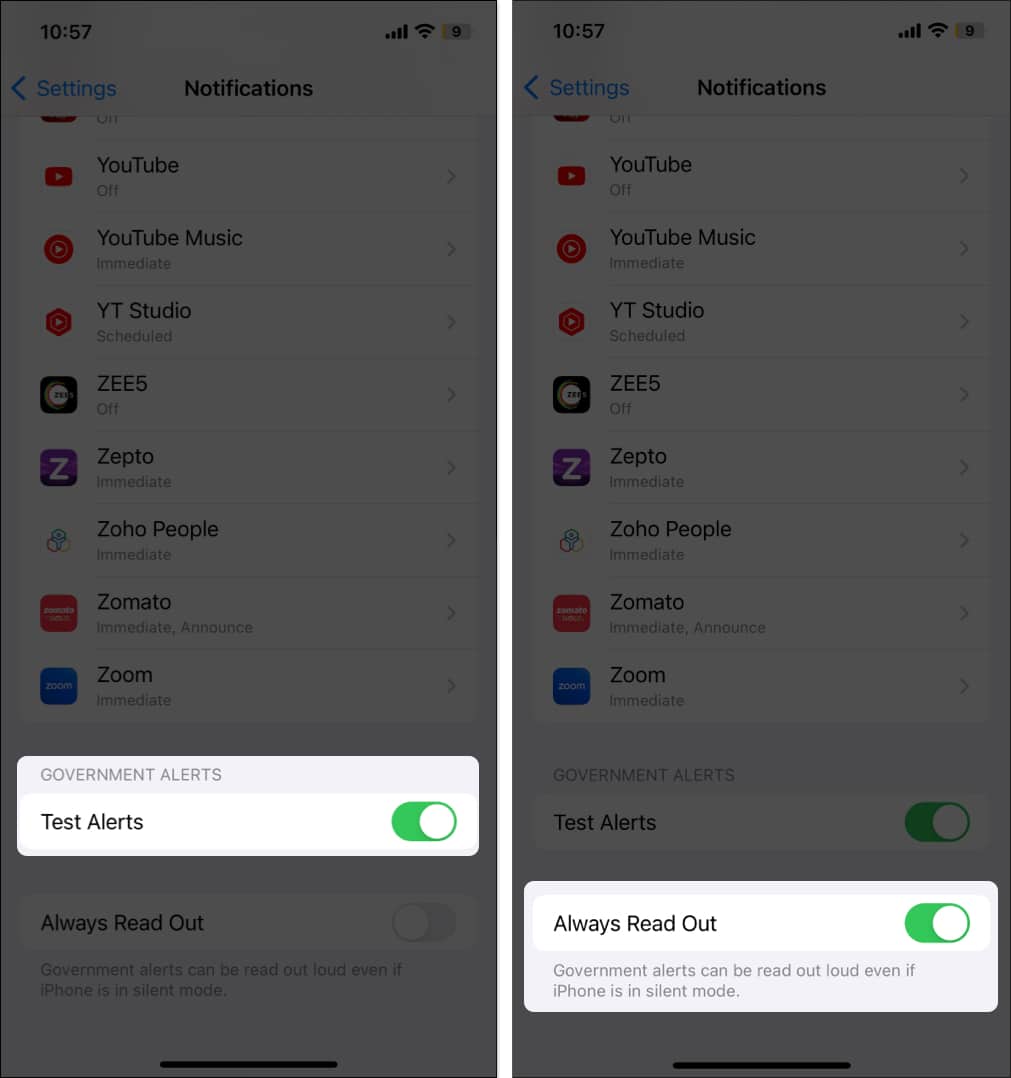
- Head to Notifications settings and scroll to the bottom.
- Here, toggle Test Alerts on or off under the Government Alerts section.
- Next, toggle Always Read Out on or off, depending on whether you want the Governments Alerts to be read out loud even when your iPhone is in Silent mode.
Notifications game sorted…
And that’s it; this is how you can manage and control the notifications on your iPhone at your will and boost your productivity.
Use the Focus modes, Scheduled Summary, and other features to create a less intrusive notification experience. Experiment with each setting we have detailed in this guide to find what works best for you and stay on top of the notifications game.
If you still have doubts or if there is a tip you want us to add to this guide, let us know in the comments.
You can head to Notifications settings and turn off notifications from the apps from which you receive unwanted notifications.
You can customize any existing Focus or create a custom one to allow only the selected app to send you notifications while the Focus mode is active.
Read more on iPhone notifications:

Leave a Reply