- HEIC is Apple’s default photo format since iOS 11, giving smaller file sizes without losing quality and supporting features like transparency and Live Photos.
- Converting HEIC to JPG improves compatibility, making photos easier to share, edit, print, and store across devices and apps that don’t support HEIC.
- To check if a photo is HEIC on iPhone, open the image in Photos, view its details, and look for HEIC or HEIF as the file type.
- On iPhone or iPad, you can convert HEIC to JPG by moving photos to the Files app or adjusting camera settings to save in JPEG format.
- Mac and Windows both allow HEIC to JPG conversion, using Quick Actions in Finder on Mac or saving/exporting from supported apps on Windows for universal access.
Apple switched to the HEIC file format on iPhones and iPads, allowing for high-quality photos with smaller file sizes than typical JPG images. However, not all devices or platforms support the HEIC format, leading to compatibility issues. Fortunately, converting HEIC photos to JPG is pretty straightforward.
In this detailed guide, I’ll explain the HEIC format and how to convert it to JPG on your iPhone, Mac, and PC.
Table of Contents
What is the HEIC format?
HEIC stands for High Efficiency Image Container, a file format created by the Moving Picture Experts Group (MPEG). With iOS 11, Apple introduced the HEIC as the default file format for clicking and storing images and image sequences on iPhones and iPads. You will also encounter HEIF (High Efficiency Image File) format media. Apple uses it to store media with time stamps, audio, animations, or video.
Although this new file format has benefits, JPG or JPEG remains the universal standard. So, if you were wondering why an iPhone takes photos in HEIC or HEIF format, here’s all you need to know.
Why does the iPhone take photos in HEIC?
Apple adopted HEIC for iPhone photos because it offers several advantages over the older JPEG format:
- Smaller file size: HEIC uses the High Efficiency Video Coding (HEVC) codec. This codec can compress images to nearly half the size of a JPEG or ProRAW without losing quality. Thus, users can store more images in their limited free storage space.
- Better image quality: Despite their reduced file sizes, HEIC images have more depth and coloration details than other formats, especially when dealing with images with gradients or under poor lighting conditions. This is because HEIC supports 16-bit color instead of the 8-bit color used in JPEG.
- Support for advanced features: HEIC supports features like transparency, Live Photos, and vast image metadata. Professionals prefer HEIC in lengthy post-processing for its non-destructive editing capabilities.
Apple observed that most users who enjoy taking pictures end up with no storage space. That’s why it made the iPhone take photos in HEIC by default. The other benefits give it an edge over JPEG.
Now, the question arrives: if this format is so beneficial, why do you need to change a HEIF or HEIC image to JPEG? Let’s find out!
Why convert a HEIC file to a JPG?
Although the HEIC format provides images of great quality but with smaller sizes, it isn’t always the most practical choice for everyday use. Here are reasons why someone would prefer changing their HEIC files to JPG.
1. Universality and compatibility
HEIC is a relatively new format; only Apple devices have fully embraced it. Many websites, online services, and even older devices or software don’t recognize or support HEIC files.
You may encounter compatibility issues if you upload a photo to a website or work on a project using older software. Transforming HEIC photos into JPG guarantees your images are accessible everywhere.
2. Ease of sharing
If you’re sending images taken from the iPhone to an Android or an old computer, they might not be able to open it due to the HEIC format. By changing your HEIF files to JPEG, you can ensure that your photos are easily shareable and viewable.
3. Archiving and long-term storage
You must want to preserve your photos in a format that will stand the test of time. JPG is a tried-and-true format that has been around for decades and is supported by virtually every device and software.
4. Printing
If you’ve ever tried to print a photo and ended up with an unusual result, then you know that using a proper file format is essential. HEIC files can be problematic for some printing services and printers, resulting in bad printing or even the refusal to process the image.
On the other hand, JPG is widely recognized and supported by all printers and print services. So, to print a HEIF or HEIC image hassle-free, you must convert it to JPEG.
5. Image editing software
Some advanced image editing software supports HEIC files, but others are still trying to catch up. You may find that your favorite editing software requires additional plugins to handle HEIC files or, worse, doesn’t support them at all. Certain software can only handle 8-bit HEIC; however, the iPhone takes photos in 16-bit HEIC.
Converting it into a JPG can enhance and simplify the whole editing process. JPEG is known and supported by all editing programs.
In summary, HEIC saves memory space and maintains good quality. However, when converted into JPEG, it offers more convenience and flexibility.
How to check if a file is HEIC?
Before you change a HEIF or HEIC image to JPEG, you must ensure it is in that format. To find out, follow these steps:
- Open the Photos app on your iPhone or iPad
- Select the image you want to check.
- Tap the ‘i’ icon at the bottom (or swipe up) to view the image details.
- Look for the file type beside your device name. If it says HEIC or HEIF, then the photo is in the High-Efficiency format.
Now that you understand why HEIC or HEIF is better and how to identify such images let’s explore the steps to convert a HEIC photo to JPEG on your iPhone.
How to convert HEIC to JPG on iPhone or iPad
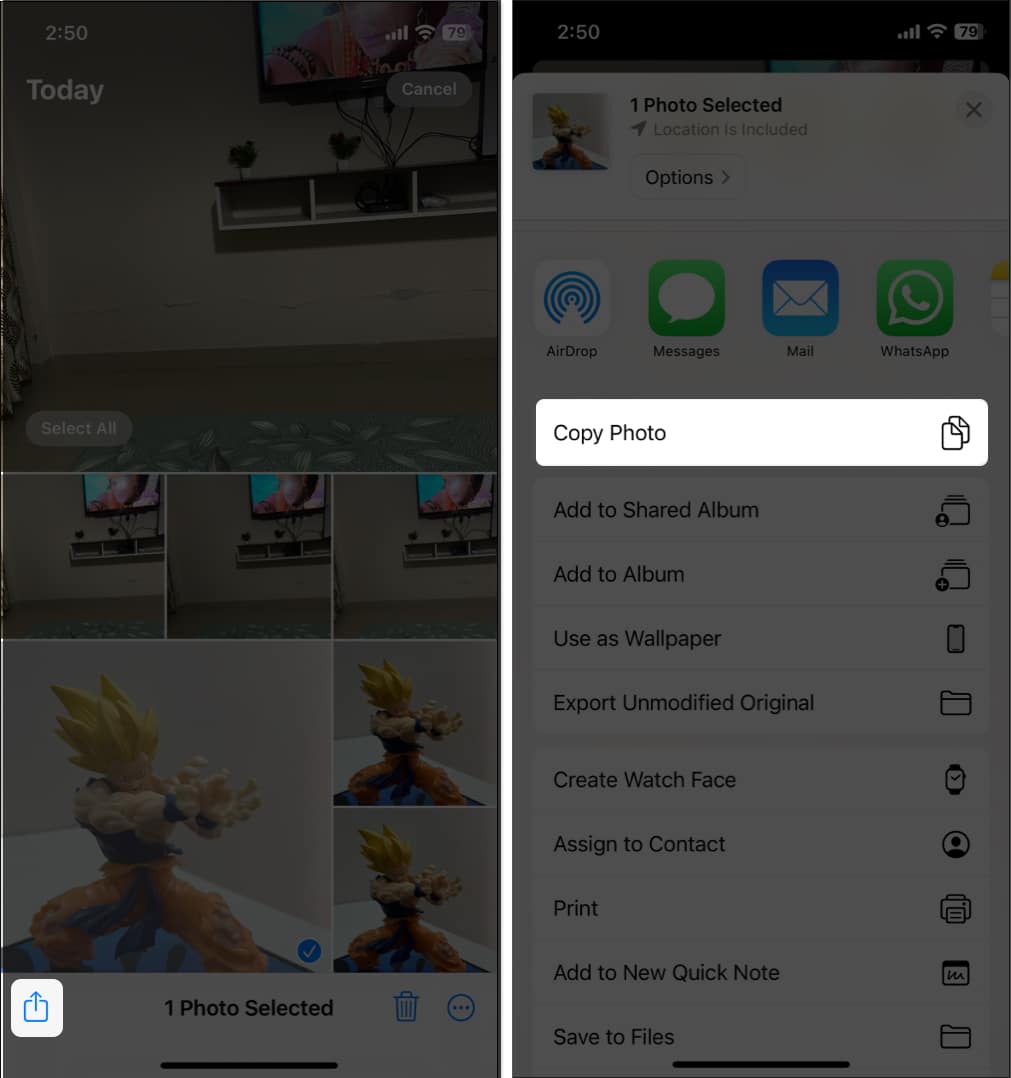
- Open the Photos app → Go to Library → Select the photos you want to convert.
- Next, tap the Share button at the bottom left → Choose Copy Photo(s) from the pop-up menu.
- Then, close the Photos app and launch the Files app.
- Here, create a New Folder or head to an existing folder.
- Long press any empty space in the folder until a pop-up menu appears.
- Finally, tap Paste in the pop-up menu.
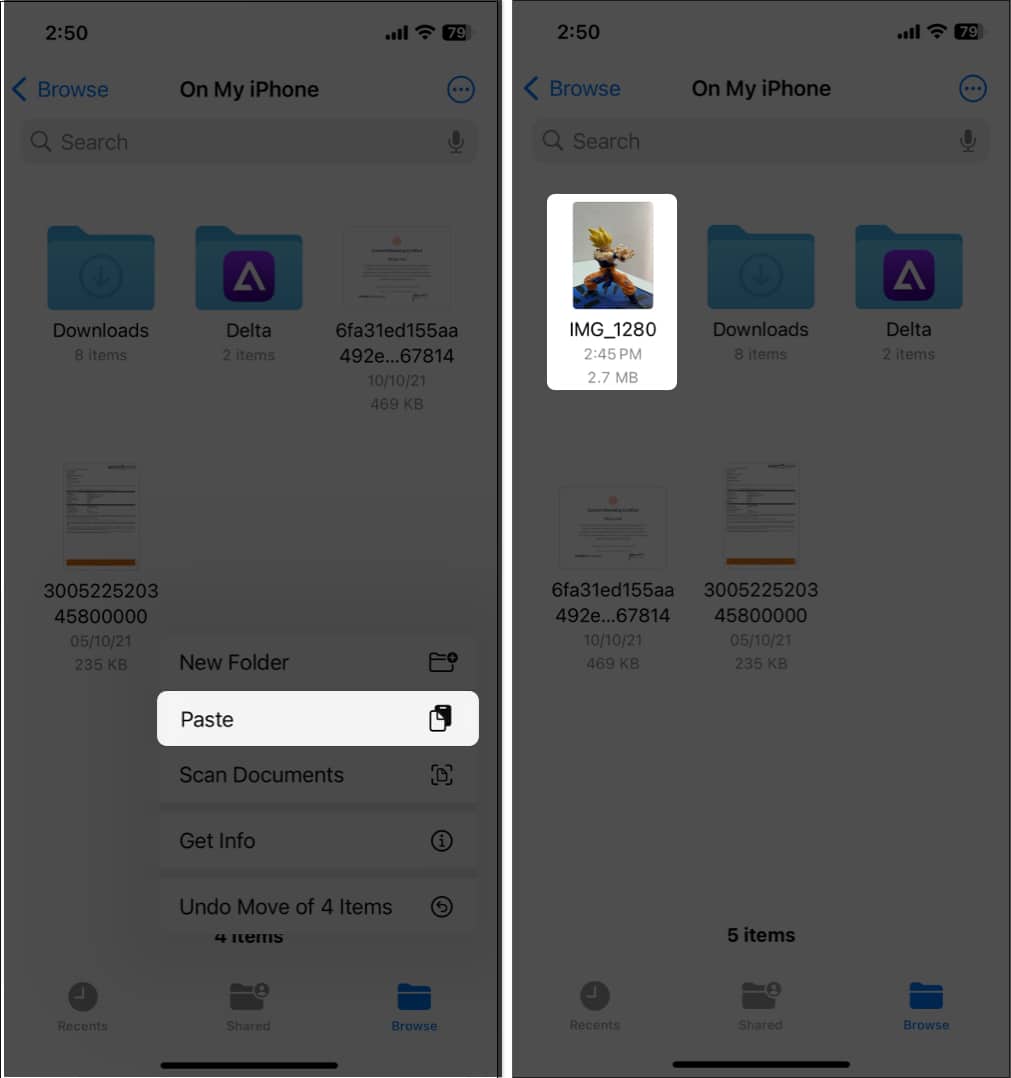


As soon as you hit Paste, all the HEIC photos you copied will automatically convert to JPEG and be available in the Files app.
While converting HEIC photos to JPEG on iPhone is fairly easy, selecting and copy-pasting each photo can sometimes get overwhelming. In that case, you can head to the Camera app settings and change the format in which the Camera app captures the shots.
How to take JPEG photos on your iPhone instead of HEIC
- Open the Settings app → Head to Camera settings.
- Next, locate and tap on Formats.
- Select Most Compatible from the available options.
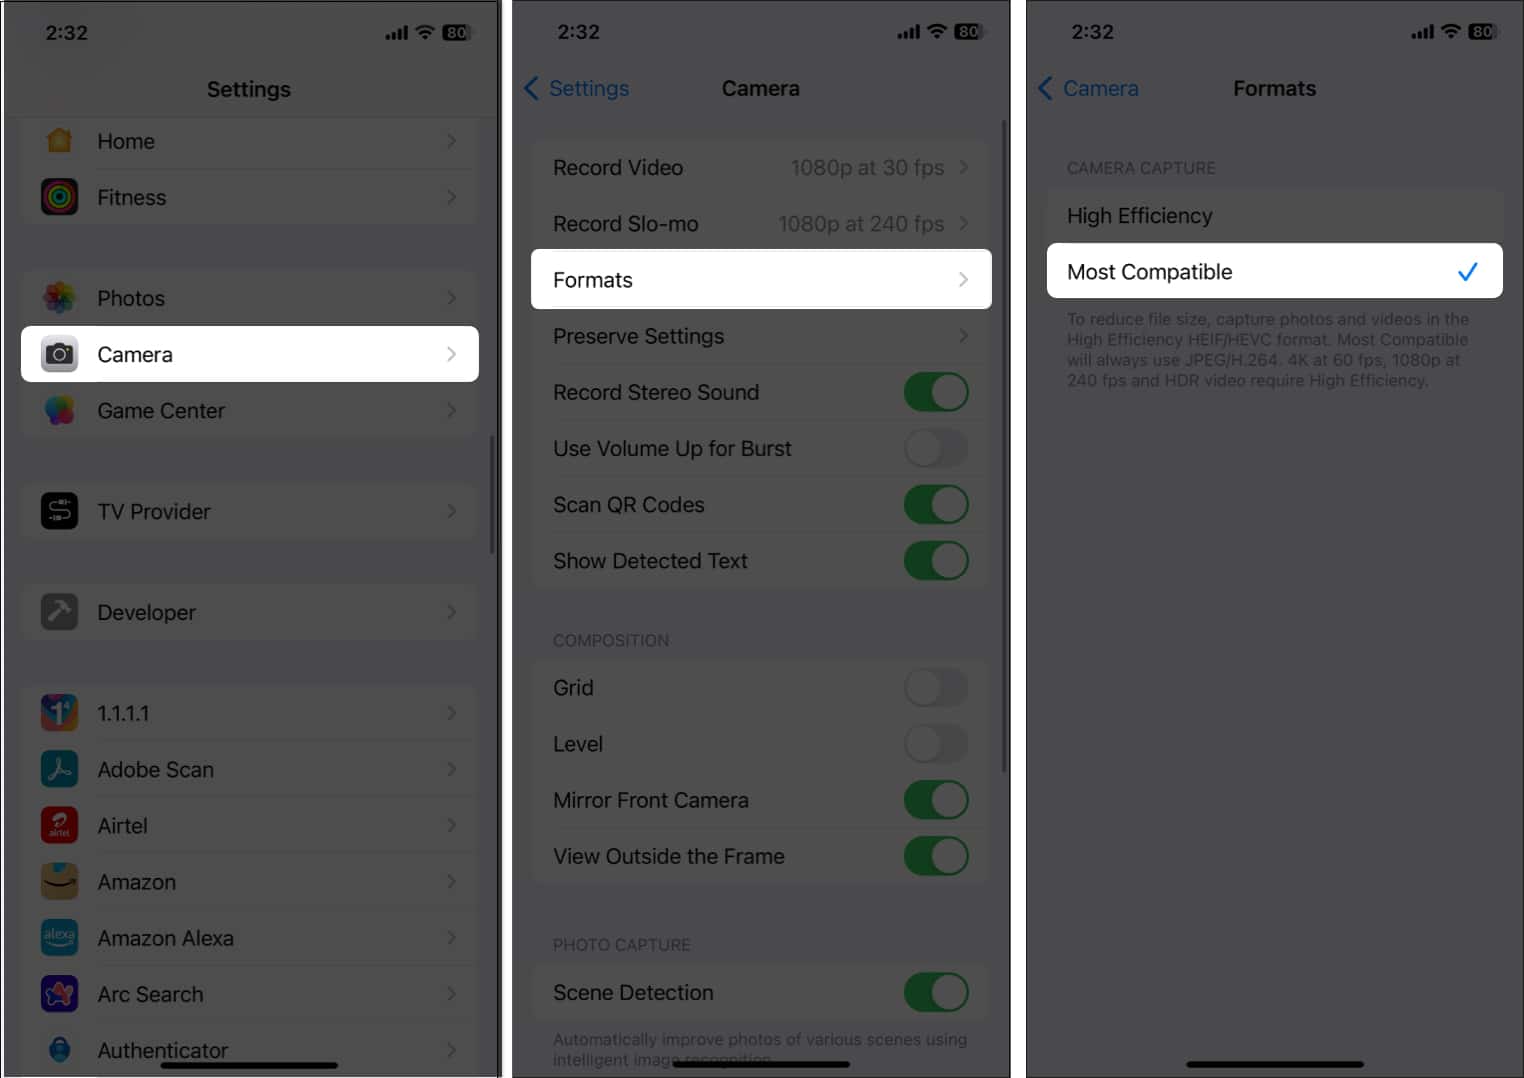

Every time you capture an image using your iPhone’s Camera app, the resulting photo will be in JPEG format.
Automatically convert HEIC photos to JPEG while transferring to Mac
When you select Most Compatible as the format on iPhone, the size of the images clicked will increase.
If you do not favor this storage issue, instead of changing the iPhone’s image format, you can set the HEIC photos to automatically convert to JPEG when exported to a Mac or Windows PC. To do this:
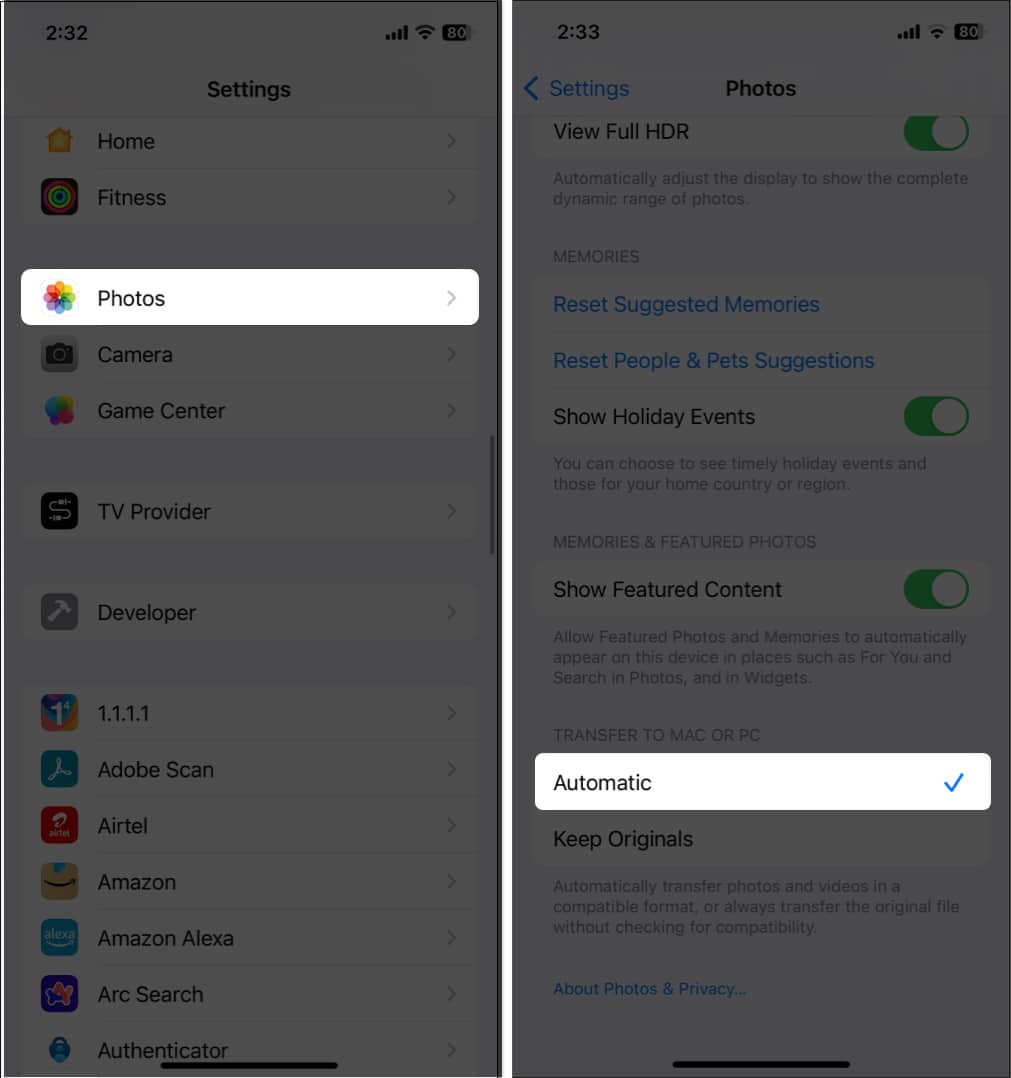
- Open Settings → Navigate to Photos settings.
- Next, scroll down to the bottom and select Automatic under the Transfer to Mac or PC section.

How to convert HEIC to JPG on Mac
From now on, selecting the Automatic format in Photos settings will apply to all the images you transfer to your Mac or PC.
However, you need to manually convert the HEIC photos saved on your Mac.
- Launch Finder on your Mac.
- Select the photos you want to change the file format of and control-click on the selection.
- From the pop-up that appears, select Quick Actions → Convert Image.
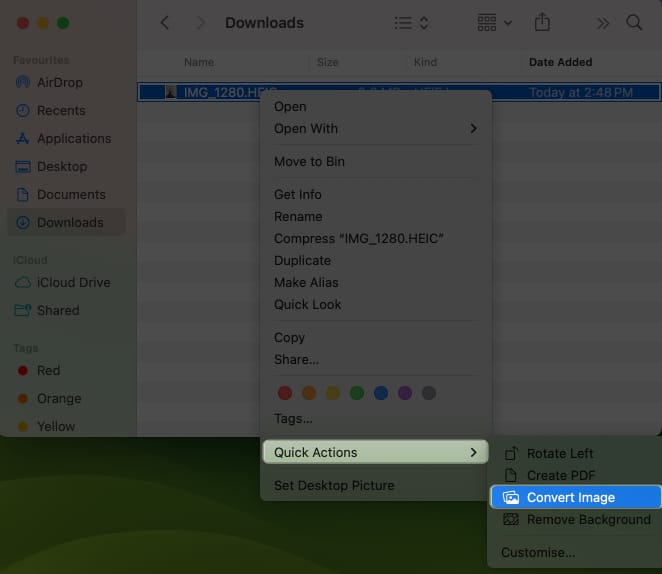
- Next, click the drop-down menu next to Format → Select JPEG.
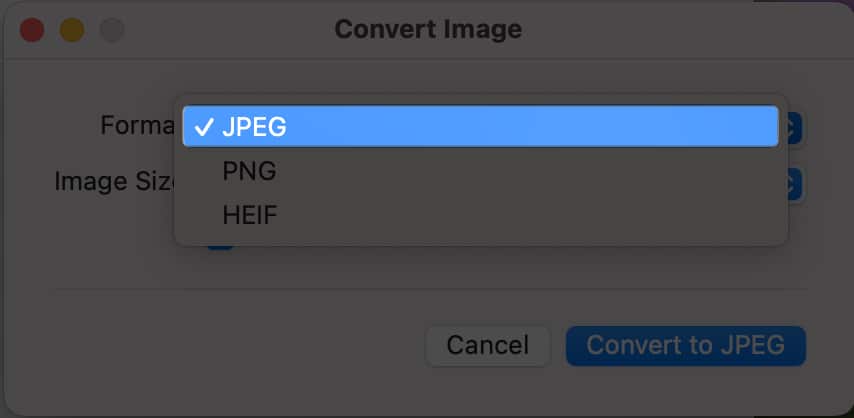
- After that, click on the Convert to JPEG button.
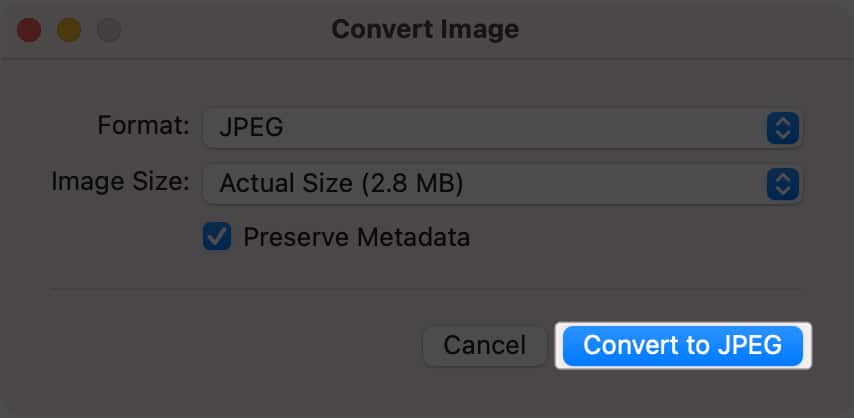


This will create a duplicate of the selected image in JPG format.
How to convert HEIC to JPG on Windows 11
Now that you know how to convert HEIC to JPG on a Mac, it’s important to know how to do the same on Windows if you don’t own a Mac.
- Open the HEIC image you want to convert to JPEG using a supported photo app.
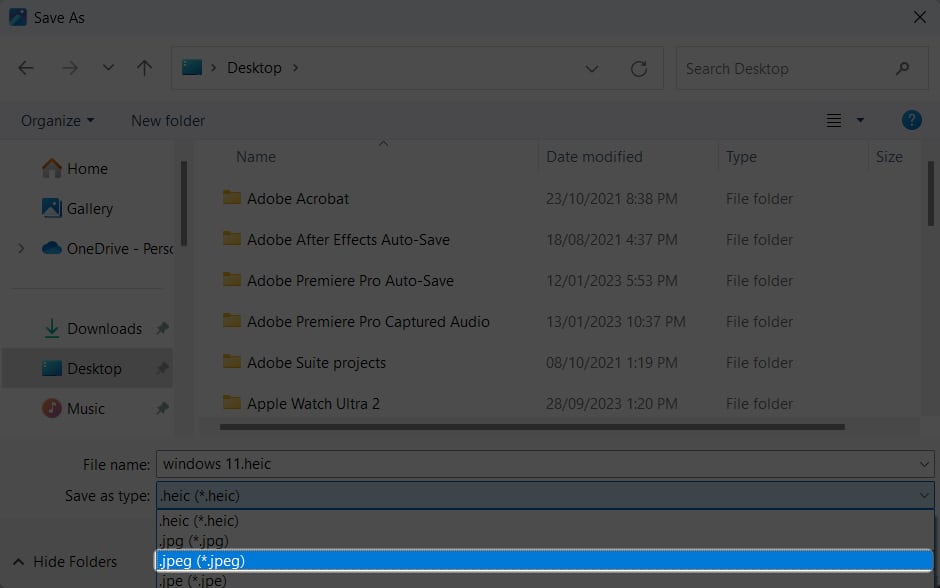
- Next, click the Three Dots button at the top center and choose Save As.
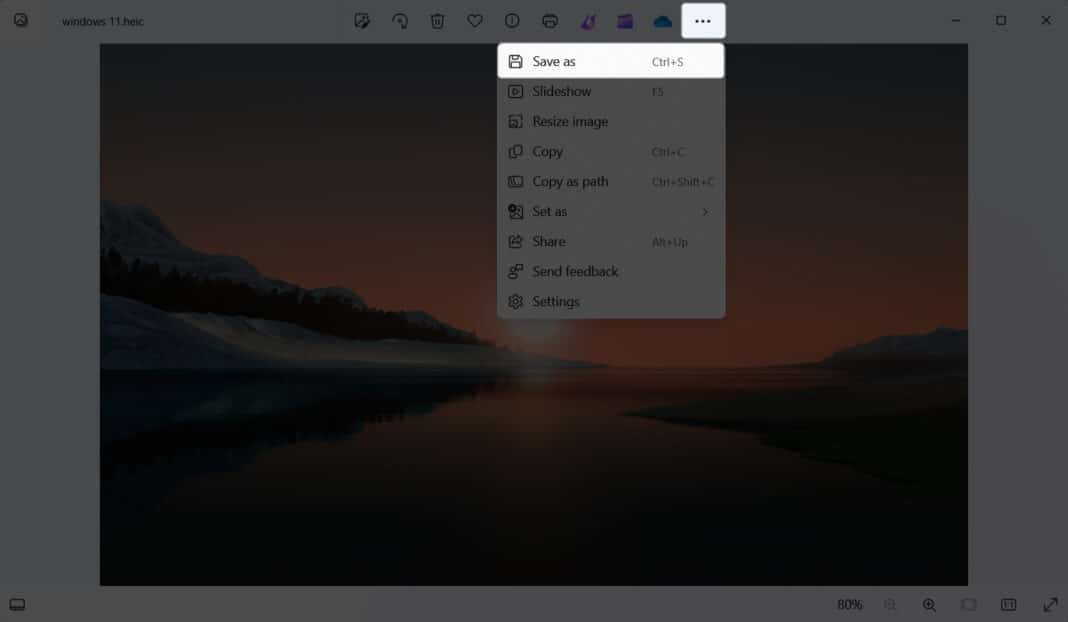
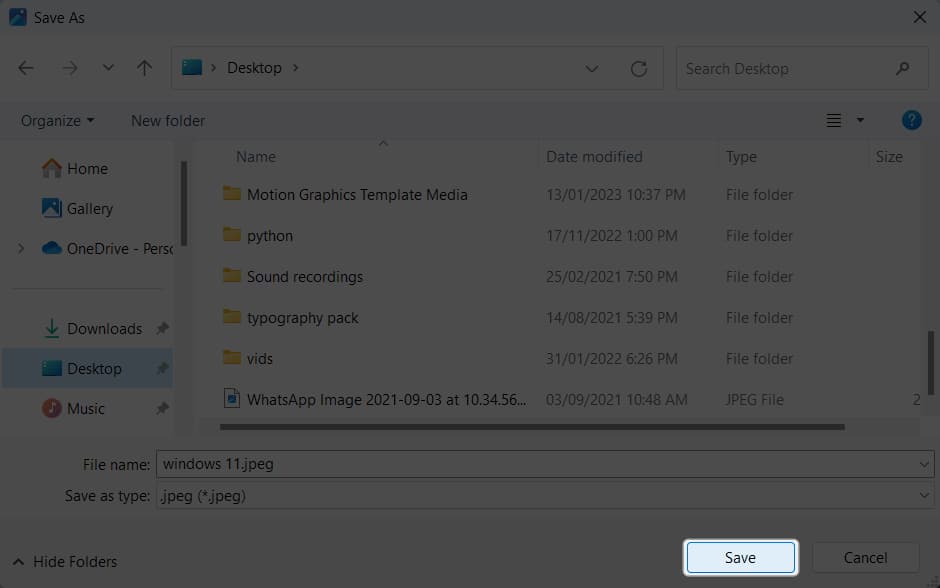
- Click the drop-down button next to Save File as field and select JPEG.
- Finally, click on the Save button.


Video: How to Convert HEIC to JPG on iPhone, Mac, PC
Conclusion
That’s all you need to know about converting HEIC photos to JPG on iPhone, iPad, Mac or Windows PC. Remember that keeping the Camera app format to High Efficiency is the best option to save space on your iPhone without compromising the image quality.
Still left with some doubts or queries? Comment below, and I’ll be happy to respond.